

Overview
Lab Details
- This lab walks you through the steps to launch and configure a virtual machine in the Amazon cloud.
- You will practice using Amazon Machine Images to launch Amazon EC2 Instances and use user data to create and install a web page using the instance. You will create a web page and publish it.
- You will also create an additional elastic network interface and an additional elastic IP. Attach these additional created resources with EC2, and use another security group with HTTPS permission to test it.
- Duration: 60 minutes
- AWS Region: US East (N. Virginia) us-east-1
Introduction
What is EC2
- AWS defines it as Elastic Compute Cloud.
- It’s a virtual environment where “you rent” to have your environment created, without purchasing.
- Amazon refers to these virtual machines as Instances.
- Preconfigured templates can be used to launch instances. These templates are referred to as images. Amazon provides these images in the form of AMIs (Amazon Machine Images).
- Allows you to install custom applications and services.
- Scaling of infrastructure i.e., up or down is easy based on the demand you face.
- AWS provides multiple configurations of CPU, memory, storage, etc., through which you can pick the flavor that’s required for your environment.
- No limitation on storage. You can pick the storage based on the type of instance that you are working on.
- Temporary storage volumes are provided, which are called Instance Store Volumes. Data stored in this gets deleted once the instance is terminated.
- Persistent storage volumes are available and are referred to as EBS (Elastic Block Store) volumes.
- These instances can be placed at multiple locations which are referred to as Regions and Availability Zones (AZ).
- You can have your Instances distributed across multiple AZs i.e., within a single Region, so that if an instance fails, AWS automatically remaps the address to another AZ.
- Instances deployed in one AZ can be migrated to another AZ.
- To manage instances, images, and other EC2 resources, you can optionally assign your own metadata to each resource in the form of tags.
- A Tag is a label that you assign to an AWS resource. It contains a key and an optional value, both of which are defined by you.
- Each AWS account comes with a set of default limits on the resources on a per-Region basis.
- For any increase in the limit, you need to contact AWS.
- To work with the created instances, we use Key Pairs.
What is an Elastic Network Interface (ENI)?
- Network Interface is a network card for the virtual machine, multiple ENI’s can be attached to a single EC2 instance.
- By default, it gives you a private IPv4 address, you can choose to attach an Elastic IP for a Public IPv4 address.
- While attaching ENI’s to EC2 instances, make sure to have your EC2 Instance in the same subnet as ENI.
- You will charged for an Elastic IP Address that is associated with a network interface but the network interface isn’t attached to a running instance.
- You can attach and detach secondary interfaces (eth1-ethn) on an EC2 instance, but you can’t detach the eth0 interface.
Architecture Diagram
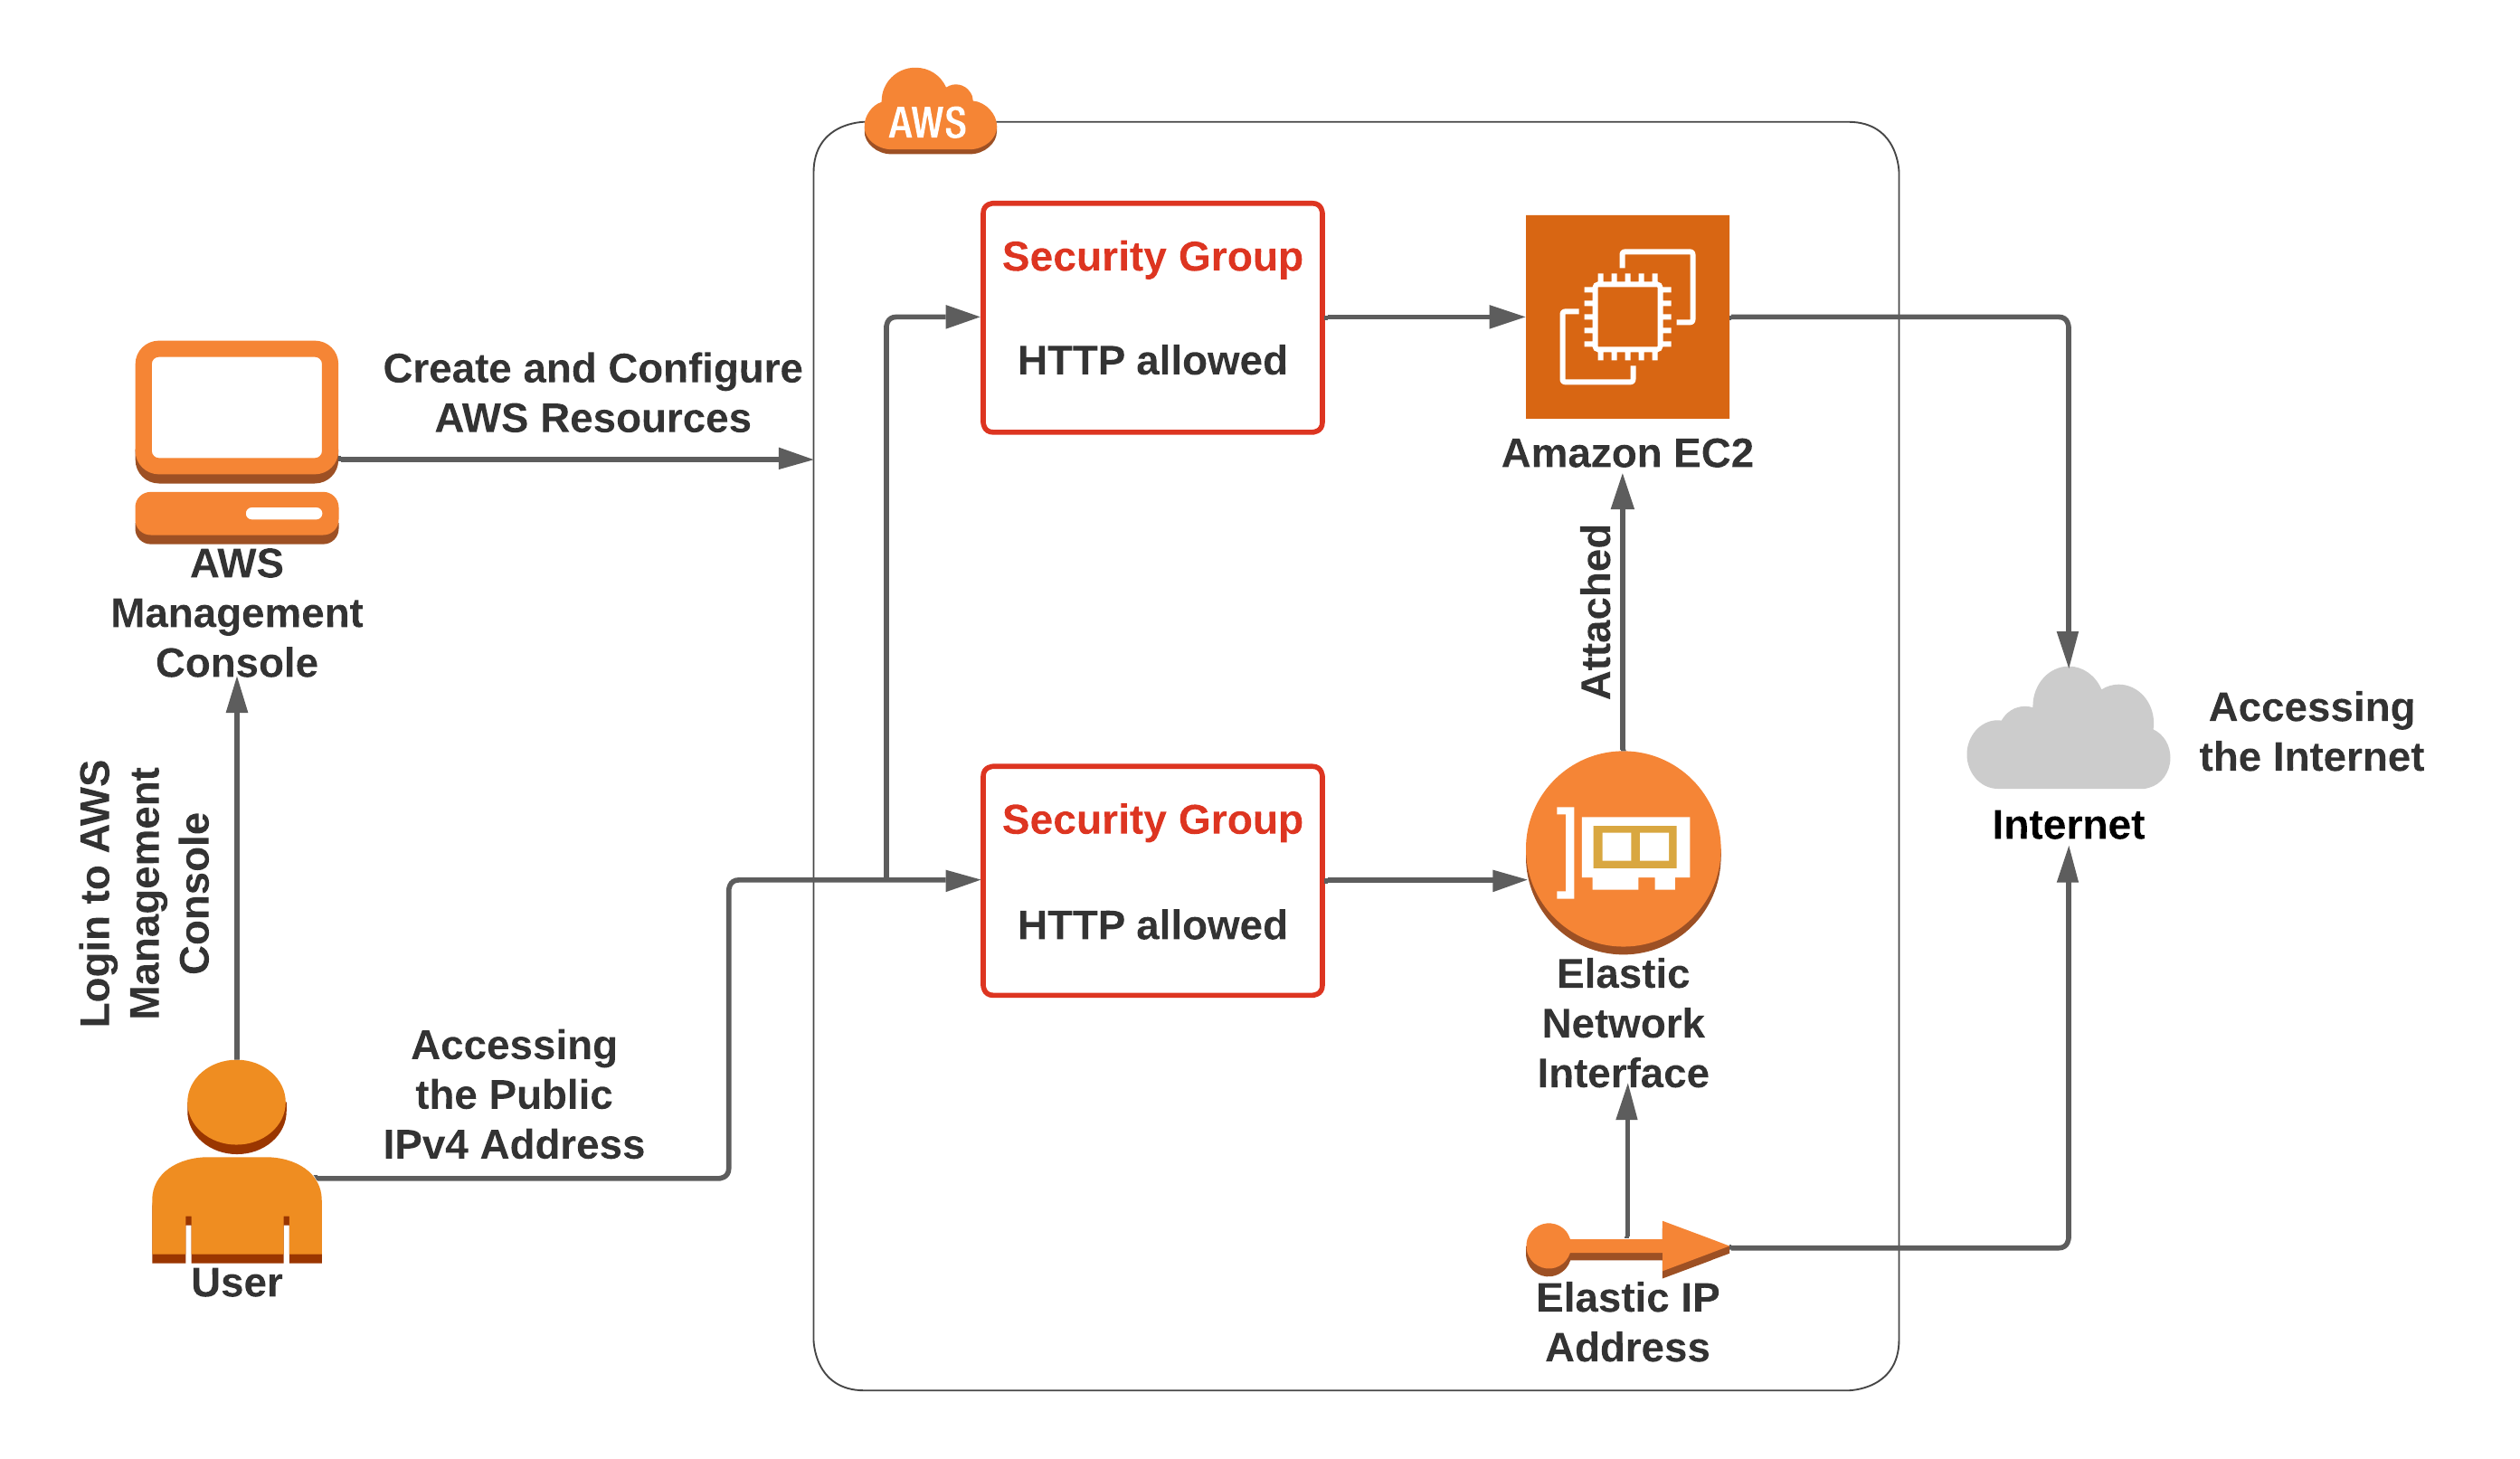
Task Details
- Sign in to AWS Management Console.
- Create a Security Group for the EC2 Instance.
- Create a Security Group for the Elastic Network Interface
- Launching an EC2 Instance.
- Create an Elastic Network Interface and attach it to the EC2 Instance.
- Allocating Elastic IP Address.
- Associating an Elastic IP Address with the ENI.
- Test both the Public IP Address of the Instance.
Launching Lab Environment
- To launch the lab environment, Click on the Start Lab button.
- Please wait until the cloud environment is provisioned. It will take less than a minute to provision.
- Once the Lab is started, you will be provided with IAM user name, Password, Access Key, and Secret Access Key.
Note : You can only start one lab at any given time
Lab guide
Lab Steps
Task 1: Sign in to AWS Management Console
- Click on the Open Console button, and you will get redirected to AWS Console in a new browser tab.
-
On the AWS sign-in page,
- Leave the Account ID as default. Never edit/remove the 12 digit Account ID present in the AWS Console. otherwise, you cannot proceed with the lab.
- Now copy your User Name and Password in the Lab Console to the IAM Username and Password in AWS Console and click on the Sign in button.
- Once Signed In to the AWS Management Console, Make the default AWS Region as US East (N. Virginia) us-east-1.
Task 2: Create a Security Group for the EC2 Instance
- Make sure you are in the N.Virginia Region.
- Navigate to EC2 by clicking on the Services menu in the top left, then click on EC2 in the Compute section.
- On the left panel menu, select the security group under the Network & Security section.
- Click on the Create Security Group button..
-
We are going to create a security group for the EC2 instance.
- Security group name: Enter EC2-Instance
- Description: Enter Security group for EC2 Instance
- VPC: Select Default VPC
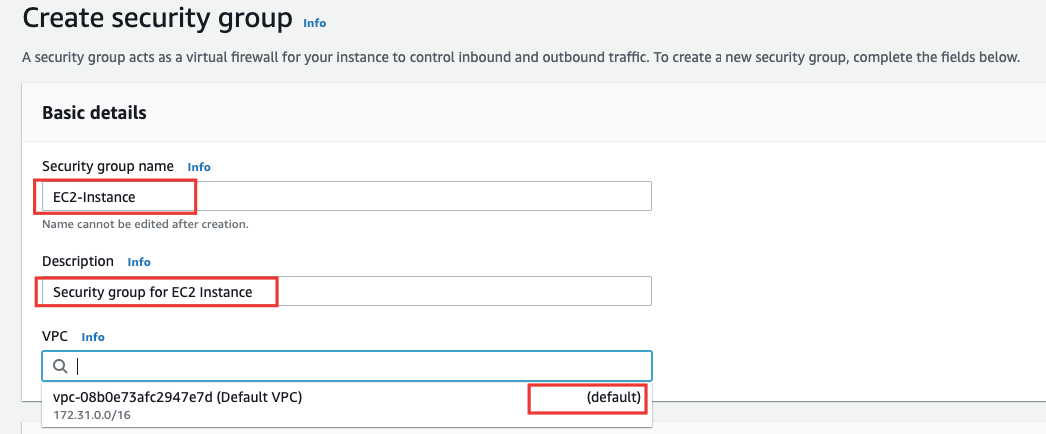
- Click on the Add Rule button under Inbound rules.
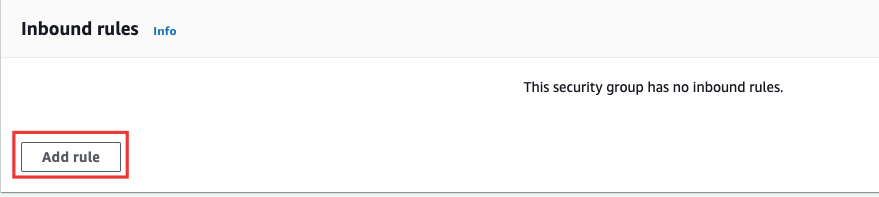
- Type : Select HTTP
- Source : Select Anywhere-IPv4
- In the textbox add 0.0.0.0/0
-
Click on the Add rule button under Inbound rules.
- Type : Select SSH
- Source : Select Anywhere-IPv4
- In the textbox add 0.0.0.0/0
- Leave everything as default and click on the Create Security Group button.

Task 3: Create a Security Group for the Elastic Network Interface
- On the left panel menu, select the security group under the Network & Security section.
- Click on the Create Security Group button.
-
We are going to create a Security Group for the Network interface.
- Security group name: Enter Network-Interface-SG
- Description: Enter Security group for secondary ENI
- VPC: Select Default VPC
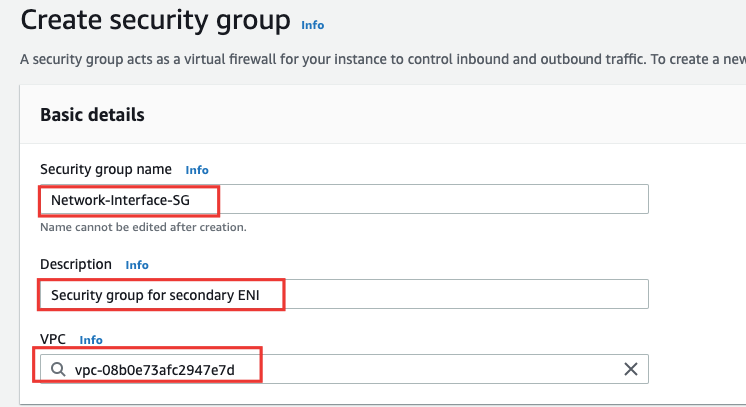
- Inbound rules:
- Click on the Add Rule button under Inbound rules.
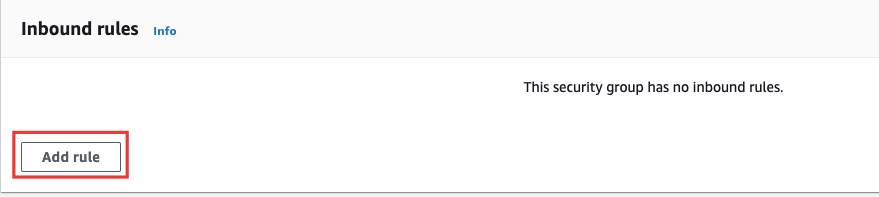
- Type : Select HTTP
- Source : Select Anywhere-IPv4
- In the textbox add 0.0.0.0/0
-
Again click on the Add Rule button.
- Type : Select SSH
- Source : Select Anywhere-IPv4
- In the textbox add 0.0.0.0/0
- Leave everything as default and click on the Create Security Group button.

Task 4: Launch First EC2 Instance
- Make sure you are in the N. Virginia(us-east-1) Region.
- Navigate to EC2 by clicking on the Services menu in the top left, then click on EC2 in the Compute section.
- Navigate to Instances from the left side menu and click on Launch Instances button.

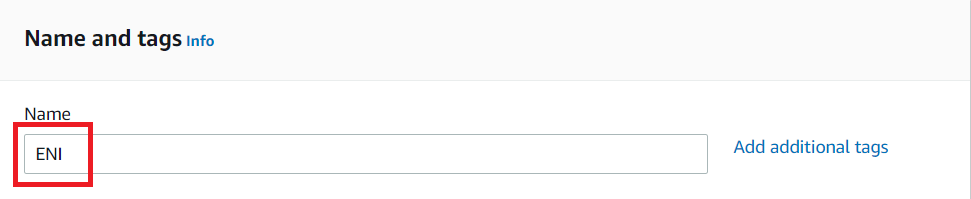
- Under the Name and tags section :
- Name : ENI
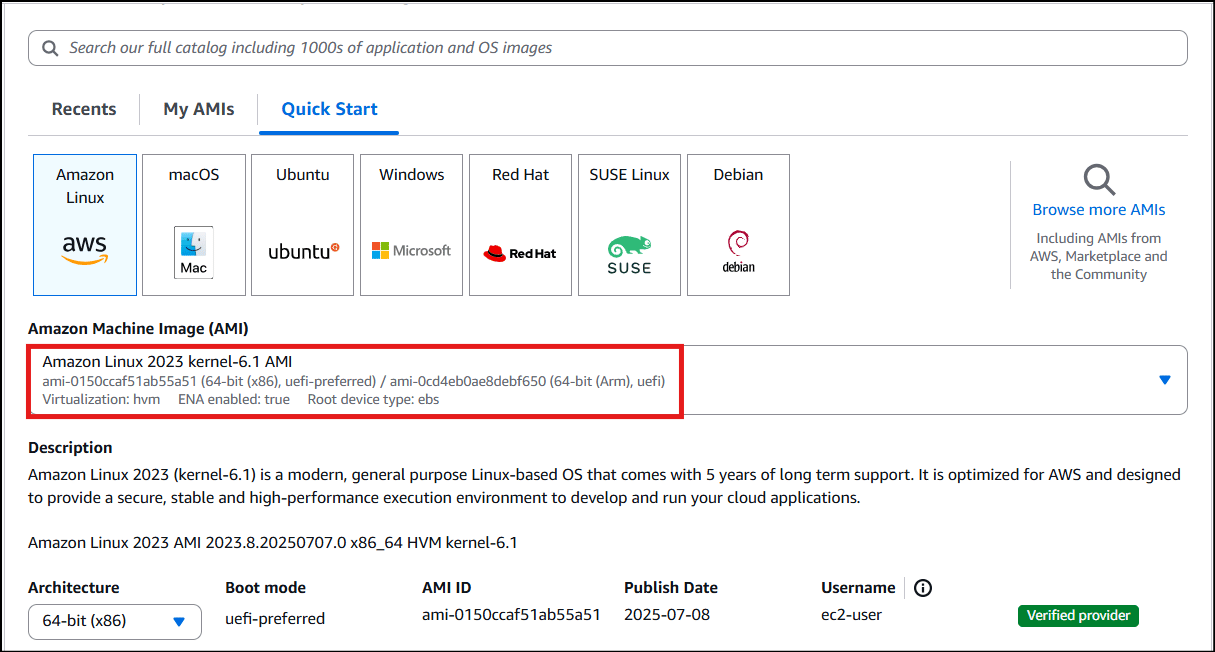
- Under the Application and OS Images (Amazon Machine Image) section :
- Select Quick Start tab and Amazon Linux under it
-
Amazon Machine Image (AMI) : select Amazon Linux 2023 kernel-6.1 AMI
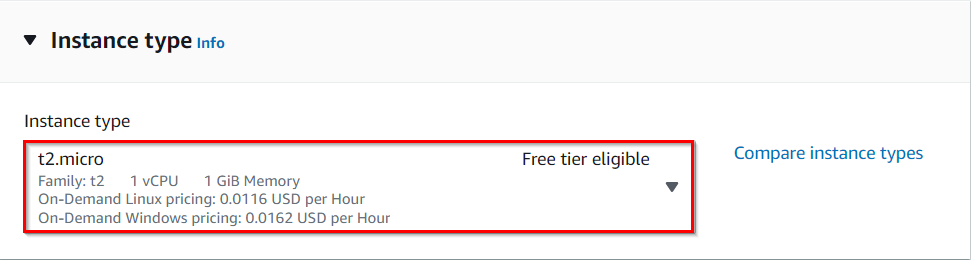
- Under the Instance Type section :
- Instance Type : Select t2.micro
-
Under the Key Pair (login) section :
- Key pair name : select Proceed without a key pair
-
Under the Network Settings section :
- Click on Edit button
- Auto-assign public IP: select Enable
- Firewall (security groups) : Select Select existing security group
- Common security groups : Select Security group with name EC2-Instance
-
Under the Advanced details section :
- Under the User data: copy and paste the following script to create an HTML page served by an Apache httpd web server.
- Keep everything else as default and click on the Launch instance button.
-
Launch Status: Your instance is now launching, Navigate to Instances page from the left menu and wait until the status of the EC2 Instance changes to running.

- Copy the availability zone, and subnet id, we’ll need them in the next steps.
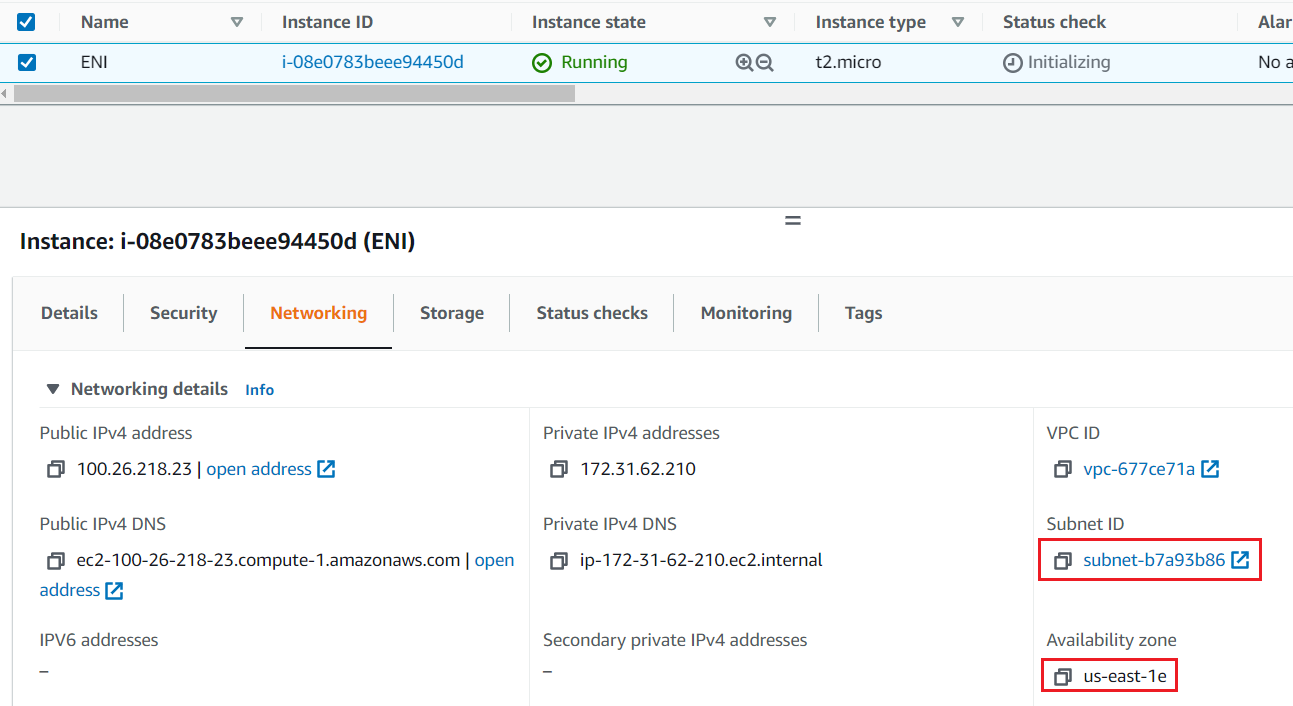
Task 5: Create an Elastic Network Interface and attach it to the EC2 Instance
- Click on the Network Interfaces present in the left sidebar under Network & Security category.
- By default, one network interface will be present.
- Click on the Create Network Interface button to create a network interface.

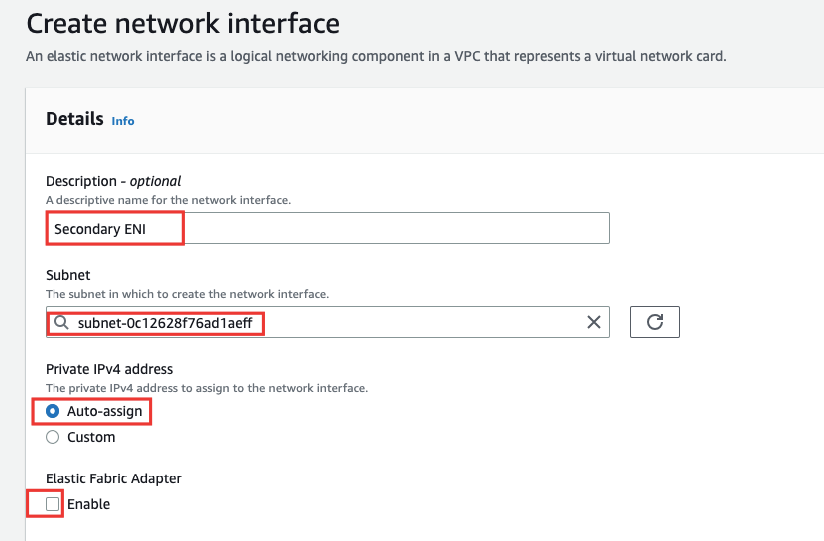
- Fill in the details as follows:
- Description: Enter Secondary ENI
- Subnet: Select the subnet that was noted in the previous step, in my case it’s subnet-34ef3d05 and the availability zone is us-east-1e.
- Private IPv4 address: Select Auto-assign
- Elastic fabric adapter: Unchecked
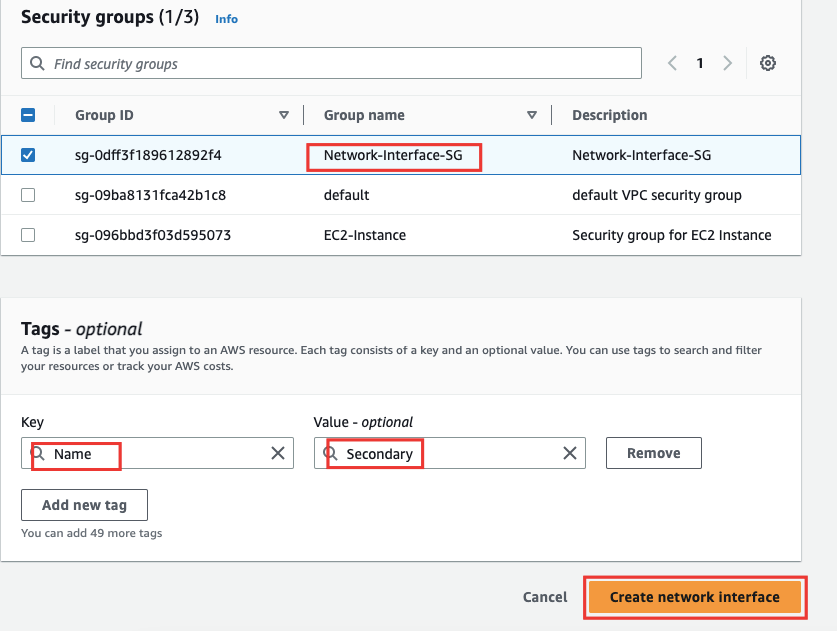
- Security group: Select Network-Interface-SG
- Tags: Click on the Add new tag button.
- Enter Key as Name and Value as Secondary.
- Once done, Click on the Create Network Interface button.

- Now attach the network interface with EC2 instance, to do so perform the following task:
- Select the network interface created now i.e. Secondary one.
- Click on the Actions button present on the right top corner.
- Choose Attach option from the dropdown menu.
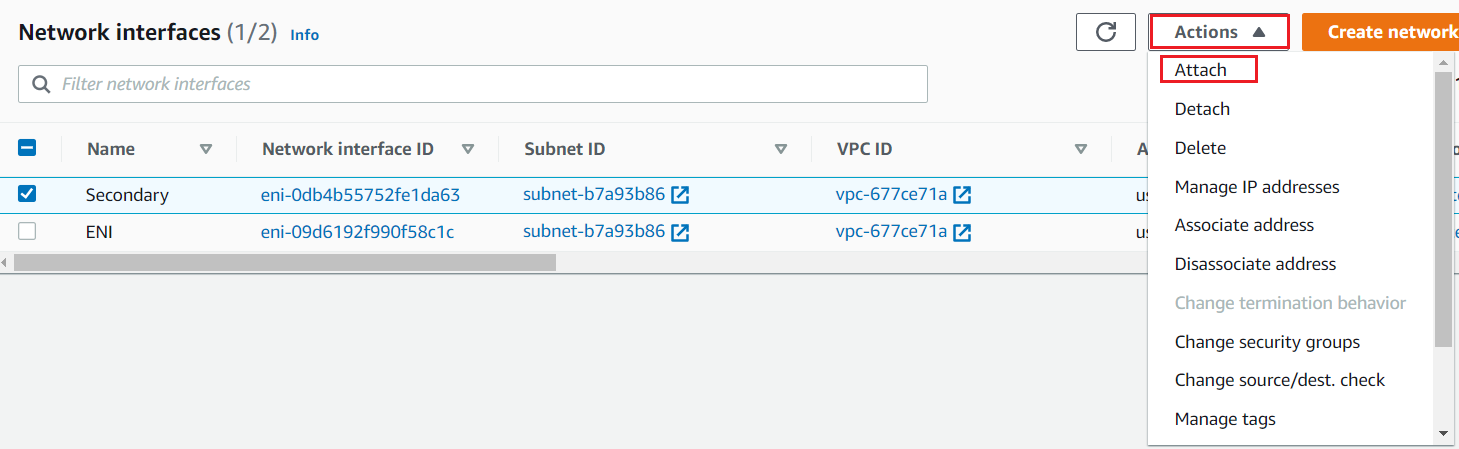
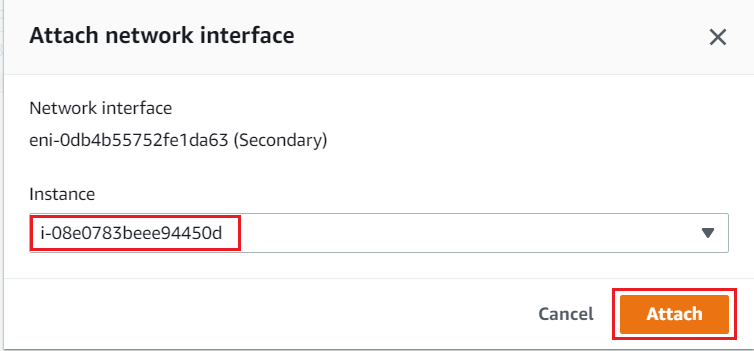
- Secondary network interface is now attached with the EC2 instance.

Task 6: Allocating Elastic IP Address
- To use an Elastic IP address, you need to allocate one to your account and then associate it with your instance or a network interface.
- Navigate to EC2. Under EC2 Dashboard click on Elastic IP under Network & Security section.
- Click on Allocate Elastic IP address button.

- Click on Allocate directly as there are no changes to be made.
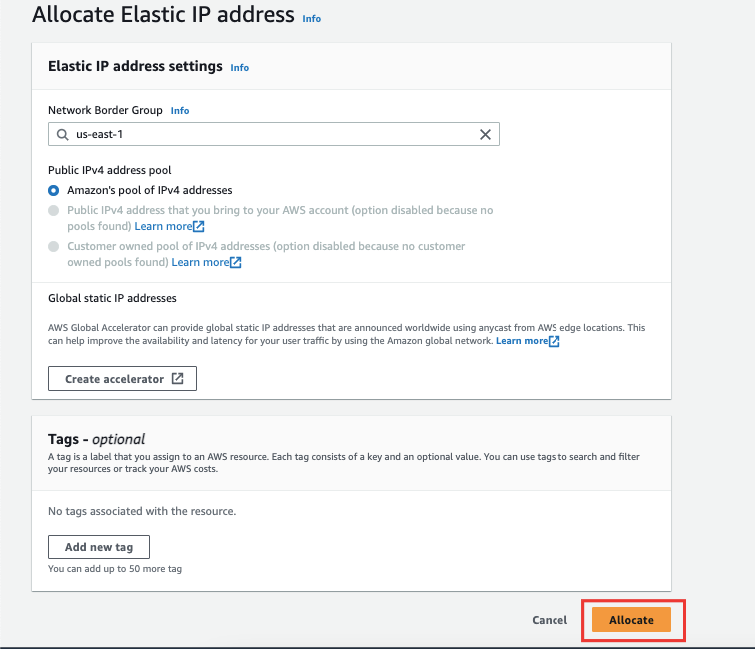
- You can see that the Elastic IP has been allocated successfully as shown below.

Task 7: Associating an Elastic IP Address with the ENI
- Select the Elastic IP address created and click on Actions. Choose an option of Associate Elastic IP address.

- Associate Elastic IP address
- Resource Type: Select Network interface
- Network interface: Choose Secondary
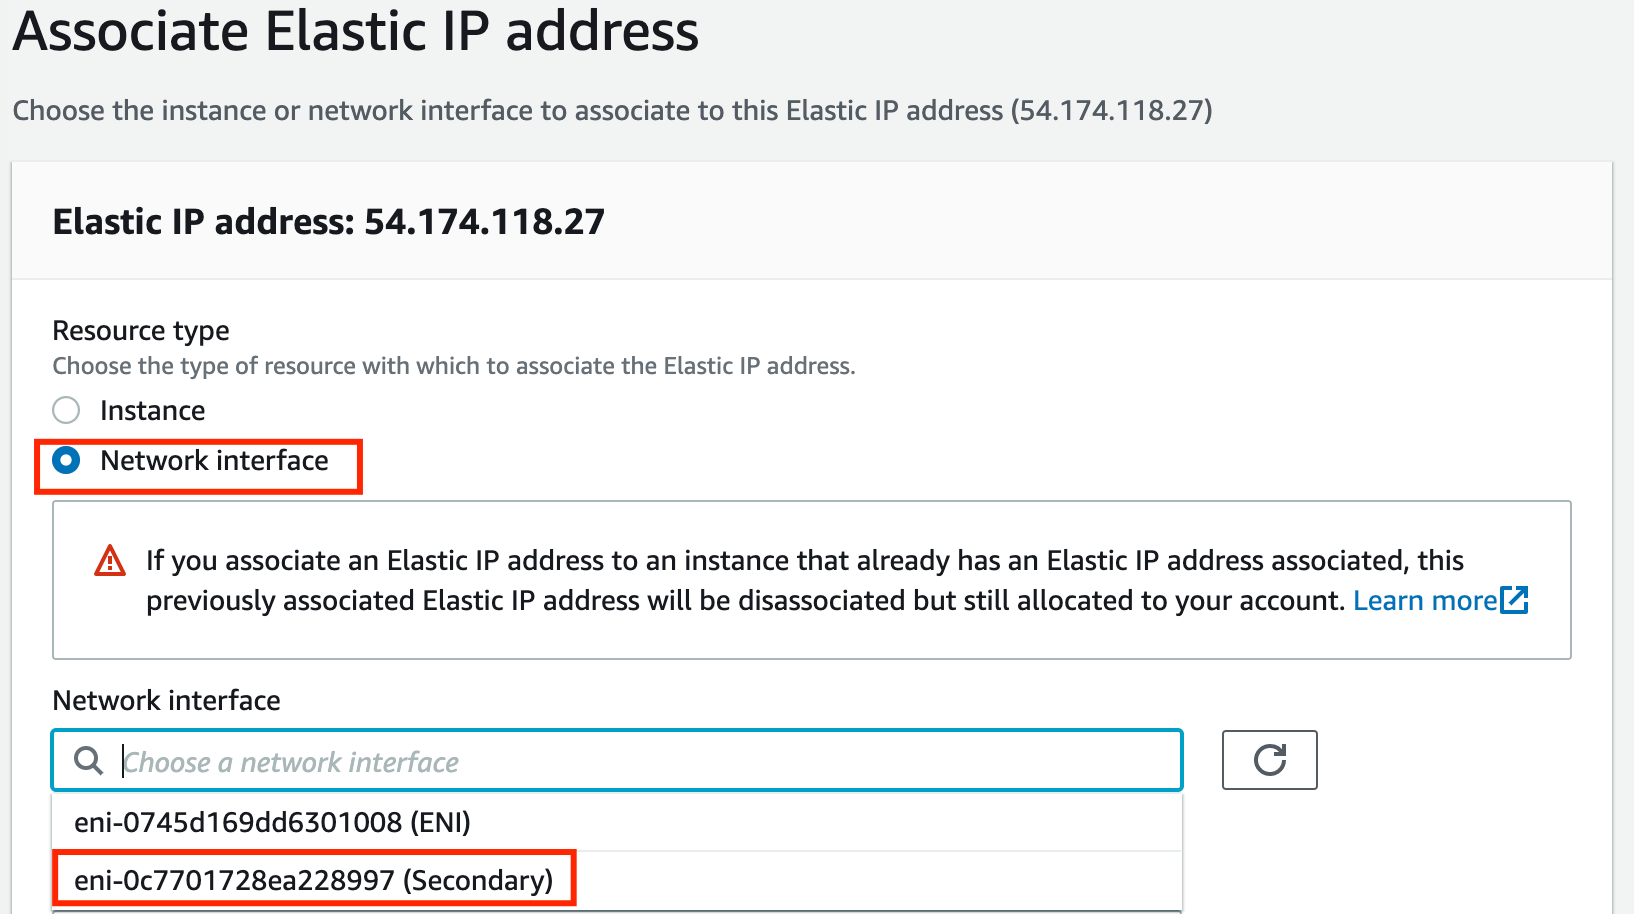
- Private IP address: Select the IP address present
- Click on the Associate button present.
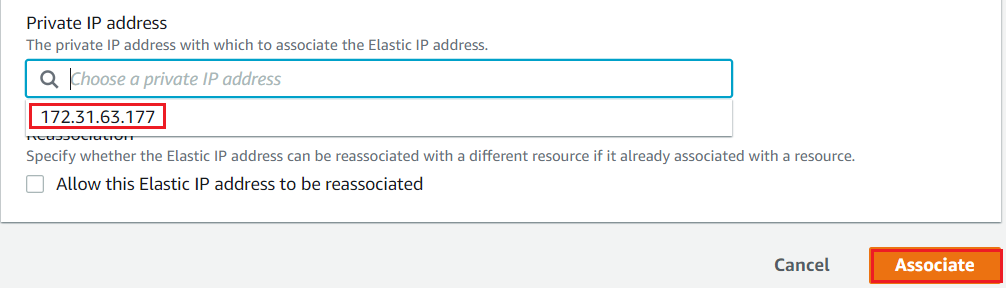
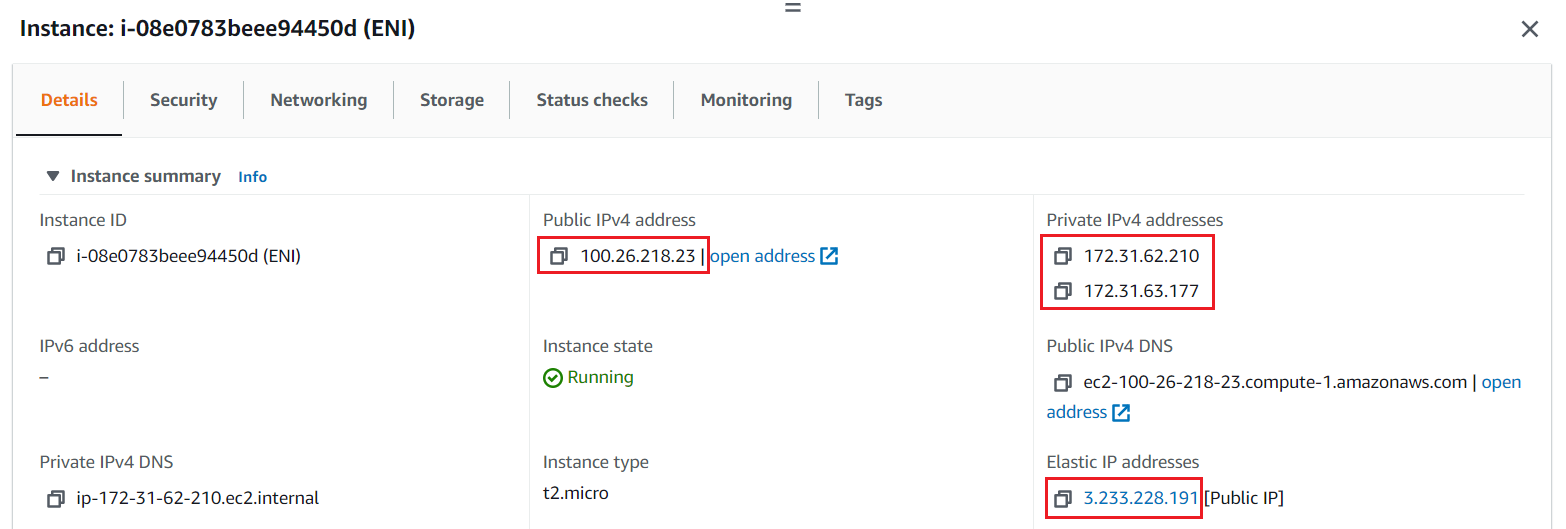
- Now you can see that the instance is associated with the Elastic IP address.

- Go to the EC2 Instance, Refresh the entire browser tab and we can see that IPv4 Public IP and Elastic IP address assigned to the same EC2 Instance.
Task 8: Test both the Public IP Address of the Instance
- Navigate to Network Interface’s page and check both Public IPs.
- Scroll towards the right to see the Public IPs.

- Paste the Elastic IP i.e Public IPv4 Address of the Secondary network interface in the browser.

- And put the Public IPv4 Address of the Primary network interface in the browser.
- So with this use case, you now have two public IPs for the one EC2 Instance.
Do you know?
ENIs allow instances to have multiple private IP addresses. This can be useful in various scenarios, such as hosting multiple websites or applications on a single instance, or when you need separate IP addresses for different purposes like public and private traffic.
- Once the lab steps are completed, please click on the Validation button on the Right side panel.
Completion and Conclusion
- You have successfully created and launched Amazon EC2 Instance.
- You have successfully created an Elastic IP and additional Network Interface.
- You have successfully created a webpage and published it.
End Lab
- Sign out of AWS Account.
- You have successfully completed the lab.
- Once you have completed the steps, click on End Lab button from the IP Lab Portal dashboard.
What gets checked
When you press Check my work, the platform verifies each of these:- Validate EC2 Instance Type t2.micro — Check whether the EC2 instance type is t2.micro.
- Create an Elastic IP — Check whether an Elastic IP is created or not.
- Associate Elastic IP — Check whether an Elastic IP is attached to an EC2 Instance or not.
- Install Apache Web Server — Check whether Apache Web Server is installed in EC2 Instance or not.