

Overview
Lab Details
- The lab involves setting up a VPC environment with two subnets (public and private).
- Launching EC2 instances in each subnet, configuring the necessary networking components (Internet Gateway, route tables, security groups), and then using the VPC Reachability Analyzer to test the connectivity between the instances.
- Duration: 1 hour
- AWS Region: US East (N. Virginia) us-east-1
Introduction
- In the cloud computing environment, ensuring reliable network connectivity between resources is crucial for the smooth functioning of applications and services.
- AWS VPC Reachability Analyzer is a powerful tool designed to help identify and troubleshoot network connectivity issues within your VPCs. It provides a centralized view of your network resources and their connectivity status, enabling you to quickly diagnose and resolve connectivity problems.
- The VPC Reachability Analyzer automates the process of testing and validating network connectivity between resources within your VPCs.
- It provides detailed explanations and recommendations to help you troubleshoot and resolve connectivity problems more efficiently.
- Proactive Monitoring: In addition to on-demand connectivity testing, the VPC Reachability Analyzer can be configured to continuously monitor your VPC resources, enabling proactive detection and notification of connectivity issues as your infrastructure evolves.
Architecture Diagram
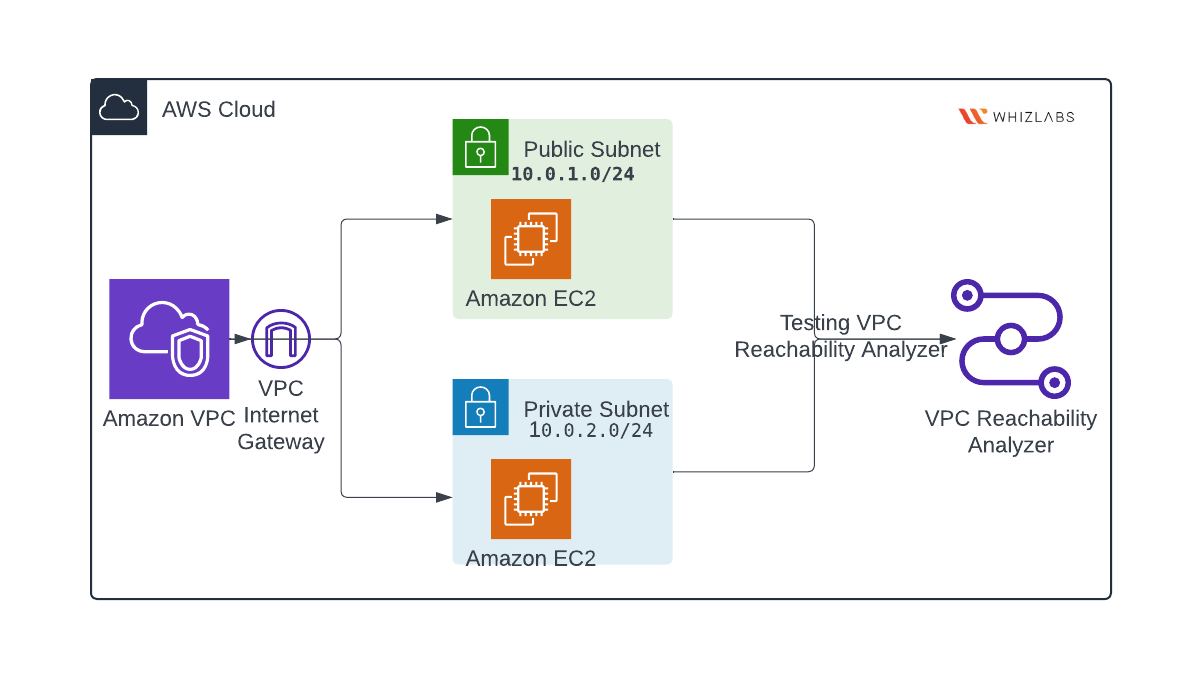
Task Details
- Sign in to AWS Management Console
- Creating VPC service associating with Subnets
- Launching 2 EC2 instances
- checking the connectivity using VPC Reachability Analyzer
Launching Lab Environment
- To Launch The Lab Environment, Click On The Start Lab Button.
- Please Wait Until The Cloud Environment Is Provisioned. It Will Take Less Than A Minute To Provision.
- Once The Lab Is Started, You Will Be Provided With IAM User Name, Password, Access Key, And Secret Access Key.
Note : You can only start one guided lab at any given time
Lab guide
Lab Steps
Task 1: Sign in to AWS Management Console
- Click On The Open Console Button, And You Will Get Redirected To AWS Console In A New Browser Tab.
- On The AWS Sign-In Page,
- Leave The Account ID As Default. Never Edit/Remove The 12 Digit Account ID Present In The AWS Console. Otherwise, You Cannot Proceed With The Lab.
- Now Copy Your User Name And Password In The Lab Console To The IAM Username And Password In AWS Console And Click On The Sign In Button.
- Once Signed In To The AWS Management Console, Make The Default AWS Region As US East (N. Virginia) Us-East-1.
Task 2: Setting Up Your Environment by creating VPC
- In the AWS Management Console, you can find the VPC service by clicking on the “Services” dropdown at the top and type VPC in the search bar. Then, select the VPC service from the search results.
- Once you’re in the VPC service dashboard, click on Your VPCs and then click on Create VPC.

- Create a new VPC: Name: reachability-test-VPC.
- Specify an IPv4 CIDR block for your VPC (10.0.0.0/16) in the IPv4 CIDR block field.
- In this case, you’re asked to use 10.0.0.0/16 as an example, but you can choose any valid CIDR block that doesn’t conflict with your existing network.
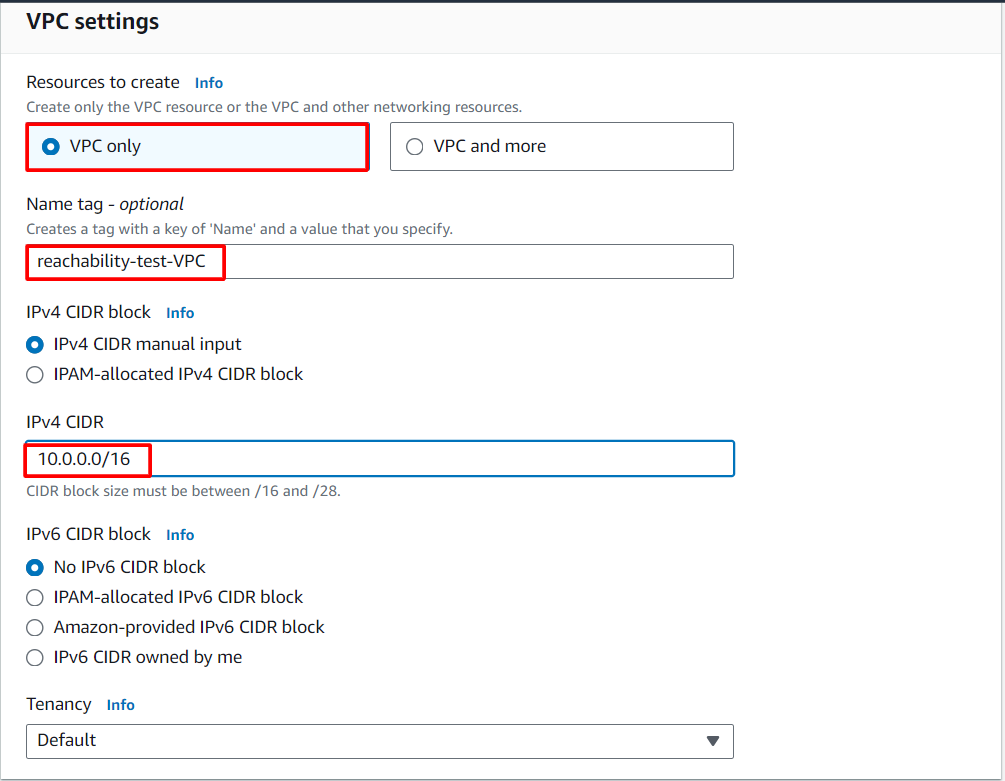
- Click on the Create VPC button.
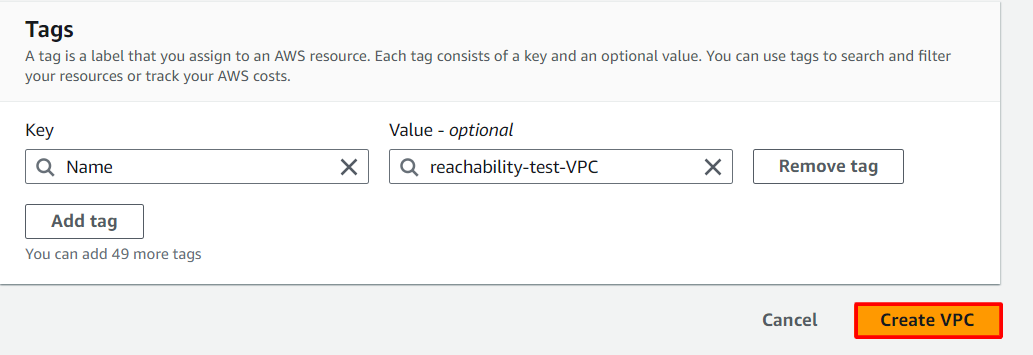
- Within your newly created VPC, you’ll need to create two subnets: one public and one private.
- To create a subnet, go to the subnets section in the VPC service and click on the Create Subnet button.
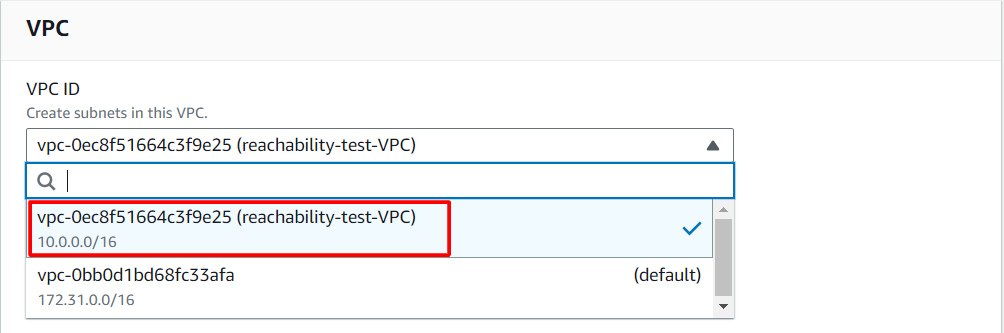
- Specify the VPC you just created, the CIDR block for the subnet
- Subnet Name: public subnet
- IPv4 subnet CIDR block: 10.0.1.0/24
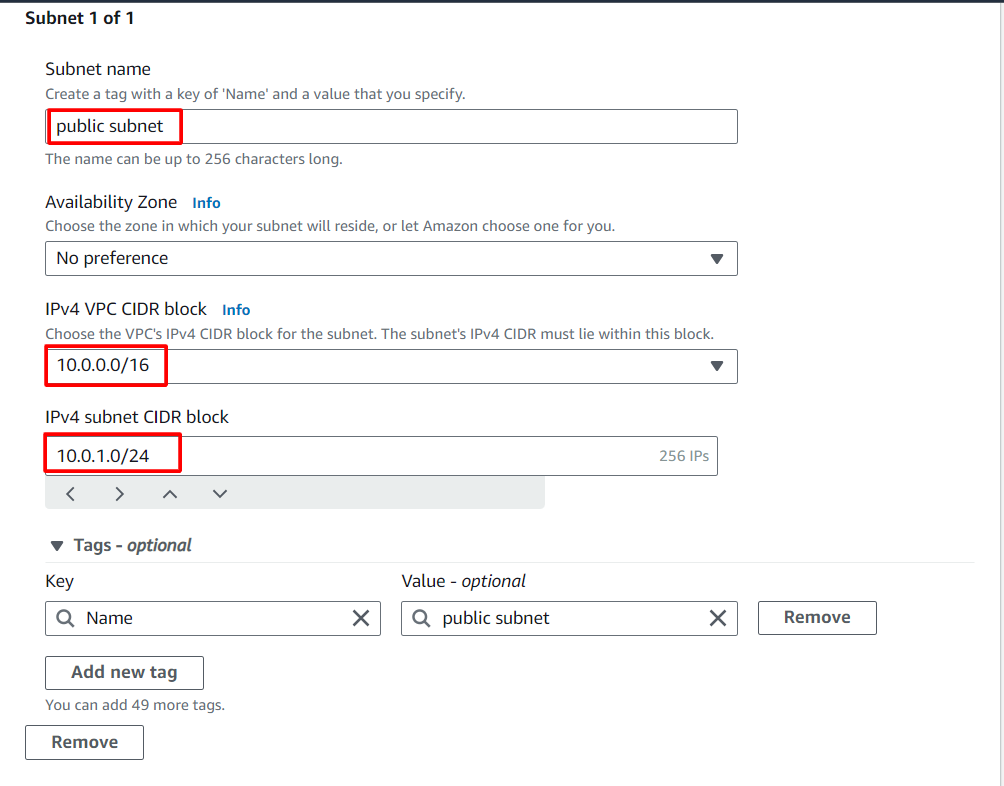
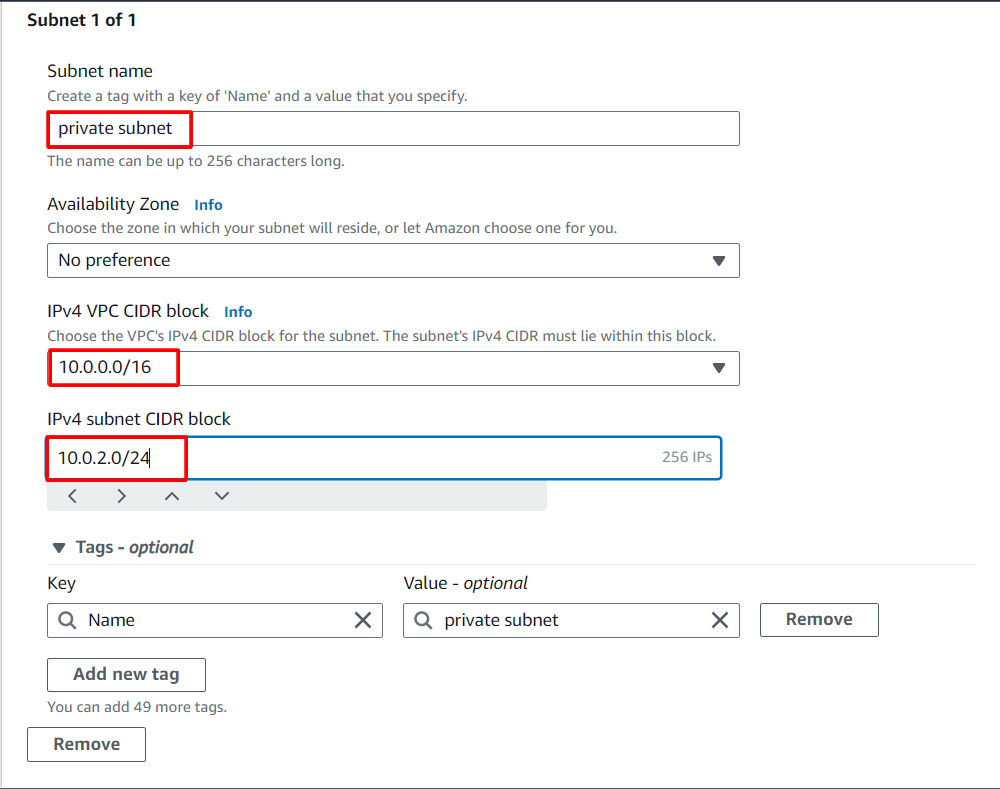
- Now we are going to create the same steps,
- Subnet name: private subnet
- subnet CIDR block: 10.0.2.0/24
- Configure the route tables and internet gateway for the public subnet
- For the public subnet to have internet access, you’ll need to configure the route table and attach an internet gateway.
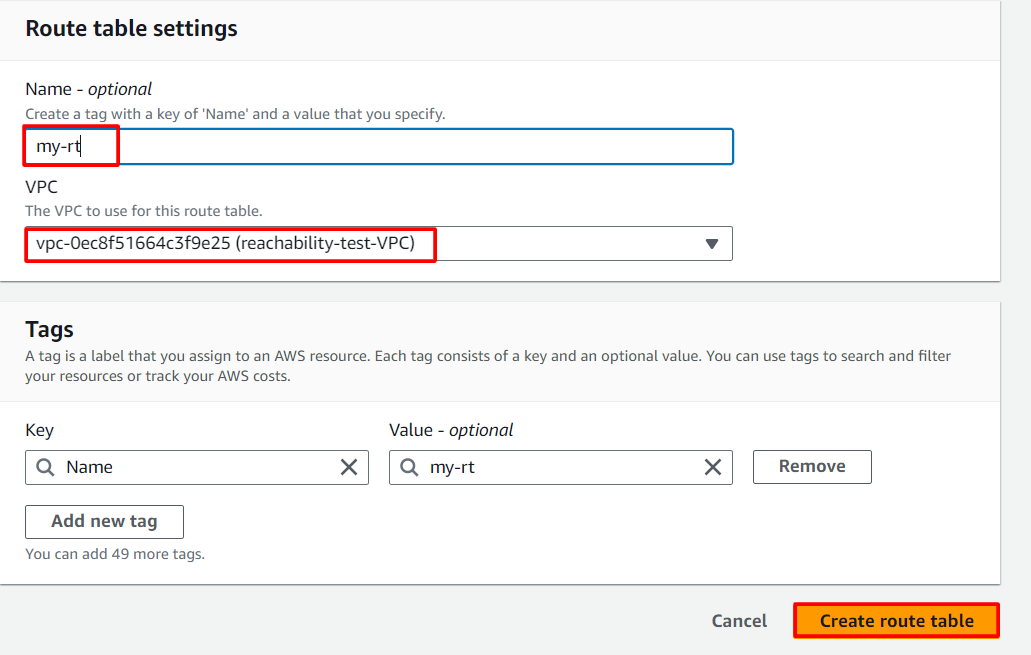
- Go to the Route Tables section in the VPC service and create a new route table for the public subnet.
- Route Table Name: MY-RT
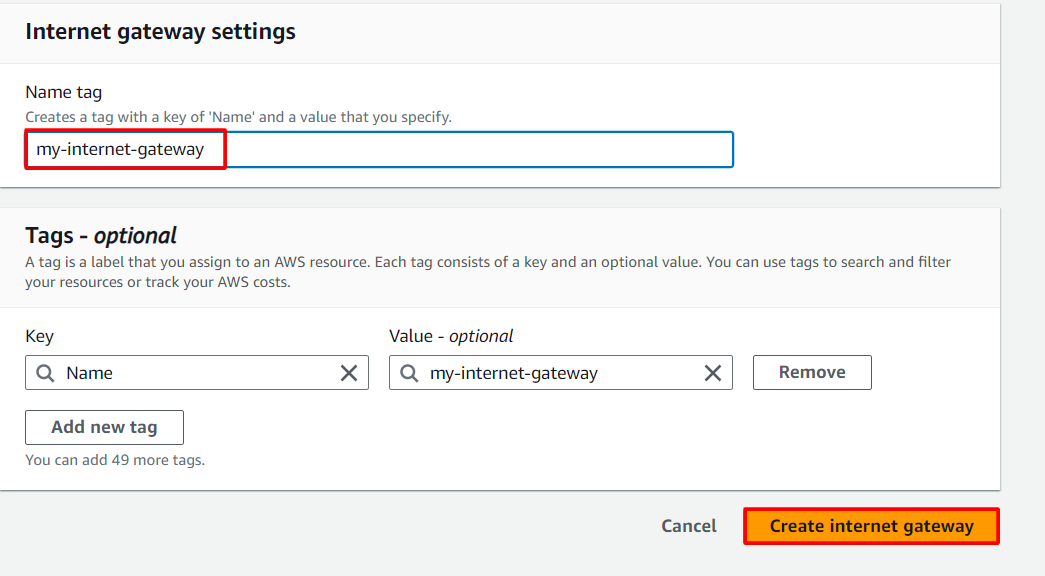
- Next, go to the Internet Gateways section and create a new internet gateway.
- Internet Gateway Name: My-Internet-Gateway
- Once Internet gateway is created Select Actions from the right side and select Attach to VPC.
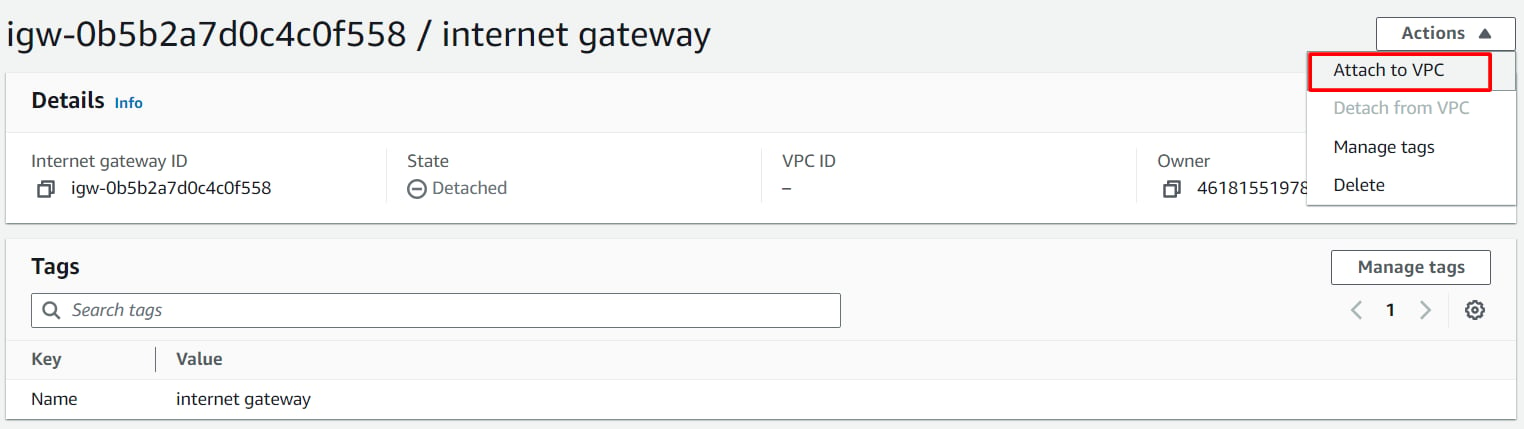
- Select the VPC you have created and click Attach to VPC. The internet gateway will be attached to the VPC you have created.
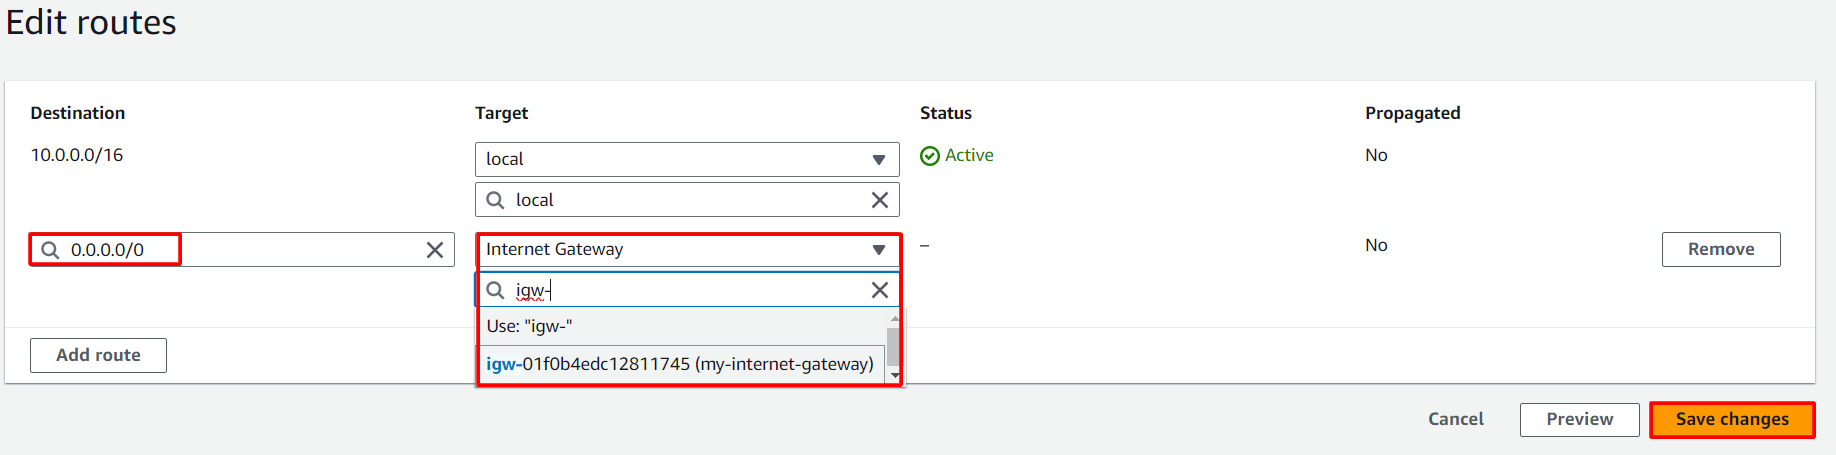
- In the route table, click on Edit routes, then add your internet gateway. The destination should be (0.0.0.0/0), and the target should be the internet gateway.
Task 3: Launch two EC2 instances within this VPC
- Navigate to EC2 by clicking on the Services menu in the top, then click on EC2 in the Compute section.
- In the EC2 service, you’ll see a left-hand side menu. Click on the Instances option, and then click on the Launch Instances button to start the process of creating a new EC2 instance.
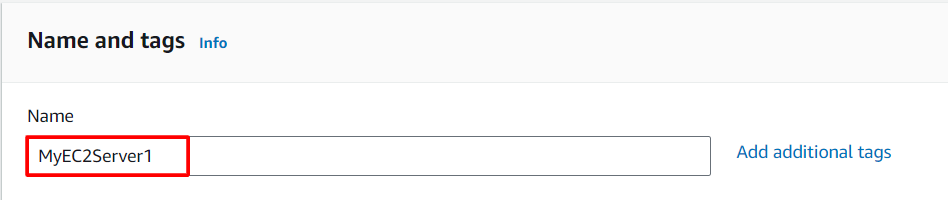
- Name: Enter MyEC2Server1
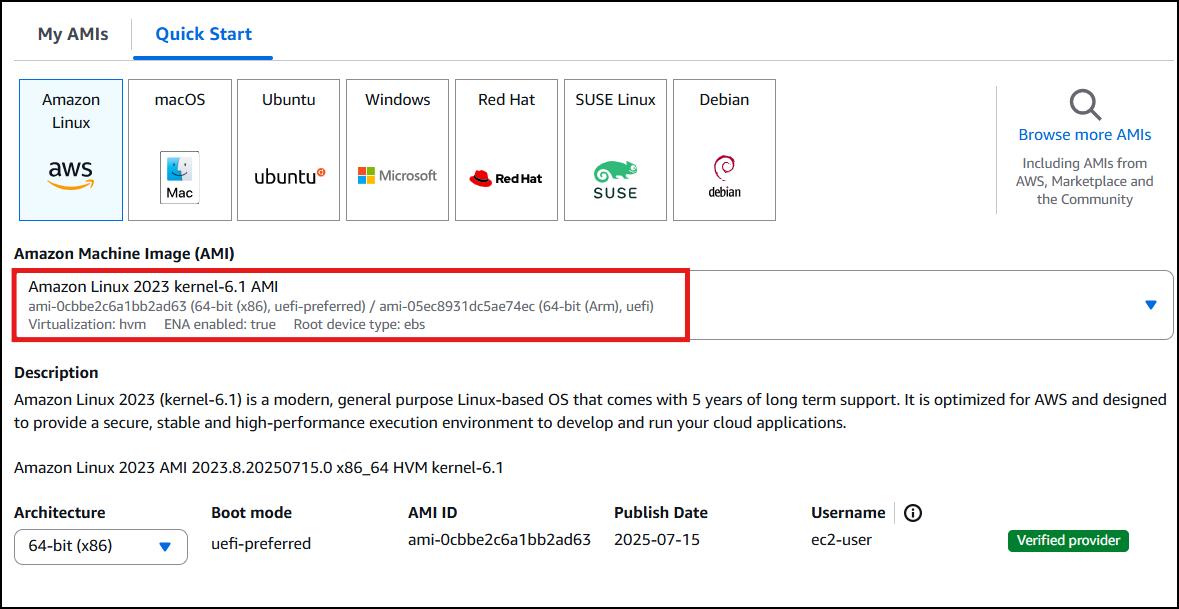
- You’ll be asked to choose an Amazon Machine Image (AMI) for your instance. Search for Amazon Linux 2023 kernel-6.1 AMI in the search box and select it by clicking on the Select button.
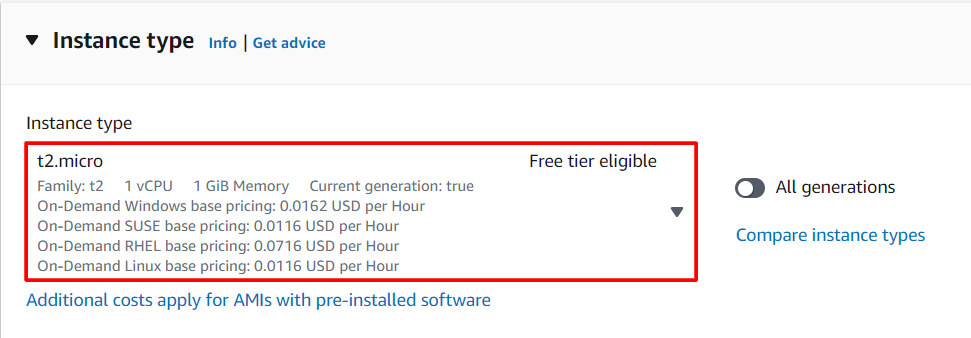
- For Instance Type: Select t2.micro
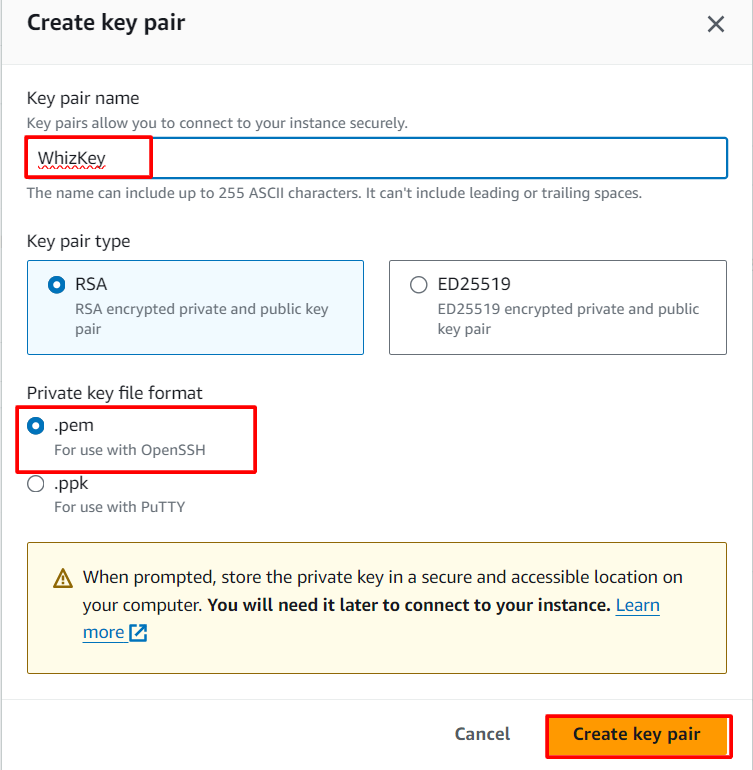
- You’ll need to create a key pair to securely connect to your EC2 instances. Select the Create a new key pair option.
- For Key pair(login): Select Create a new key pair Button
- Key pair name: WhizKey
- Key pair type: RSA
- Private key file format: .pem
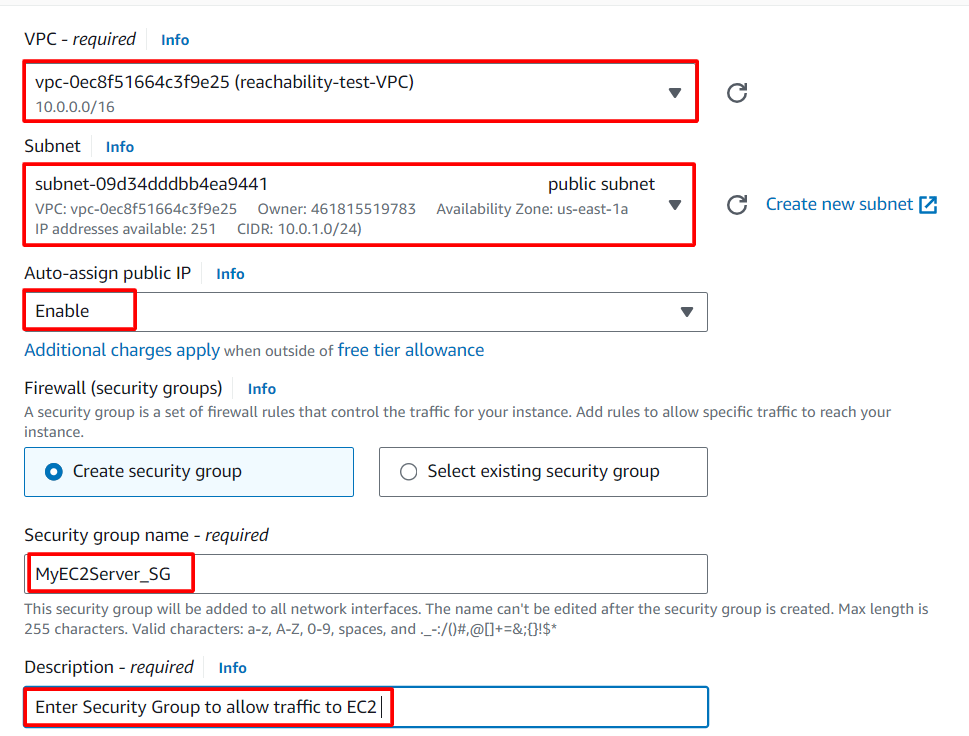
- In Network Settings Click on Edit Button:
- VPC: select reachability-test-VPC
- Subnet: select Public subnet
- Auto-assign public IP: Enable
- Select Create security group
- Security group name: Enter MyEC2Server_SG
- Description: Enter Security Group to allow traffic to EC2
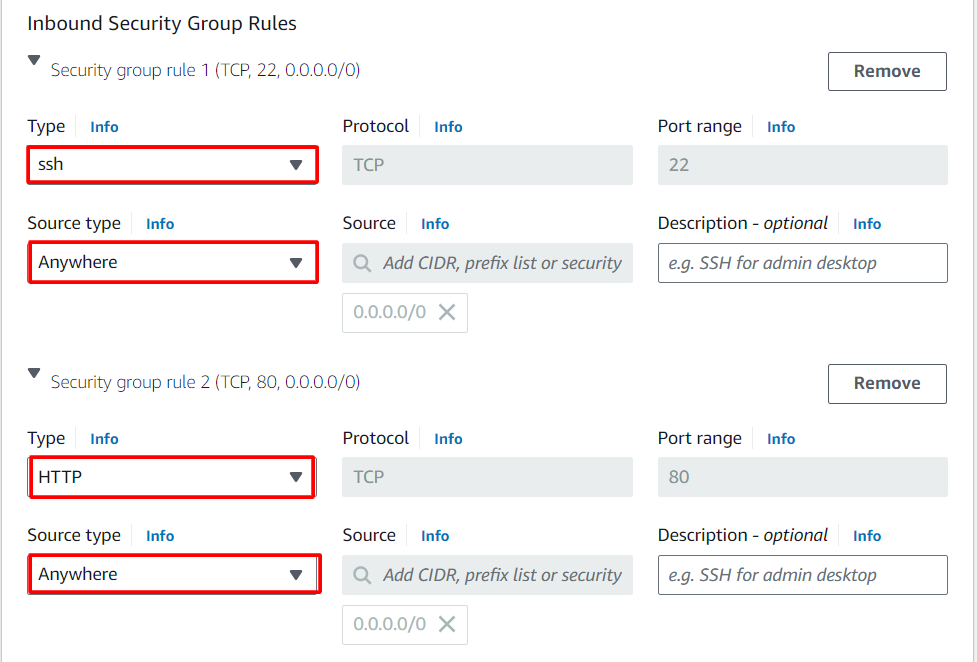
- We will now add the security group rules. SSH will already be present there.
- For HTTP, Select Add security group rule Button
- Choose Type: Select HTTP Source: Select Anywhere
- Click Launch Instance.
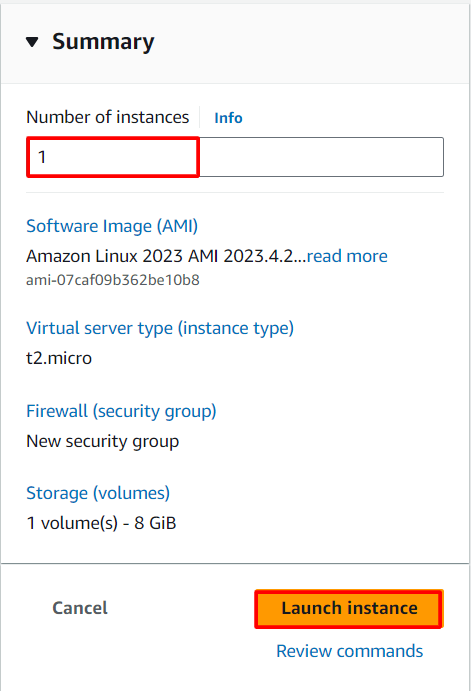

- Repeat the steps to launch another instance, ensuring it’s in the same (reachability-test-VPC) VPC but in the private subnet.
- To create the second EC2 instance, repeat the same steps 2-8 and make sure to select the same VPC you created.
- Name: Enter MyEC2Server2
- Create a new security group for this instance, allowing inbound traffic from the first instance’s security group.
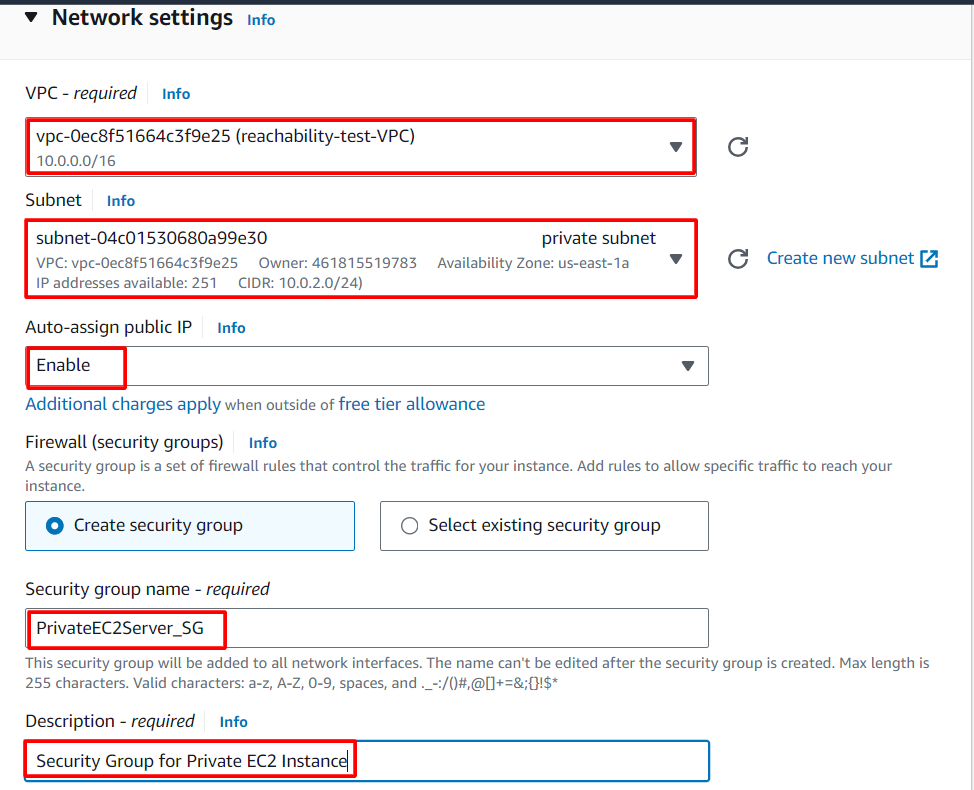
- Security Group for the second EC2 instance (Private):
- Name: PrivateEC2Server_SG (or any descriptive name)
- Description: Security Group for Private EC2 Instance
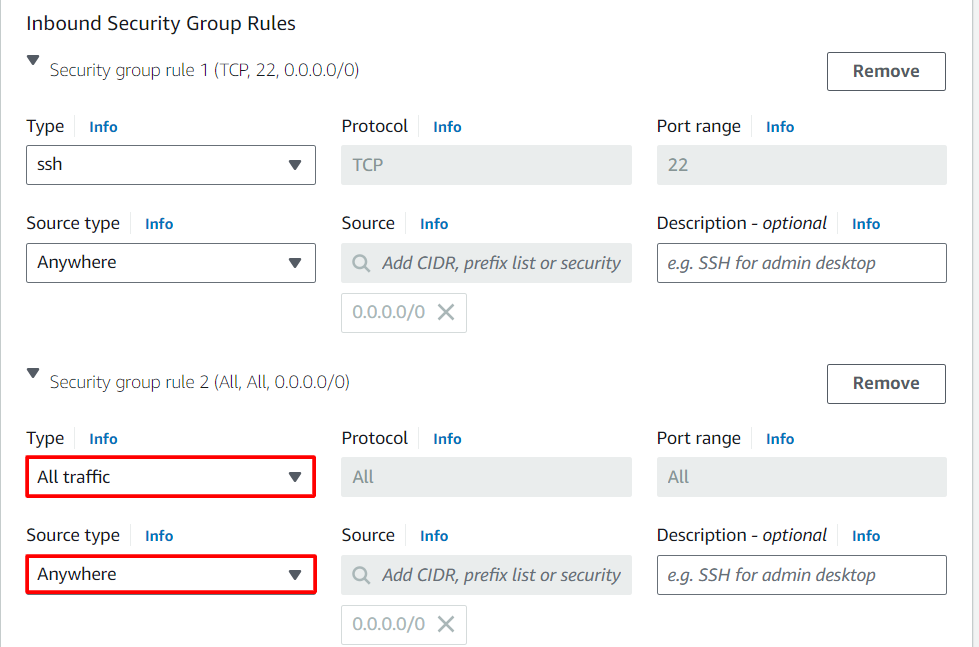
- Inbound Rules:
- Allow All Traffic (or specific ports/protocols) from the MyEC2Server_SG security group
- Click Launch Instance.

Task 4: Testing Connectivity
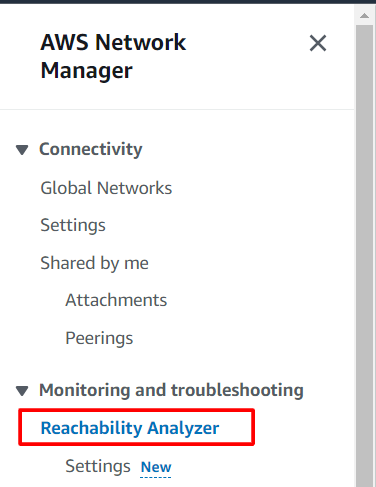
- Go to AWS Network Manager you’ll see a left-hand side menu. Click on the Reachability Analyzer option and click on create and analyze path.
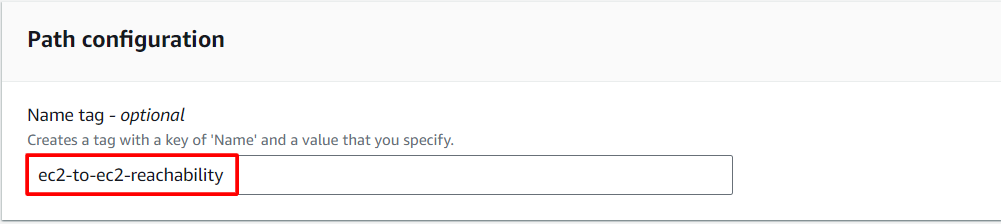
- Name tag: ec2-to-ec2-reachability.
- In the source type, select instances and choose the first EC2 instance you created.
- In the destination type, select instances and choose the second EC2 instance.
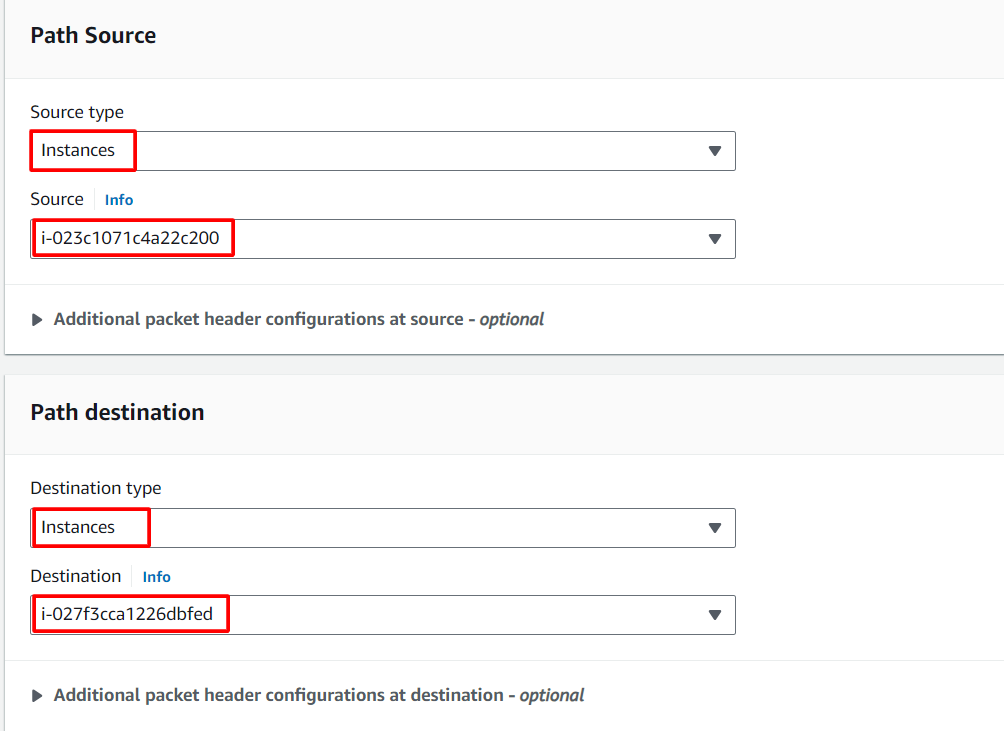
- Leave everything as default.
- After configuring the source and destination instances, click on the create and analyze path button to run the analysis test.

Task 5: Now We are going to analyze the path to both the source and destination
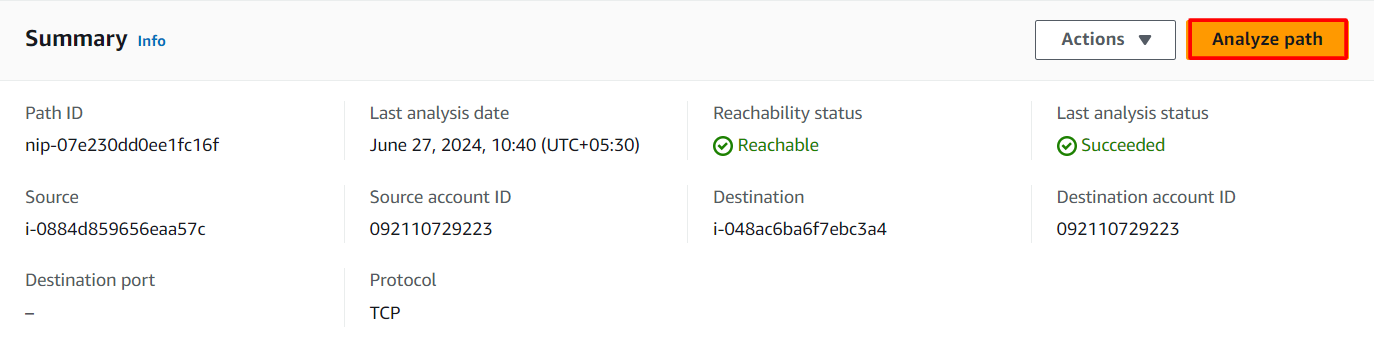
- Click on the Analyze path to reach the both source and destination path.
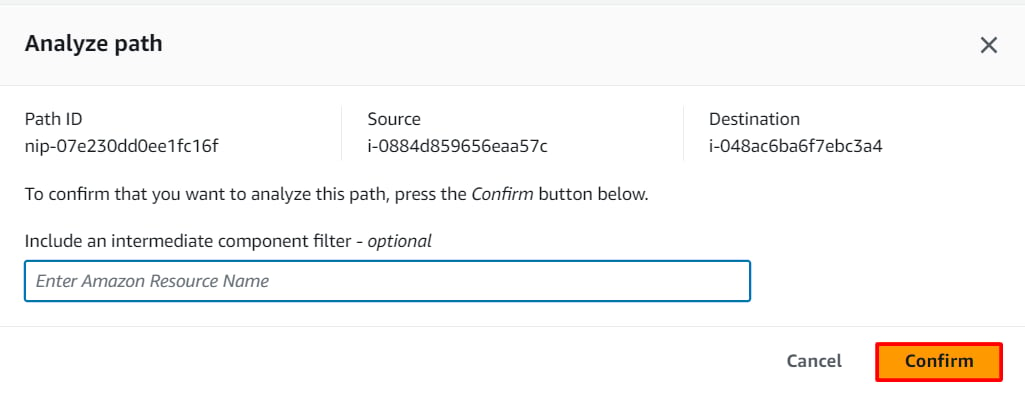
- click on the confirm button
Task 6: Reviewing Results
- Once the reachability test is complete, review the results displayed by the Reachability Analyzer.
- If the test result shows Reachable, it indicates that the two EC2 instances can communicate with each other within the VPC you created.
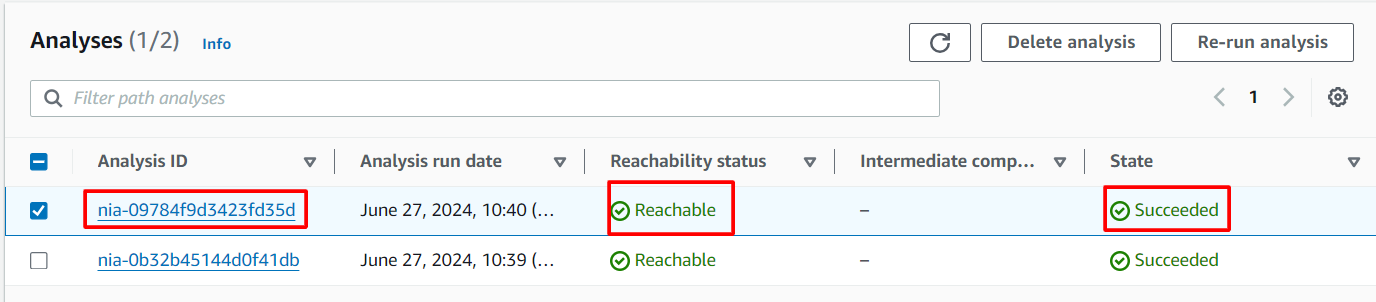
- If the test result shows unreachable, the Reachability Analyzer will provide detailed information about the issue and potential reasons for the connectivity problem between the two instances.
Do you know? Introducing VPC Reachability Analyzer, a game-changer in AWS network troubleshooting. Unlike traditional methods, it dynamically maps network traffic, providing real-time insights across VPCs and subnets. This end-to-end visibility extends beyond boundaries, automating root cause analysis and integrating seamlessly with AWS services like CloudWatch. Not just troubleshooting, it ensures compliance and security, scaling effortlessly from small deployments to enterprise networks. With its speed, accuracy, and automation, VPC Reachability Analyzer revolutionizes network management in AWS environments.
Completion and Conclusion
- You Have Successfully logged into AWS console.
- You Have Successfully created VPC.
- You Have Successfully created EC2 instance.
- You Have Successfully created Reachability analyzer
End Lab
- Sign Out Of AWS Account.
- You Have Successfully Completed The Lab.
- Once You Have Completed The Steps, Click On End Lab From Your IP Lab Portal And Wait Till The Process Gets Completed.
What gets checked
When you press Check my work, the platform verifies each of these:- Create Amazon Custom VPC — Check whether a Custom VPC is created or not.
- Create Amazon Custom VPC Subnet — Check whether a Subnet is created for the Custom VPC or not.
- Create Internet Gateway — Check whether an Internet Gateway is created and attached to the Custom VPC or not.
- Launch an EC2 Instance — Check whether an EC2 Instance is launched or not.
- Create Network Reachability Analyzer — Check whether a Network Reachability Analyzer path is created or not.