

Overview
Lab Details
This lab walks you through the steps to encrypt and decrypt and re-encrypt the data. Duration: 1 Hour AWS Region: US East (N. Virginia)Introduction
What is KMS ?
AWS Key Management Service (KMS) is a pivotal component of Amazon Web Services’ security infrastructure, providing a managed service designed to simplify the creation and management of encryption keys. Encryption is a crucial aspect of data security, especially when it comes to protecting data at rest. AWS KMS seamlessly integrates with various AWS services, such as EBS, S3, Redshift, Elastic Transcoder, and Amazon relational databases, facilitating easy encryption of data using keys managed by the service. Case Study: In scenarios where safeguarding data is paramount, AWS KMS offers a fully managed key management infrastructure. The selection of reliable key sources becomes critical during processes like encrypting data at rest and performing server-side encryption. AWS KMS addresses this by storing customer master keys, which can directly perform encryption or generate unique symmetric data keys. These data keys, whether 128 or 256 bits, are encrypted using the customer master key.Key Functions of AWS KMS:
- Storage of Customer Master Keys: KMS stores customer master keys, enabling direct encryption or generation of data keys.
- Hardware Security Modules: All encryption and key generation are performed within hardware security modules, ensuring high security standards validated against FIPS 140-2.
- Multi-Tenant API: KMS acts as a multi-tenant API in front of HSMs, with customers interacting through the KMS API, while AWS maintains exclusive access to the hardware.
- Logging and Compliance: KMS logs key usage to CloudTrail, aiding in compliance requirements and facilitating audits to track key usage.
- Cryptographic Material Protection: The cryptographic material constituting the customer master key remains within the HSM, enhancing the overall security of KMS.
- Integration with AWS Services: KMS seamlessly integrates with various AWS services that perform server-side encryption, allowing them to retrieve data keys from KMS.
- Certifications: AWS KMS is certified against stringent controls including SOC1, SOC2, SOC3, and PCI DDS level 1, ensuring a high level of security compliance.
Architecture Diagram
Lab Tasks
- Sign in to AWS Management Console
- Create a group for KMS users and attach a policy to the group.
- Create 2 users for managing the KMS.
- Creating a KMS Key
- Launch an EC2 instance.
- SSH into EC2 Instance
- Perform KMS Encryption and Decryption.
Launching Lab Environment
- To launch the lab environment, Click on the Start Lab button.
- Please wait until the cloud environment is provisioned. It will take less than a minute to provision.
- Once the Lab is started, you will be provided with IAM user name, Password, Access Key, and Secret Access Key.
Note : You can only start one lab at any given time
Lab guide
Lab Steps
Task 1: Sign in to AWS Management Console
- Click on the Open Console button, and you will get redirected to AWS Console in a new browser tab.
-
On the AWS sign-in page,
- Leave the Account ID as default. Never edit/remove the 12 digit Account ID present in the AWS Console. otherwise, you cannot proceed with the lab.
- Now copy your User Name and Password in the Lab Console to the IAM Username and Password in AWS Console and click on the Sign in button.
- Once Signed In to the AWS Management Console, Make the default AWS Region as US East (N. Virginia) us-east-1.
Task 2: Create a User group for KMS users and attach a Policy to the Group
- Make sure to choose N.Virginia region in the AWS Management console dashboard, which is present in the top right corner.
- Navigate to the Services menu at the top, click on IAM in the Security, Idenitity, & Compliance section.
- In the IAM section, click on IAM User groups.
- Click on Create group
-
Enter the following user group name :
-
Attach permissions policies: For the Policy name type KMS and select ROSAKMSProviderPolicy

- Now, Click on Create Group button.
- We have successfully created a new group for our KMS lab.
Task 3: Create two users for managing the KMS
In this task, We are going to add two users to the group we created.- Click on Users on the left side of the IAM dashboard.
- Click on the Create User button.
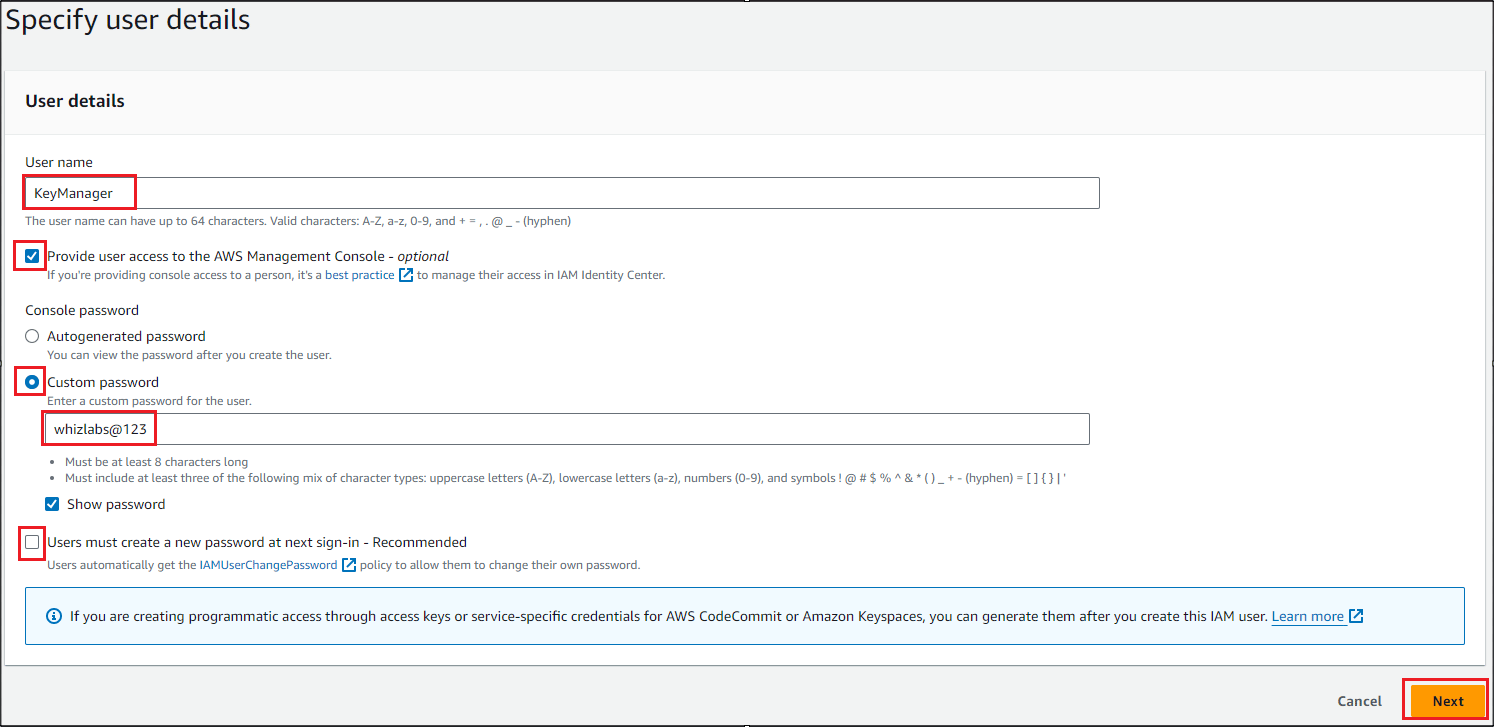
- Enter the following user name :
- Check Provide user access to the AWS Management Console checkbox.
- Click on the Custom password.
- Give the following password:
- Uncheck the Users must create a new password at the next sign-in. Click on Next.
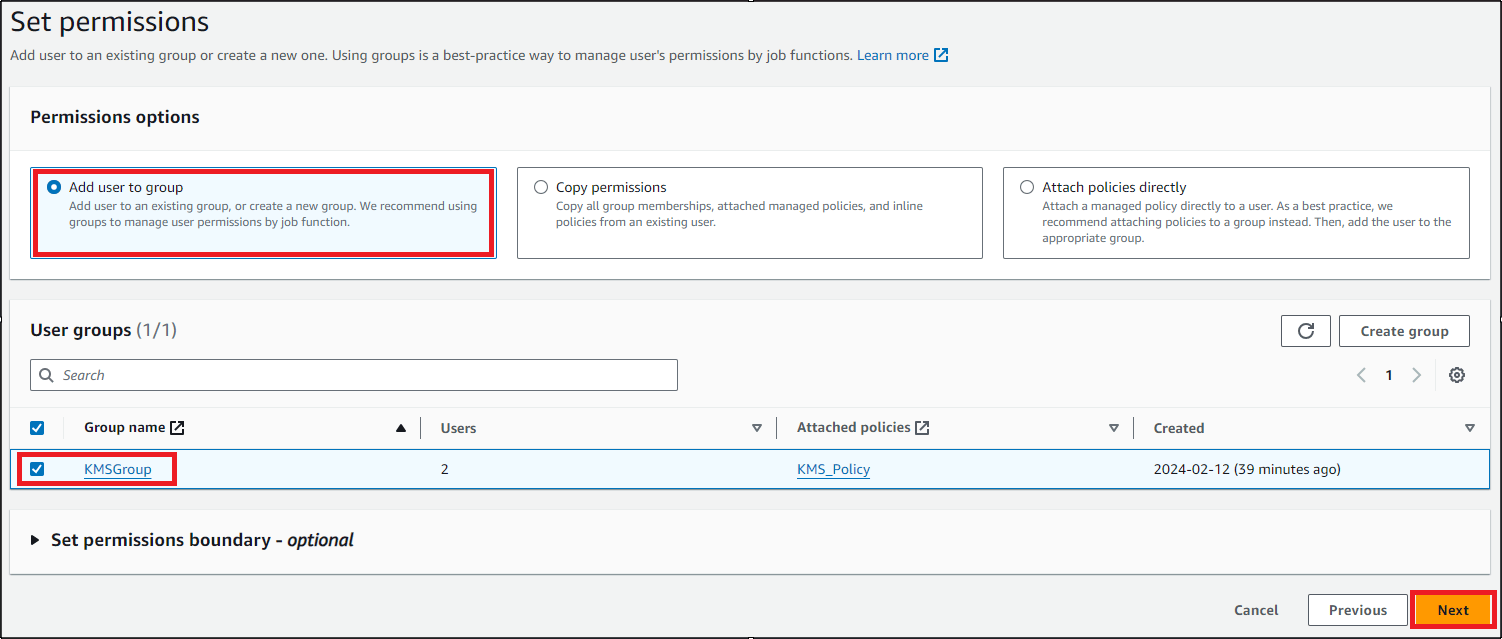
- For permission, select Add User to group .
- Select the KMSGroup that we created, and click on the Next button.
- In the review section, if all the settings are as per the requirement.
- Click on Create User.
- We have successfully created our KeyManager. Click on Return to users list button and click again on Continue button to return back to Users tab.
- Now similarly we’re going to create a new user and this will be the person who does the decryption.
- Click on Users on the left side of the IAM dashboard.
- Click on the Create User button.
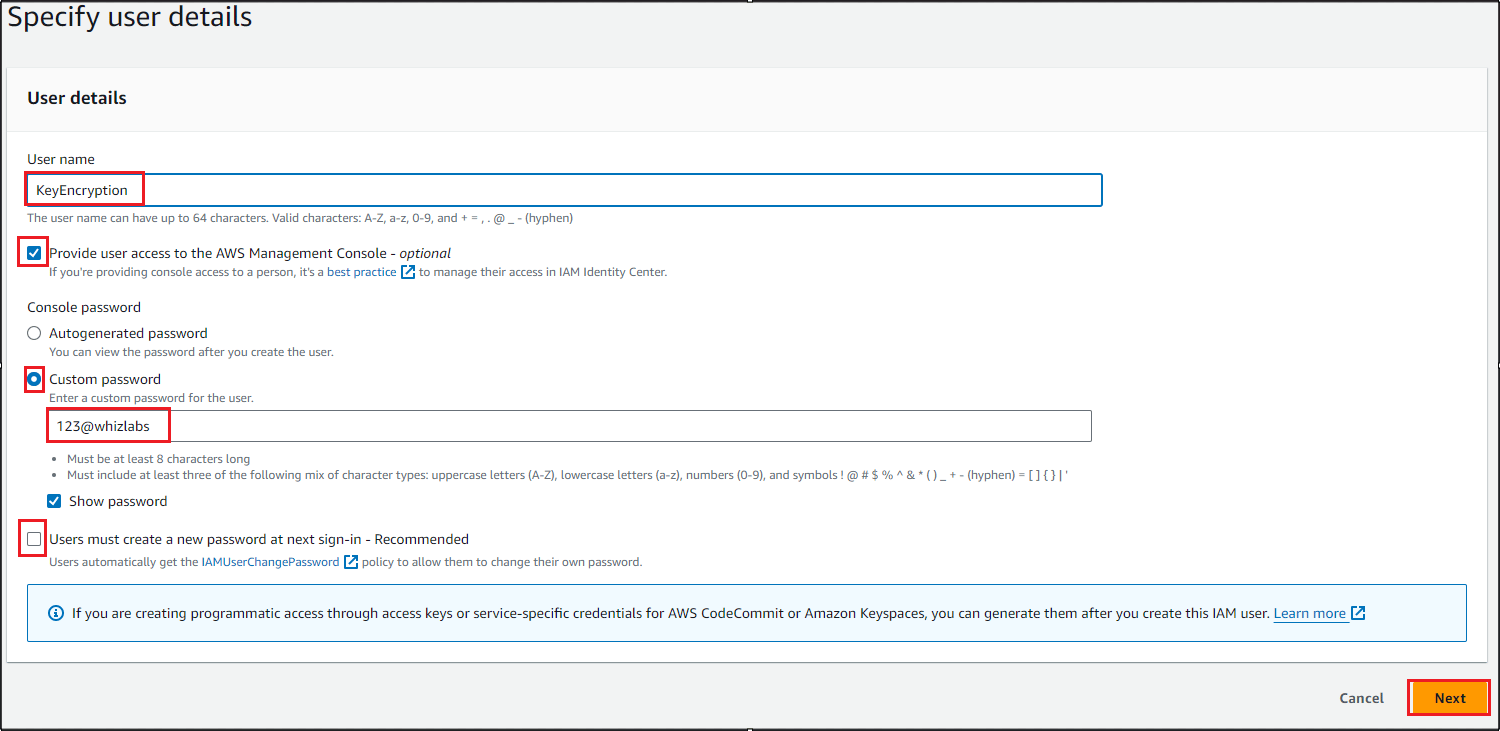
- Enter the following user name :
- Check Provide user access to the AWS Management Console checkbox.
- Click on the Custom password
- Give the following password:
- Uncheck the Users must create a new password at the next sign-in. Click on Next.
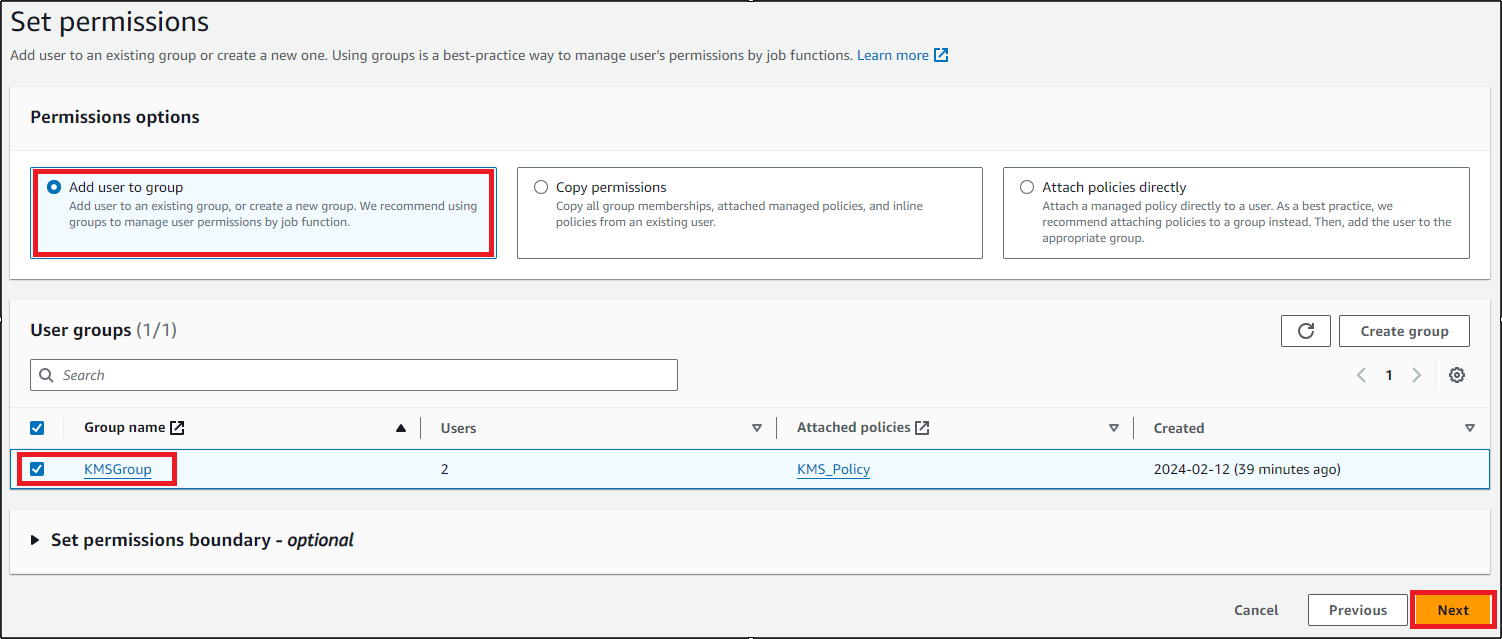
- For permission, select Add User to group .
- Select the KMSGroup that we created, and click on the Next button.
- In the review section, if all the settings are as per the requirement
- Click on Create User. Click on Return to users list button and click again on Continue button to return back to Users tab.
- Click on Users on the left side of the IAM dashboard.
- Click on KeyEncryption user and go to the Security credentials tab.
- Scroll down and click on Create access key button.
-
Select Use case as Command Line Interface (CLI), check the confirmation box and click on Next button.
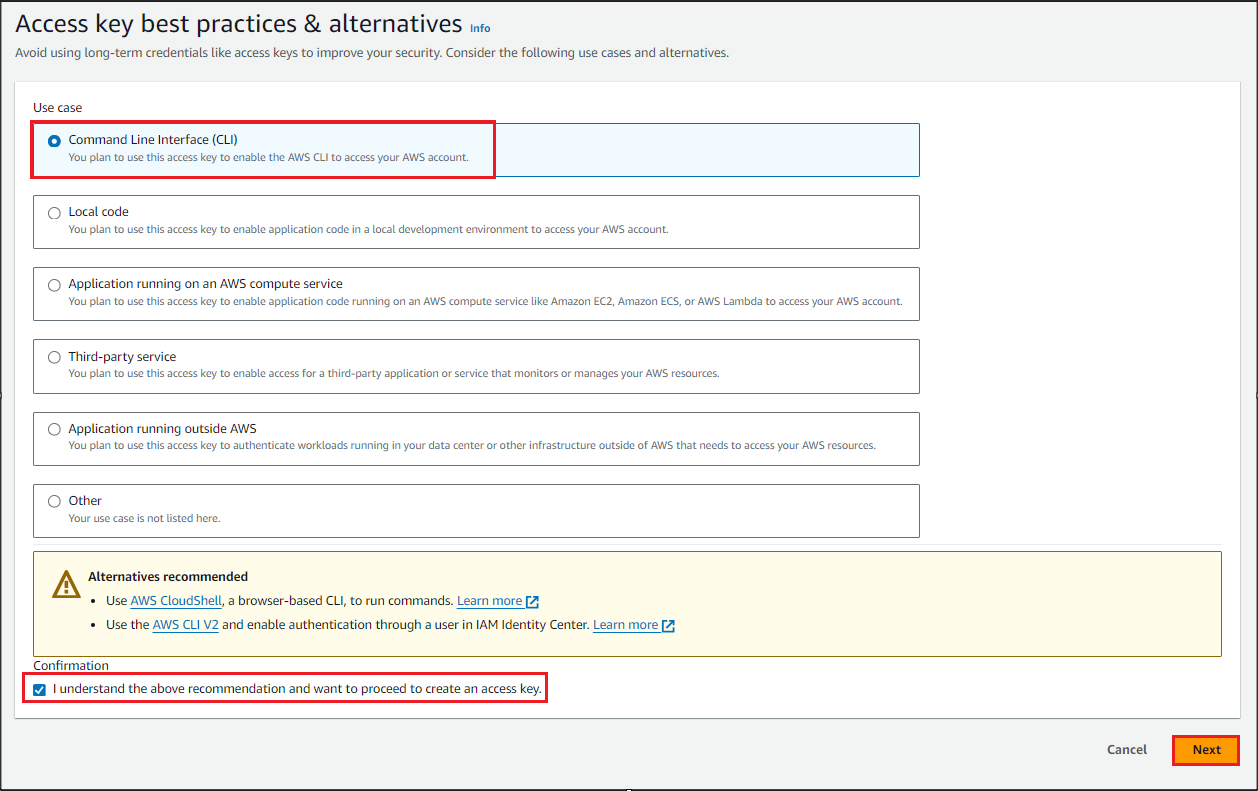
- Leave Description tag value as blank in Set description tag step.
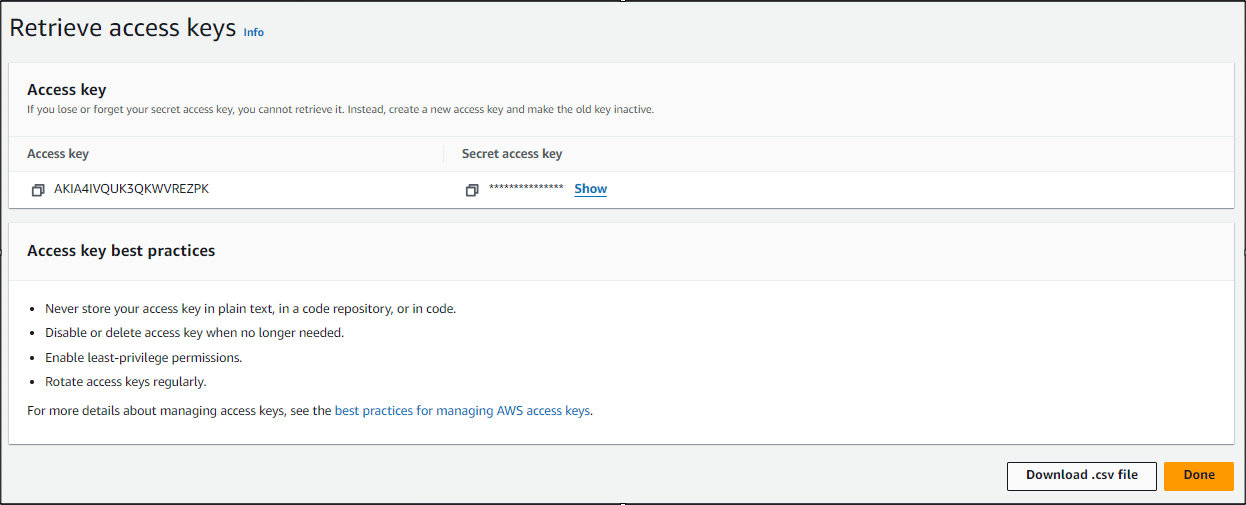
- Click on Create access key button.
-
Click on Download .csv file button to download the secret access key of the user as it will be required to connect with our EC2 instance for encryption.
Task 4 : Creating a KMS Key
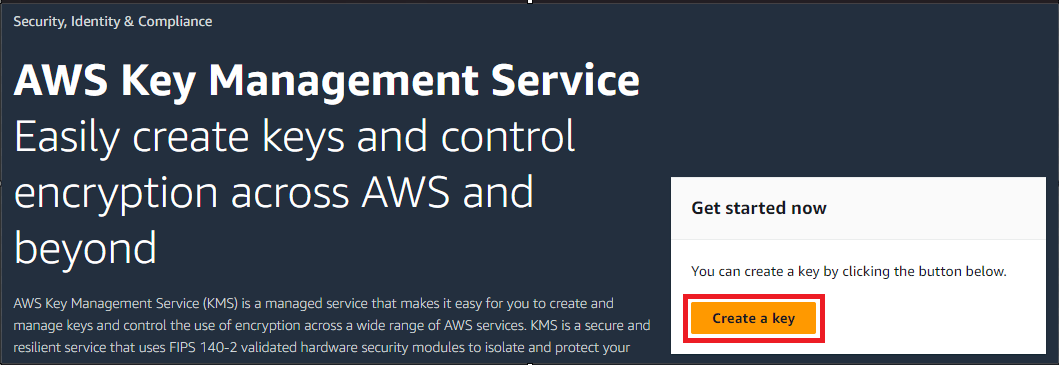
- Navigate to the Services menu at the top, click on AWS Key Management Service (KMS) in the Security, Identity, & Compliance section
-
Click on the Create a key button.
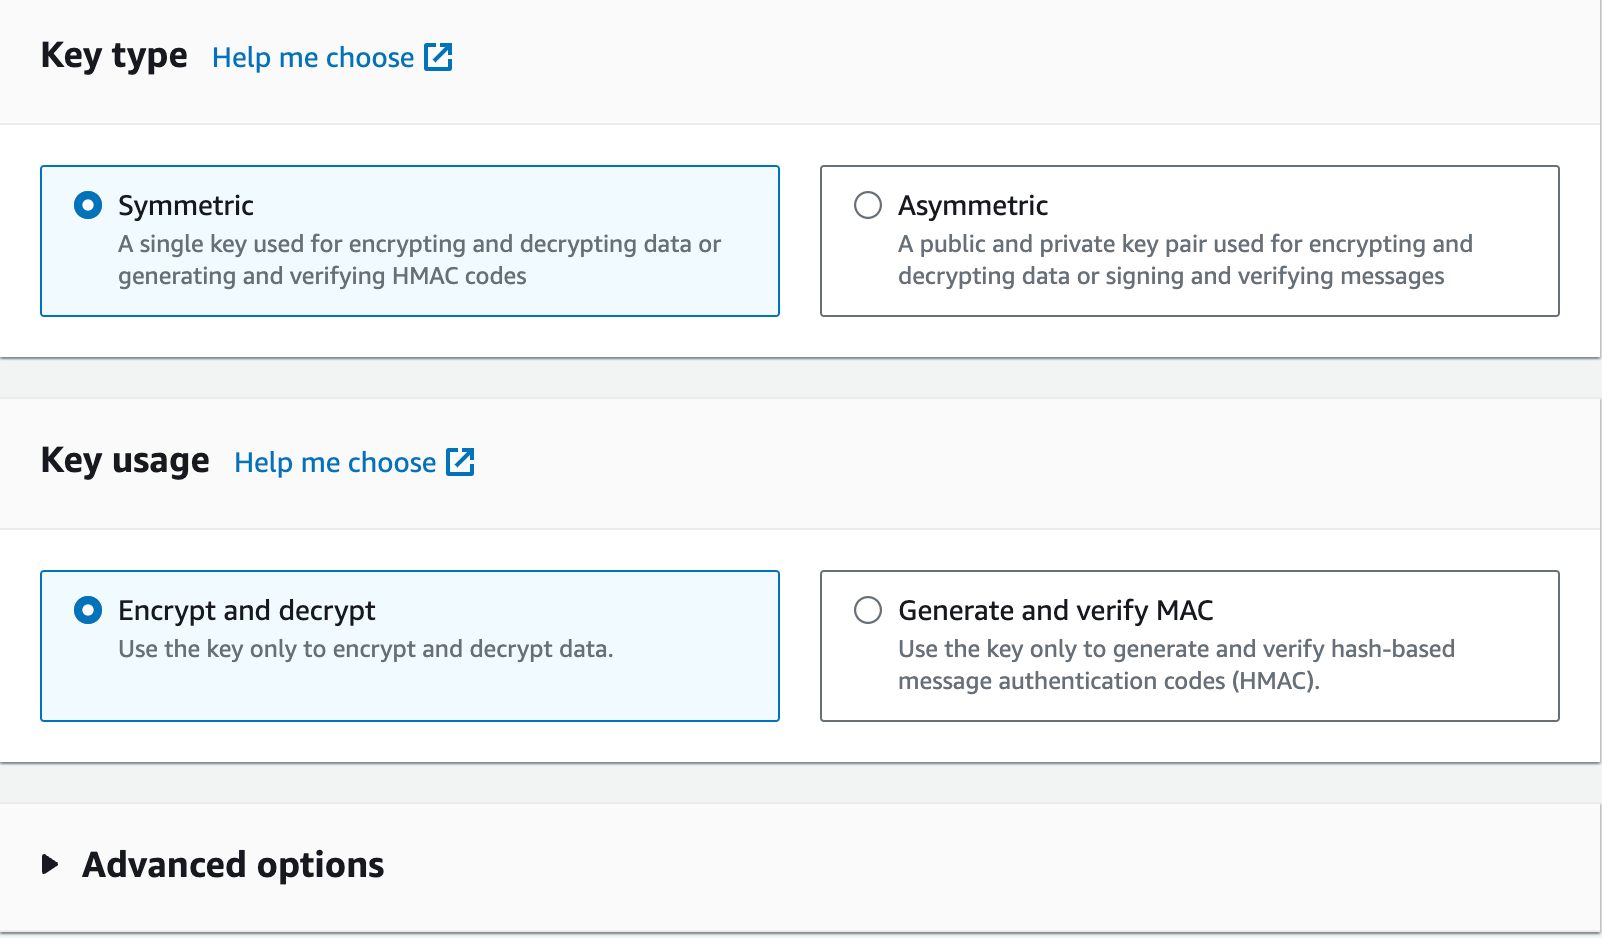
- Select Key type as Symmetric and Key usage as Encrypt and decrypt, click on next button.
- Enter Alias as :
- Leave the other field as it is, and click on the Next button.
- In Define key administrative permissions select KeyManager and click on Next button.
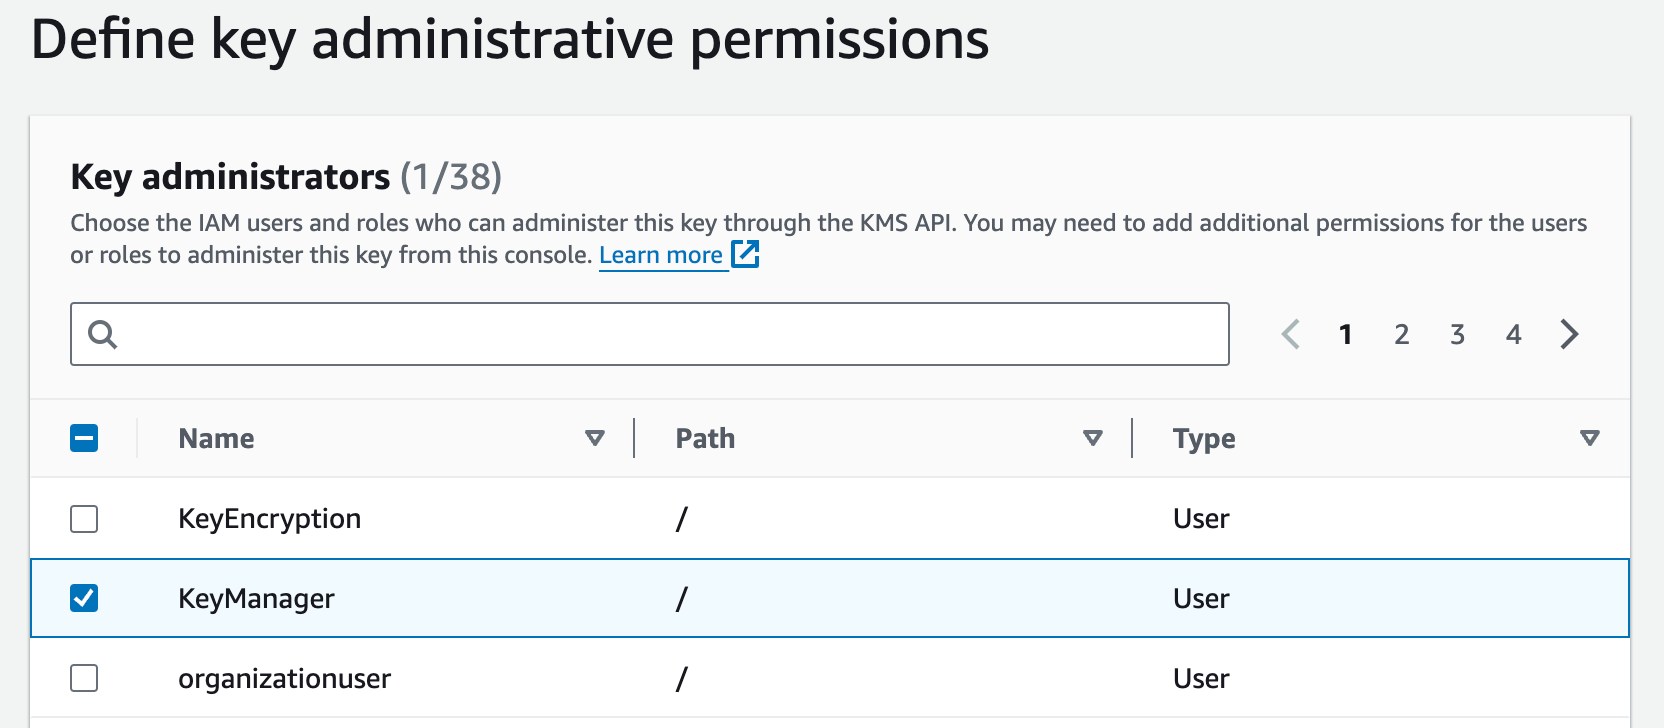
- In Define key usage permissions select KeyEncryption and click on Next button.
- Once you click on Next you’ll be moved to the review section. Review the key policy that we have created and if everything is fine, just click on Finish button.
- We have successfully created the KMS key. Copy the Key ID in Notepad for future use.

- Now that we have created the KMS and User policies, move to the service section and choose EC2 under the Compute section.
Task 5 : Launching an EC2 Instance
- Make sure you are in N.Virginia Region.
- Navigate to the Services menu at the top, click on EC2 in the Compute section.
- Click on Launch Instance
- Enter Name as following: MyEC2Server
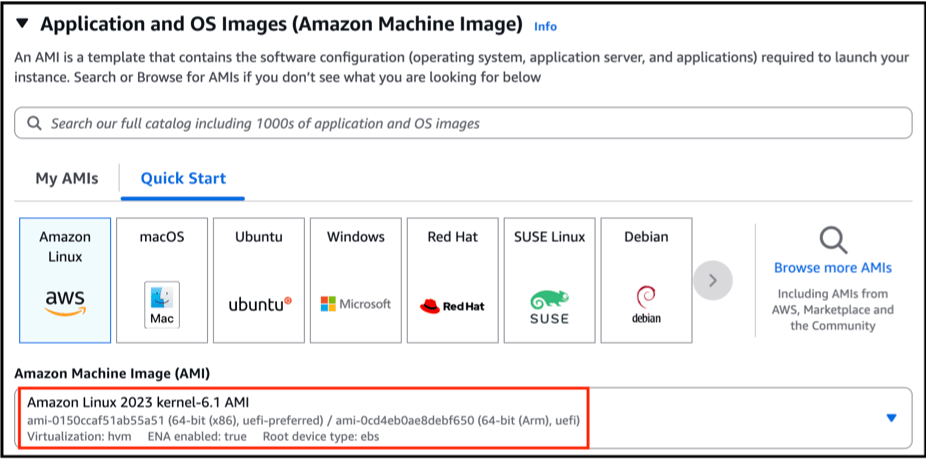
- For AMI Select Amazon Linux 2023 in the quickstart menu.
- For Instance Type: Select t2.micro.
-
For Key pair(login): Select Create a new key pair Button
- Key pair name: WhizKey
- Key pair type: RSA
- Private key file format: .pem
- Keep all the settings as default and click on the Launch instance button.
- Click on View all instances button.
-
Your instance is now launching, wait for the complete initialization of the instance till the Status check changes to 2/2 checks passed

Task 6: SSH into the EC2 Instance
- Please follow the steps in SSH into EC2 Instance.
Task 7 : Perform KMS Encryption and Decryption
-
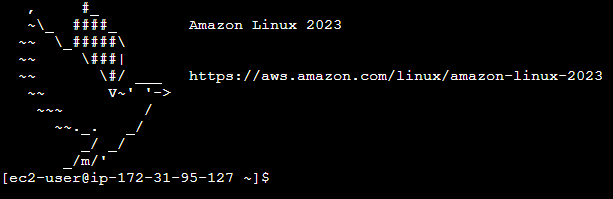
Once you click on connect you get a terminal which is our EC2-user login on EC2-instance. Here we will perform KMS Encryption and Decryption.
- First we need to create a file with the name secret.txt , Execute the command.
- Now that we have created a file secret.txt we need to execute the following configuration command.
- Enter the AWS Access key ID and AWS Secret Access Key from the user KeyEncryption file that you downloaded in task 3.
- Enter default region as us-east-1
- Leave the default output as blank and press Enter

- Once AWS configure is complete, we need to execute the command for encryption.
- Run the following command to encrypt text file but first replace <replace-key-id> with the Key ID copied earlier.
- We have successfully encrypted our text file. To view the statement, execute

- We are going to decrypt the encrypted file to view the data.
- We have successfully decrypted our text file . To view the statement execute.

- Run the following command to re-encrypt text file but first replace <replace-key-id> with the Key ID copied earlier.
- You can check the created files by using command :

- We have successfully encrypted our text file . To view the statement execute

- We have successfully executed the re-encrypt statement.
Do You Know?
KMS enforces access control policies to ensure that only authorized individuals or systems can use or manage cryptographic keys. This helps prevent unauthorized access to sensitive information.
- Once the lab steps are completed, please click on the Validation button on the left side panel.
Completion and Conclusion
- You have successfully created a group for KMS users and attached a policy to the group.
- You have successfully created 2 users for managing the KMS.
- You have successfully created a KMS Key.
- You have successfully launched an EC2 Instance and connected to SSH using the browser.
- You have successfully configured KMS.
- You have become familiar with Encryption, decryption, re-encryption.
End Lab
- Sign out of AWS Account.
- You have successfully completed the lab.
- Once you have completed the steps, click on End Lab from your IP Lab Portal and wait till the process gets completed.
What gets checked
When you press Check my work, the platform verifies each of these:- Create Private S3 bucket — Check whether a private S3 bucket is created or not
- Create an Amazon SNS Topic — Check If SNS Topic created or not
- AWS config rule — check whether AWS config rule is created or not