

Overview
Project Details
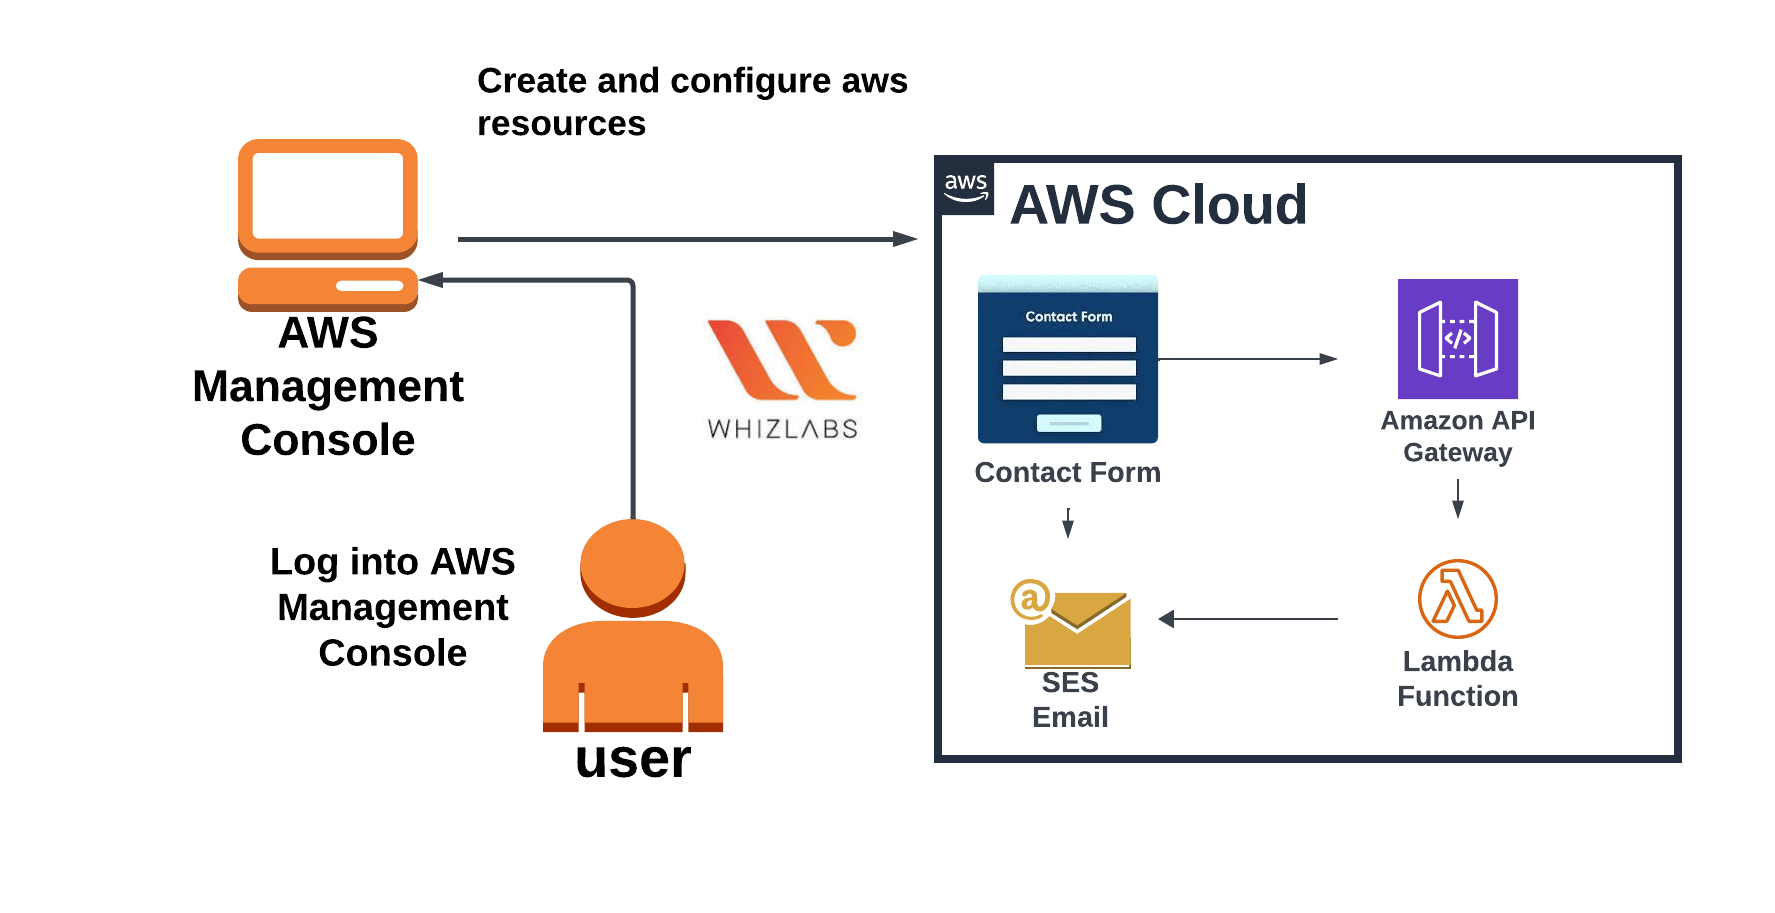
- This project provides a guide on creating a contact form and receive email notifications when a form is completed and submitted.
- Duration: 1 Hour
- AWS Region: US East (N. Virginia) us-east-1
Introduction
What is a Serverless in AWS?
- Serverless computing abstracts away the infrastructure management tasks such as server provisioning, maintenance, and scaling. Developers do not need to worry about server operations.
- Services like AWS Lambda automatically scale based on the incoming workload. They can handle any scale of traffic, from a few requests per day to thousands per second, without manual intervention.
- With serverless architectures, you pay only for the compute resources consumed by your application or function. There are no upfront costs or charges for idle capacity, which can lead to cost savings, especially for sporadic workloads.
- Serverless applications are typically event-driven, responding to triggers such as HTTP requests, database modifications, file uploads, etc. AWS Lambda functions, for example, execute in response to events without needing to be continuously running.
- AWS provides managed services like AWS Lambda, API Gateway, DynamoDB, S3, etc., which handle operational aspects such as patching, scaling, and availability. Developers can focus more on application logic rather than infrastructure management.
Architecture Diagram
Task Details
- Sign into the AWS Management Console
- Create an Email Identity using SES
- Verify the Email address
- Create a Lambda Function
- Create a new API
- Create a Resource
- Create a Method
- Deploy the API
- Test Contact form
Launching Project Environment
- To launch the project environment, Click on the Start Project button.
- Please wait until the cloud environment is provisioned. It will take less than a minute to provision.
- Once the Project is started, you will be provided with IAM user name, Password, Access Key, and Secret Access Key.
Note : You can only start one project at any given time
Lab guide
Project Steps
Task 1: Sign in to AWS Management Console
- Click on the Open Console button, and you will get redirected to AWS Console in a new browser tab.
-
On the AWS sign-in page,
- Leave the Account ID as default. Never edit/remove the 12-digit Account ID present in the AWS Console. otherwise, you cannot proceed with the project.
- Now copy your User Name and Password in the Project Console to the IAM Username and Password in AWS Console and click on the Sign in button.
- Once Signed In to the AWS Management Console, Make the default AWS Region as US East (N. Virginia) us-east-1.
Task 2: Create an Email Identity using SES
- Make sure you are in the US East (N. Virginia) us-east-1 Region.
- Navigate to the Services menu at the top. Click on Amazon Simple Email Service in the Business Application section.
- On the left side menu, Select Identities
- Click on Create Identity button.
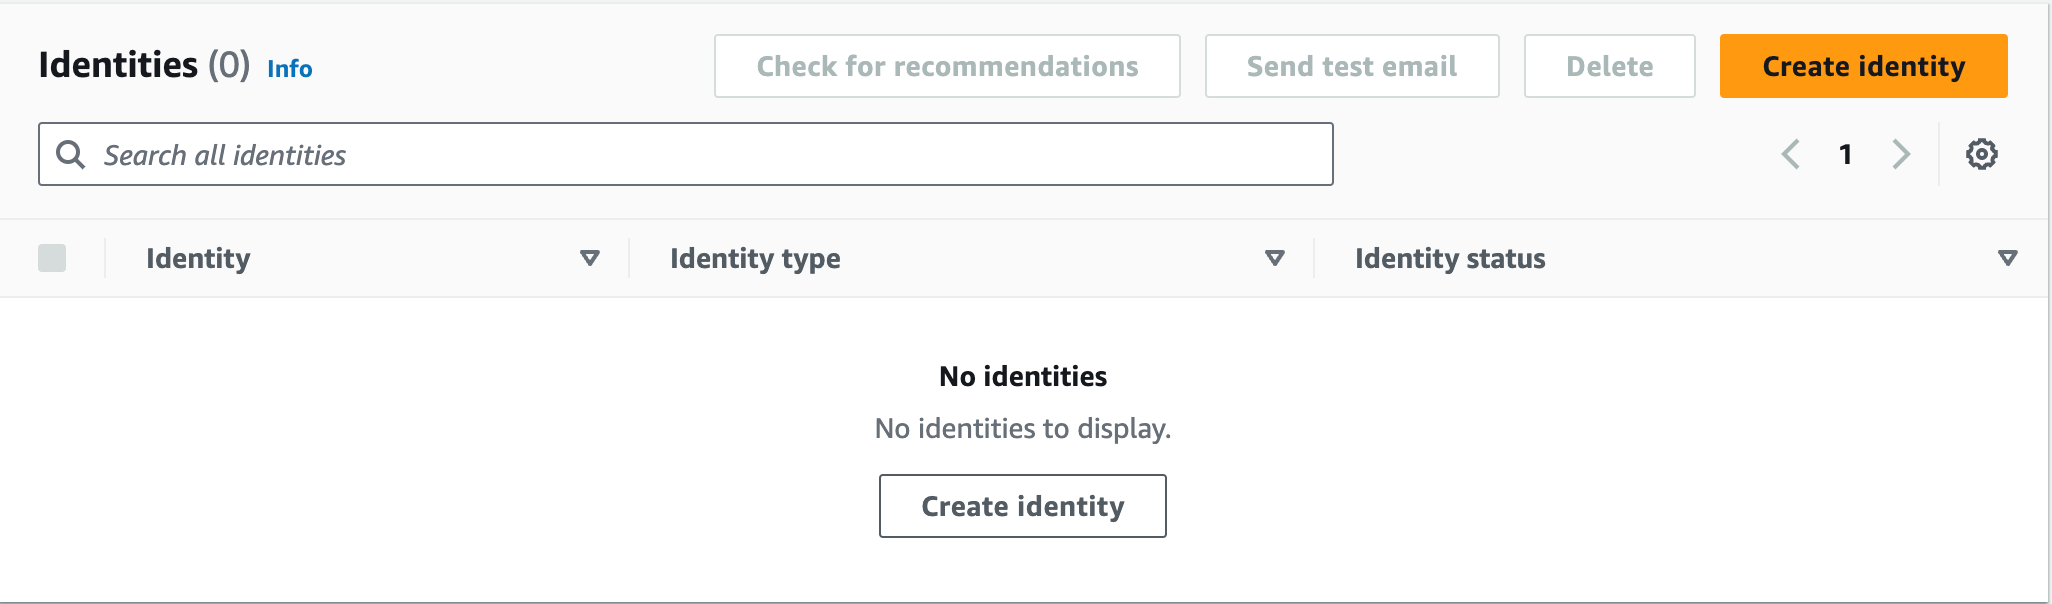
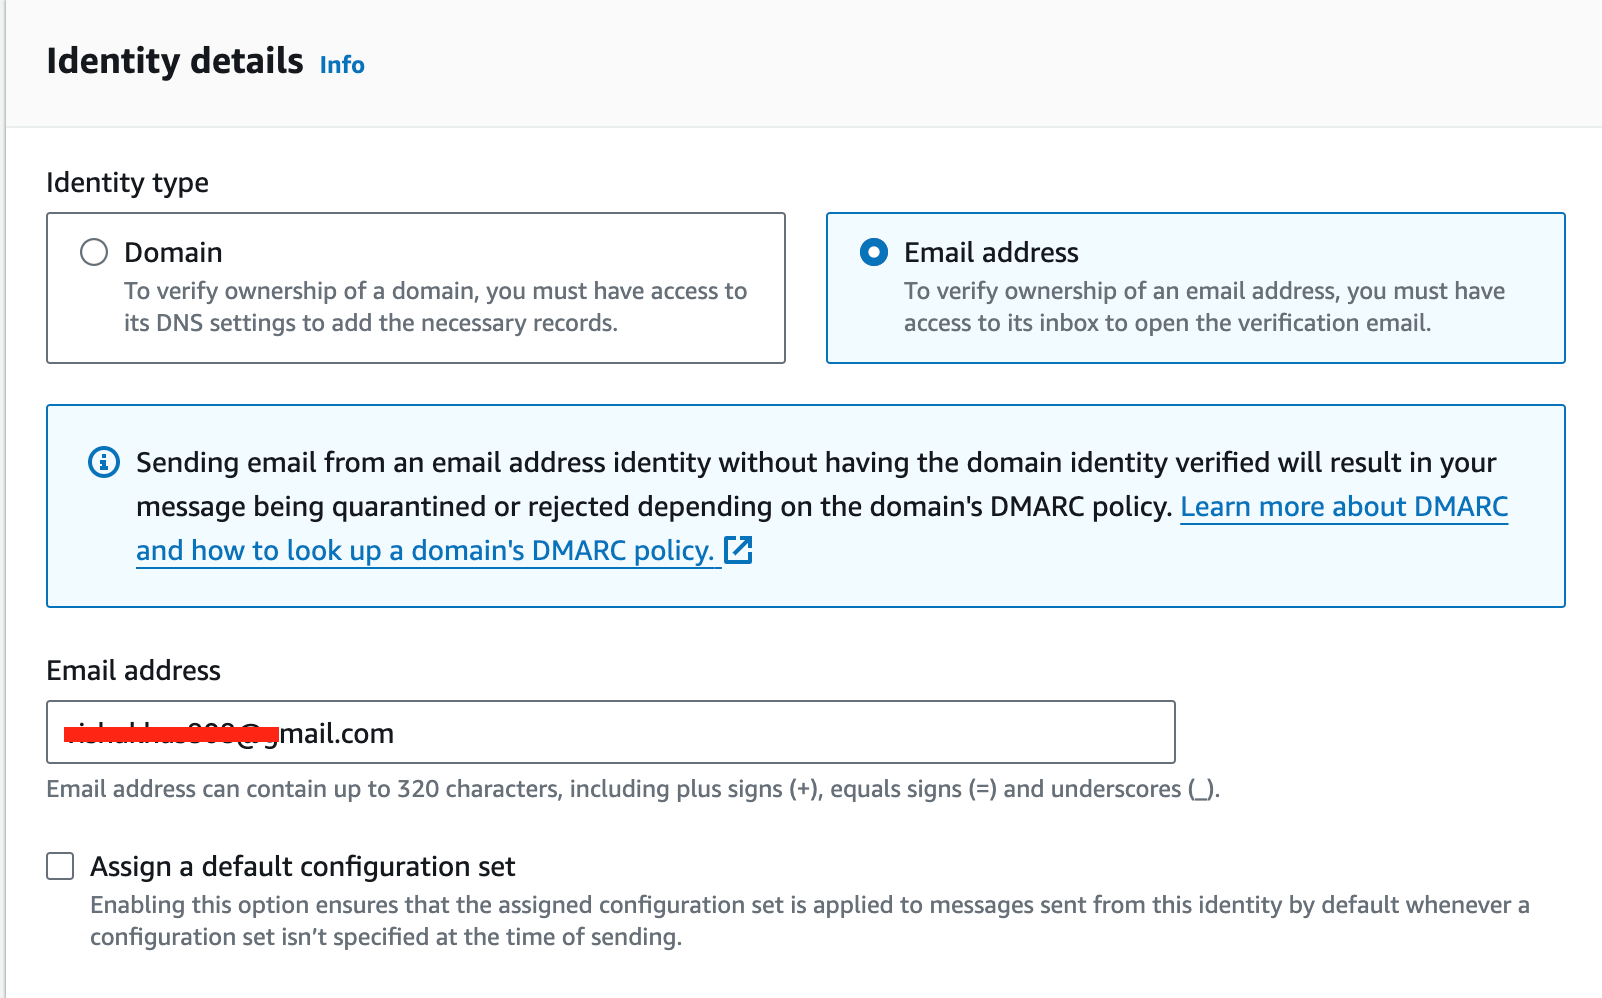
- Enter following details:
- Identity type: Select Email Address
- Email address: Enter your valid Sender Email ID.
- Leave other options as default.
- Click on Create Identity button.
- Similarly create another identity for receiver email
- Create on Create Identity button.
- Enter following details:
- Identity type: Select Email Address
- Email address: Enter your valid Reveiver Email ID.
- Leave other options as default.
- Click on Create Identity button.
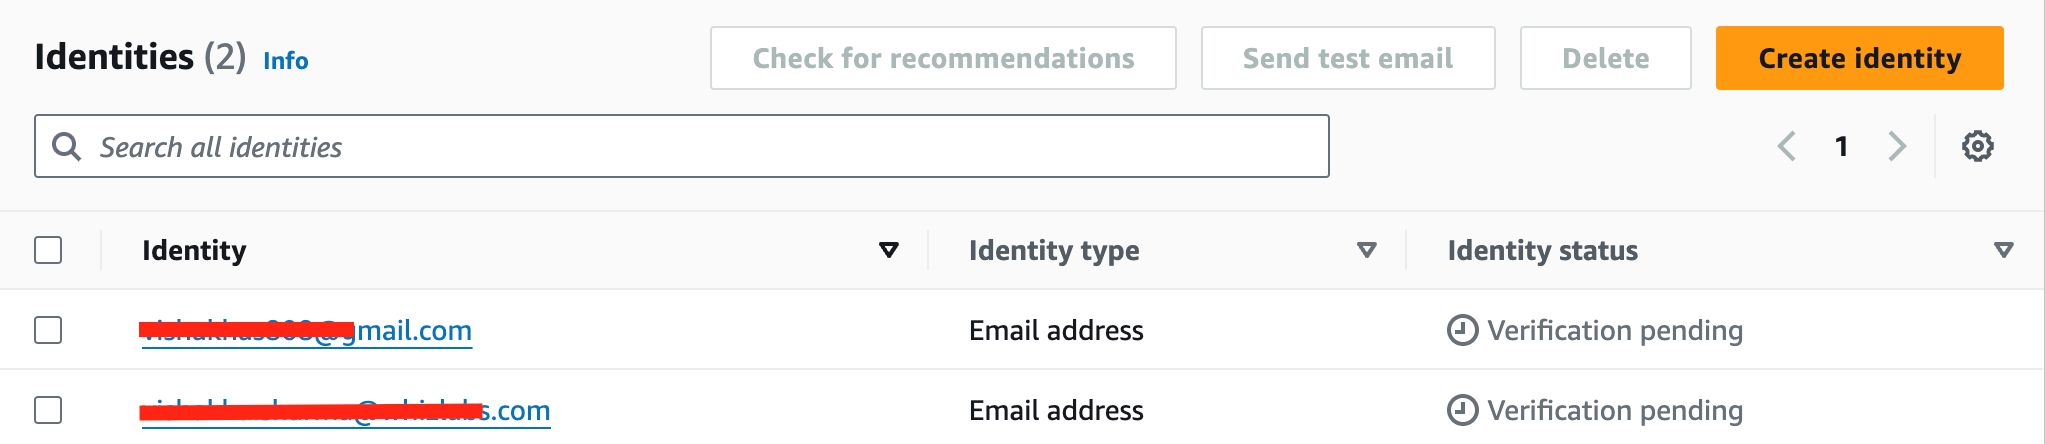
- Now you will be able to see that the Identity Status on the Email will be Verification Pending.
Task 3: Verify the Email Address
- AWS will send a confirmation email to the email that you provided in the above step.
- Log in to your Sender mailbox and you will be able to see a mail from Amazon Web Services.
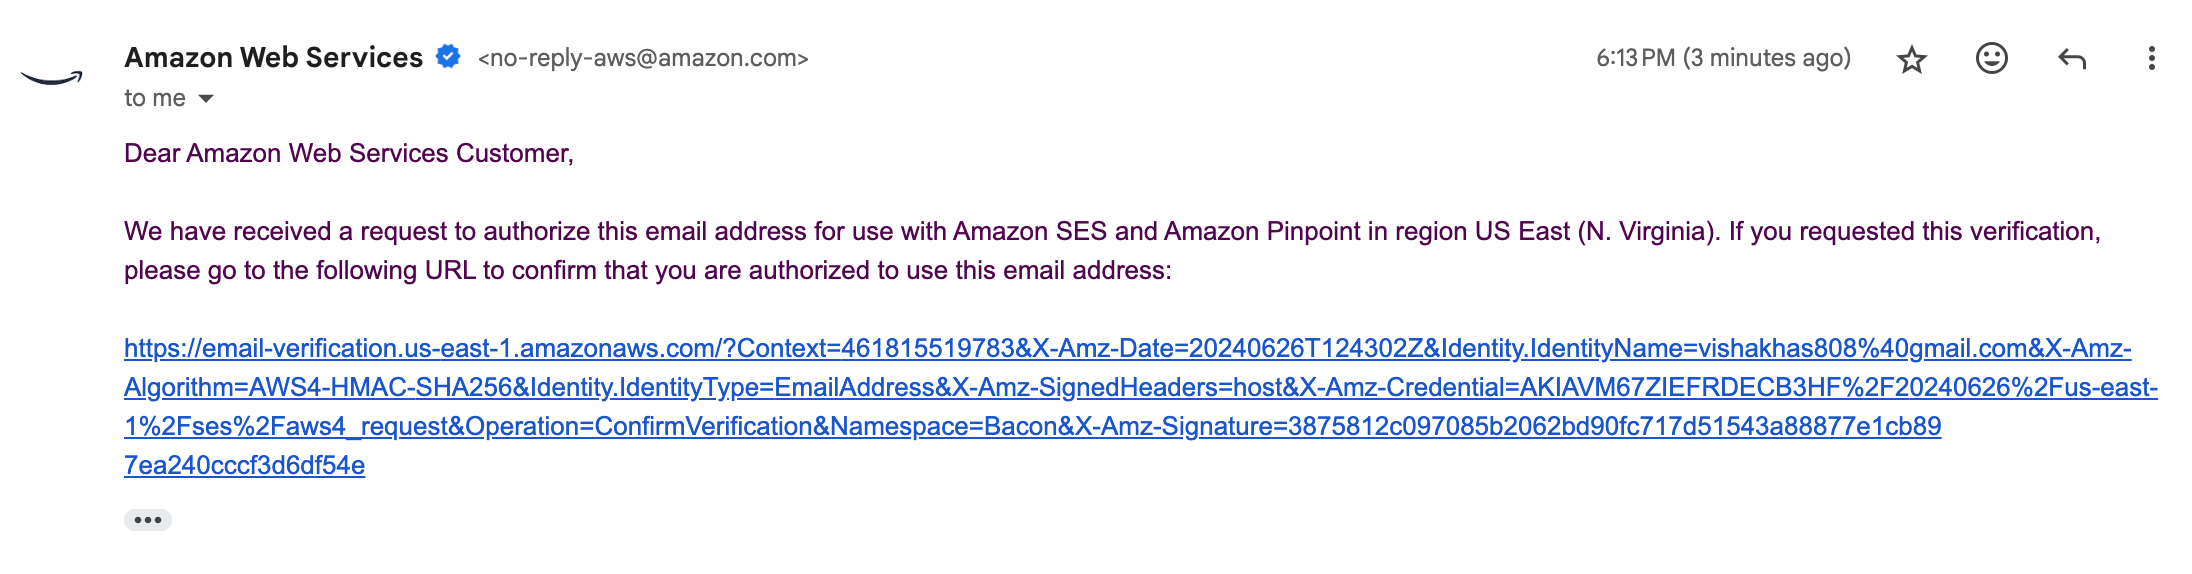
- Once you click on the link, you will be routed to the success page.

- Similarly Verify the Receiver’s mail also.
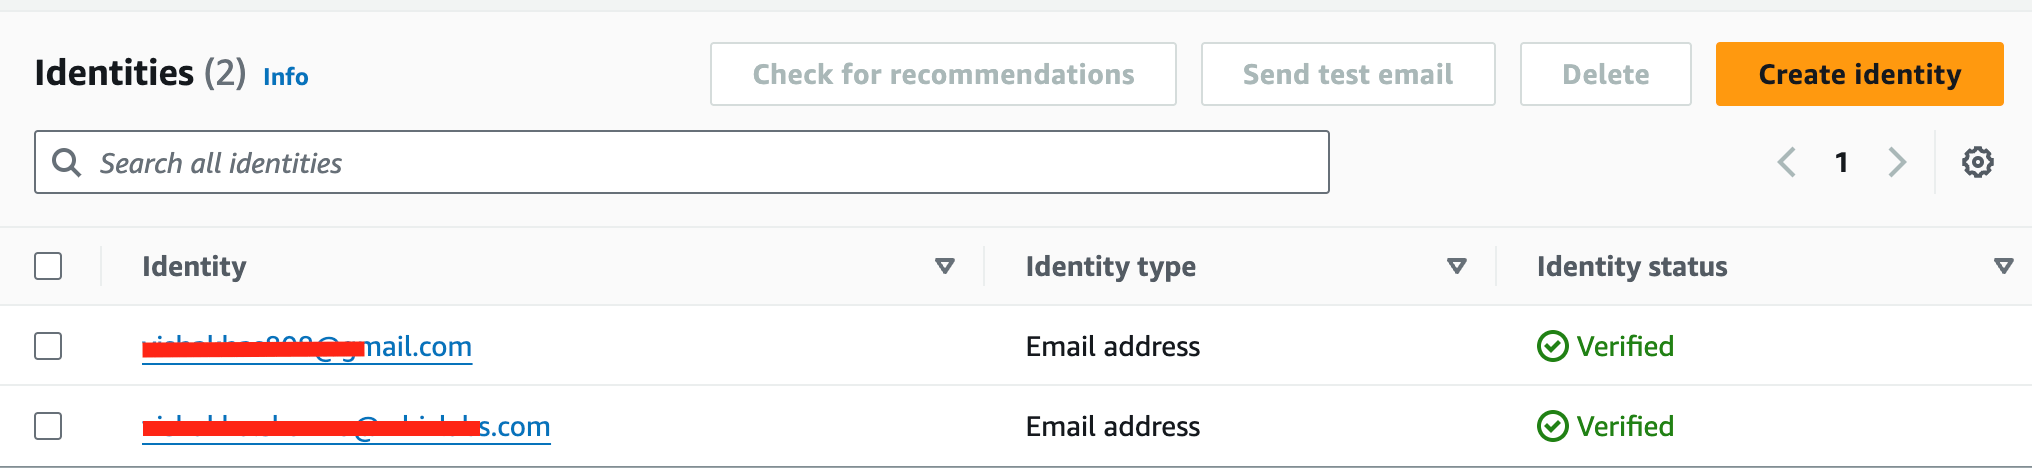
- Now go to the SES Email Address page and refresh the page. You will be able to see the Verification status as Active.
Task 4: Create a Lambda Function
- Navigate to the services menu at the top, then click on Lambda under the Compute section.
- Click on the Create a function button.
- Choose: Author from scratch.
- Function name: Enter WhizFunction
- Runtime: Select Node.js 22.x
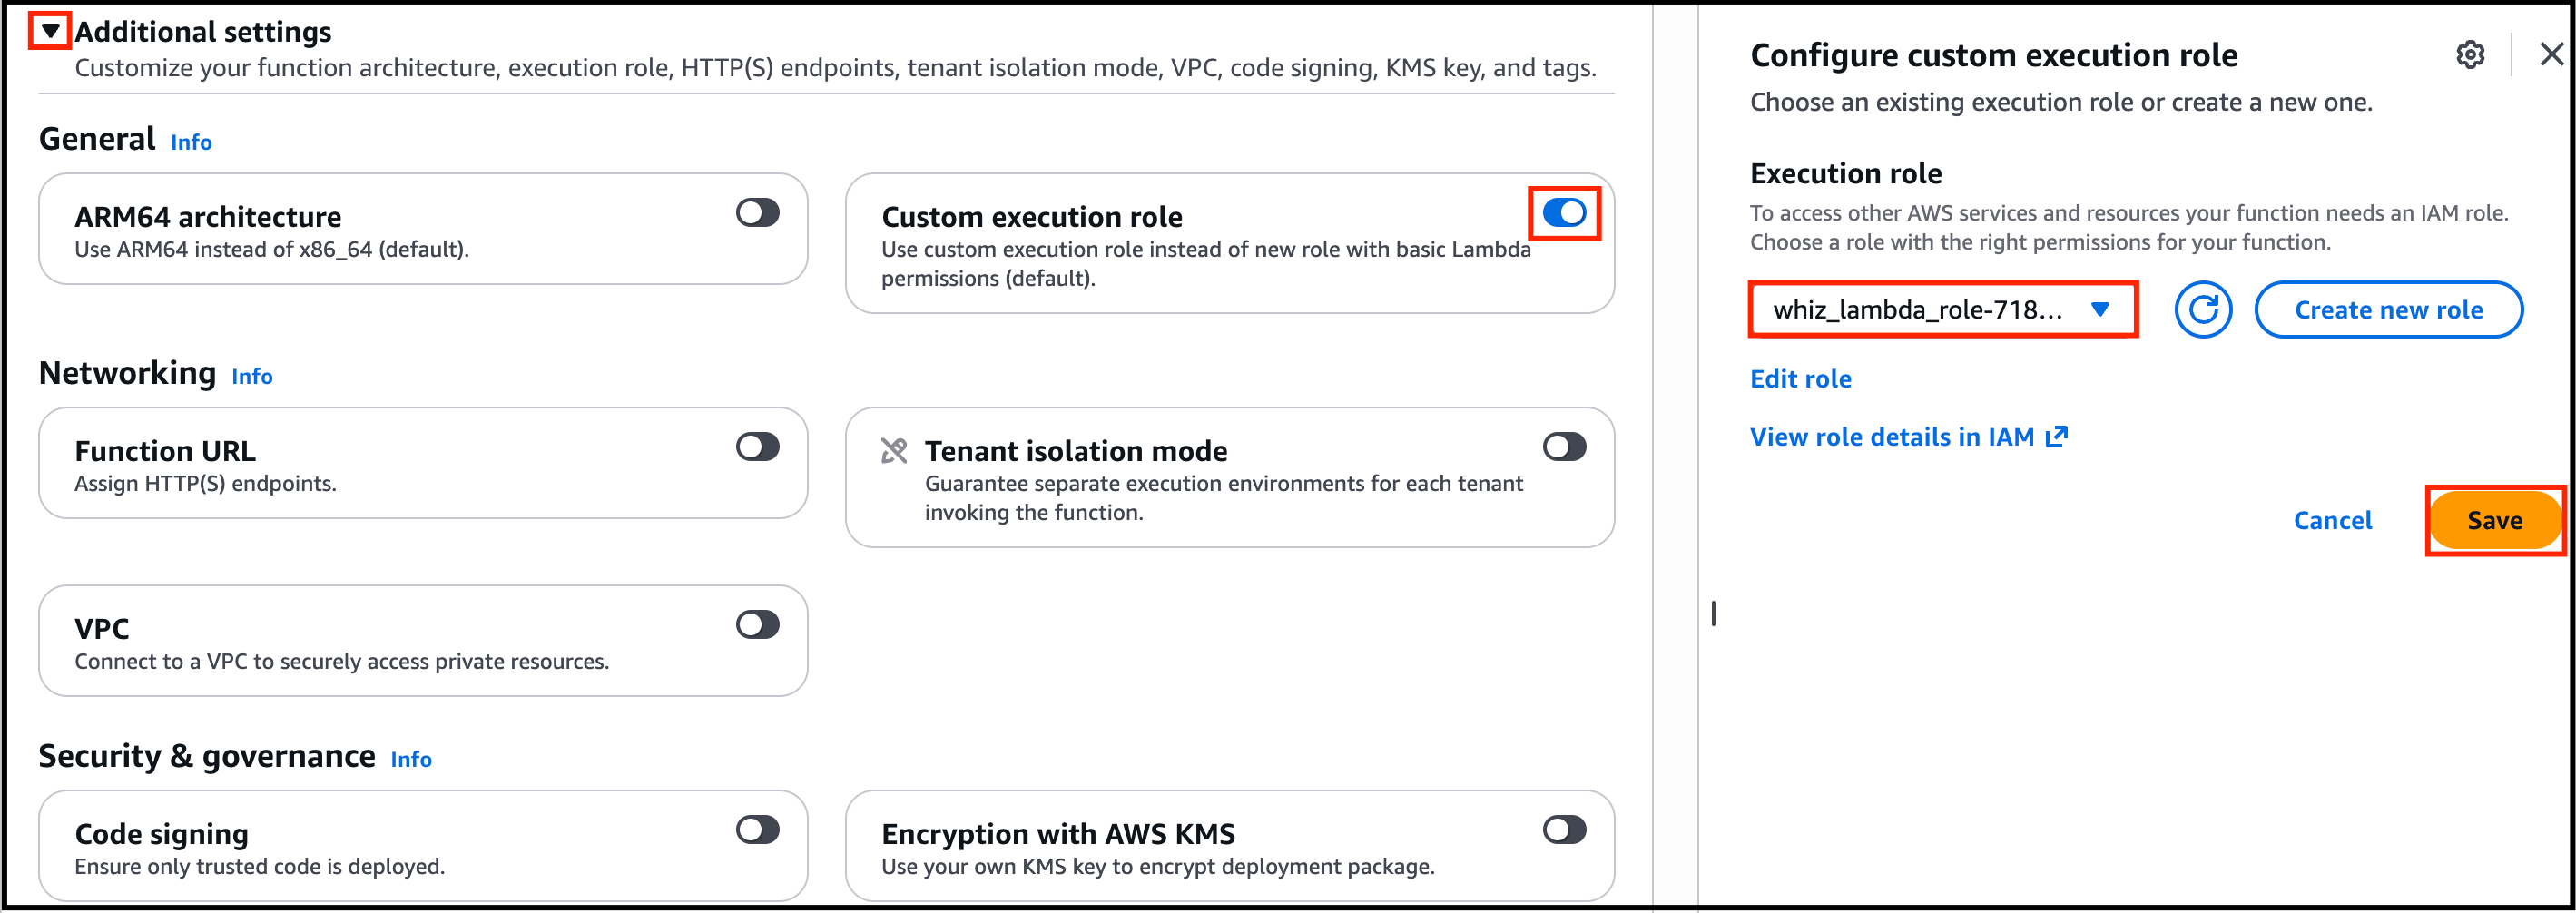
- Click on Additional Settings, then Enable Custom execution role option.
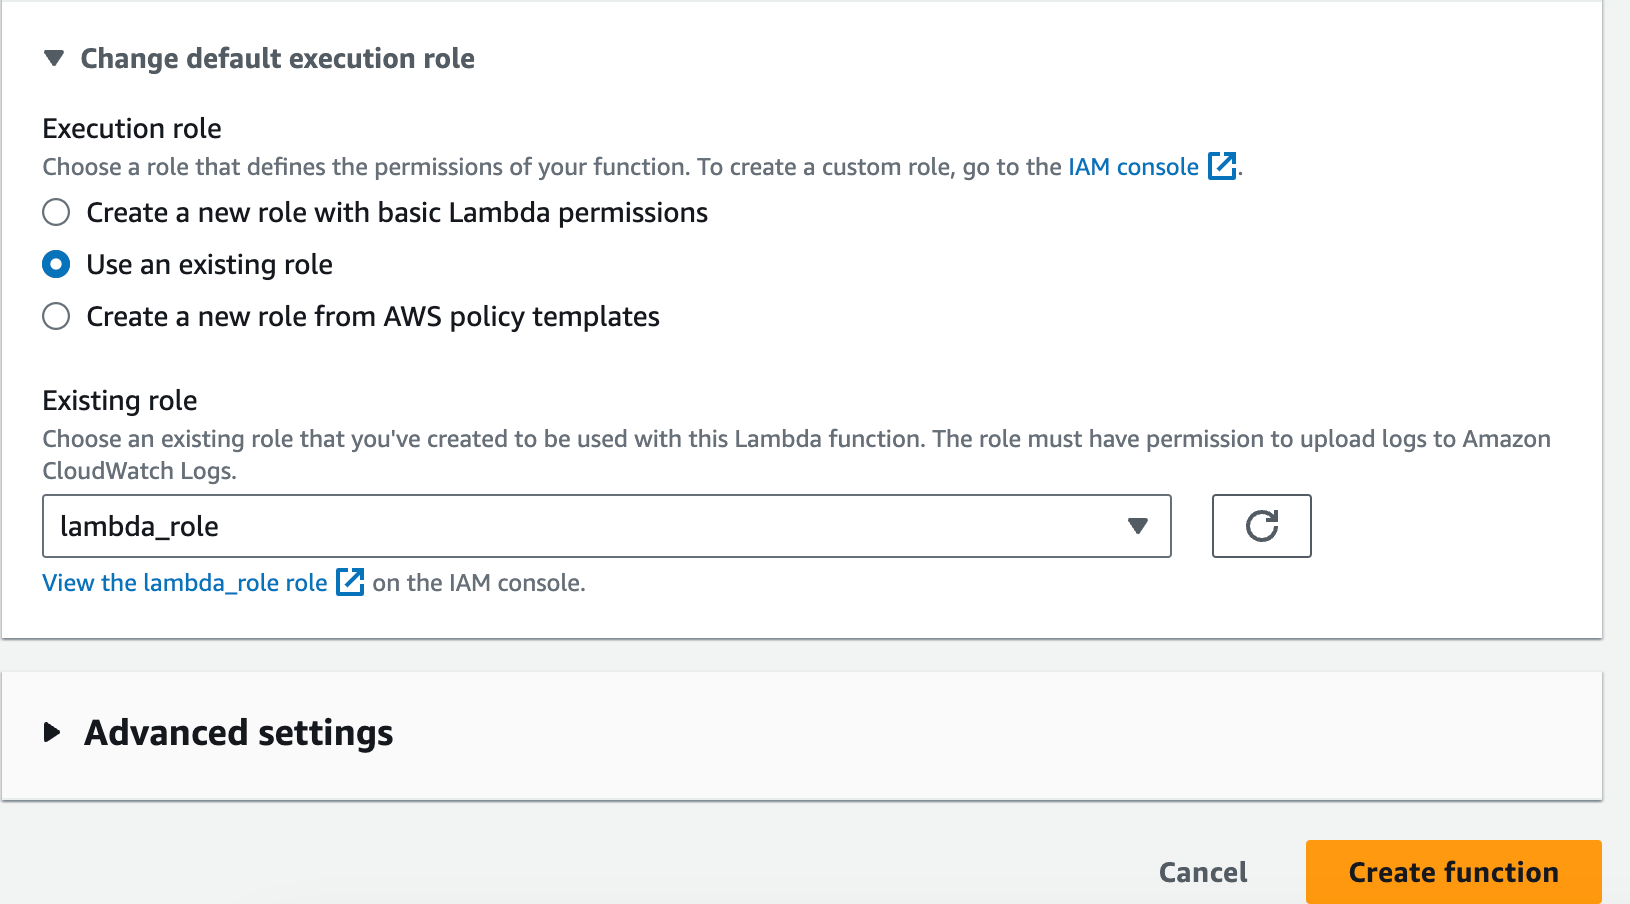
- Choose the Role name as Whiz Lambda Role from the list. Click on Save.
- Click on Create function button.
- Download the Zip file using this Link and extract the zip file locally. You will see one node.js file and one html file for contact form.
- If you scroll down a little bit, you can see the Code source section. Here we need to copy paste the NodeJs code that uses the AWS SDK to send an email via Amazon SES (Simple Email Service).
- It parses the incoming event’s body to extract information such as the sender’s name, email, and message, then constructs and sends an email containing this information. The function handles success and error cases, returning appropriate HTTP status codes and messages.
- Remove the existing code in AWS lambda index.js. Copy Paste the node.js code into your lambda index.js file.
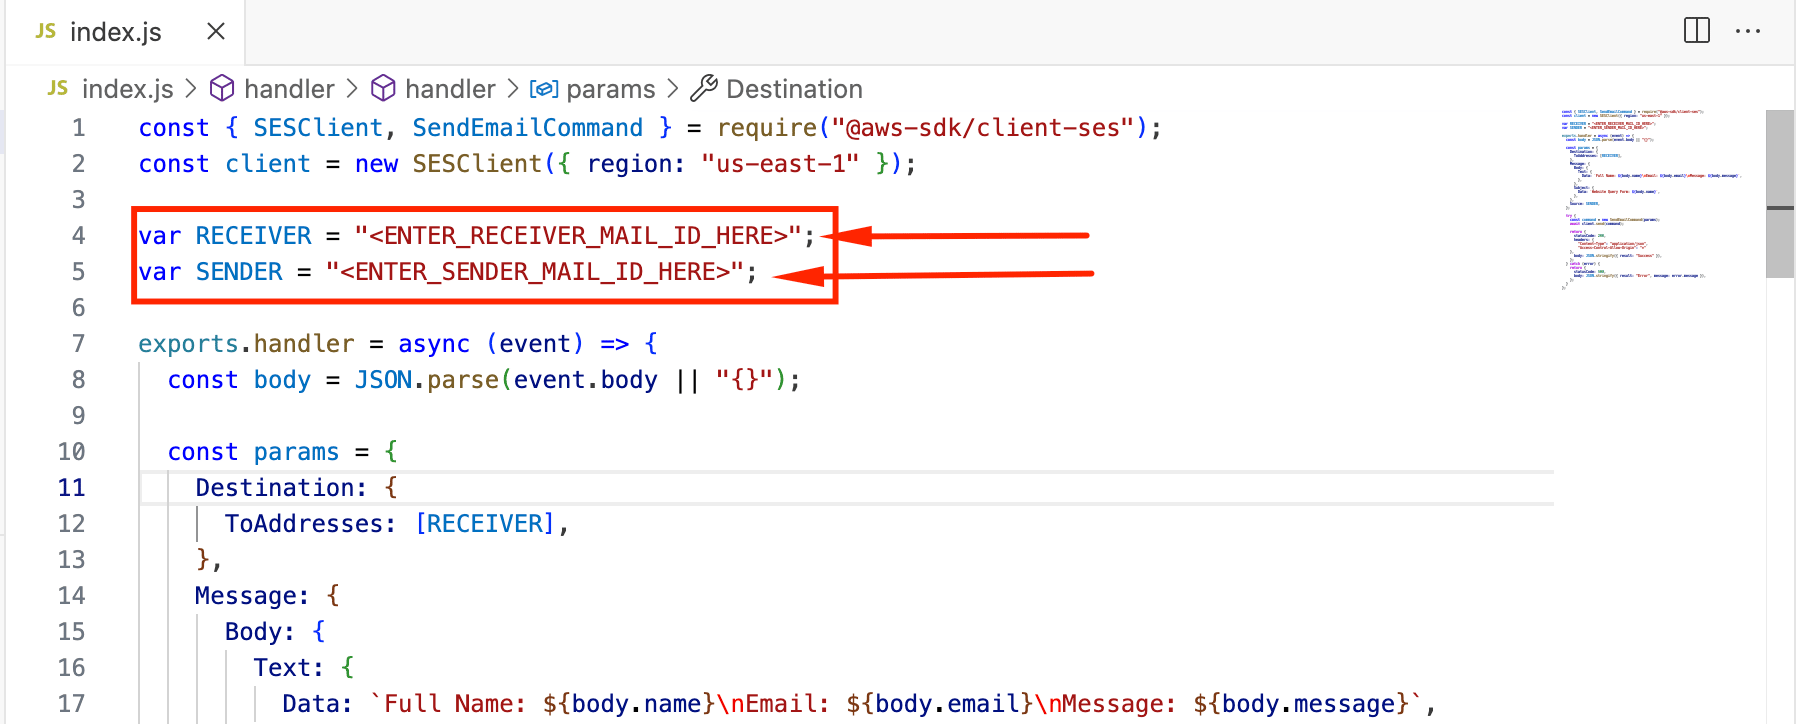
- You need to change the sender and receiver email address in the index.js file line number 4 & 5.
- Save the function by clicking on Deploy button.
Task 5: Create an API
- Navigate to the services menu at the top, then click on API Gateway in the Network and Content Delivery section.
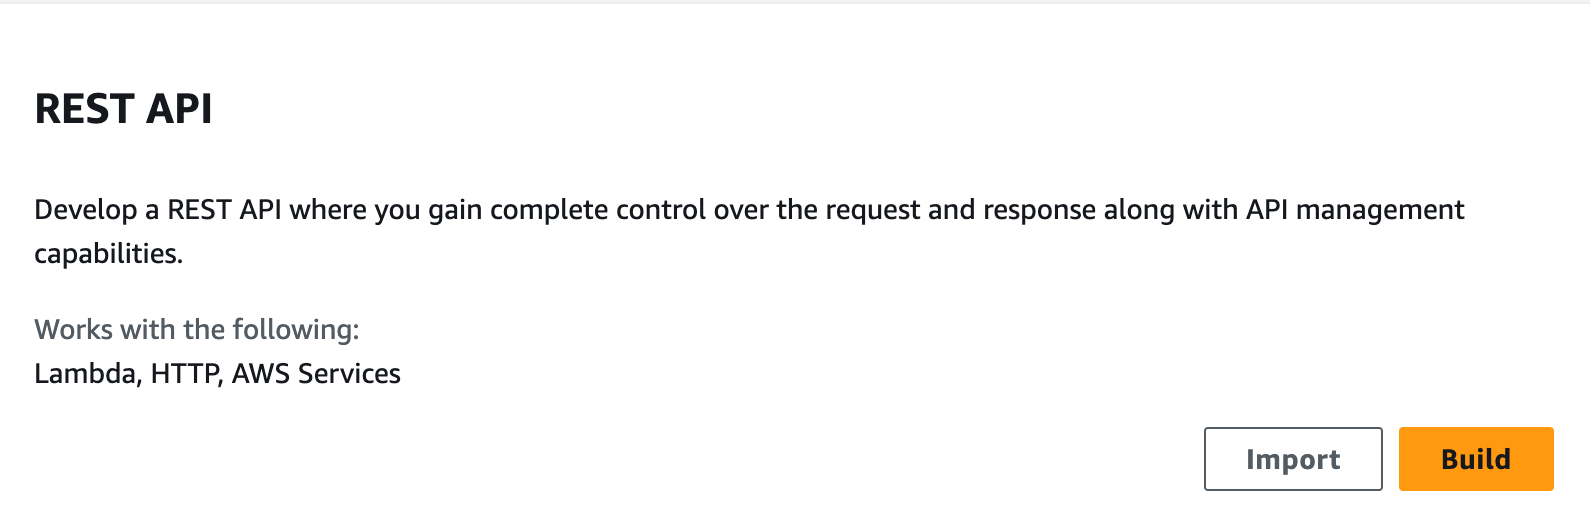
- Click on Build in REST API.
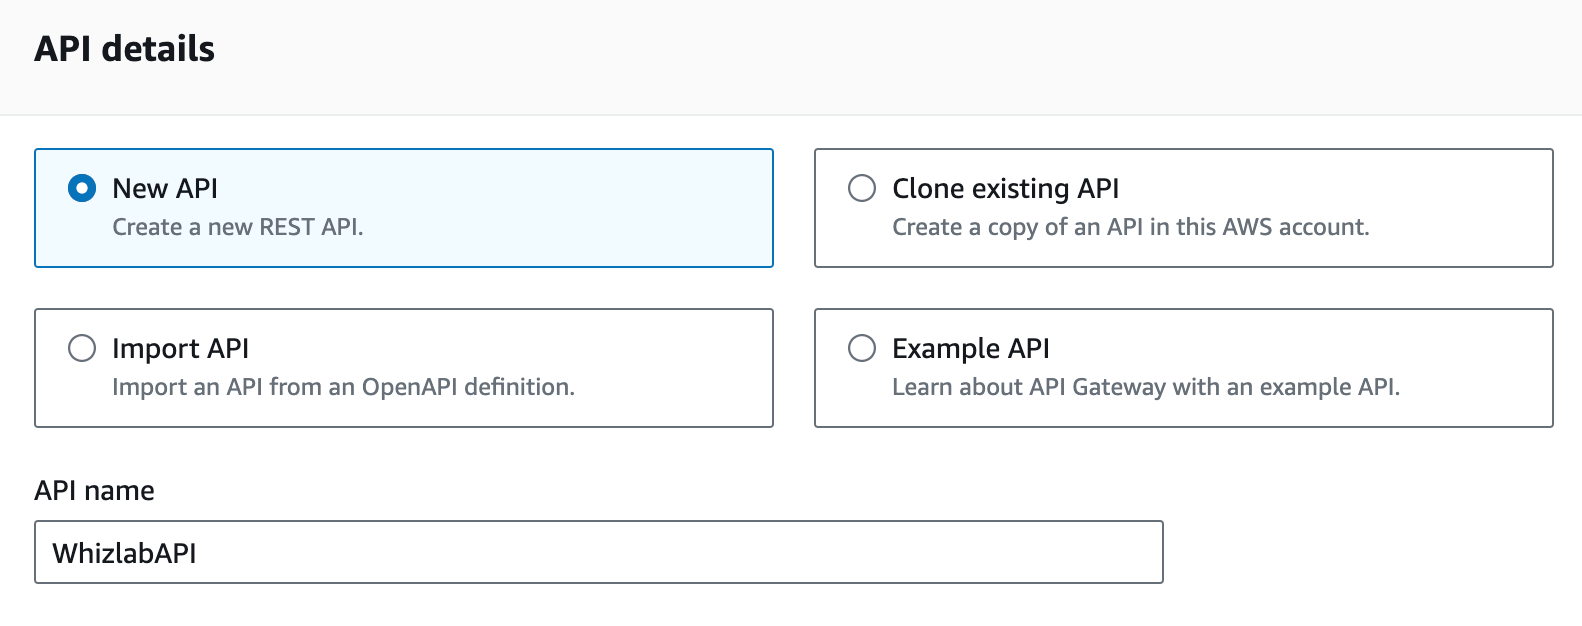
- Choose to create a new API as New API. Under settings, choose the API name WhizlabAPI. Leave other options as default and click on Create API
Task 6: Creating a Resource
- Once the API is created, select the API.
- Select Create Resource in actions.
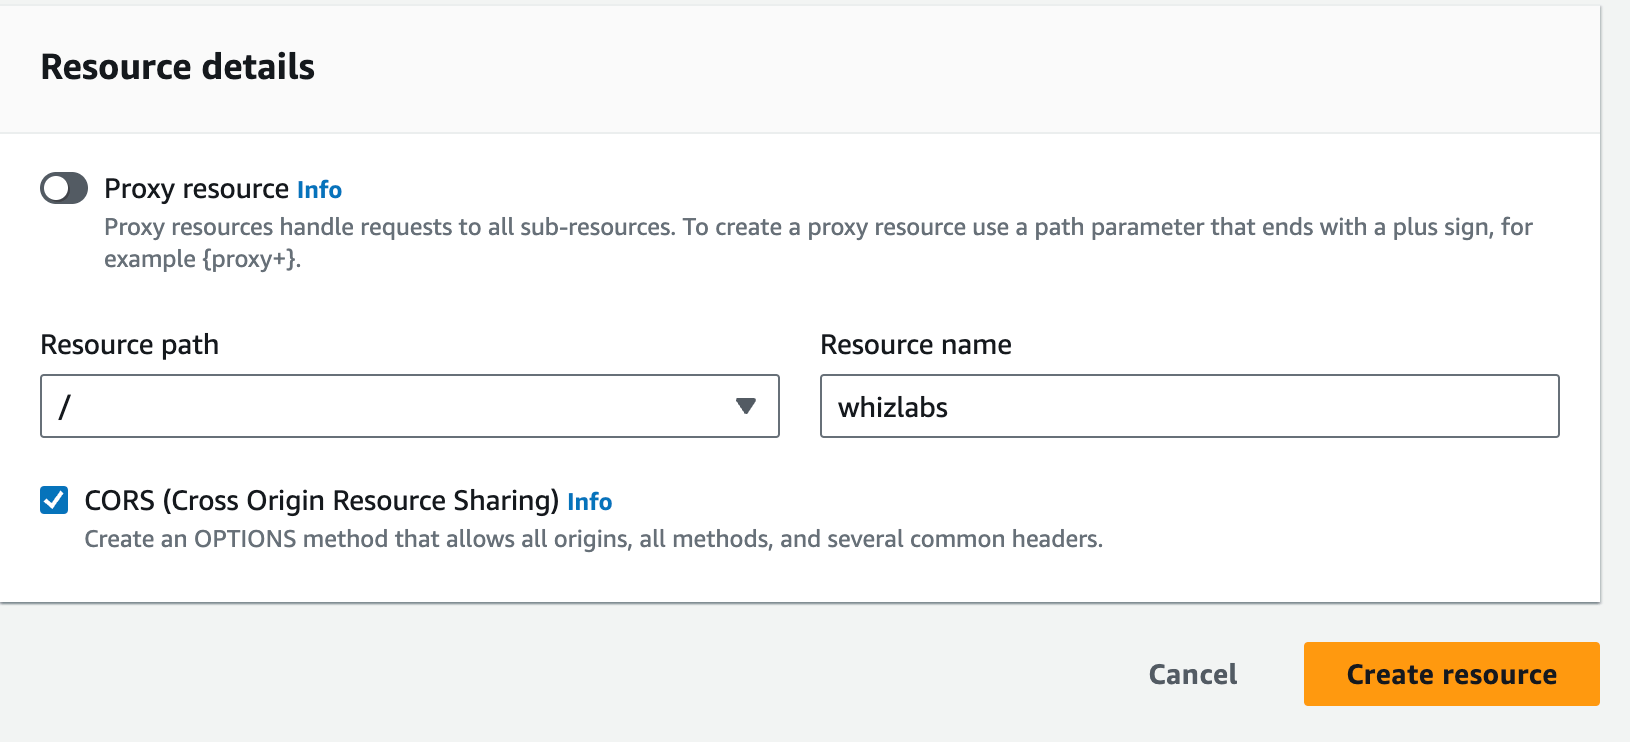
- Resource Name: Enter whizlabs
- Check CORS (Cross Origin Resource Sharing)
- Enter the resource name and click on Create Resource button
Task 7: Creating a Method
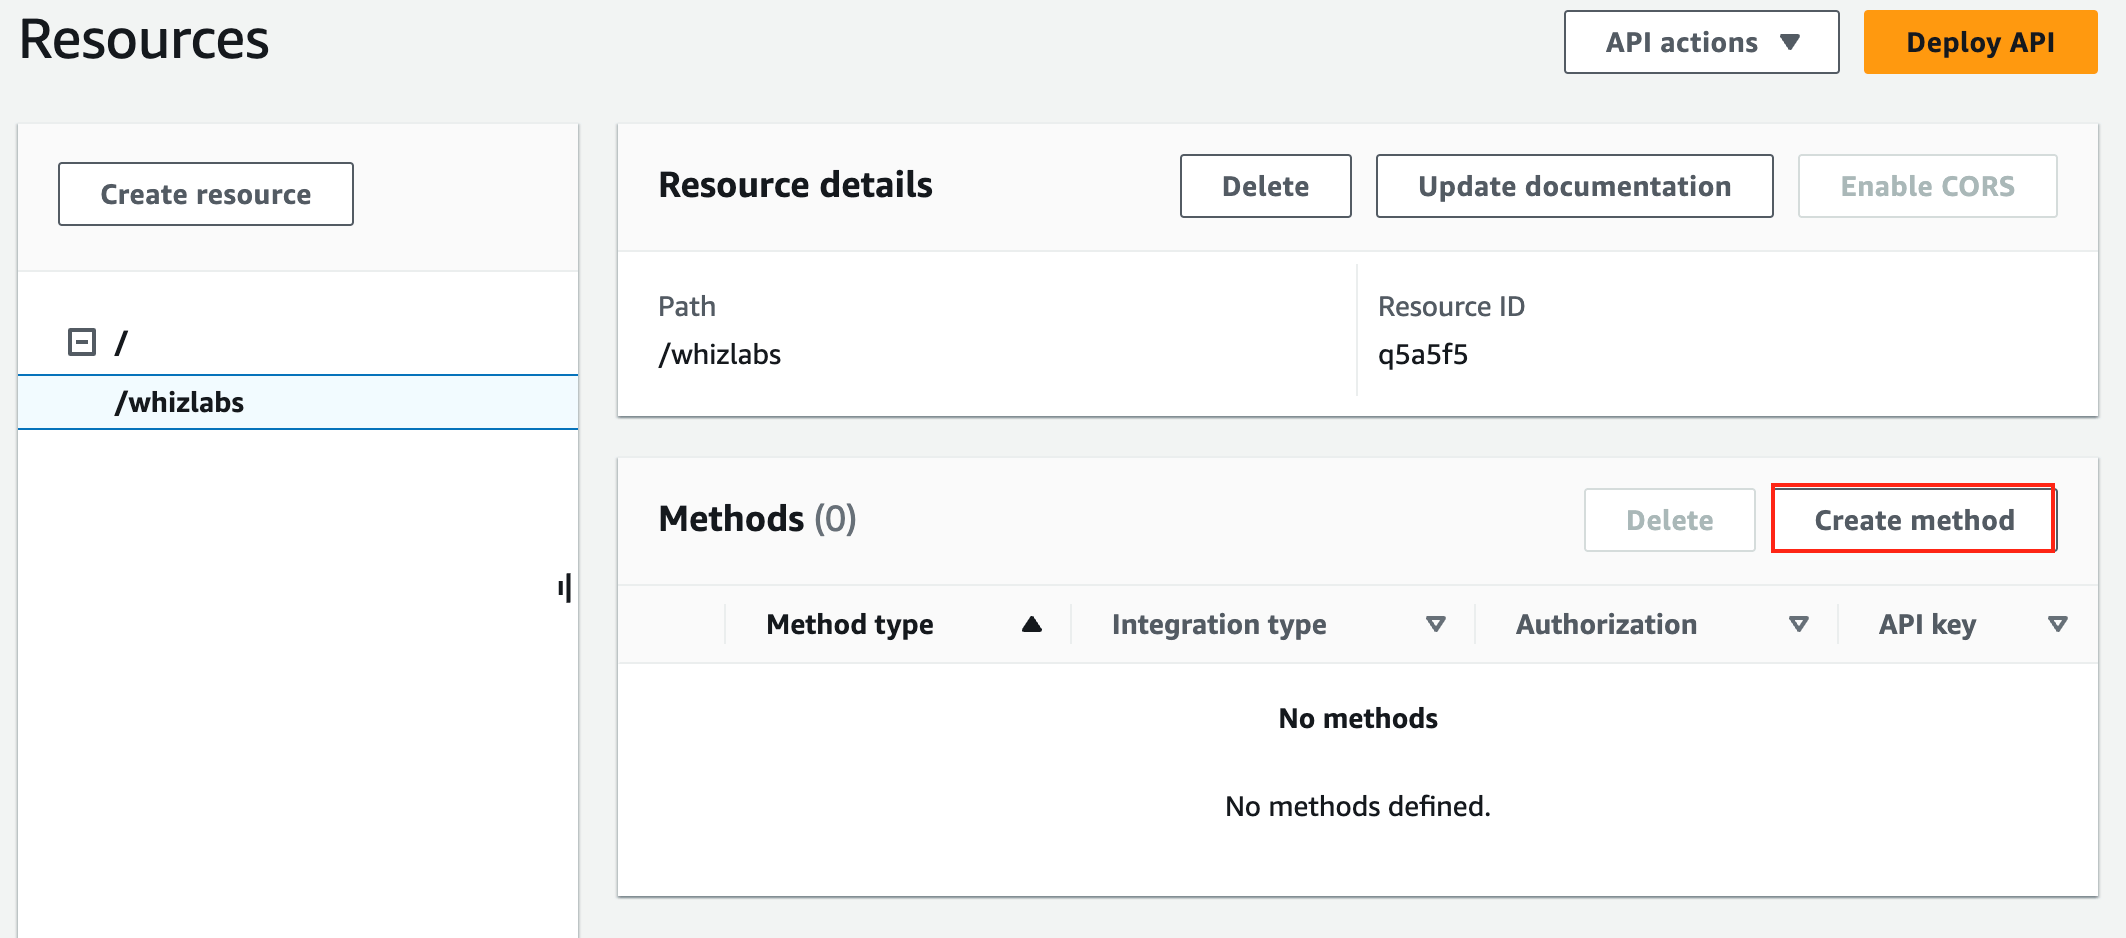
- Once you create a resource, click on Create Method.
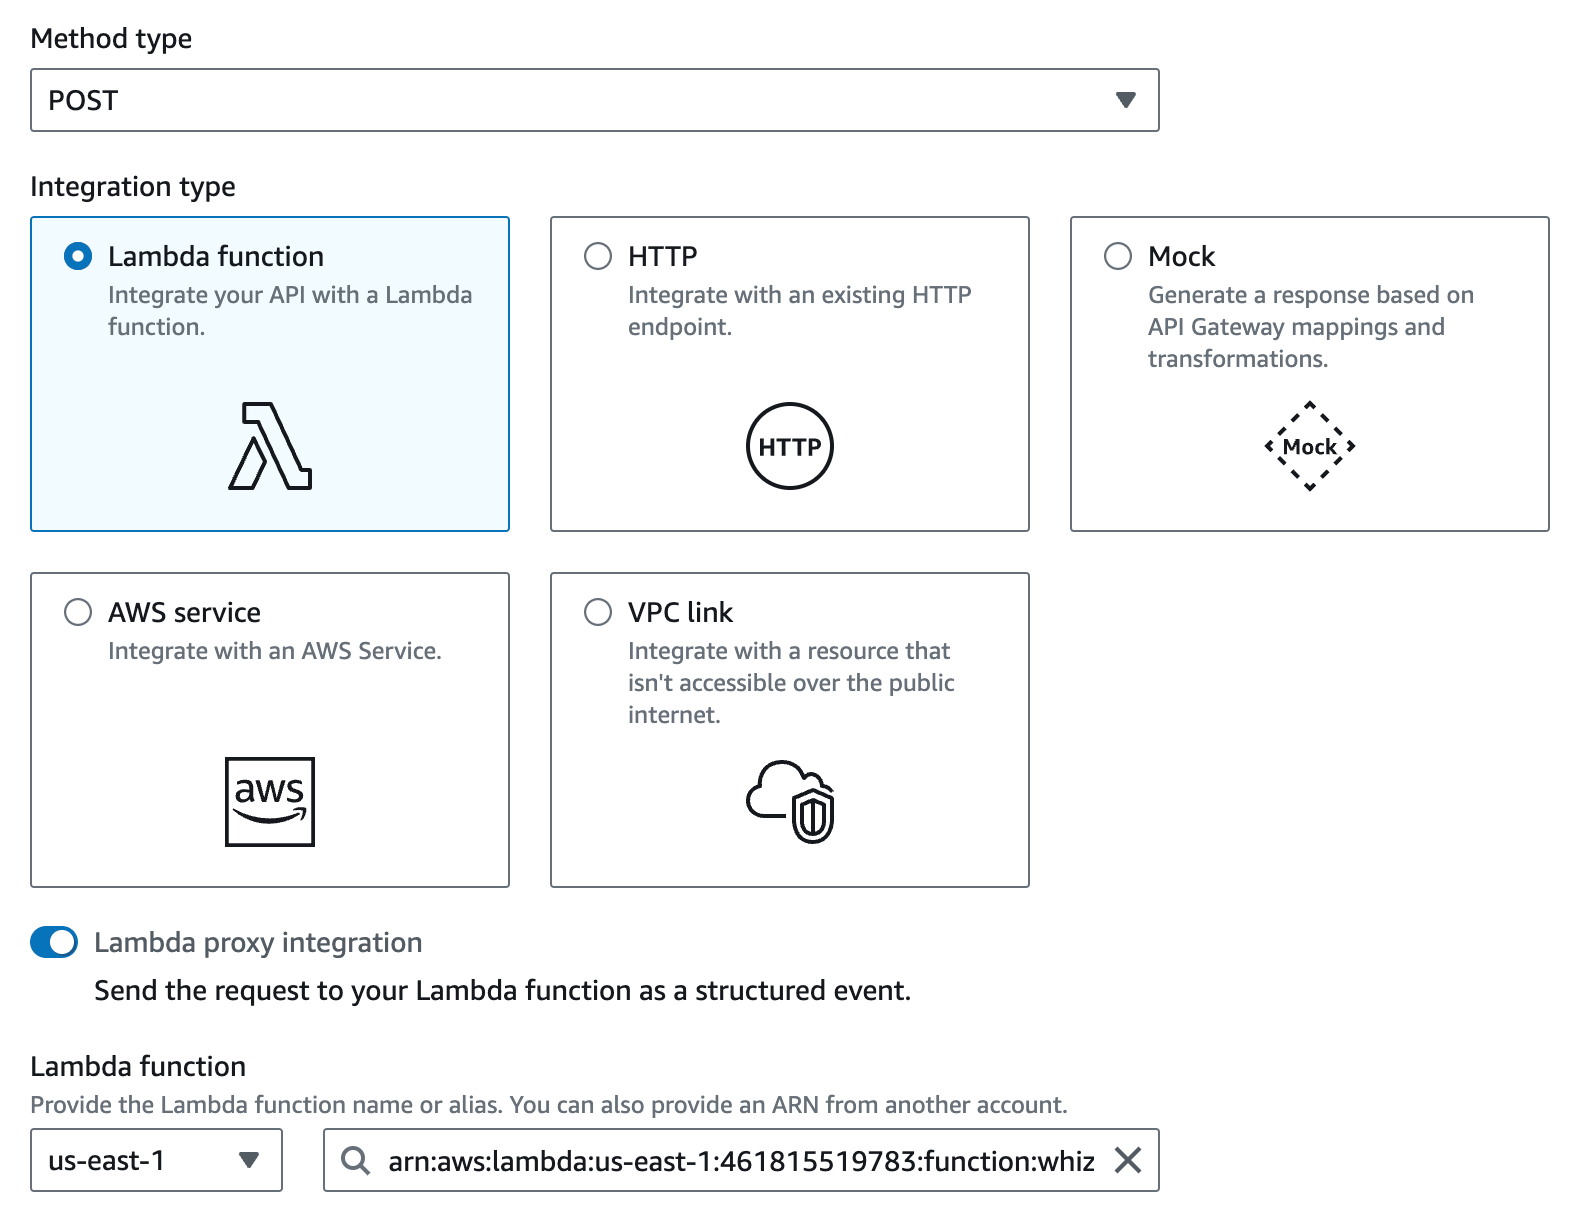
- Select POST in the drop-down list of Method Type.
- Select the Integration Type as Lambda function.
- Check Lambda proxy integration
- Enter the Lambda Function as WhizFunction. Click on Create Method
Task 8: Deploy the API
- Once the resource and the method have been created successfully, you can deploy the API.
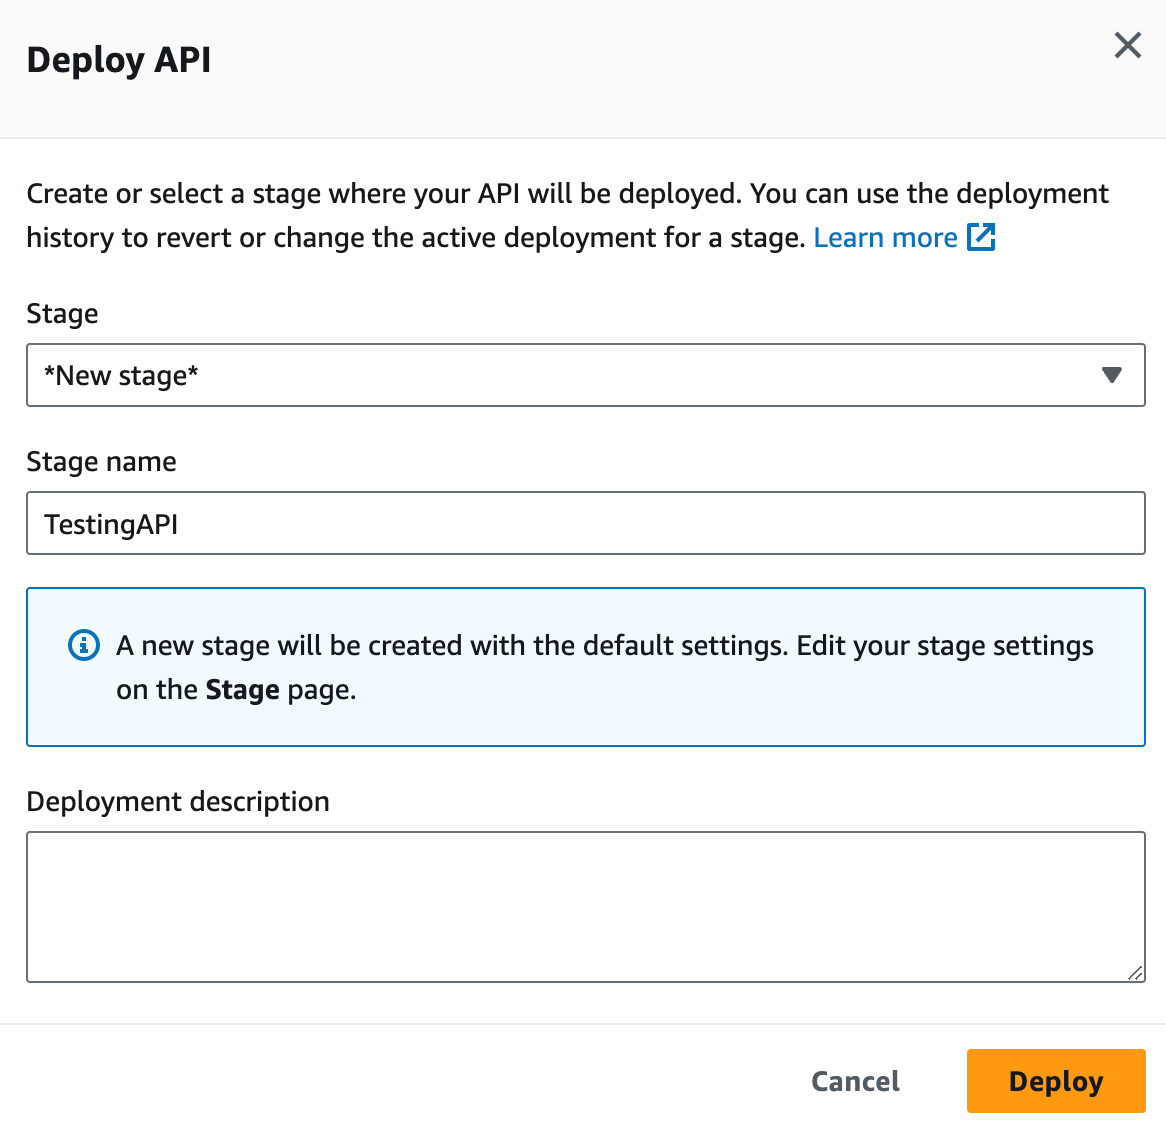
- Click on Deploy API button.
- Select the Deployment Stage in the drop-down as New Stage.
- Enter Stage Name: TestingAPI and Stage description as Testing environment for my WhizlabsAPI.
- Click on Deploy.
- Once the API has been deployed, navigate to Stages. You will be able to see the following
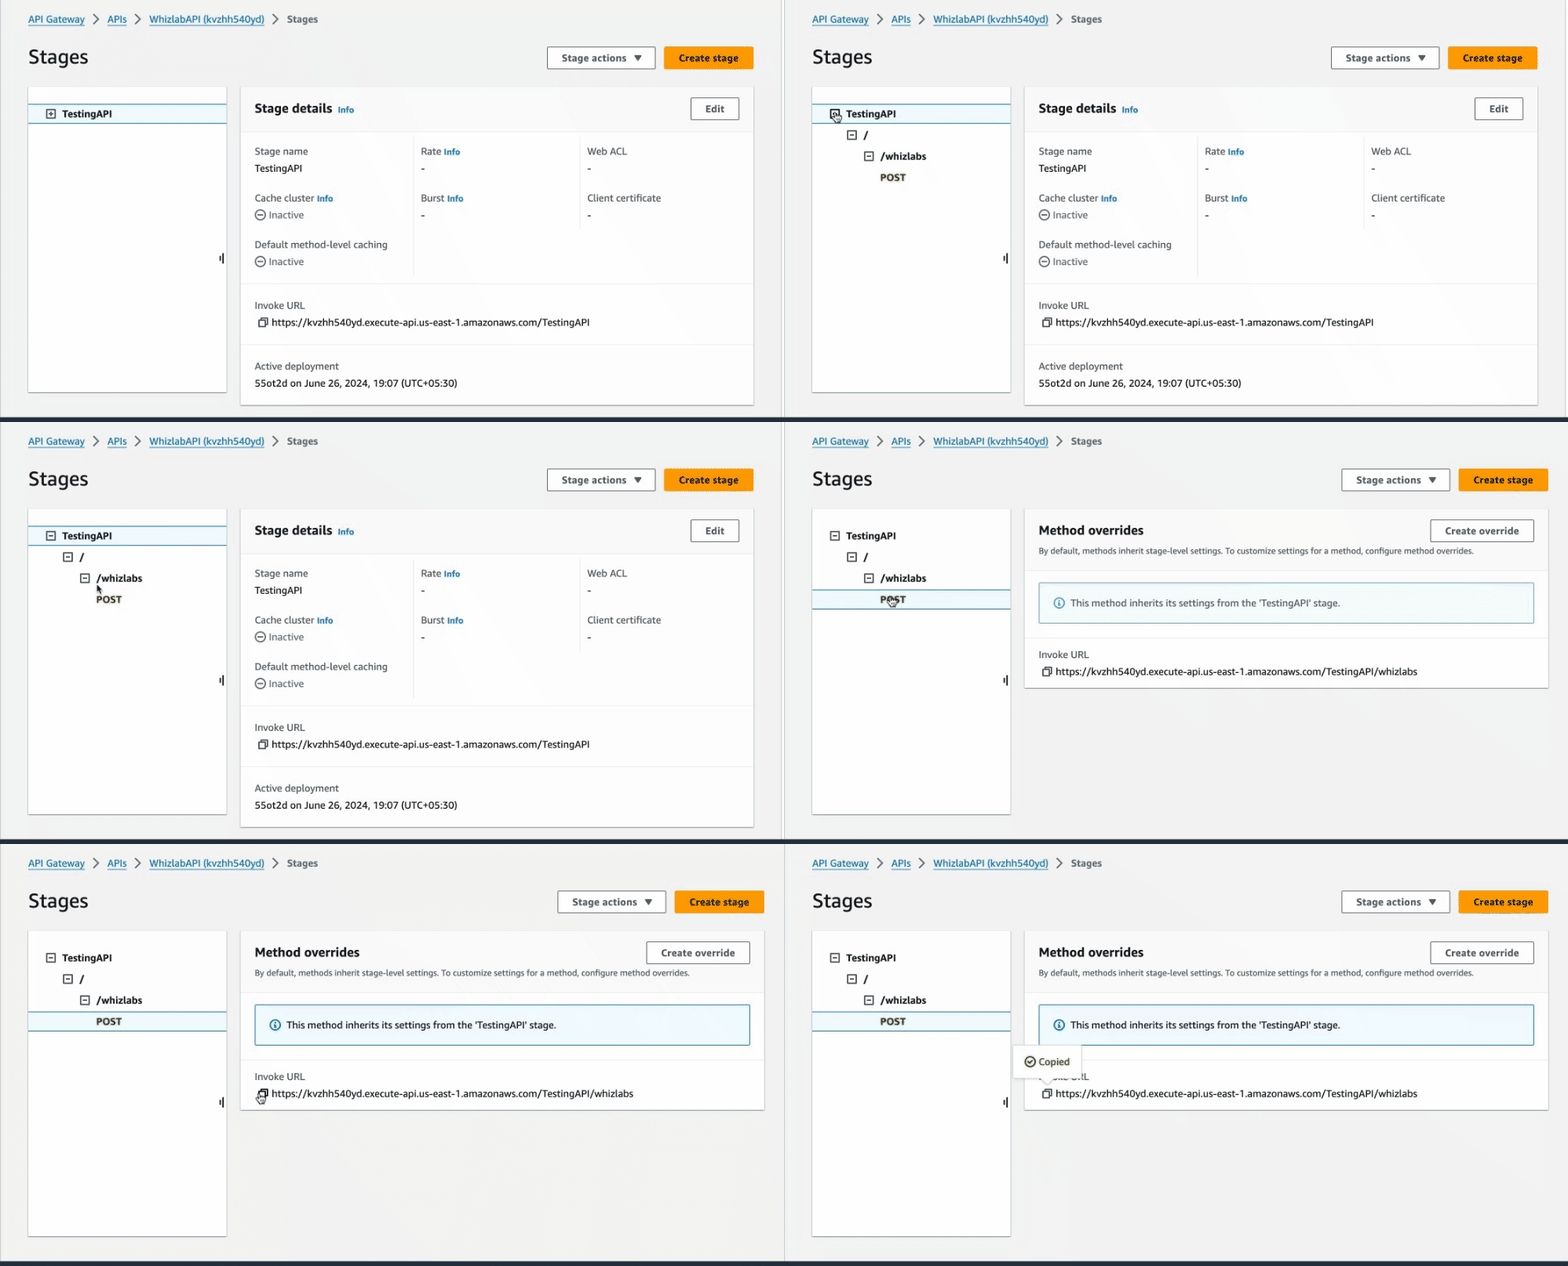
- Copy the Invoke URL as mentiond in GIF and save it to any text editor to be used in contact form page which will look similar to : https://kvzhh540yd.execute-api.us-east-1.amazonaws.com/TestingAPI/whizlabs
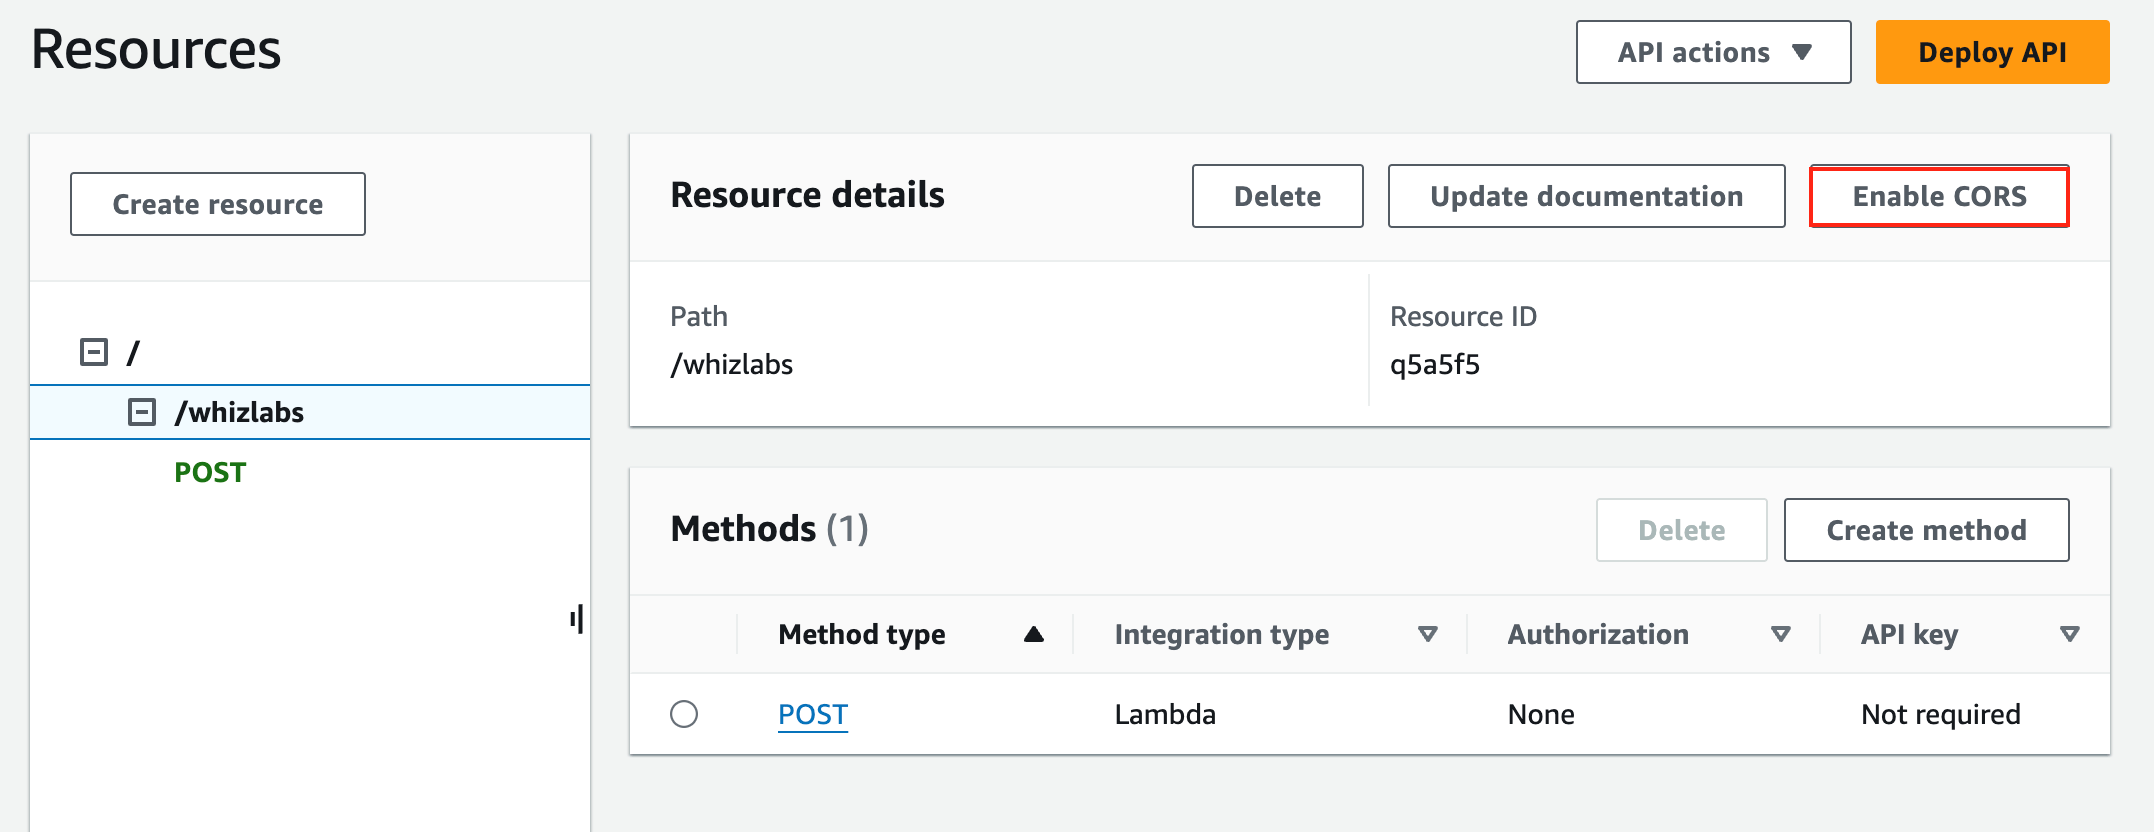
- Now, to Enable the cors click on Resources in the left menu and click on whizlabs resource, Now click on Enable CORS button
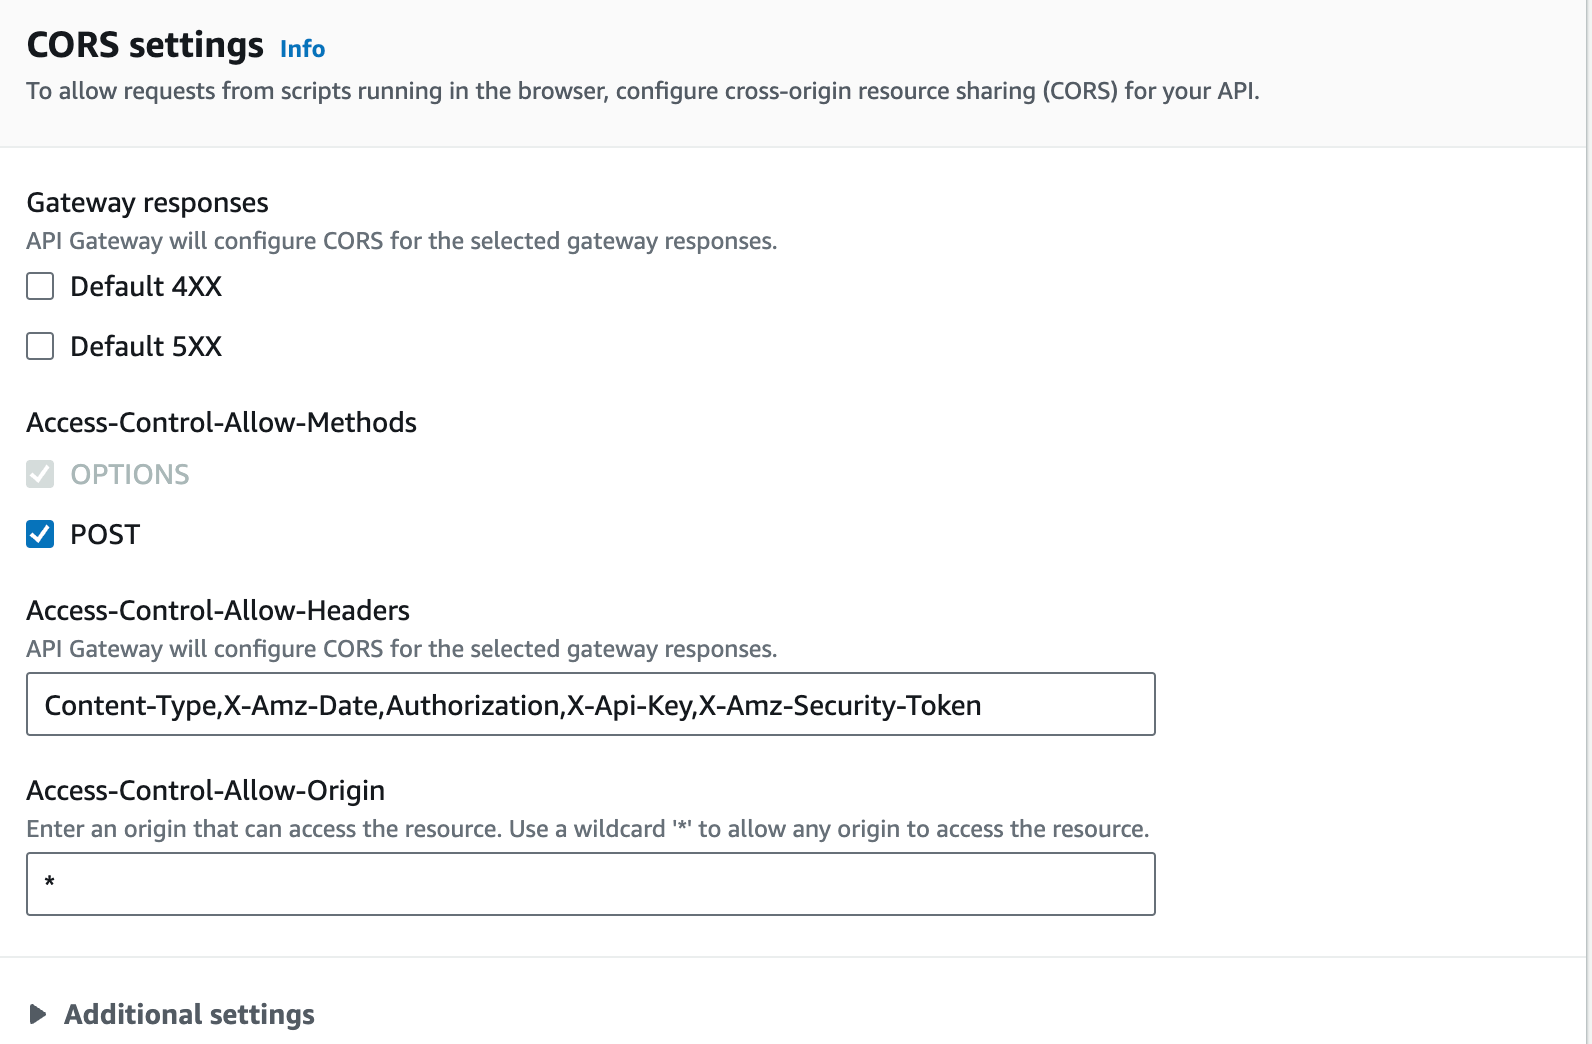
- Select POST method in Access-Control-Allow-Methods checkbox and click on Save button.
Task 9: Test Contact form
- Open the contactform.html file in any text editor in your local.
- This page includes a form for users to input their name, email, and message. When the form is submitted, the submitToAPI JavaScript function sends the input data as a JSON object to a specified API endpoint using an AJAX POST request. Upon successful submission, the user is alerted, the form is reset, and the page reloads. If there’s an error, an alert displays the error details.
- Now update the invoke url in line number 92 with the invoke url you copied
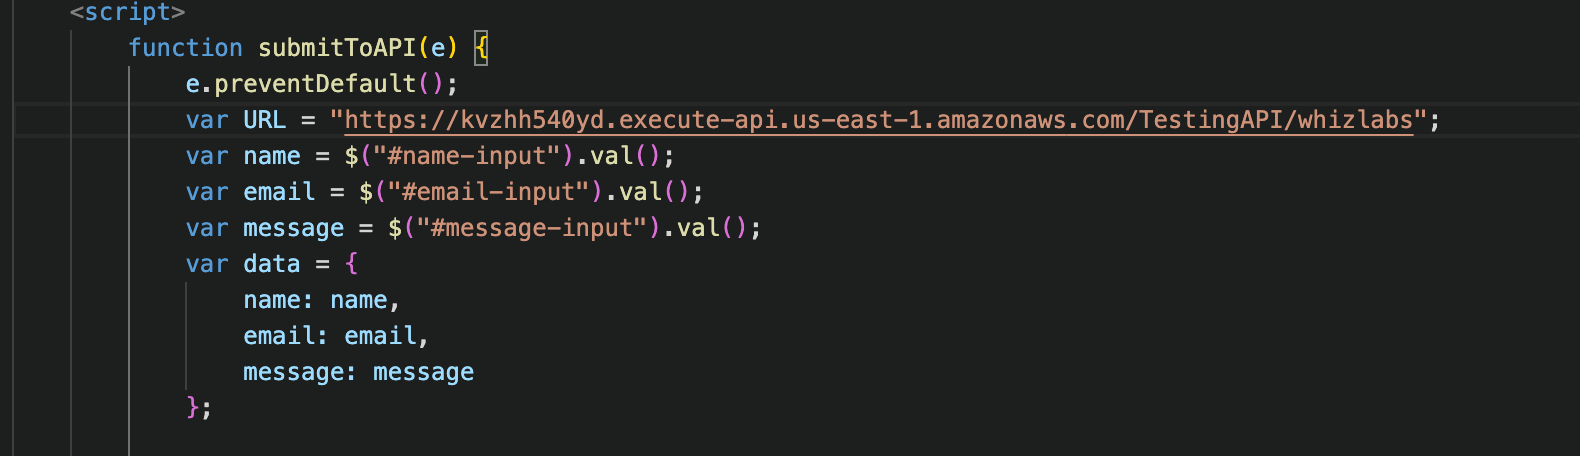
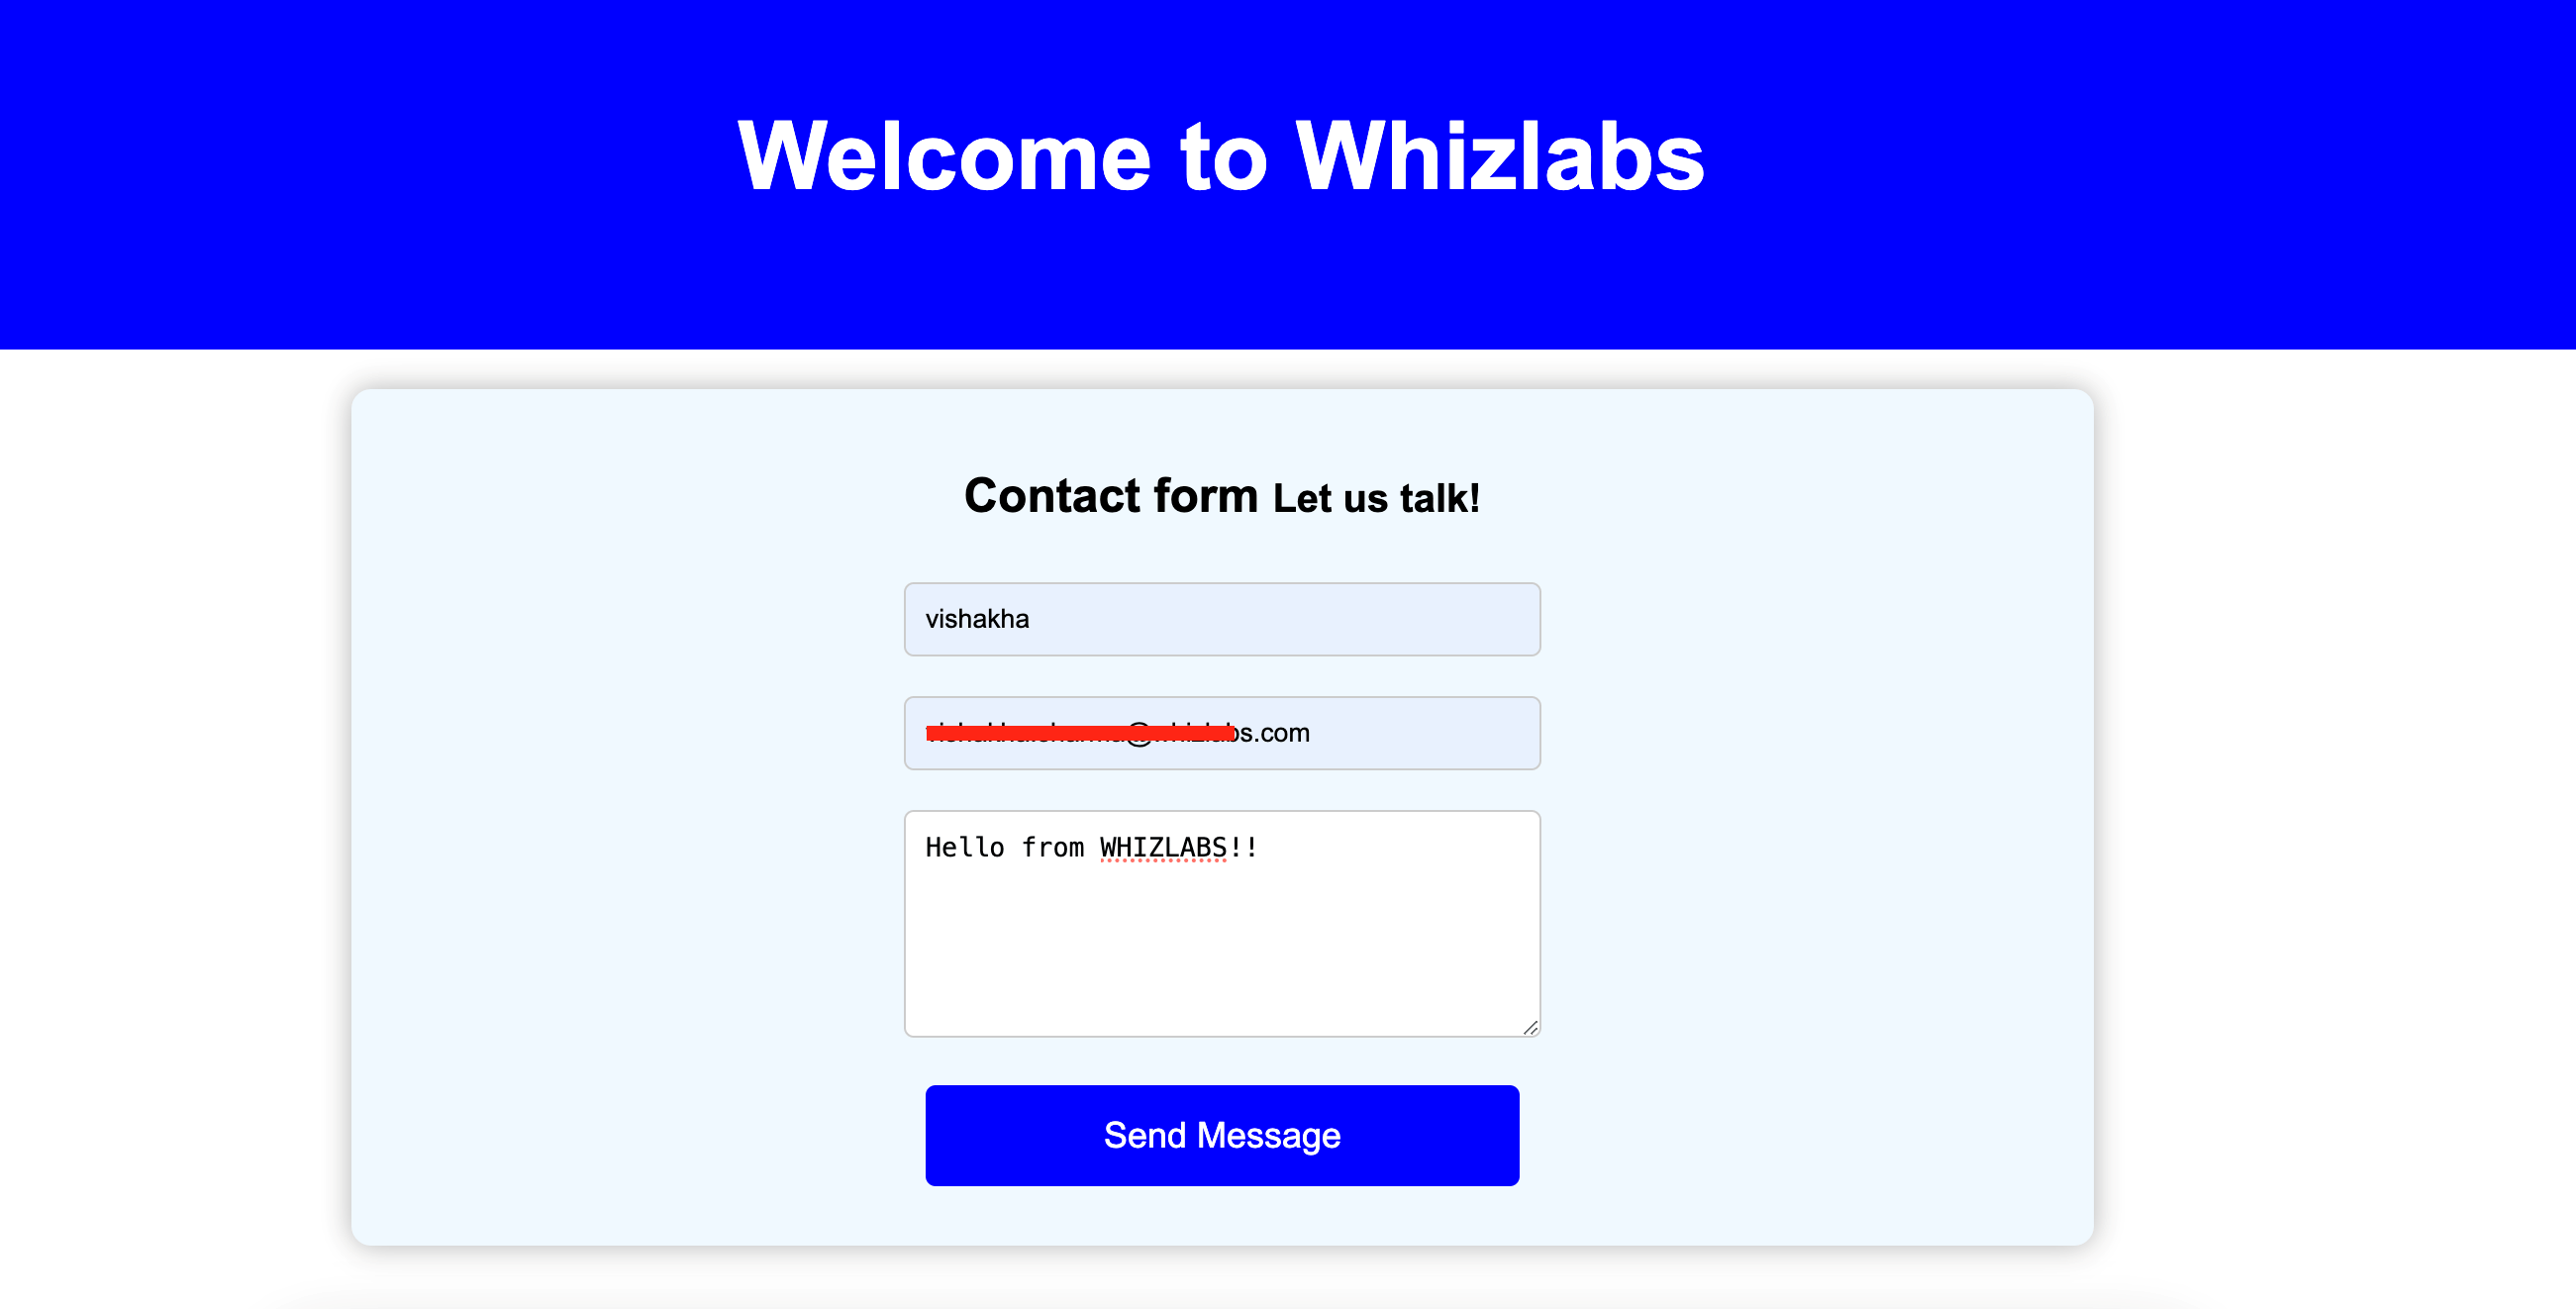
- Save the file and open the html document in browser. This will display the created contact form.
- Enter the details :
- Name: Enter
- Email : Enter Receiver Email
- Message : Enter your message
- Click on Send Message button.
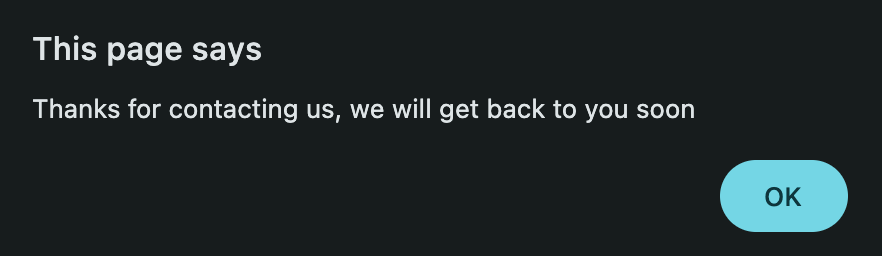
- It will return the success message.
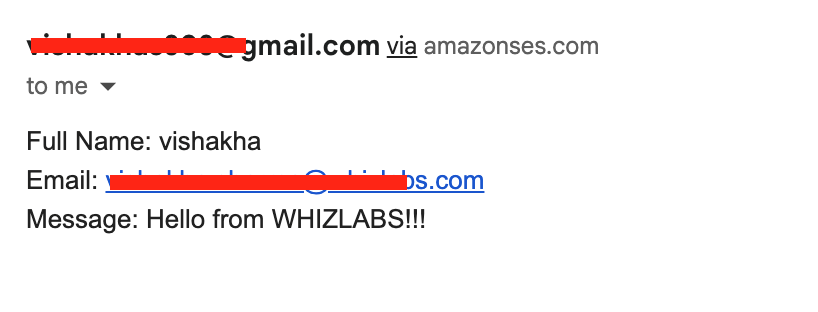
- You can verify the mail in your receiver mail ID.
Do You Know? Serverless websites can automatically scale to handle millions of requests, ensuring high availability without the need for manual intervention. This architecture allows developers to focus solely on code, as server management is handled by cloud providers like AWS, resulting in faster deployment and reduced operational costs.
Completion and Conclusion
- You have successfully created and verified Email Identity.
- You have successfully created a lambda function.
- You have successfully created and deployed your api gateway.
- You have successfully Tested your serverless contact form website.
End Project
- Sign out of AWS Account.
- You have successfully completed the project.
- Once you completed the steps, click on End Project from the IP Lab Portal project console and wait till the process gets completed.
What gets checked
When you press Check my work, the platform verifies each of these:- Create a SES Email Identity — Check whether an SES Email Identity is created or not
- Check SES Email Identity Verification Status — Check whether an SES Email Identity is Email is verified or not
- Create an AWS Lambda Function — Check whether a Lambda Function is created or not
- Create an AWS REST API Gateway with CORS enabled — Check whether a REST API Gateway is created with CORS enabled or not