

Overview
Lab Details
- This lab walks you through how to peer VPC with Transit Gateway using terraform. You will be creating 2 VPC with a public and private subnet. Launch EC2 Instances in both of the VPC and establish peering between them.
- You will be using the Transit gateway attachment to add VPC and add the entry in the route table. Then you will use SSH into the private EC2 from the public EC2 instance.
- Duration: 45 minutes
- AWS Region: US East (N. Virginia) us-east-1.
Introduction
What is a Transit gateway?
- The AWS Transit Gateway helps you connect multiple VPCs and on-premises networks through a central hub. It simplifies your network with VPCs and on-premises connections and solves the problem of complex peering relationships.
- With VPC peering using the Transit gateway, your data is always encrypted and no longer uses the public internet for communication.
-
Benefits of using Transit gateway:
- Easy to connect
- Full control
- Greater security
- Multicast feature
-
Reasons to use Transit gateway over VPC peering:
- VPC peering does not support transitive peering, meaning you can only peer two VPC at a time.
- To peer your VPC with an on-premise network, you can not use VPC peering. Transit gateway supports connecting on-premise networks.
-
Transit gateway limits:
- Per transit gateway, you can have 20 transit gateway route tables.
- Per transit gateway, you can have 10000 routes.
- Per transit gateway, there can be 50 transit gateway attachments.
- Per VPC, you can have 5 unique transit gateways.
How Transit gateway can help you simplify your network?
-
Transit Gateway acts as a cloud router that supports connecting with the following resources:
- Amazon VPC
- VPN Connection having Customer Gateway
- AWS Direct Connect Gateway
Without Transit Gateway:
- VPC peering can have only one-to-one relationship between two VPCs. The complexity increases as you scale the number of connections.
-
Maintenance of the route table is another big challenge when you are scaling, you must keep the route table having routes to VPC and connection with the on-premise network using a separate network gateway for each new connection.
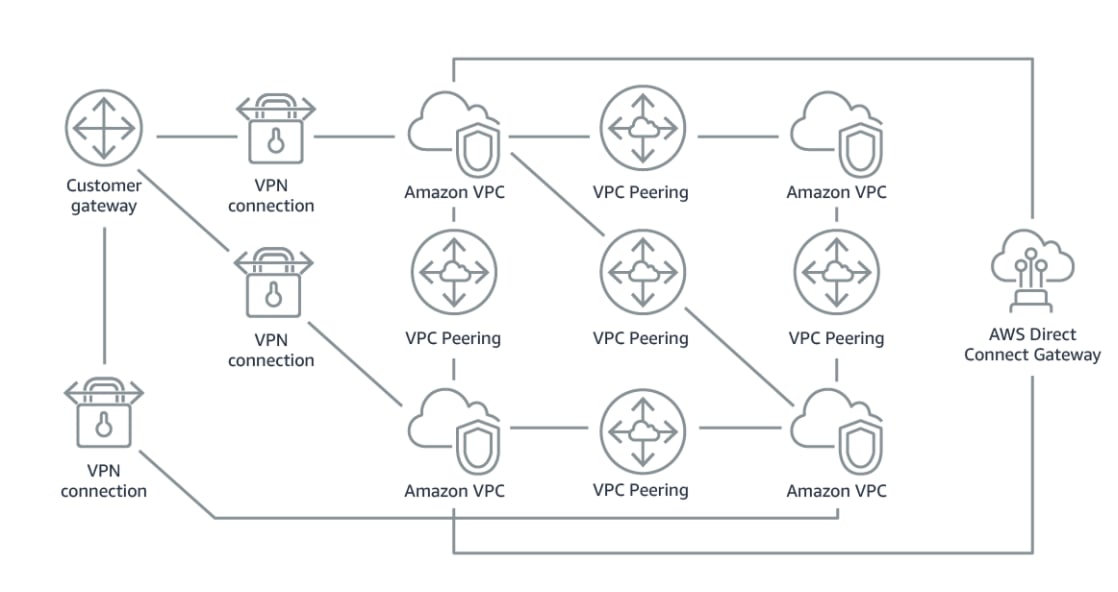
With Transit Gateway:
- To interconnect Amazon VPC with an on-premise network, we can use Transit Gateway.
-
The network is standardized and easily scalable. With Transit Gateway, you have one place to manage and monitor the number of active connections for each network.
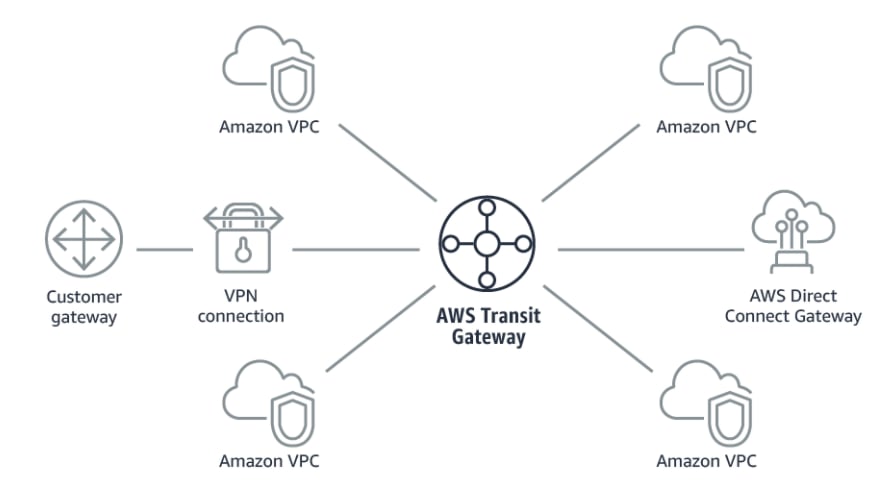
- Since connecting to an on-premise network is not possible virtually, In this lab, you will learn how to create a Transit gateway and use it to peer VPC.
Transit gateway use cases
- Applications can be delivered around the world.
- Move your network design from Multi-AZ to Multi-region.
- Scale quickly and respond to spikes in traffic smoothly.
- Connect to all types of networks in one place.
Task Details
- Sign into the AWS Management Console.
- Setup Visual Studio Code
- Create a Variable file
- Create the key pair from EC2 Console
- Create the First VPC in main.tf file
- Create a Public subnet in First VPC
- Create Internet Gateway and Route Table
- Create a Security group for EC2 in main.tf file
- Launch an EC2 instance in the First VPC
- Create a Second VPC
- Create a Private subnet in Second VPC
- Create a Security Group for Second VPC
- Launch an EC2 instance in the Second VPC
- Create a Transit Gateway
- Create two Transit gateway attachment for VPCs created
- Add the routes in the route table
- Create Output File
- Confirm the installation of Terraform by checking the version
- Apply terraform configurations
- Test the connectivity between two VPCs
- Delete AWS Resources
Launching Lab Environment
- To launch the lab environment, Click on the Start Lab button.
- Please wait until the cloud environment is provisioned. It will take less than a minute to provision.
- Once the Lab is started, you will be provided with IAM username, Password, Access Key, and Secret Access Key.
Note : You can only start one lab at any given time
Lab guide
Lab Steps
Task 1: Sign in to AWS Management Console
- Click on the Open Console button, and you will get redirected to AWS Console in a new browser tab and it will be Logged in Successfully.
- On the AWS Console, in the search bar search for IAM and click on it.
-
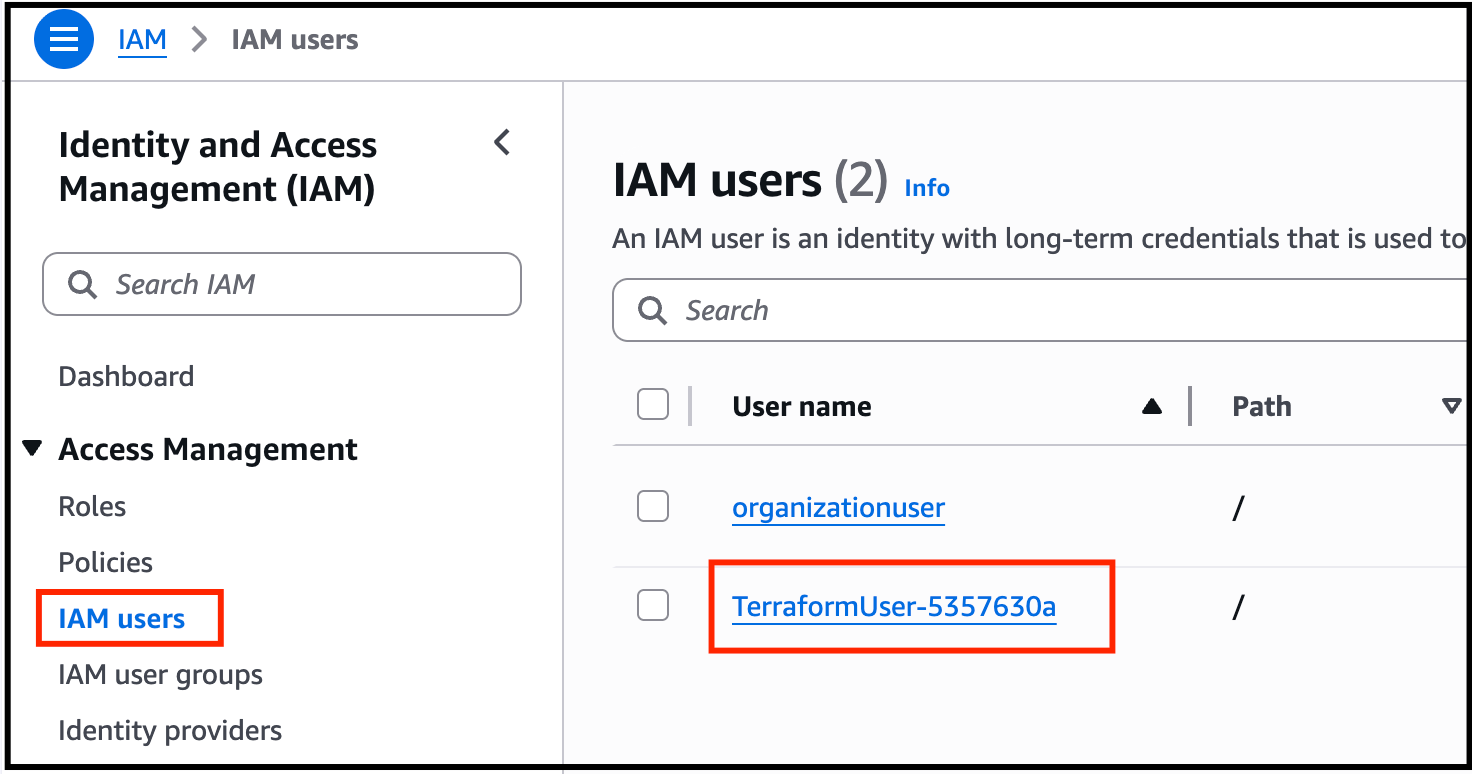
Then Click on IAM Users and select TerraformUser-XXXXX
-
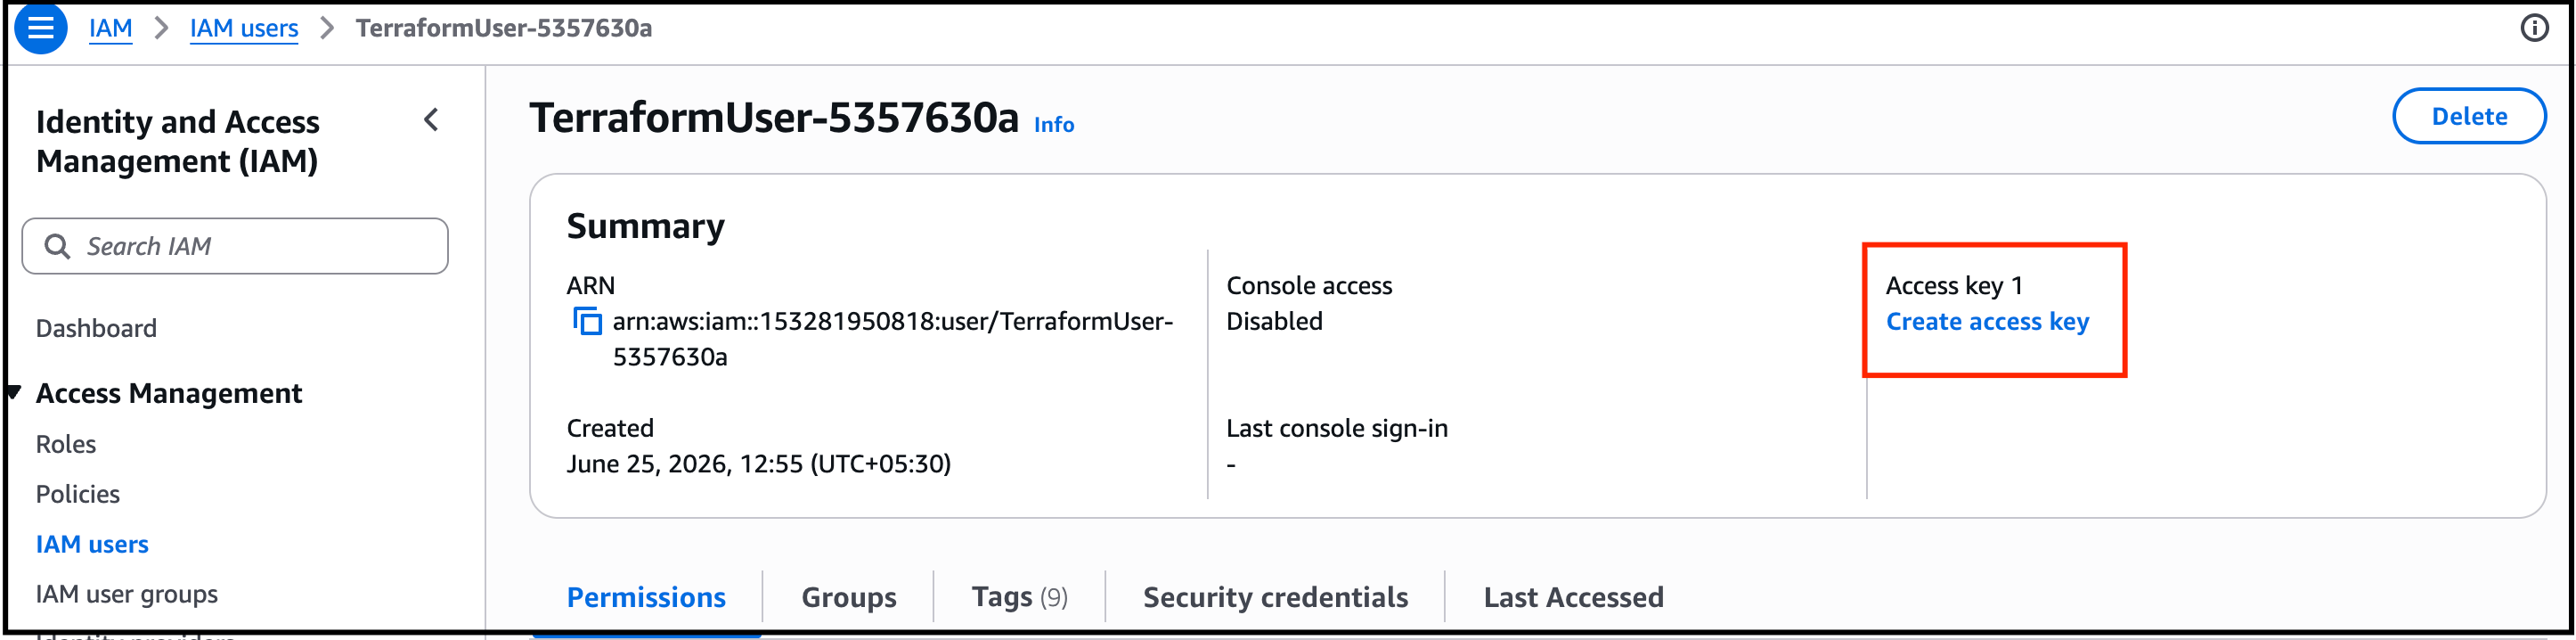
Click on Create Access Key.
-
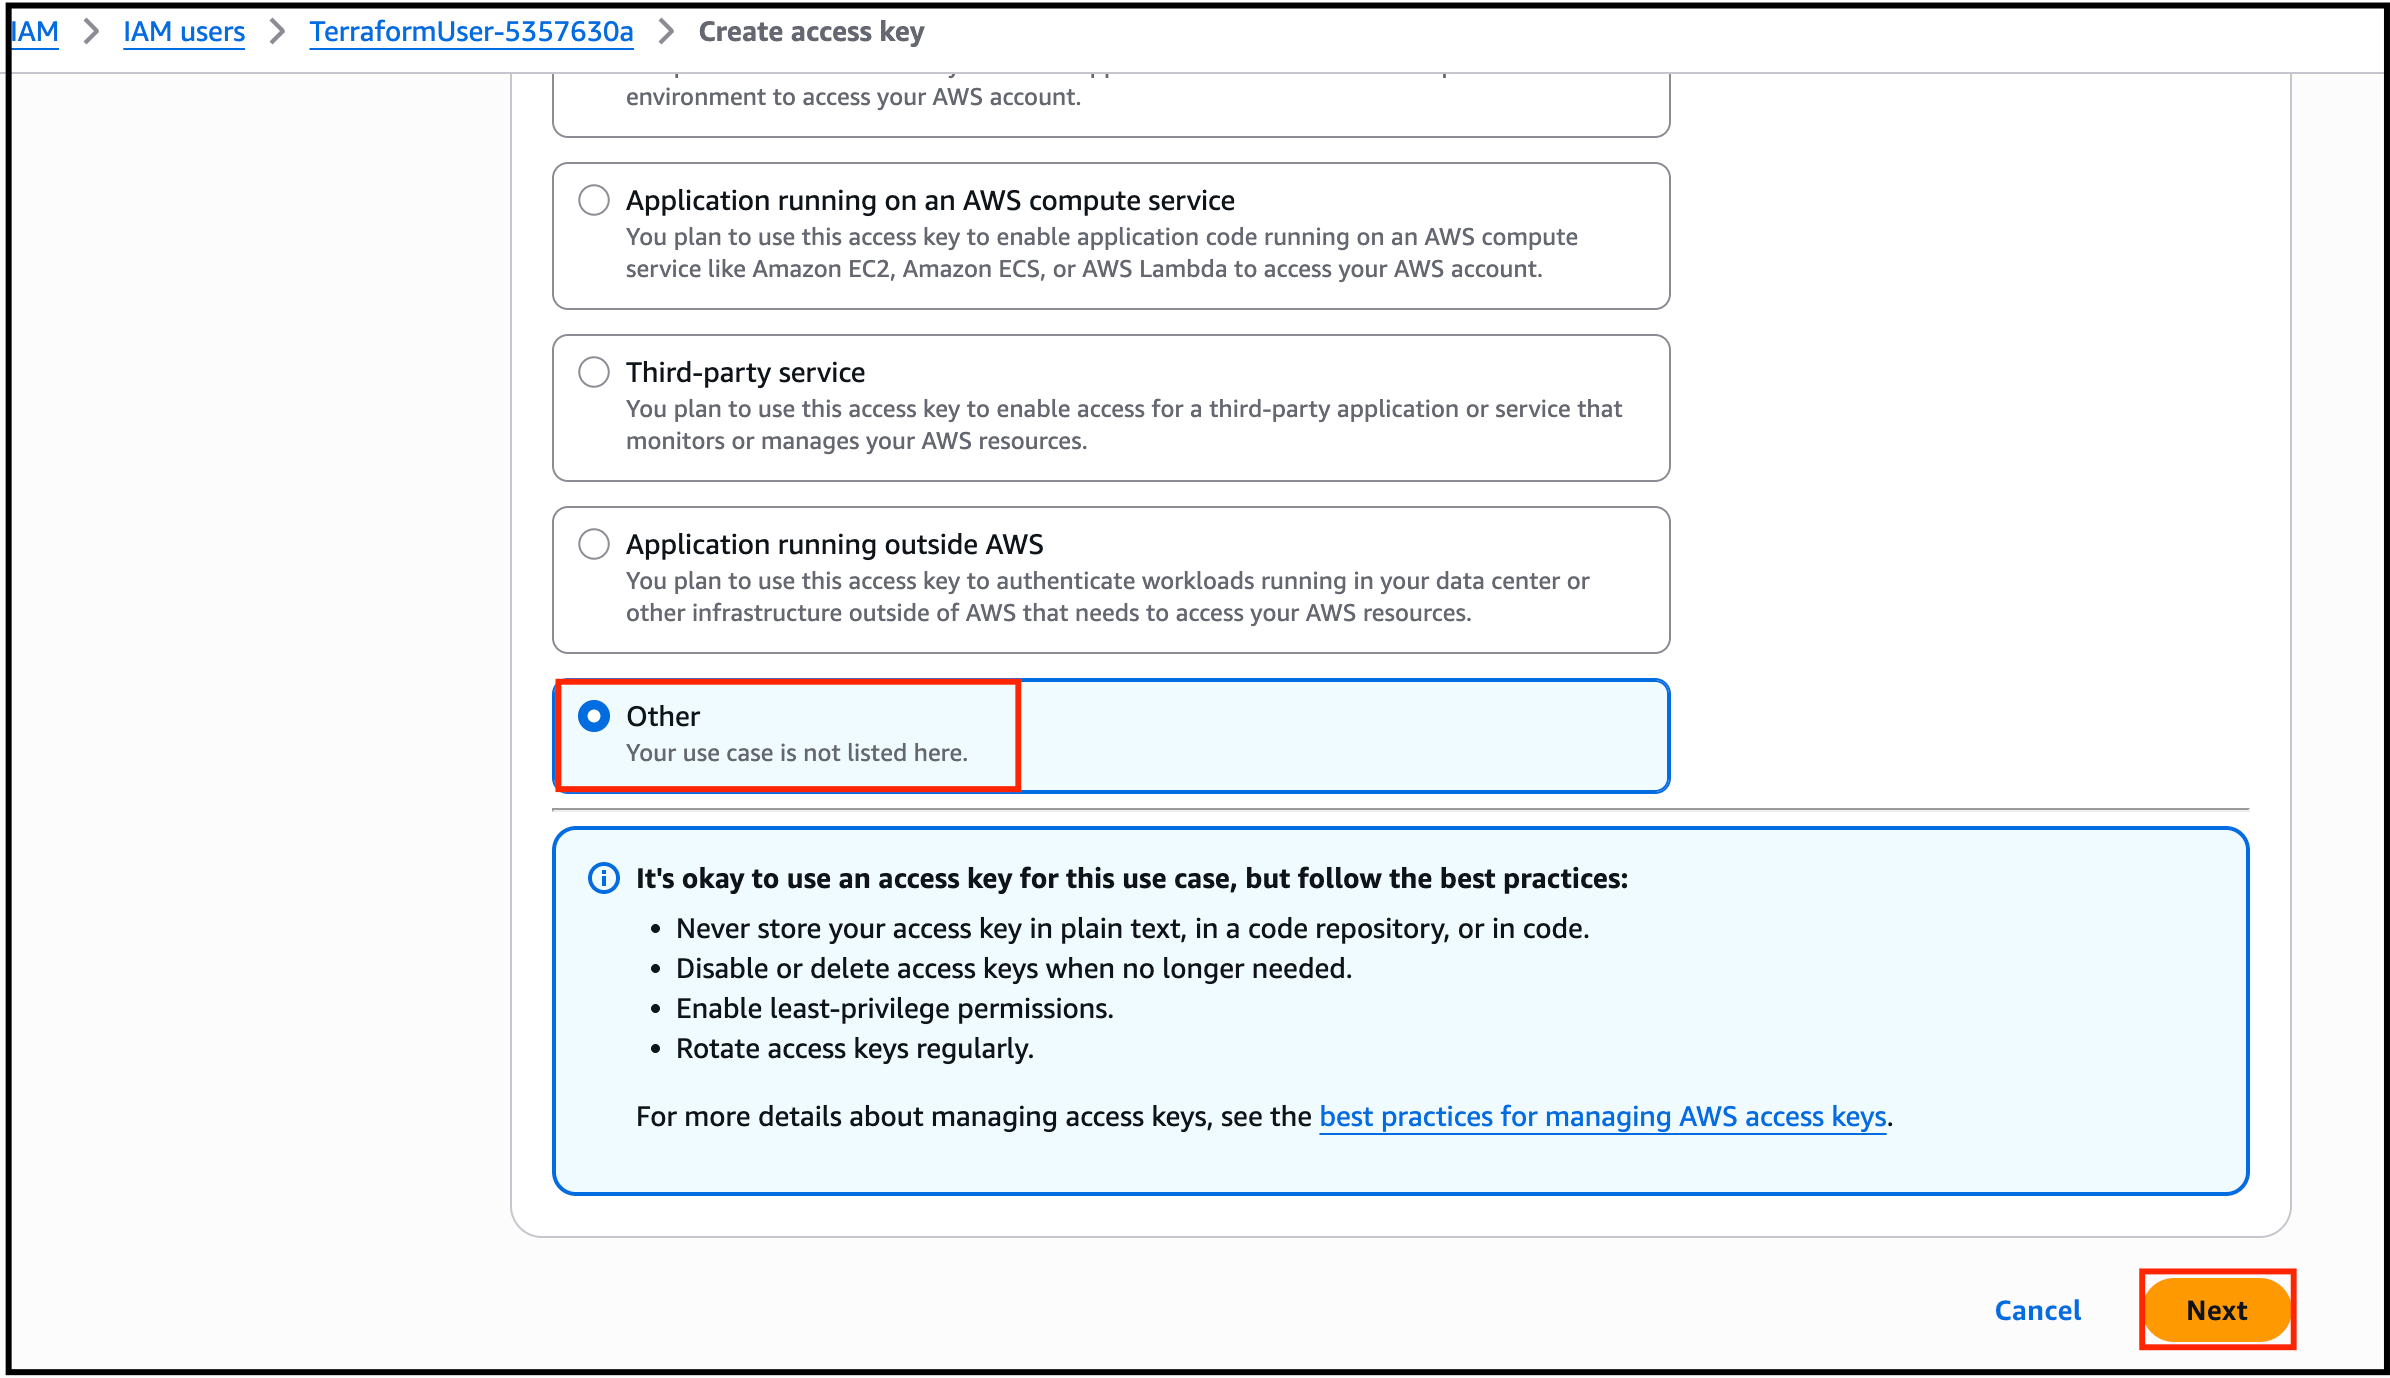
Choose Other, Click on Next and click on Create Access Key.
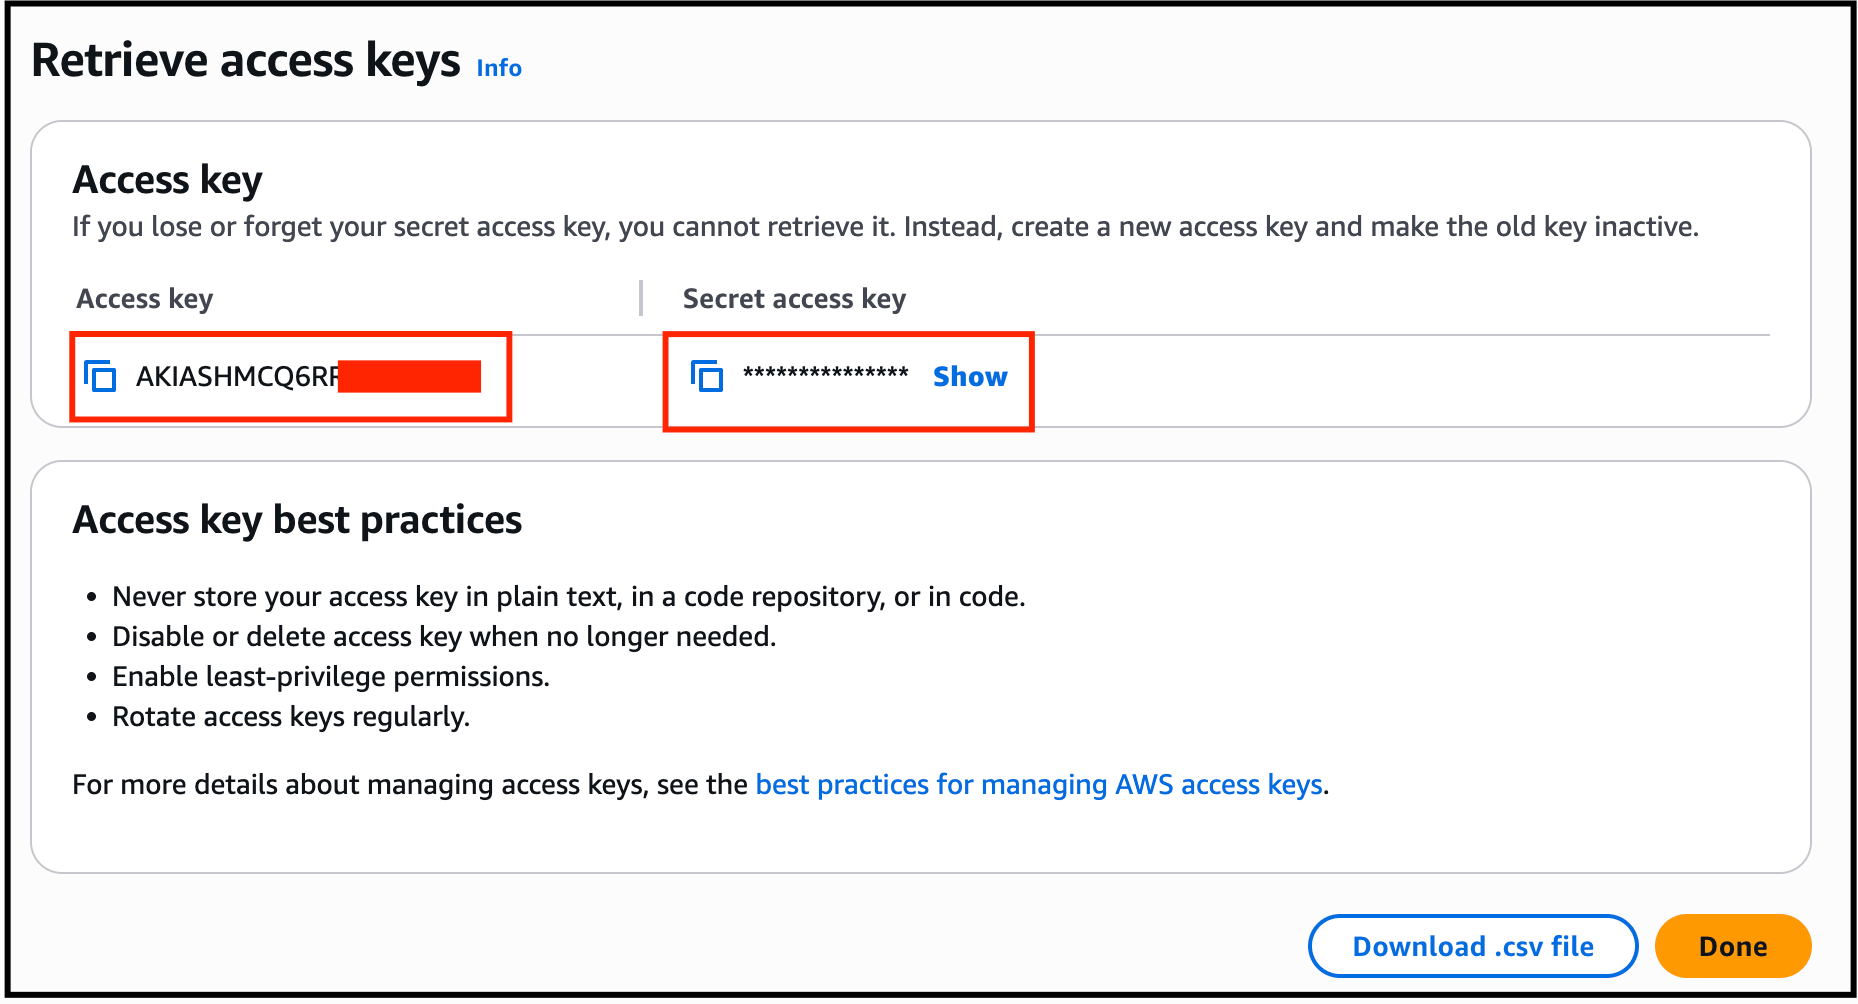
- Your Access and Secret key will get Created. Make a note of it for later use.
Task 2: Setup Visual Studio Code
- Open the visual studio code.
- If you have already installed and using Visual studio code, open a new window.
- A new window will open a new file and release notes page (only if you have installed or updated Visual Studio Code recently). Close the Release notes tab.
- Open Terminal by selecting View from the Menu bar and choose Terminal.
- It may take up to 2 minutes to open the terminal window.
-
Once the terminal is ready, let us navigate to the Desktop.
-
Create a new folder by running the below command.
-
Change your present working directory to use the newly created folder by running the below command:
-
Get the location of the present working directory by running the below command:
- Note down the location, as you will open the same in the next steps.
- Now click on the first icon Explorer present on the left sidebar.
-
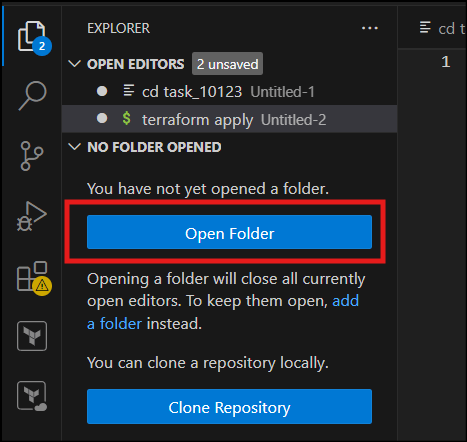
Click on the button called Open folder and navigate to the location of folder task_13081.
- (Optional) Click on Authorize button for allowing Visual Studio Code to use the task_13081 folder. This will only be asked when you have been using Visual Studio code for a while as you are allowing a new folder to be accessed by VSC.
- Visual Studio Code is now ready to use.
Task 3: Create a variable file
In this task, you will create variable files where you will declare all the global variables with a short description and a default value.- To create a variable file, expand the folder task_13081 and click on the New File icon to add the file.
- Name the file as variables.tf and press Enter to save it.
- Note: Don’t change the location of the new file, keep it default, i.e. inside the task_13081 folder**.**
- Paste the below contents in variables.tf file.
- In the above content, you are declaring a variable called, access_key, secret_key, and region with a short description of all 3.
- After pasting the above contents, save the file by pressing ctrl + S.
- Now expand the folder task_13081 and click on the New File icon to add the file.
- Name the file as terraform.tfvars and press Enter to save it.
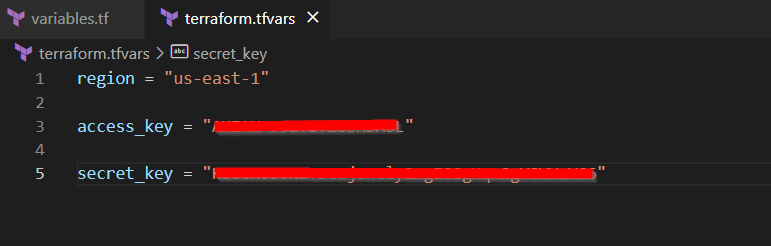
- Paste the below content into the terraform.tfvars file.
- In the above code, you are defining the dynamic values of variables declared earlier.
- Replace the values of access_key and secret_key by copying from the lab page.
- After replacing the values of access_key and secret_key, save the file by pressing Ctrl + S.
Task 4: Create the key pair from EC2 Console
Navigate to EC2 Console and on the left bottom under Network & Security Click on Key Pairs- Click on Create Key Pair and Enter MySSHKey.
- Select Key Pair type as RSA
-
Private key format as .pem and click on Create Key Pair.
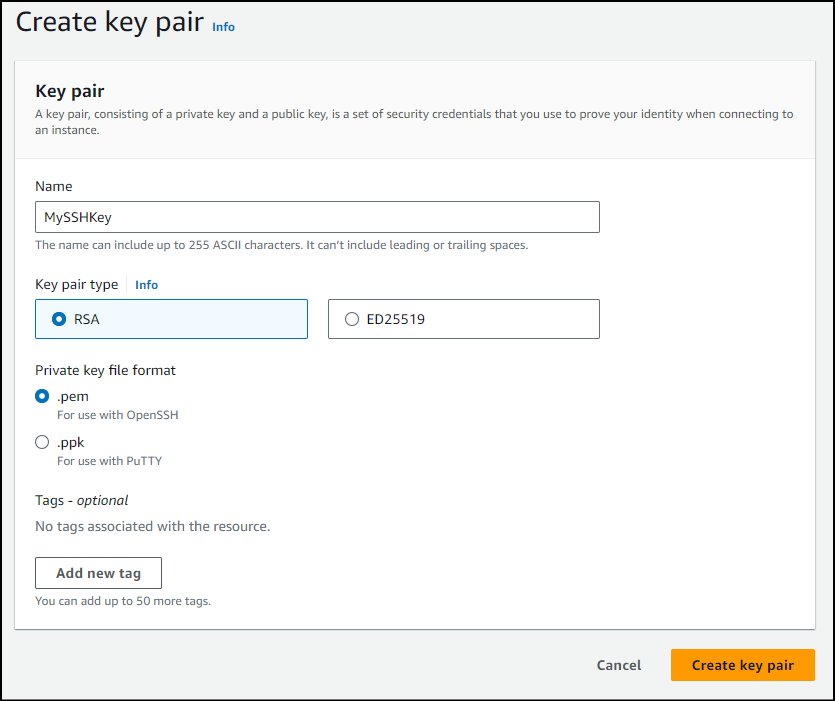
- MySSHKey will be created.
Task 5: Create the first VPC in main.tf file
In this task, you will create a main.tf file where you will add details of the provider and resources.- To create a main.tf file, expand the folder task_13081 and click on the New File icon to add the file.
- Name the file as main.tf and press Enter to save it.
- Paste the below content into the main.tf file.
- In the above code, you are defining the provider as aws.
- Next, we want to tell Terraform to create a first VPC
- To create an First VPC Paste the below content into the main.tf file after the provider.
Task 6: Create a Public subnet in First VPC
In this task, we are going to create a public subnet within the first VPC. The public subnet will be used for launching an EC2 instance that will be accessible over the internet.- To create a public subnet in first vpc add another block of code just below the vpc creation into the main.tf file.
- Save the file by pressing Ctrl + S.
Task 7: Create Internet Gateway and Route Table
In this task, you will create a Internet Gateway and Route table in main.tf file- To create a Internet Gateway and Route Table add another block of code just below the public subnet code into the main.tf file
Task 8: Create a Security group for EC2 in main.tf file
In this task, you will create a Security group EC2 instance in main.tf file- To create a security group Paste the below content into the main.tf file after the route table association.
- Save the file by pressing Ctrl + S.
Task 9: Launch an EC2 instance in the First VPC
In this task, we are going to launch an EC2 instance in the first VPC’s public subnet. This EC2 instance will be used to test the connectivity between the VPCs after peering them using the Transit Gateway.- To Launch an EC2 Instance add another block of code just below the security group code into the main.tf file
Task 10: Create a Second VPC
In this task, we are going to create the second VPC, which will be the other VPC that is peered with the first VPC using the Transit Gateway.- To create an Second VPC Paste the below content into the main.tf file after the EC2 creation.
Task 11: Create a Private subnet in Second VPC
In this task, we are going to create a private subnet within the second VPC. The private subnet will be used for launching an EC2 instance that will not have direct internet connectivity.- To create a private subnet in first vpc add another block of code just below the vpc creation into the main.tf file.
Task 12: Create a Security group for Second VPC
In this task, you will create a Security group EC2 instance in main.tf file- To create a security group Paste the below content into the main.tf file after the private subnet creation.
- Save the file by pressing Ctrl + S.
Task 13: Launch an EC2 instance in Second VPC
In this task, we are going to launch an EC2 instance in the Second VPC’s private subnet. This EC2 instance will be used to test the connectivity between the VPCs after peering them using the Transit Gateway. To Launch an EC2 Instance add another block of code just below the security group code into the main.tf fileTask 14: Create a Transit Gateway
In this task, we are going to create a Transit Gateway, which acts as a central hub for connecting multiple VPCs and on-premises networks. The Transit Gateway simplifies the network architecture and facilitates the peering between VPCs.- To create a private subnet in first vpc add another block of code just below the ec2 creation into the main.tf file.
Task 15: Create two Transit gateway attachment for the VPCs created
In this task, we are going to create two Transit Gateway attachments, one for each of the VPCs created. These attachments establish the peering between the VPCs and the Transit Gateway.- To create a private subnet in first vpc add another block of code just below the transit gateway into the main.tf file.
Task 16: Add the routes in the route table
1. To create a private subnet in first vpc add another block of code just below the tranist gateway attachment creation into the main.tf file.Task 17: Create Output File
- In this task, you will create an output.tf file where you add details of the output you want to display.To create an output.tf file, expand the folder task_13081 and click on the New File icon to add the file.
- Name the file as output.tf and press Enter to save it.Paste the below content into the output.tf file.
Task 18: Confirm the installation of Terraform by checking the version
- In the Visual Studio Code, open Terminal by selecting View from the Menu bar and choose Terminal.
-
If you are not in the newly created folder change your present working directory by running the below command.
- To confirm the installation of Terraform, run the below command to check the version:
- If you are getting output as command not found: terraform, this means that terraform is not installed on your system, To install terraform follow the official guide link provided in the Prerequisite section above.
Task 19: Apply terraform configurations
-
Initialize Terraform by running the below command,
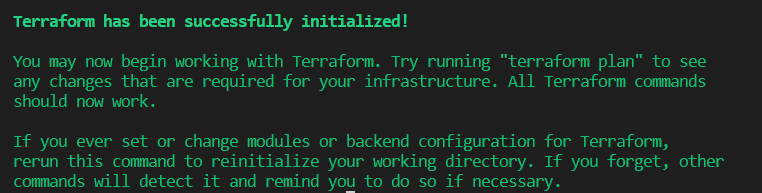
Note: terraform init will check for all the plugin dependencies and download them if required, this will be used for creating a deployment plan
-
To generate the action plans run the below command,
- To create all the resources declared in main.tf configuration file, run the below command:
- Approve the creation of all the resources by entering yes.
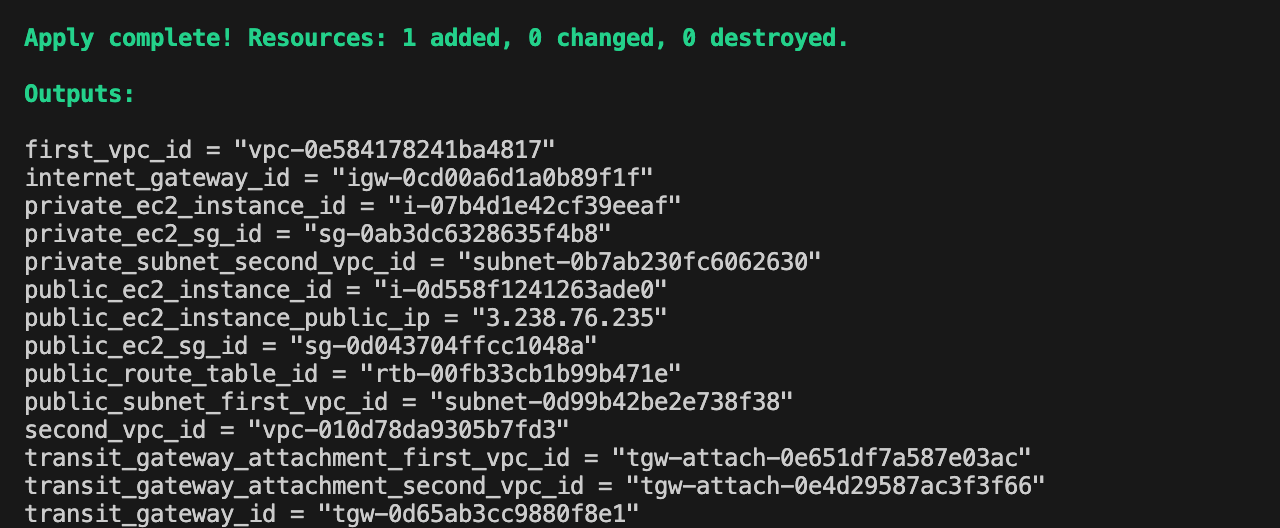
- It may take up to 2-5 minutes for the terraform apply command to create the resources.
- Id’s of all the resources created by terraform will be visible there.
Task 20 : Test the connectivity between two VPCs
In this task, we are going to test the connectivity between the EC2 instances in both VPCs. This step confirms that the VPCs have been successfully peered using the Transit Gateway, and the EC2 instances can communicate with each other.- You have copied the IPv4 Public IP of the EC2 instance created in the First VPC.
-
Please follow the steps for Session manager to connect into First_VPCs_EC2
-
Select First_VPCs_EC2 and click on Connect button.

-
Select First_VPCs_EC2 and click on Connect button.
- Go to Session Manager and click Connect
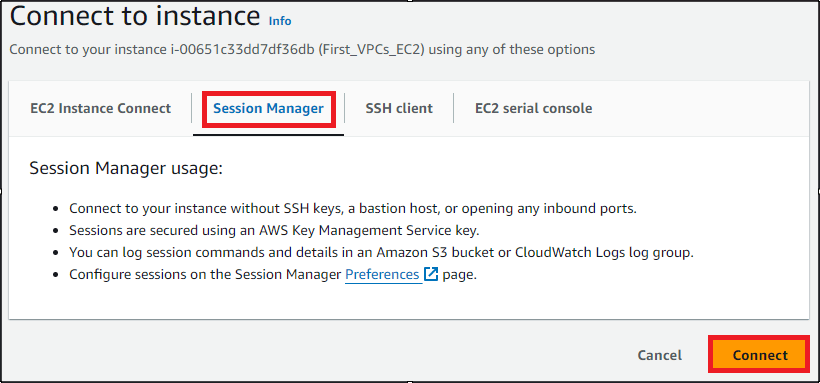
- Once you have successfully connected in to EC2, run the following commands :
-
Switch to root user :
-
Update server repository :
- Now we need to copy the .pem key of the EC2 instance created.
-
Create a file :

-
Open the .pem key of EC2 MySSHKey in your local editor and paste it in the terminal file.
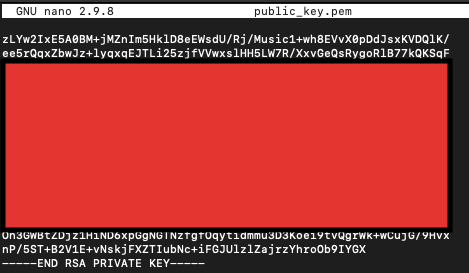
- Press :wq
- File Name : No changes, press [Enter] key in your keyboard
- Change the .pem key permission
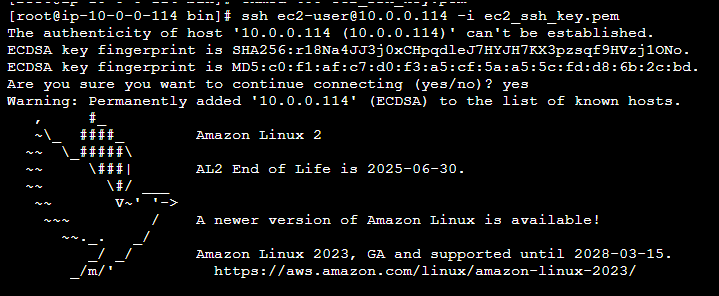
- SSH into the Private EC2 MySSHKey
- Copy the Private IP of First_VPCs_EC2
- Example : ssh ec2-user@20.0.0.11 -i MySSHKey.pem

- As you can see the IP address is changed to private ec2 private IP 30.0.1.154
Task 21: Delete AWS Resources
- To delete the resources, open Terminal again.
-
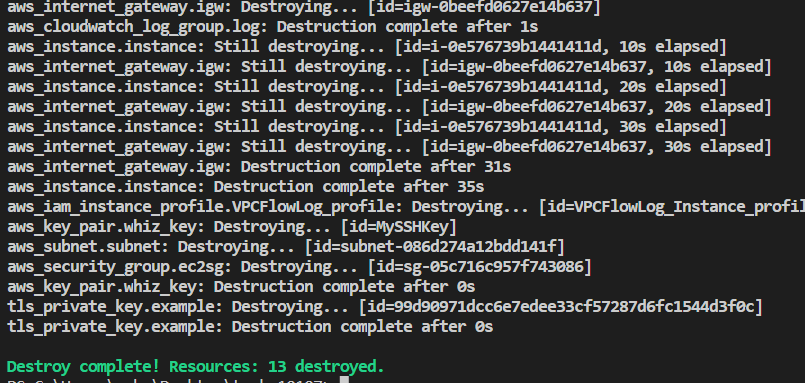
Run the below command to delete all the resources.
-
Approve the creation of all the resources by entering yes. You can see the Destroy complete! message.
Do You Know?
With Transit Gateway, you can easily add or remove VPC connections as your network grows or changes, without impacting existing connections. It provides a flexible and scalable solution for interconnecting VPCs and simplifies network administration, routing, and security.
Completion and Conclusion
- You have successfully created a VPC with a public subnet & internet gateway and Launched an EC2 instance.
- You have successfully created a VPC with a private subnet and Launched an EC2 instance.
- You have successfully created the Transit gateway.
- You have successfully created the Transit gateway attachments for both the VPC’s.
- You have successfully tested the connectivity of VPC after peering using the Transit gateway.
End Lab
- Sign out of AWS Account.
- You have successfully completed the lab.
- Once you have completed the steps, click on End Lab from the IP Lab Portal dashboard.
What gets checked
When you press Check my work, the platform verifies each of these:- Launch an EC2 Instance — Check whether an EC2 Instance is launched or not.
- Create VPC Transit Gateway — Check whether a Transit Gateway is created with status Available or not.
- Create VPC Transit Gateway Attachment — Check whether a Transit Gateway Attachment is created with Resource Type VPC and status Available or not.