

Overview
Lab Details
- This lab walks you through the steps to create and configure an Amazon CloudFront distribution with origins from an EC2 instance and an S3 bucket.
- Duration: 90 minutes
- AWS Region: US East (N. Virginia) us-east-1.
Introduction
What is CloudFront?
- Amazon CloudFront is a content delivery network (CDN) offered by AWS.
- It provides a globally-distributed network of proxy servers that cache content closer to end-users.
- CDN improves access speed by reducing latency and minimizing the number of internet hops required to retrieve content.
- CloudFront works on a pay-as-you-go basis, allowing users to scale their content delivery as needed.
- It integrates with various origin servers, such as Amazon S3 and Amazon EC2, where the content is stored.
- When a request is made for content, CloudFront delivers it from the nearest edge server, reducing latency and improving performance.
- It supports both “Progressive” and “Streaming” delivery of content, allowing for optimized video streaming and dynamic content acceleration.
- CloudFront can be used to distribute web content, videos, software downloads, and other bulky media.
Architecture Diagram
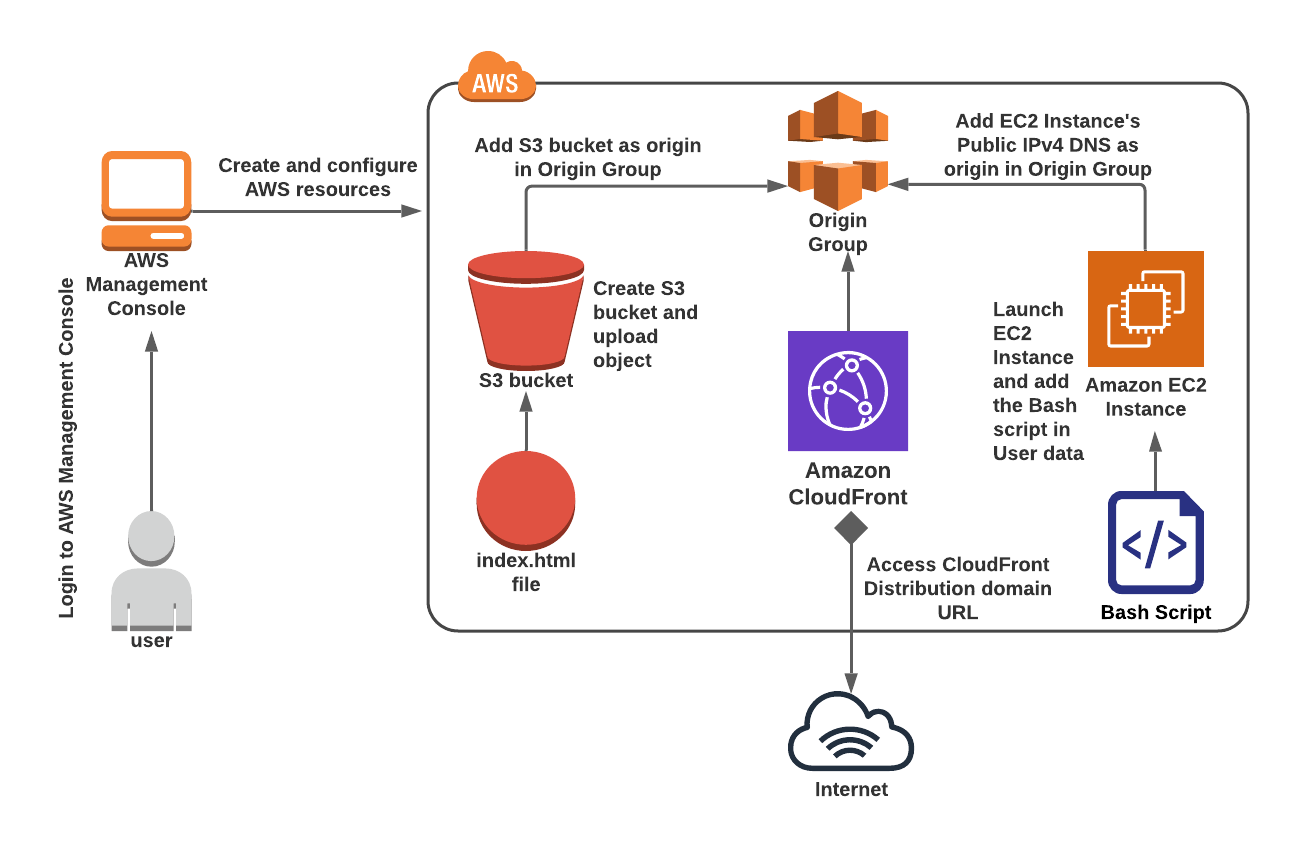
Task Details
- Sign in to the AWS Management Console.
- Create S3 Bucket
- Upload a file to an S3 bucket
- Make the objects publicly accessible
- Creating CloudFront Distribution
- Launching an EC2 Instance
- Add EC2 as the Origin and create Origin Group
- Test the Origin group
- Deleting AWS Resources.
Launching Lab Environment
- To launch the lab environment, Click on the Start Lab button.
- Please wait until the cloud environment is provisioned. It will take less than a minute to provision.
- Once the Lab is started, you will be provided with IAM user name, Password, Access Key, and Secret Access Key.
Note : You can only start one lab at any given time
Files you need
Download these before you start — the lab cannot be completed without them.Lab guide
Lab Steps
Task 1: Sign in to AWS Management Console
- Click on the Open Console button, and you will get redirected to AWS Console in a new browser tab.
-
On the AWS sign-in page,
- Leave the Account ID as default. Never edit/remove the 12-digit Account ID present in the AWS Console. Otherwise, you cannot proceed with the lab.
- Now copy your Username and Password in the Lab Console to the IAM Username and Password in AWS Console and click on the Sign-in button.
- Once Signed In to the AWS Management Console, make the default AWS Region as US East (N. Virginia) us-east-1.
Task 2: Create S3 Bucket
- Make sure you are in the US East (N. Virginia) us-east-1 Region.
- Navigate to the Services menu at the top. Click on S3 in the Storage section.
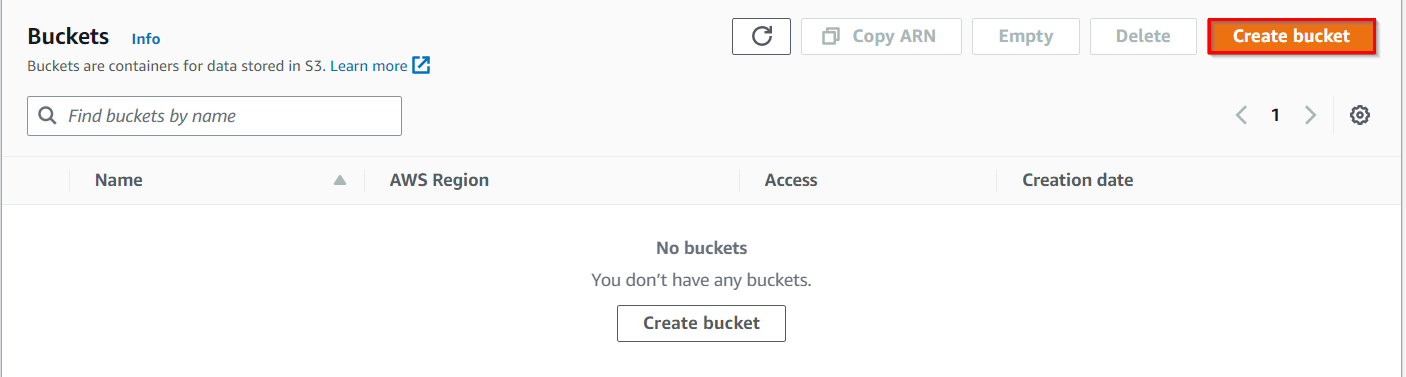
- In the S3 dashboard, click on the Create bucket button and fill in the bucket details.
-
Bucket name: Enter whizlabs1234567
- Note: S3 Bucket names are globally unique, choose a name that is available.
- Region: Select US East (N. Virginia) us-east-1.
- Object Ownership: ACLs disabled
-
Scroll down to Block Public Access settings for bucket and Uncheck the Block all Public Access and acknowledge the change.
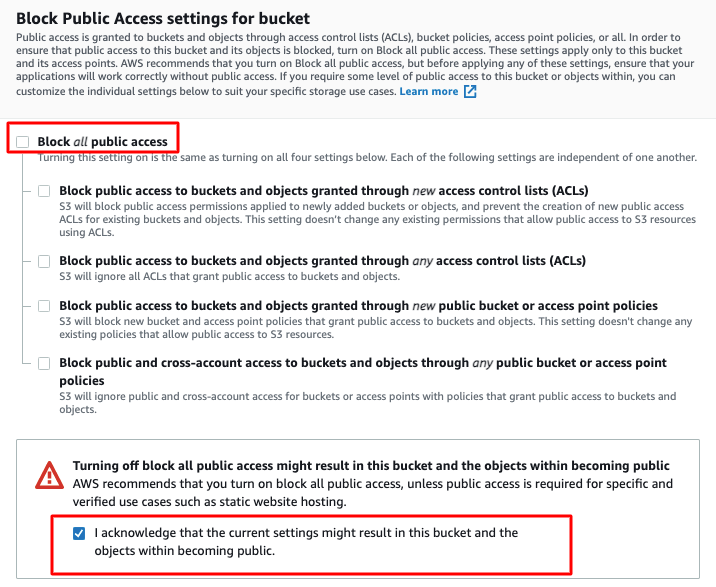
- No need to change anything further, just click on the Create bucket button.
Task 3: Upload a file to an S3 bucket
- Enter the S3 bucket by clicking on your bucket name.
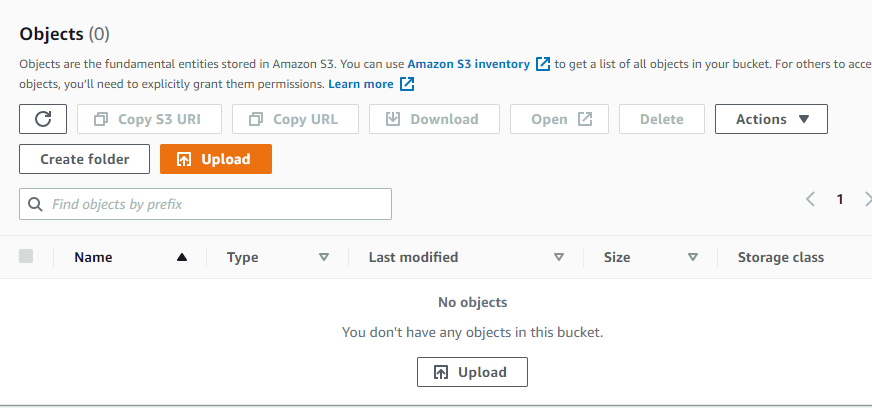
- Download our sample index.html file from here.
-
To upload a file to our S3 bucket,
- Click on Upload.
- Click on Add files.
- Browse for your local image or the image we provided and select it.
- Click on the Upload button.
- You can watch the progress of the upload from within the transfer panel at the bottom of the screen.
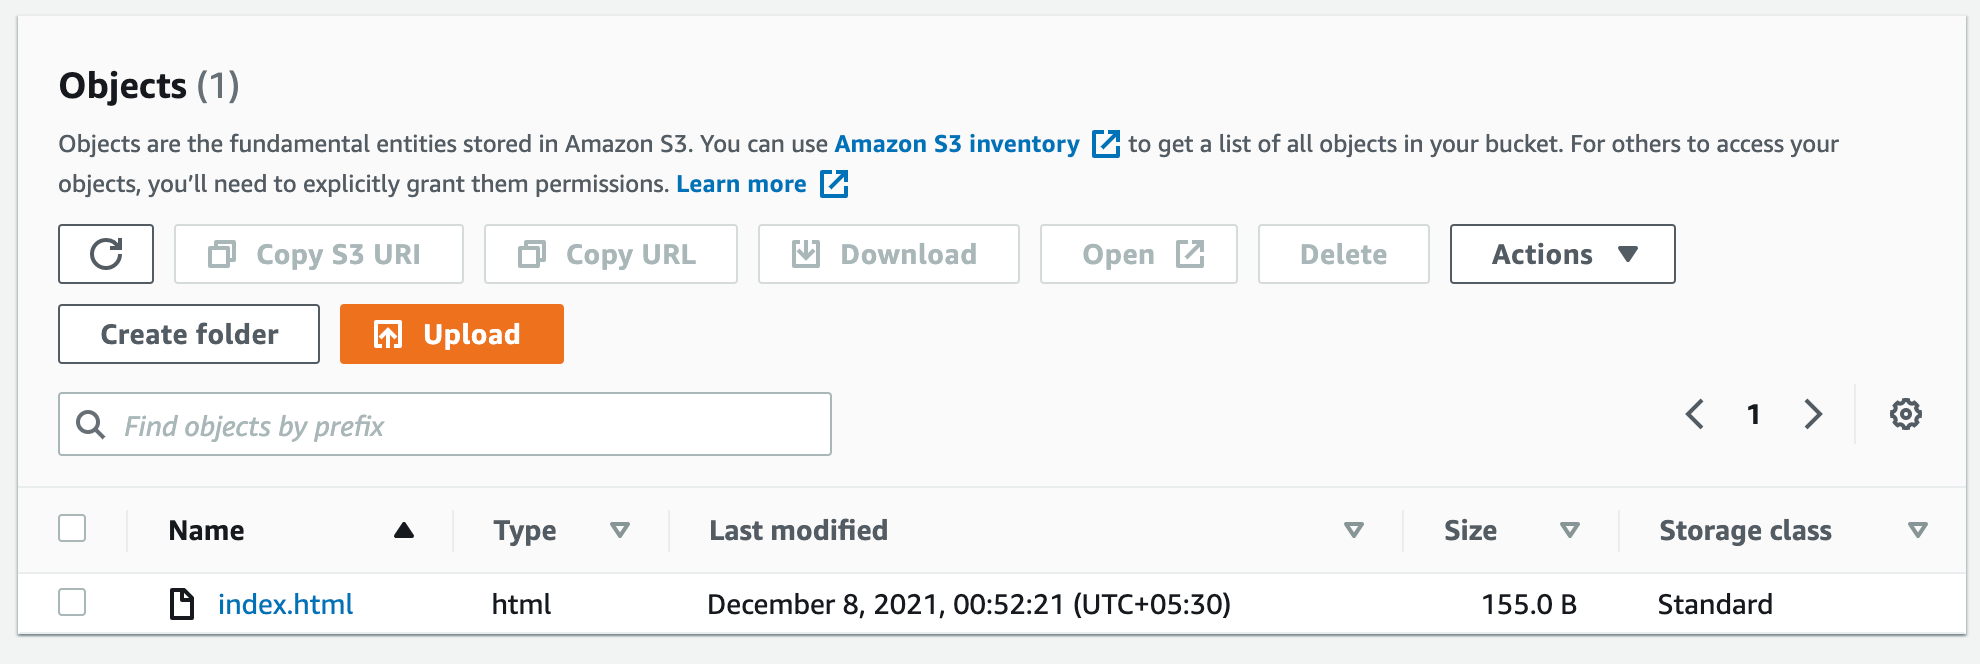
- Once your file has been uploaded, click on Close and you can see an object in the bucket.
-
Note: Uploading files other than index.html will result in validation failure. Please upload the same index.html file only.
Task 4: Make the objects publicly accessible
In this task, we are going to configure the permissions of the S3 bucket to allow public access to the uploaded objects. This step ensures that the content stored in the S3 bucket can be accessed by CloudFront and served to end-users.-
Click the Permissions tab to configure your bucket.
- In the Permissions tab, Edit the Bucket Policy.
- You will be able to see a Blank policy editor.
- Before creating the policy, you will need to copy the ARN (Amazon Resource Name) of your bucket.
- Copy the ARN of your bucket to the clipboard. It is displayed at the top of the policy editor. It looks like ARN:“arn:aws:s3:::your-bucket-name”.
- In the policy below, update the bucket ARN on the Resource key-value and copy the policy code.
-
Copy the bucket policy.
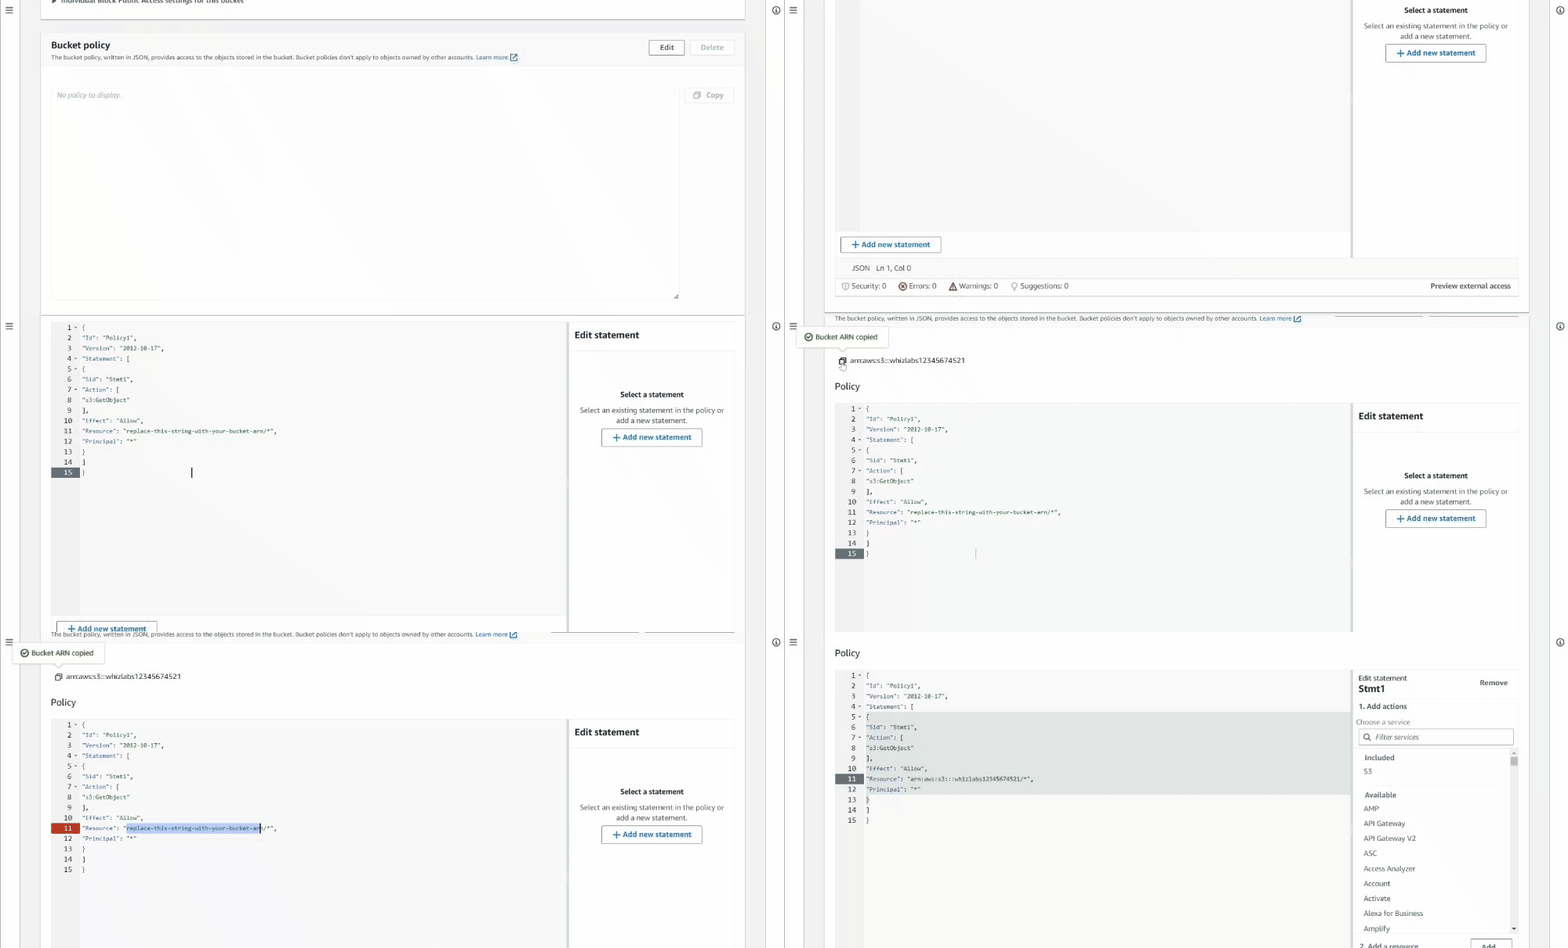
- Click on Save changes.
Task 5: Creating CloudFront Distribution
- Select CloudFront under Networking and Content Delivery from the Services menu.
- Navigate to the left side and select Distributions tab.
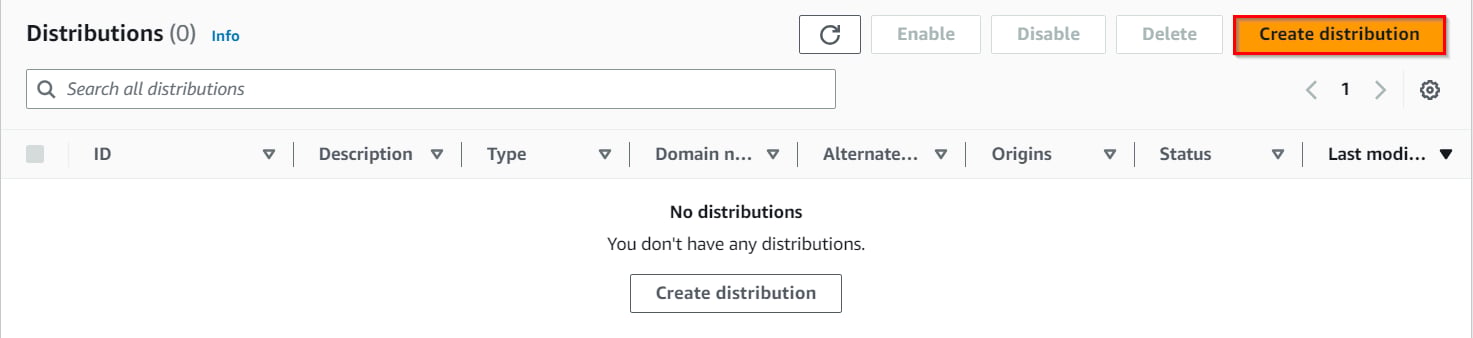
- Now click on the Create distribution button.

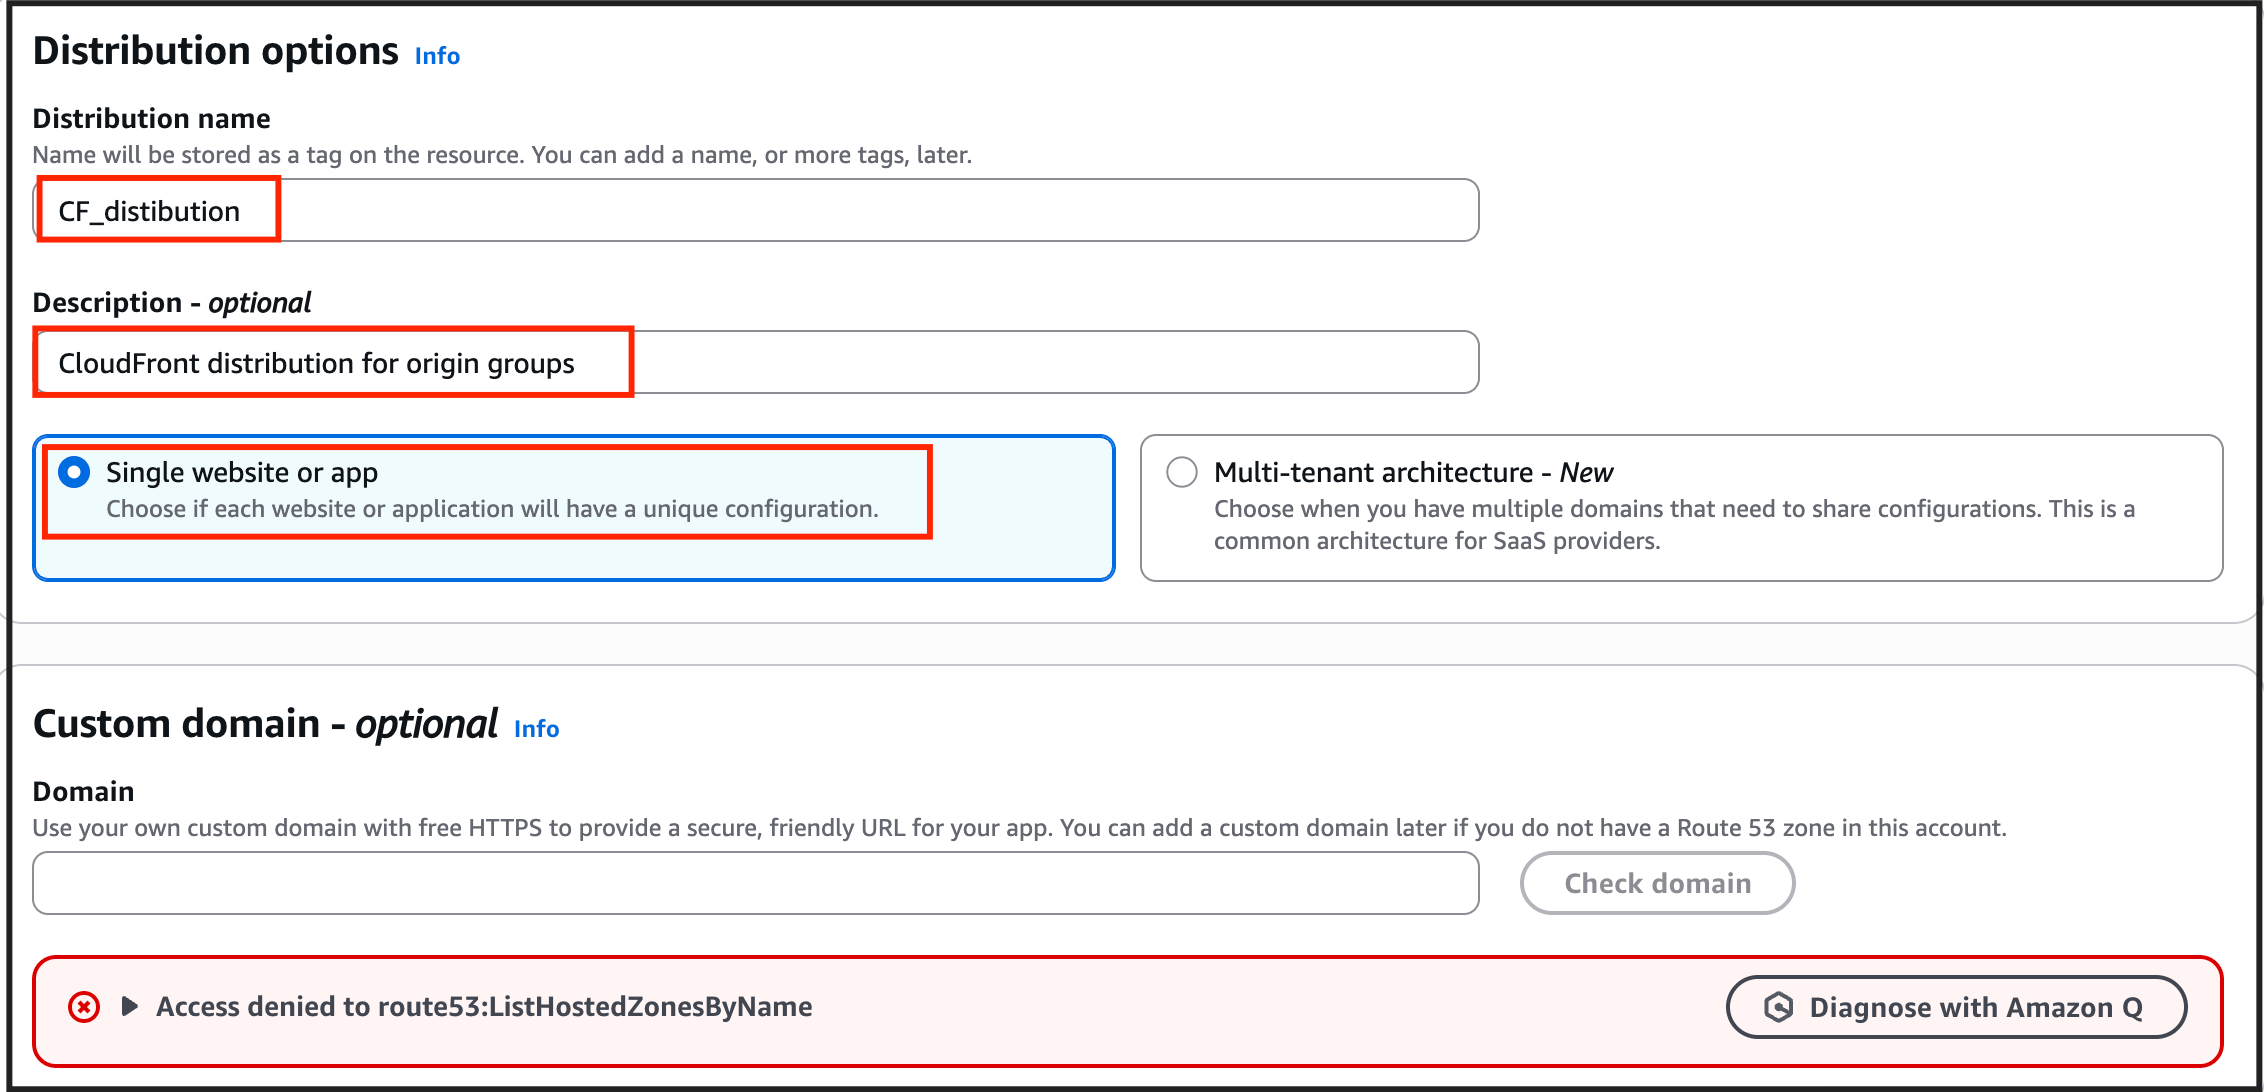
- Now, configure the distribution as follows Under Distribution options,
- Distribution name : CF_Distribution
- Description : CloudFront distribution for origin groups
- Choose : Single website or app
- Custom domain : optional leave it.
- Click on the Next button.
- Origin type : Select Amazon S3
- S3 origin : Click on the Browse S3 button and select the previously created bucket.
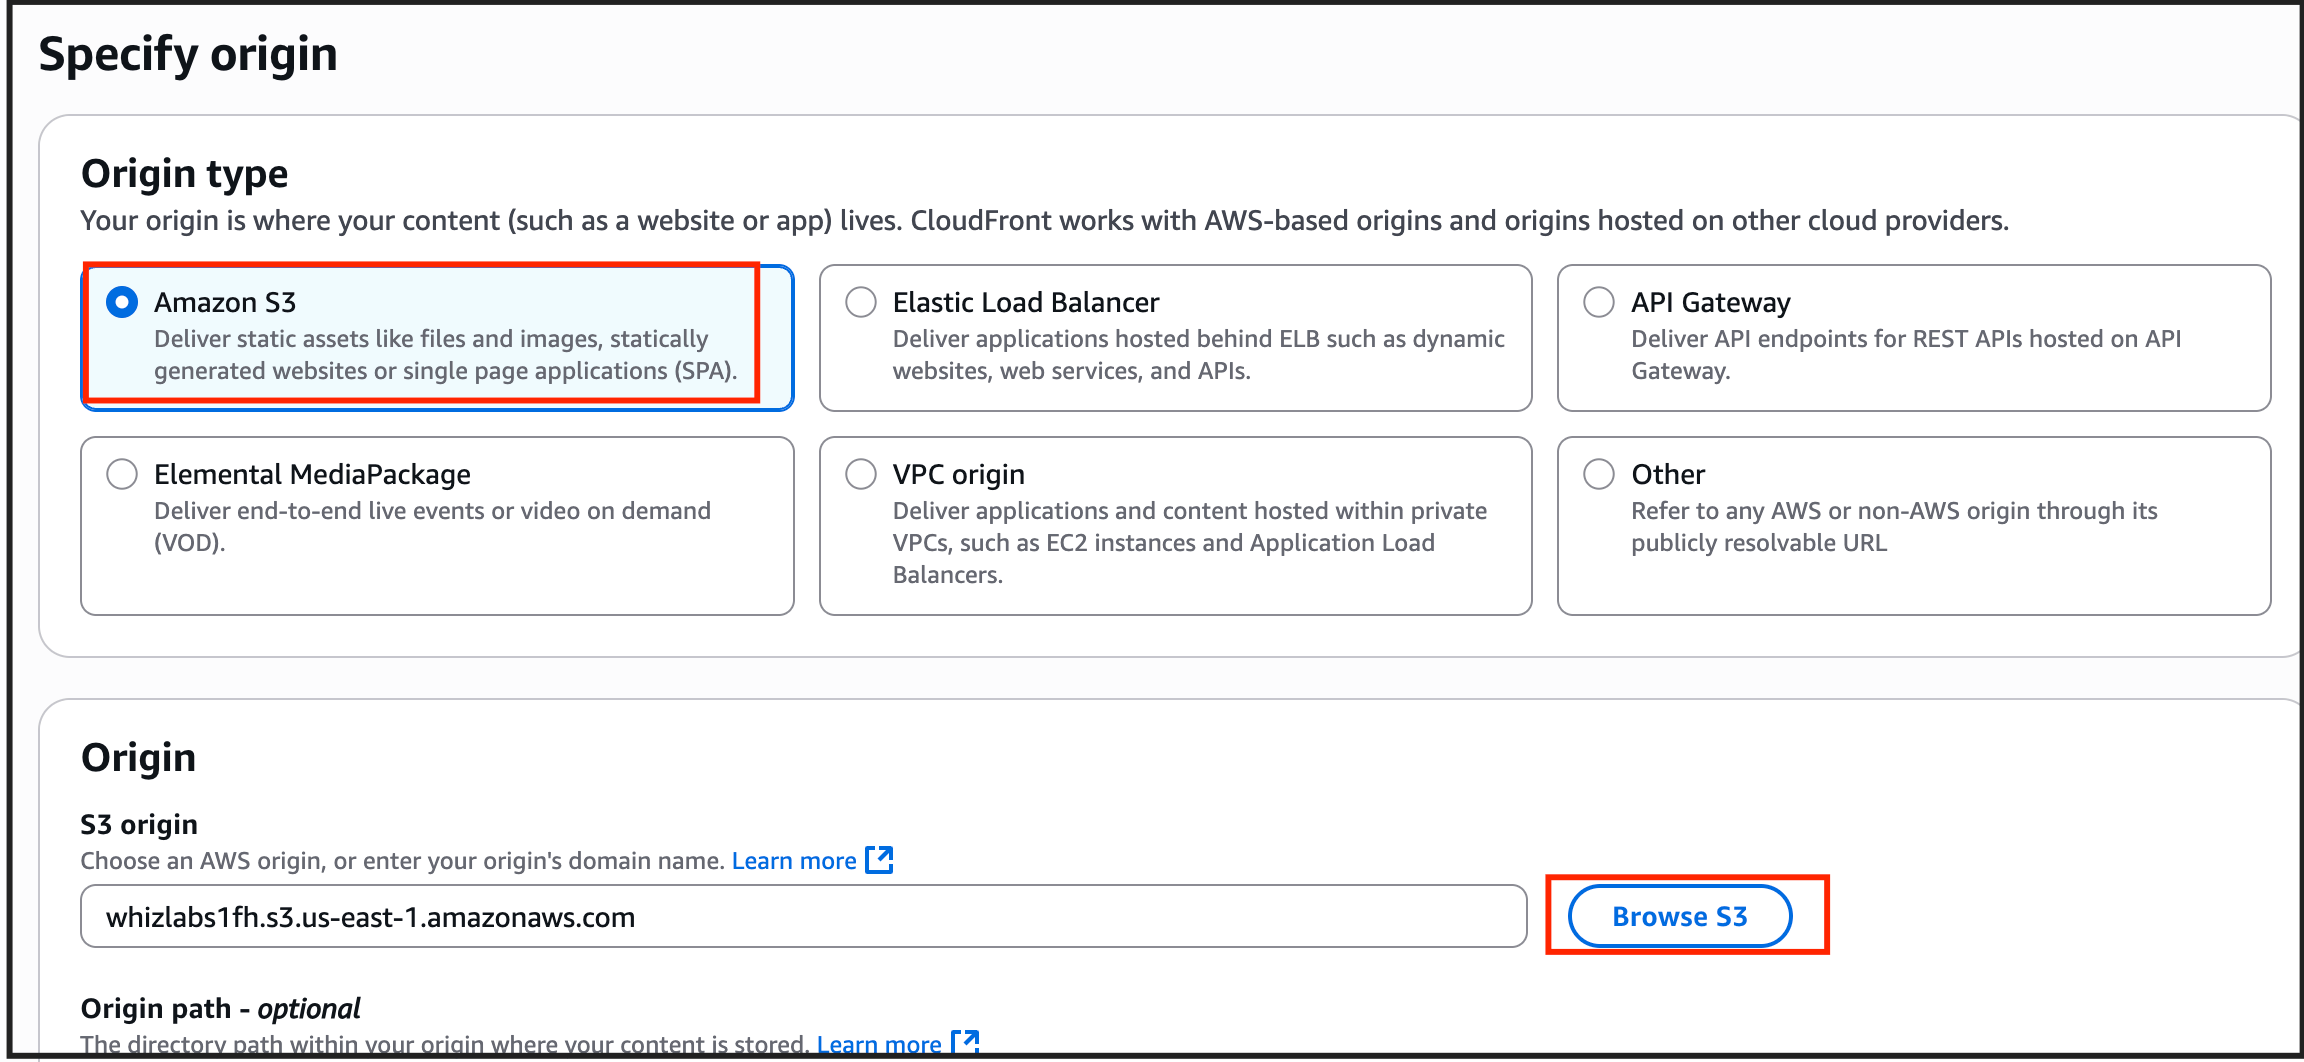
- Leave other options as it is and click on the Next button.
- For Web Application Firewall (WAF) select Do not enable security protections
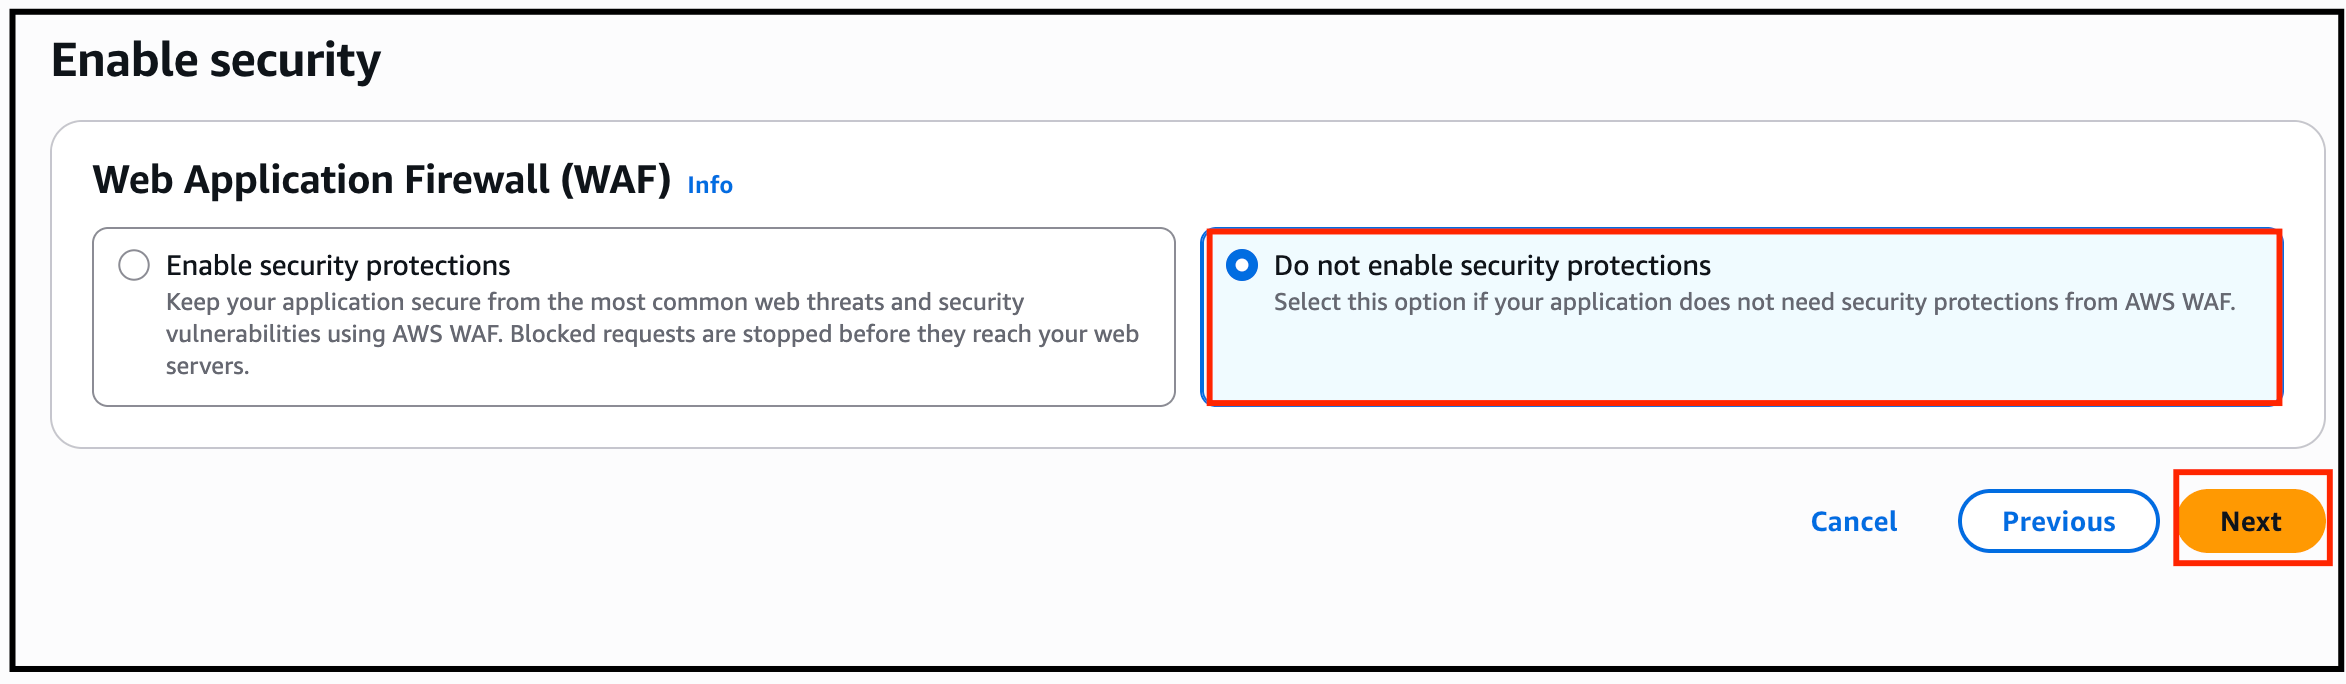
- Click on the Next button, scroll down, and lastly click on the Create Distribution button.
-
You can see that CloudFront is enabled and deployed
- Note: This process will take around 10–15 minutes.
- You can see the Deploying status changed and the last modified time is present.

- The domain name that Amazon CloudFront assigns to your distribution appears in the list of distributions.
- Copy and paste the domain of the CloudFront distribution in the new tab of your browser.
- It will throw an error because the S3 bucket is having object index.html and to access that enter the same in the path.
- Copy and paste the domain of CloudFront distribution in the new tab of your browser and add /index.html in the URL.
-
It should display the index.html page present in the S3 bucket.
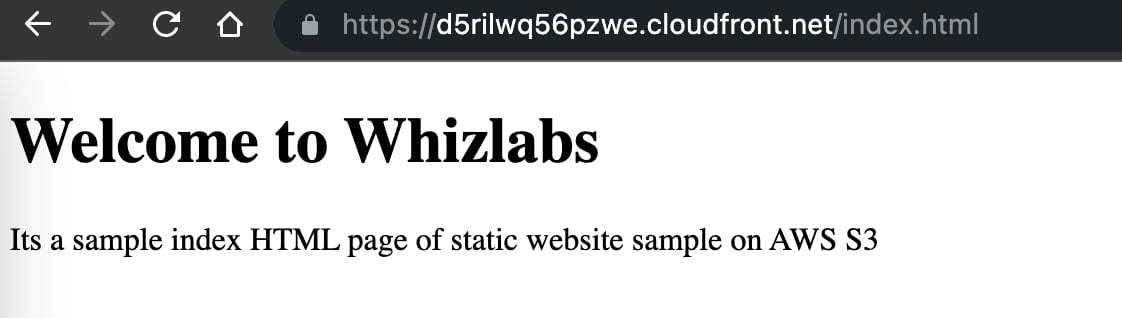
Task 6: Launching an EC2 Instance
In this task, we are going to launch an Amazon EC2 instance. The EC2 instance will serve as another origin for the CloudFront distribution, alongside the S3 bucket.- Make sure you are in US East (N. Virginia) us-east-1 Region.
- Navigate to EC2 by clicking on the Services menu in the top, then click on EC2 in the Compute section.
- Navigate to Instances from the left side menu and click on Launch instance button.

- Under the Name and tags section : Name – MyEC2server
-
Choose an Amazon Machine Image (AMI): Search for Amazon Linux 2023 kernel-6.1 AMI.
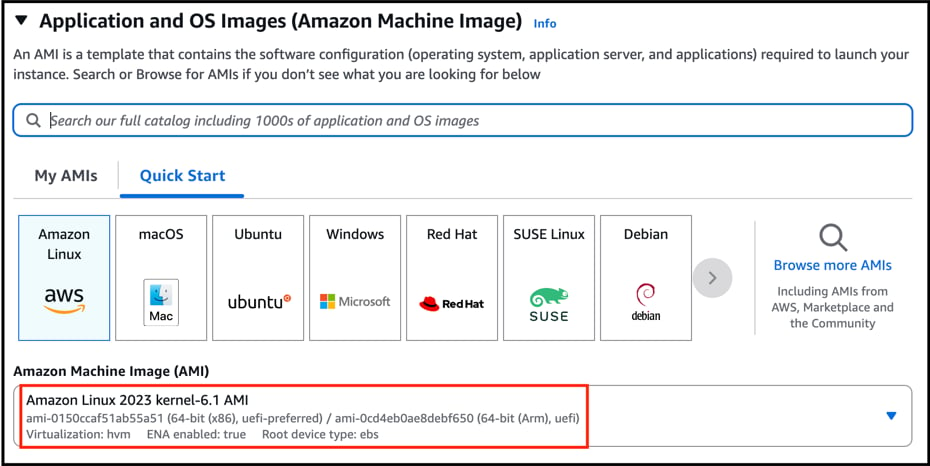
- Choose an Instance Type: select t2.micro.
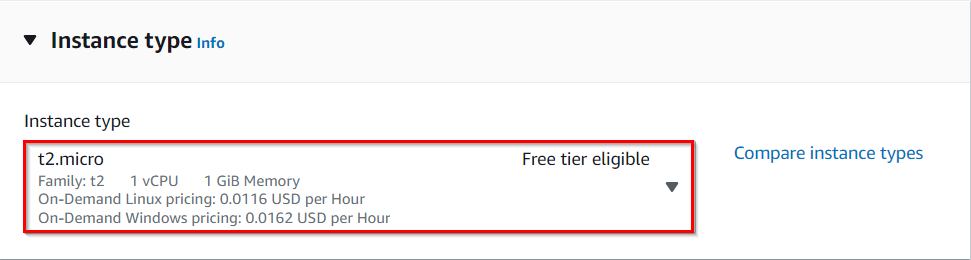
- Keypair Details: No need to generate Keypair for this instance, you can proceed without a keypair.
- Under the Network Settings section :
- Click on Edit button.
- Leave the default VPC as it is.
- Subnet**:** default subnet
- Auto-assign public IP: select Enable
- Firewall (security groups) : Select Create security group
- Security group name : MyEC2Server_SG
- Description : Security Group to allow traffic to EC2
-
For HTTP:
- Choose Type: Select HTTP
- Source: Select Anywhere
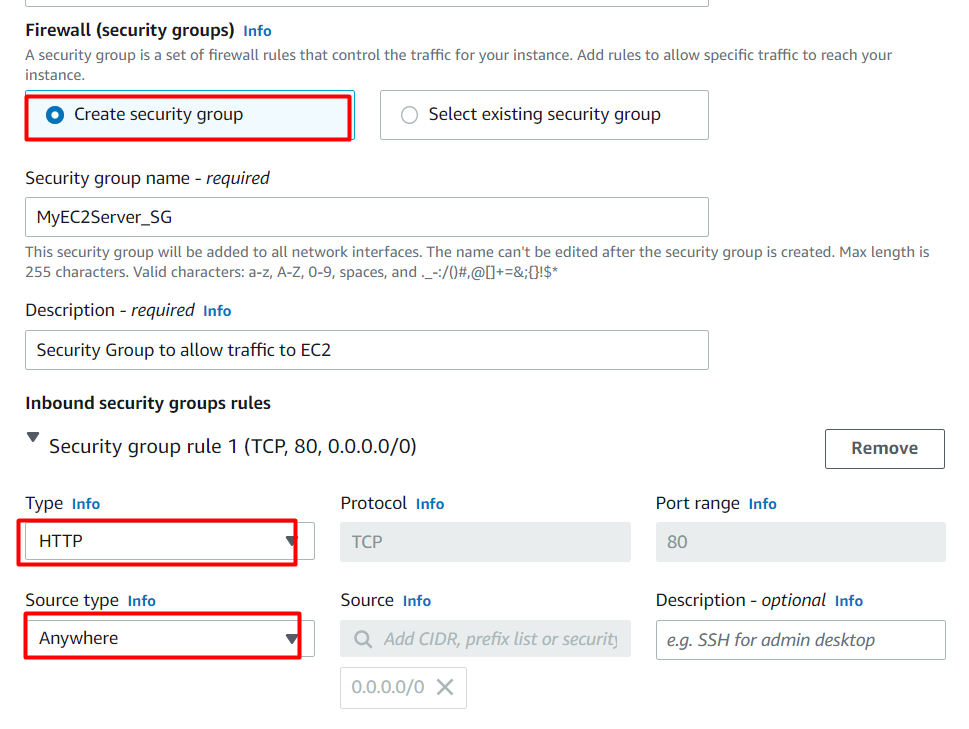
- Click on Advanced Details : Scroll to the end and paste the below script in the user data section.
- Keep everything else as default and click on the Launch instances button.
- After 1–2 minutes, the Instance State will change to running.
- Note down the sample Public IPv4 DNS Address of the EC2 instance.
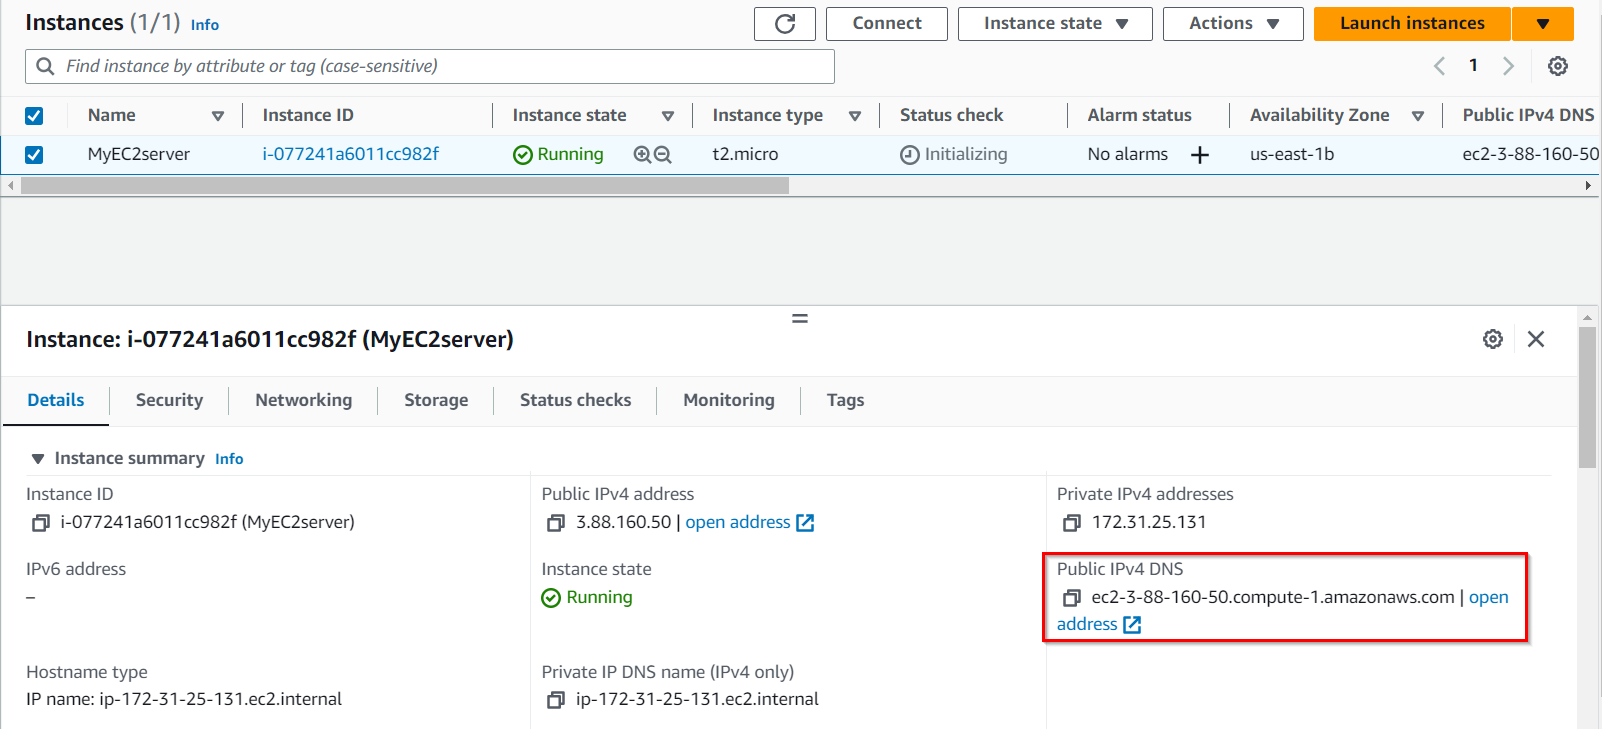
- Try accessing the Public IPv4 DNS address by pasting in the browser and adding /index.html at the end, you will see the response as present below.

- Now update the URL by modifying /index.html to /index2.html

Task 7: Add EC2 as the Origin and create Origin Group
In this task, we are going to add the EC2 instance as an additional origin to the CloudFront distribution and create an origin group. This allows CloudFront to distribute the content from both the S3 bucket and the EC2 instance, providing redundancy and failover capabilities.- Before adding EC2 Instance as Origin, make sure CloudFront distribution is having Enabled status
-
Once the CloudFront distribution is having Enabled status, click on the ID to add the origin.

-
Switch to the Origins tab and click on the Create origin button.

- In the first option Origin domain, paste the copied Public IPv4 DNS of EC2 Instance.
- Once pasted, all the details of the Origin domain will be listed below.
- Protocol : Select HTTP Only
- Keep all the options as default and click on the Create origin button.
-
Now there are two origins present.
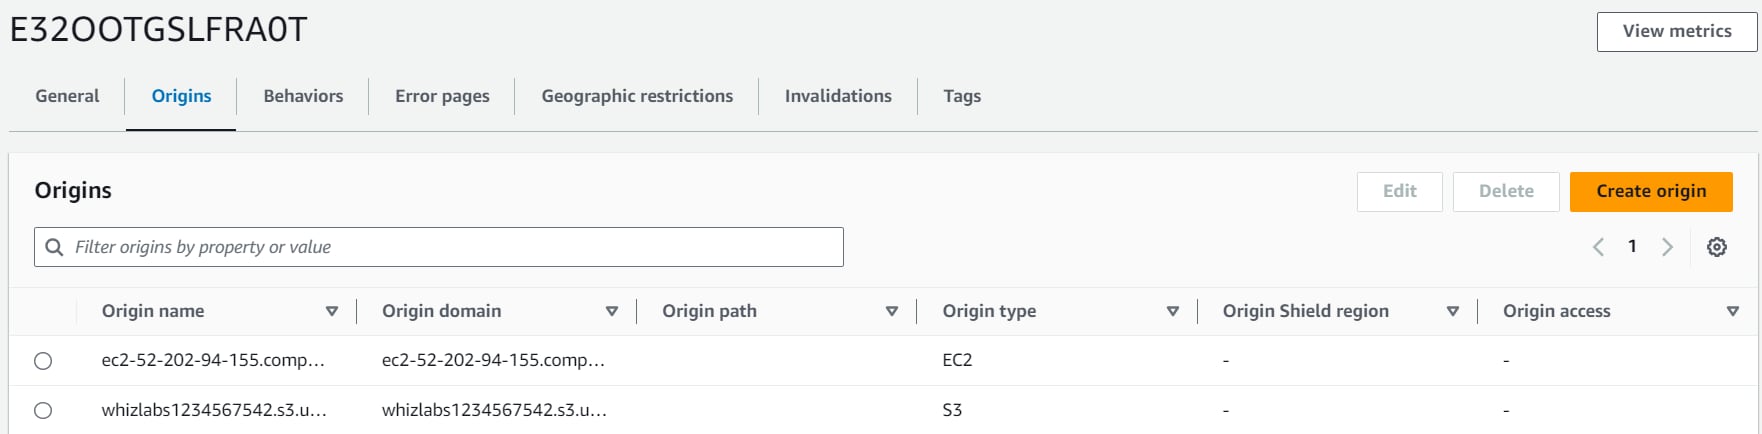
- Go back to the General tab, you will see these changes are getting deployed.
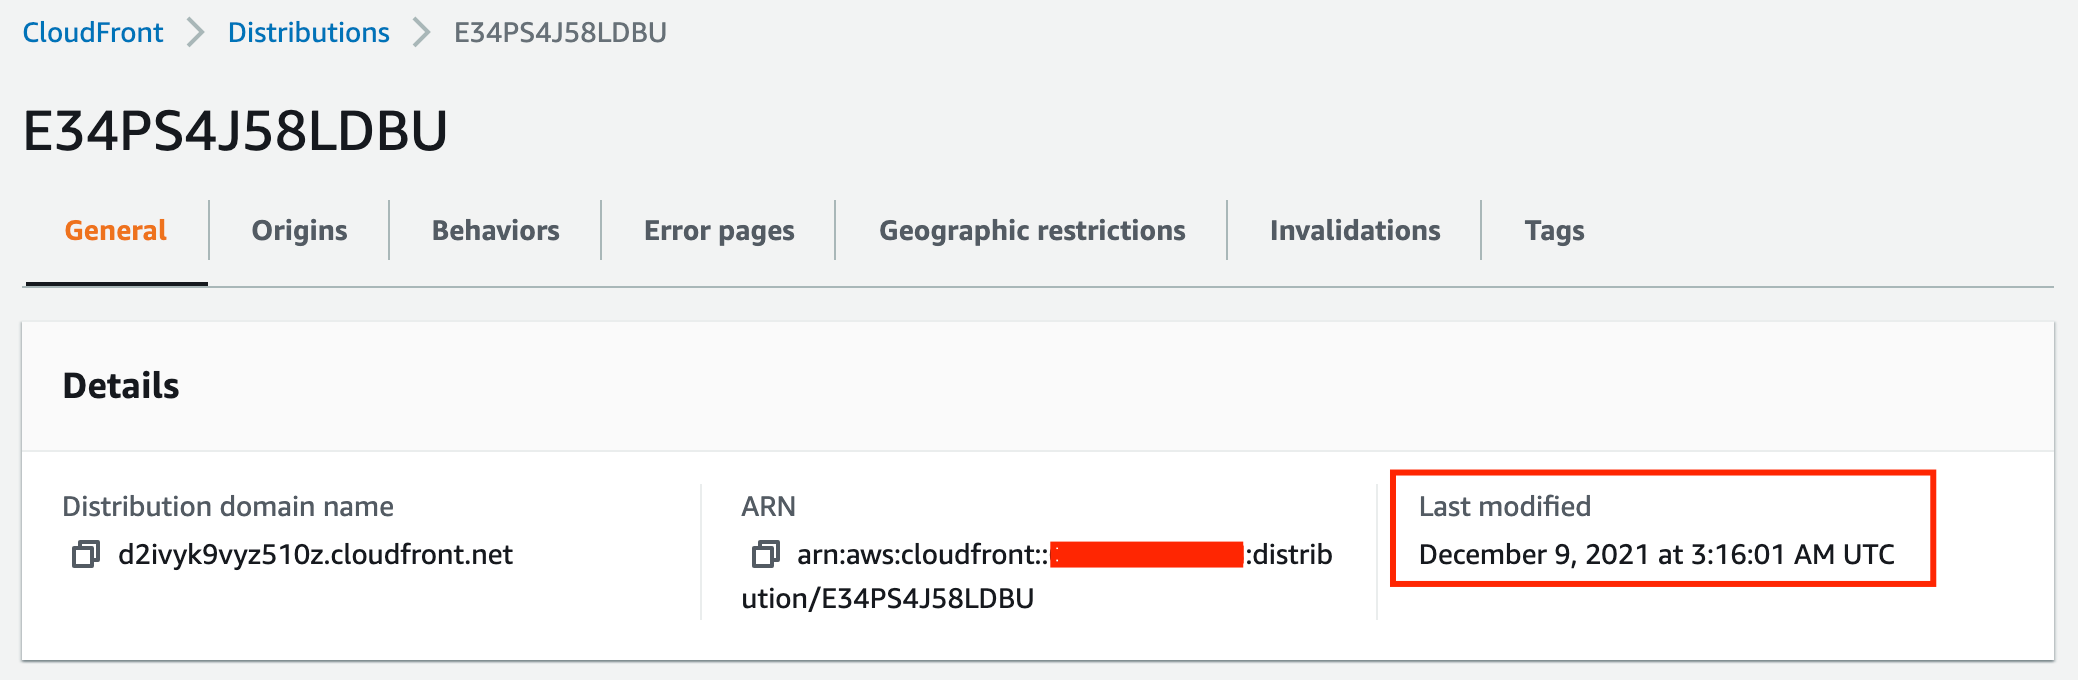
- Wait for 5-10 minutes until you see the Deploying status changes and the Last modified time is present.
- Switch to Origins tab and scroll below and click on the Create origin group button.
- Select the Public IPv4 DNS of EC2 Instance and click on the Add button.
- Similarly, select the S3 Bucket endpoint and click on the Add button.
- Once both the Origins are added, give a name as Whiz-Origin-Group in the next field.
- For the failover criteria, Select 404 Not found error code present.
- Once done, click on the Create origin group button.
- Origin group is now created.
- Go back to the General tab, you will see these changes are getting deployed.
- Wait for 5-10 minutes until you see the Deploying status changes and the Last modified time is present.
- Now Switch to the Behaviors tab.
- Select the present behavior and click on the Edit button.
- On the Edit behavior page, for the Origin and origin groups option, select the present Origin Group i.e. Whiz-Origin-Group from the dropdown.
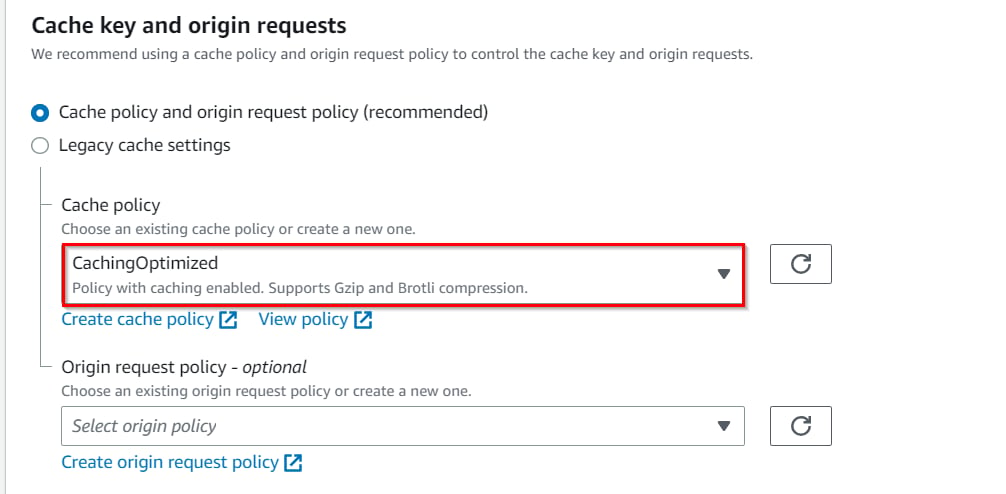
- In Cache key and origin requests, select CachingOptimized
- Scroll to the end of the page and click on the Save changes button.
- The default cache behavior is now updated to the Origin group.
-
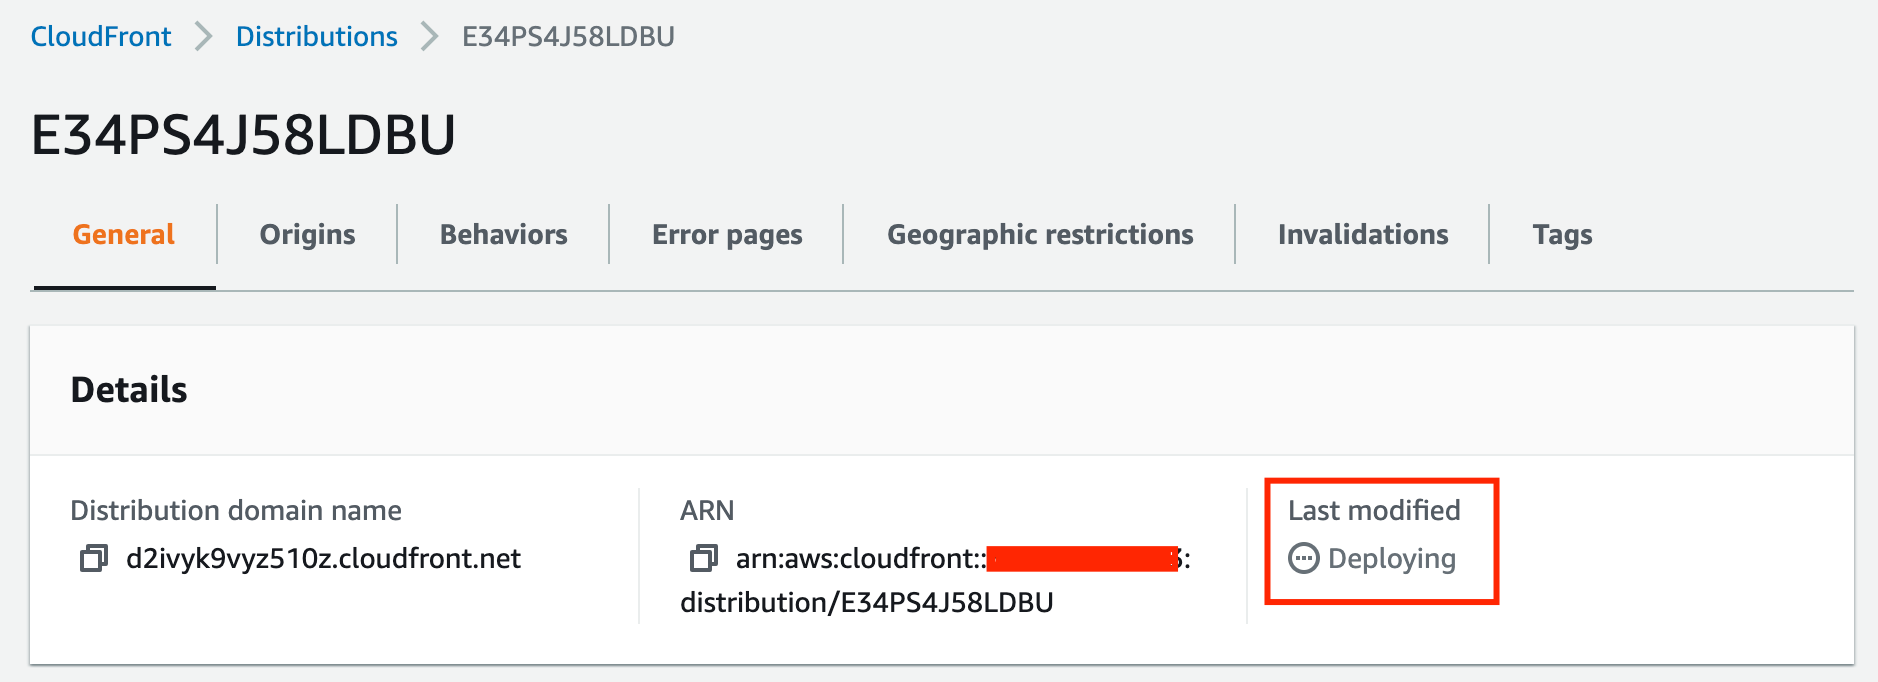
Go back to the General tab, you will see these changes are getting deployed.
-
Wait for 5-10 minutes until you see the Deploying status changes and the Last modified time is present.
- Now you can test the origin group.
Task 8: Test the Origin group
In this task, we are going to test the functionality of the origin group. By accessing the CloudFront distribution URL, users can verify that the content from both the S3 bucket and the EC2 instance is being served correctly.- Copy the Distribution domain name and paste it into the new tab of your browser.
-
This should now display the index.html page from EC2 Instance as it has the Private IP DNS name.

-
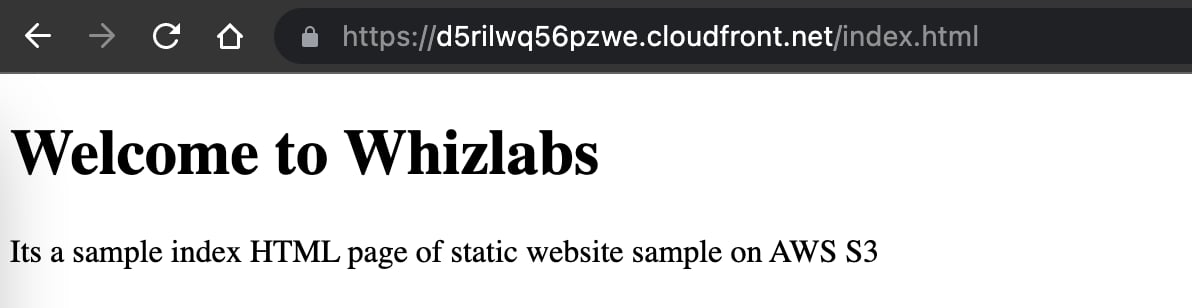
Now add /index.html into the URL. This displays the contents of the index.html file present in the S3 Bucket.
-
Now update the URL by changing /index.html to /index2.html

Do You Know?
Amazon CloudFront has a massive global presence, with edge locations located in over 200 cities across more than 90 countries. This extensive network allows CloudFront to deliver content with low latency and high data transfer speeds to users around the world, ensuring a fast and responsive experience for accessing websites, streaming videos, downloading files, and more.
- Once the lab steps are completed, please click on the Validation button on the left side panel.
Completion and Conclusion
- You have successfully created an S3 Bucket, uploaded index.html, and made the bucket publicly accessible using bucket policy.
- You have successfully created an Amazon CloudFront distribution and published the S3 bucket’s index.html file through CloudFront.
- You have successfully launched the EC2 Instance and tested the Public IPv4 DNS of the instance.
- You have successfully created the origin and origin groups in CloudFront.
- You have successfully tested the failover using the distribution domain name.
End Lab
- Sign out of AWS Account.
- You have successfully completed the lab.
- Once you completed the task, click on End Lab from the IP Lab Portal dashboard.
What gets checked
When you press Check my work, the platform verifies each of these:- Launch an EC2 Instance — Check whether an EC2 Instance is launched or not.
- Validate EC2 Instance Type t2.micro — Check whether the EC2 instance type is t2.micro.
- Launch EC2 AMI type Amazon Linux — Check whether the EC2 instance is launched using an Amazon AMI.
- Create Public AWS S3 Bucket — Check whether a Public S3 Bucket created or not
- Create an AWS S3 Bucket with Policy — Check whether S3 bucket is created and bucket policy added or not
- check s3 object — Check whether an object is uploaded to the S3 bucket.
- Create CloudFront Distribution — Check whether a CloudFront Distribution is created and status as Deployed or not.
- Invoke CloudFront Distribution Domain — Check whether the CloudFront Distribution domain is accessible from the internet or not.