

Overview
Lab Details
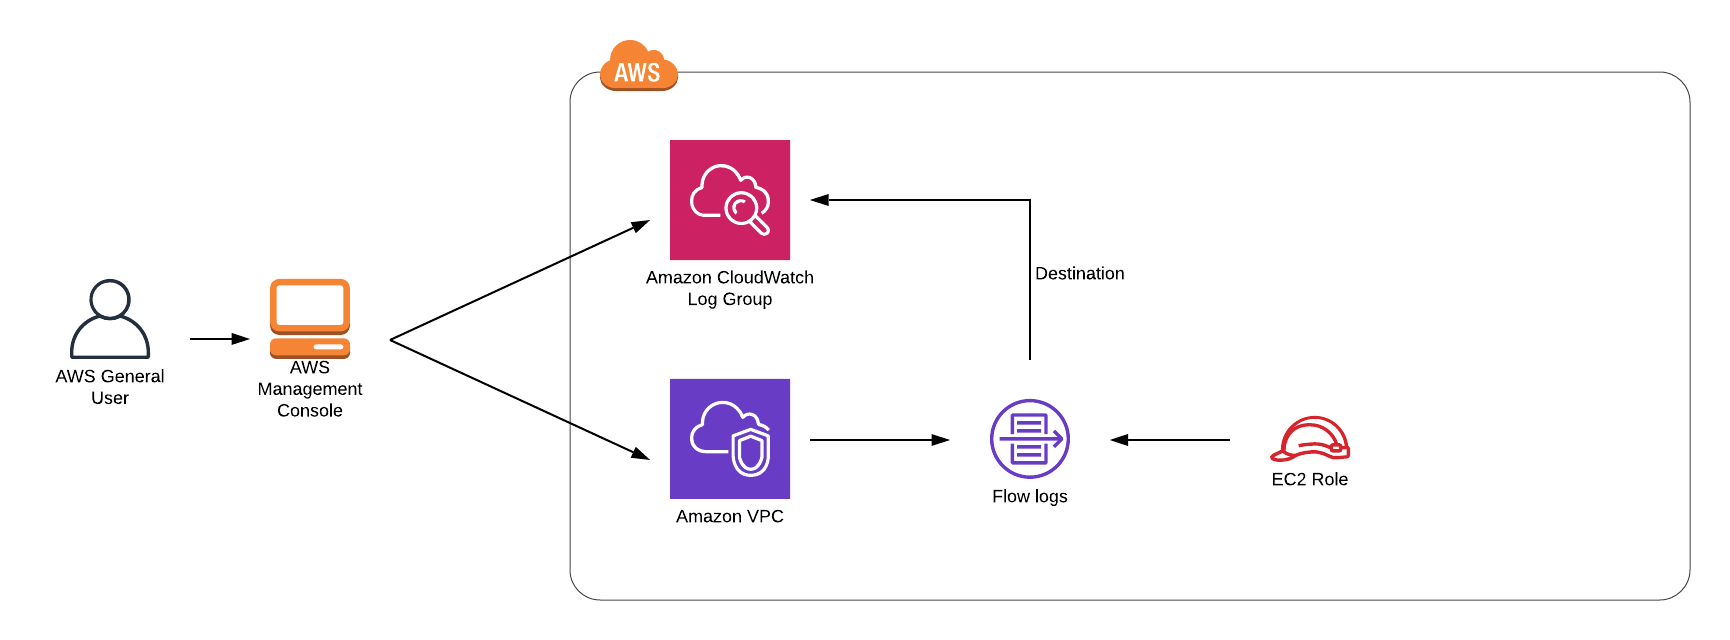
- This lab walks you through the steps to creating VPC Flow Logs. VPC Flow Logs allow you to capture information about the IP traffic going to and from your VPC, including details such as source and destination IP addresses, ports, protocols, and packet counts.
- You will practice using VPC flow logs with AWS VPCs.
- Duration: 45 minutes.
- AWS Region: US East (N. Virginia) us-east-1
Introduction
Amazon Virtual Private Cloud
- Amazon Virtual Private Cloud (Amazon VPC) lets you provision a logically isolated section of the AWS Cloud where you can launch AWS resources in a virtual network that you define. You have complete control over your virtual networking environment, including a selection of your own IP address range, creation of subnets, and configuration of route tables and network gateways.
- You can use both IPv4 and IPv6 in your VPC for secure and easy access to resources and applications.
- You can easily customize the network configuration of your Amazon VPC. For example, you can create a public-facing subnet for your web servers that have access to the internet.
- You can also place your backend systems, such as databases or application servers, in a private-facing subnet with no internet access. You can use multiple layers of security, including security groups and network access control lists, to help control access to Amazon EC2 instances in each subnet.
Architecture Diagram
Task Details
- Sign in to the AWS Management Console.
- Create CloudWatch Logs.
- Create a VPC.
- Create VPC Flow Logs
Launching Lab Environment
- To launch the lab environment, Click on the Start Lab button.
- Please wait until the cloud environment is provisioned. It will take less than a minute to provision.
- Once the Lab is started, you will be provided with IAM user name, Password, Access Key, and Secret Access Key.
Note : You can only start one lab at any given time
Lab guide
Lab Steps
Task 1: Sign in to AWS Management Console
- Click on the Open Console button, and you will get redirected to AWS Console in a new browser tab.
- On the AWS sign-in page,
- Leave the Account ID as default. Never edit/remove the 12 digit Account ID present in the AWS Console. otherwise, you cannot proceed with the lab.
- Now copy your User Name and Password in the Lab Console to the IAM Username and Password in AWS Console and click on the Sign in button
Task 2: Create a CloudWatch Log
In this task, you will create a CloudWatch Log Group called “whizvpclogs” using the CloudWatch service. Follow the steps below:- Navigate to the Services menu at the top and choose CloudWatch under Management and Governance.
-
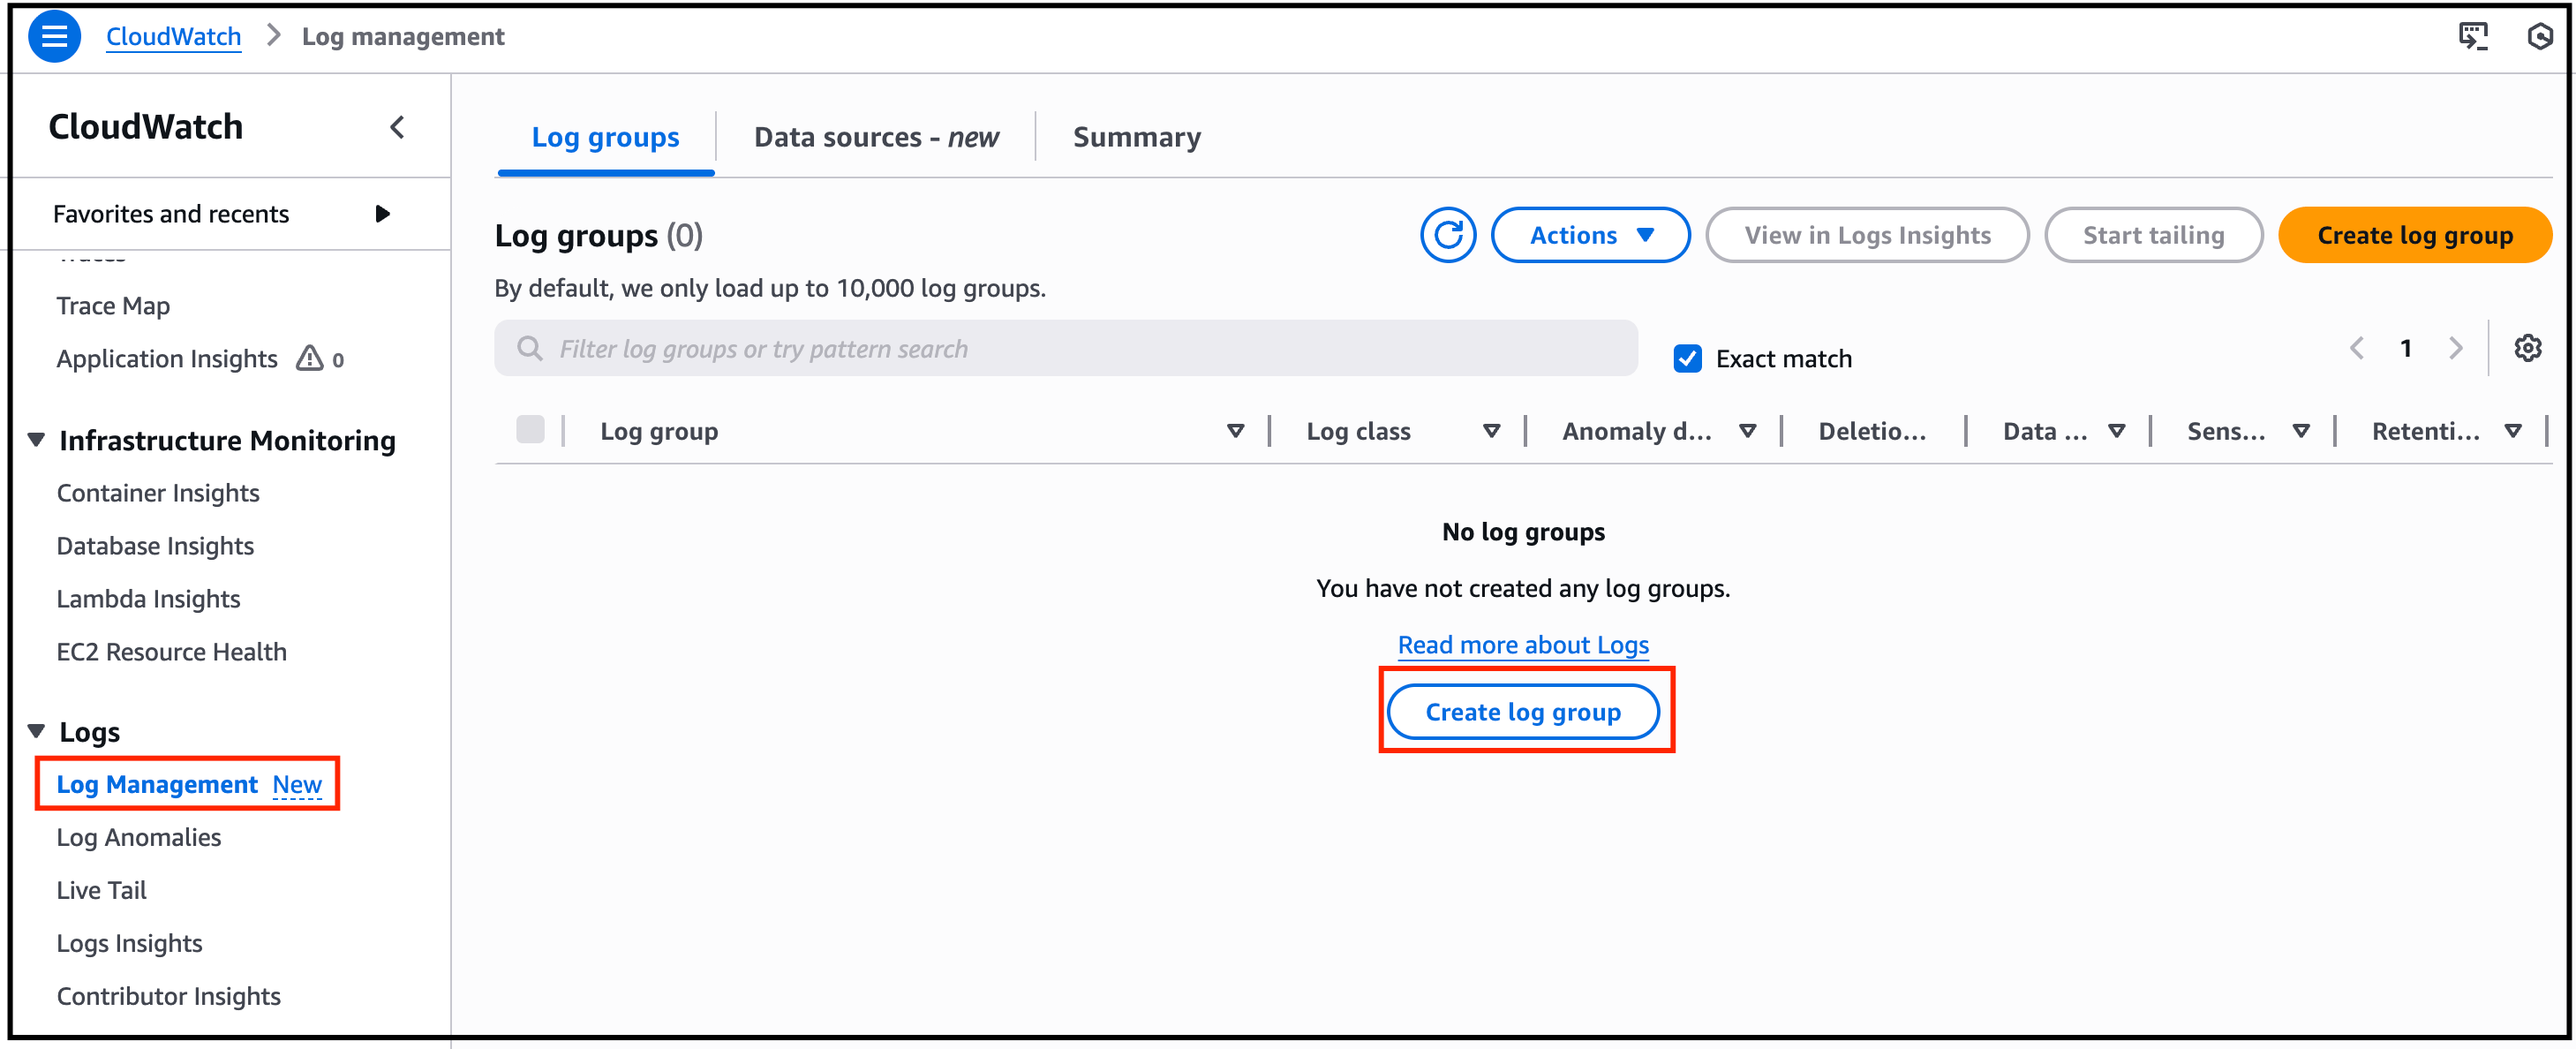
Click on Log Management under Logs in the left-side panel, click on Create Log Group.
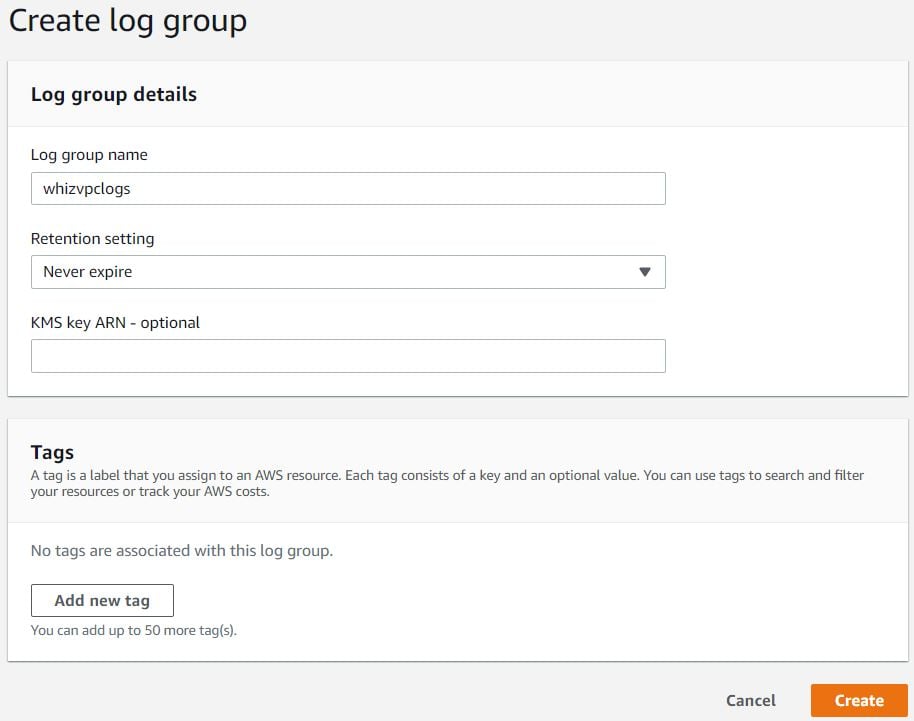
- Enter the Log Group Name : whizvpclogs and click on Create button. Note: You can ignore the error related to fetching CloudWatch metrices

Task 3: Create a VPC
- Navigate to the Services menu on the top and choose VPC under Networking and Content Delivery.
- Click on Your VPC’s in the left side panel then click on Create VPC.
- Select VPC only.
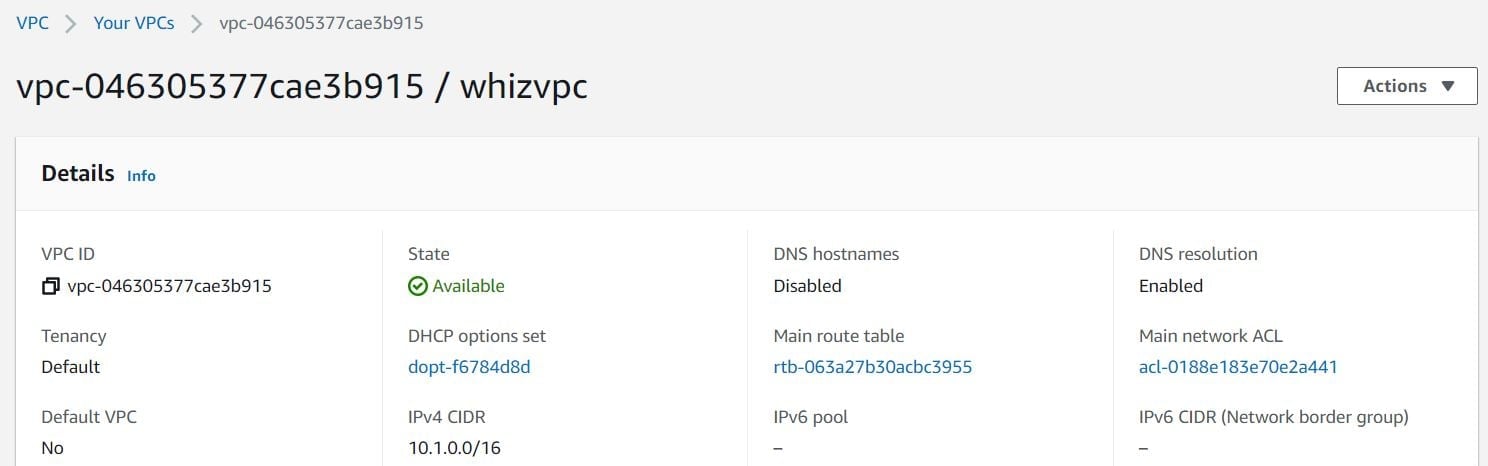
- Enter the Name tag: whizvpc and enter IPv4 CIDR block: 10.1.0.0/16. Leave other options as default and click on Create button.
Task 4: Create VPC Flow Logs
In this task, you will create VPC Flow Logs for your VPC using the AWS Management Console. Follow the steps below:- Inside whizvpc, scroll down and click on Flow logs tab and click on Create Flow Log button**.**
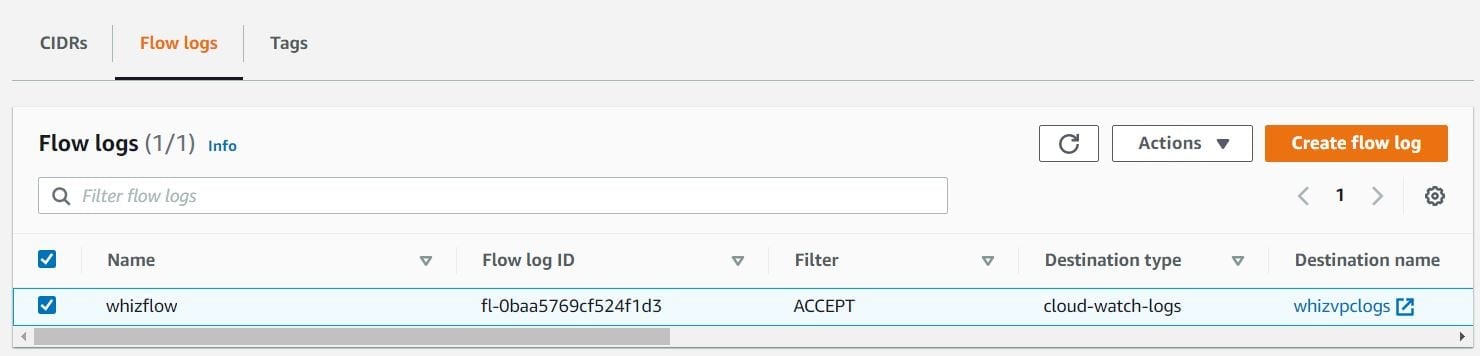
- Under Flow log settings: Name: whizflow
- Select “Filter” as Accept and select “Destination” as Send to CloudWatch Logs. Choose the above created CloudWatch Logs “whizvpclogs”.
- Under Service access, choose Use an existing service role and select the IAM role “EC2VPCNetworkingProvisionerUSE1Role-xxxx” under Service role and leave the others as default. Click on Create flow log.
- Once the flow logs are created, scroll down click on Flow Logs.
-
Now you have successfully learned how to create VPC Flow Logs.
Do You Know?
AWS VPC Flow Logs can be used not only for network monitoring and security analysis but also for troubleshooting and performance analysis of your Amazon Virtual Private Cloud (VPC) environment. - Once the lab steps are completed, please click on the Validate button on the left side panel.
Completion and Conclusion
- You have successfully created the CloudWatch Logs.
- You have successfully created the VPC.
- You have successfully created the VPC Flow Logs.
End Lab
- Sign out of AWS Account.
- You have successfully completed the lab.
- Once you have completed the steps click on End Lab from the IP Lab Portal dashboard.
What gets checked
When you press Check my work, the platform verifies each of these:- Check Log Group — Check whether a CloudWatch log group exists.
- Create Amazon Custom VPC — Check whether a Custom VPC is created or not.
- Create VPC Flow Logs — Check whether VPC Flow Logs are created for the Custom VPC or not.