

Overview
Lab Details
- This lab guides you through the process of deploying a sample website on an EC2 Linux instance, utilizing the Apache web server, and capturing real-time website logs. These logs are then streamed to AWS S3 for storage and analysis using a combination of Kinesis Data Streams, Kinesis Agent, Kinesis Firehose, and S3.
- By following this lab, you will have the opportunity to practice working with these AWS services and create a comprehensive data pipeline for processing website logs.
- Duration : 1 hour 30 minutes
- AWS Region : US East (N. Virginia) us-east-1
Introduction
Amazon Kinesis Data Streams
- Data streaming technology enables a customer to ingest, process and analyze high volumes of data from a variety of sources.
- Kinesis data streams is one such scalable and durable real-time data streaming service.
- A Kinesis data stream is an ordered sequence of data records meant to be written to and read from in real time.
- The pricing of the data streams is on a per-shard basis.
Components
- Data record - The unit of data stored by Kinesis Data Stream.
- Data stream - represents a group of data records. The data records in a data stream are distributed into shards.
- Retention period - Length of time Data records are accessible from streams. A Kinesis data stream stores records from 24 hours by default, up to 365 days.
- Kinesis Client Library - Ensures that for every shard there is a record processor running and processing the shard.
- A producer puts data records into shards..
- A consumer gets data records from shards
-
Shard - It has a sequence of data records in a stream.
- There can be more than one shards. The number of shards required is mentioned while creating the data stream.
- Total capacity of stream is the sum of capacities of its shards.
- Ingest rate per shard - 1 MB or 1,000 messages per second.
- Data read rate per shard - 2 MB per second.
- Partition Key - Used to group data by shard within a stream.
- The stream records can be directly sent to services like S3, Redshift, ElasticSearch, etc. instead of creating consumer applications.
Amazon Kinesis Agent
- Amazon Kinesis agent is a Java software application that offers an easy way to collect and send data to Kinesis Data Firehose.
- The agent continuously monitors a set of files and sends new data to your Kinesis Data Firehose delivery stream.
Architecture Diagram
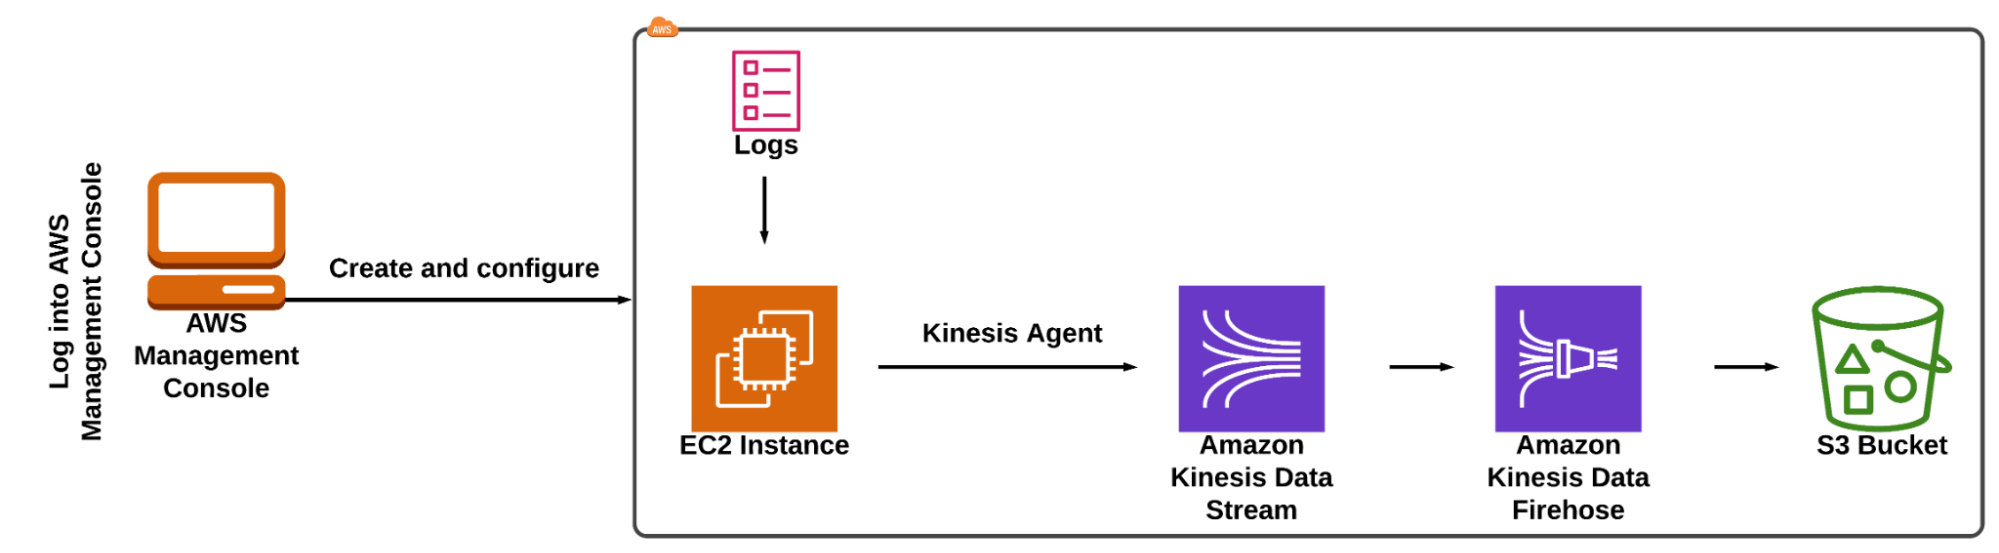
Case Study
- Suppose an application is running on the EC2 Instance and it is generating continuous logs.
- Those logs will be pushed into the Kinesis Data Streams.
- From the Kinesis Data Streams, it gets consumed through the Kinesis Firehose.
- The data from Kinesis Firehose is then saved into the S3 Bucket.
Task Details
- Sign in to AWS Management Console
- Launching an EC2 Instance
- SSH into EC2 Instance
- Host a sample website
- Set file permissions to httpd
- Creating Kinesis data stream
- Creating a S3 Bucket
- Creating Kinesis Data Firehose
- Creating and configuring Kinesis Agent
- Testing the real-time streaming of data
- Checking the CloudWatch metrics of Kinesis Data Streams and Data Firehose
- Deleting AWS Resources
Launching Lab Environment
- To launch the lab environment, Click on the Start Lab button.
- Please wait until the cloud environment is provisioned. It will take less than a minute to provision.
- Once the Lab is started, you will be provided with IAM user name, Password, Access Key, and Secret Access Key.
Note : You can only start one lab at any given time
Lab guide
Lab Steps
Task 1: Sign in to AWS Management Console
- Click on the Open Console button, and you will get redirected to AWS Console in a new browser tab and it will be Logged in Successfully.
- On the AWS Console, in the search bar search for IAM and click on it.
-
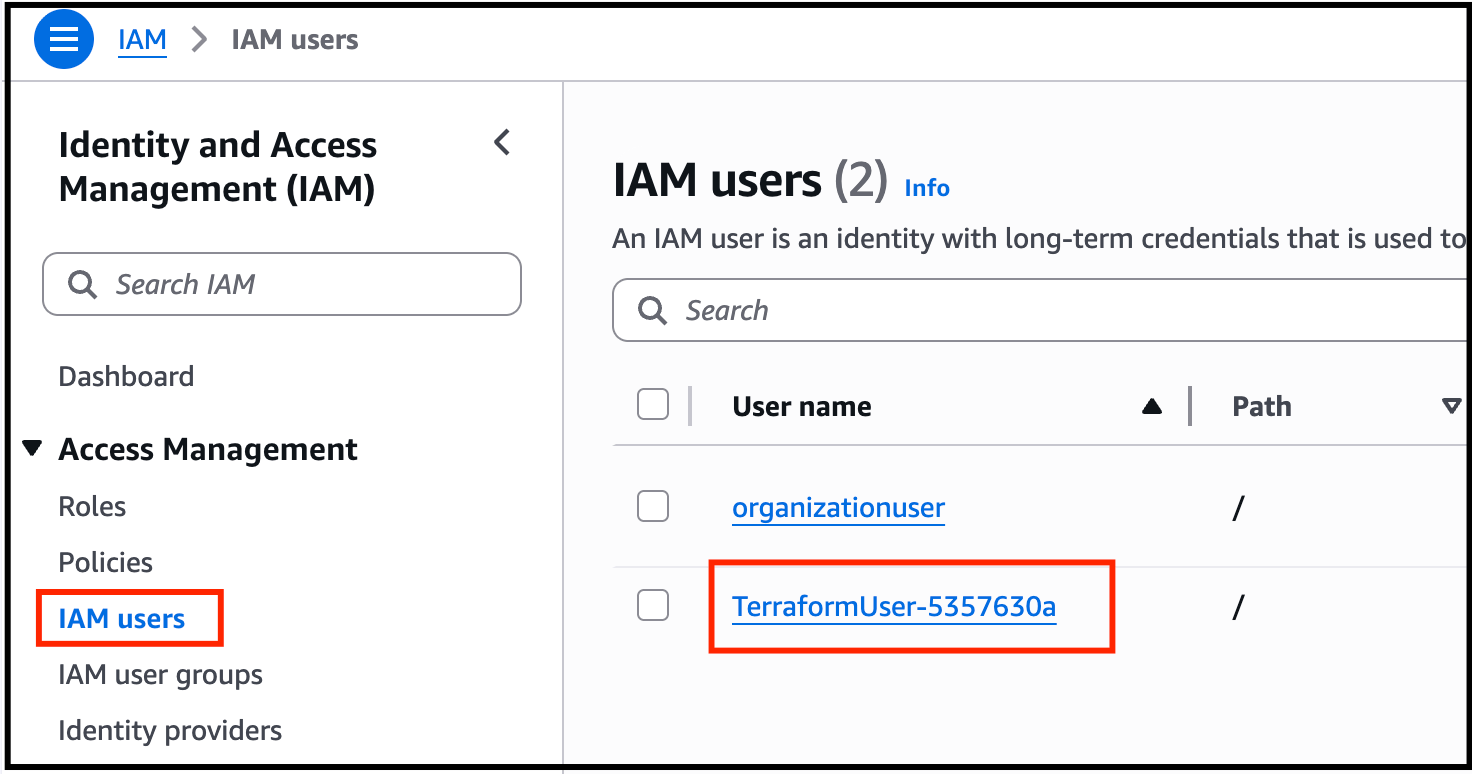
Then Click on IAM Users and select TerraformUser-XXXXX
-
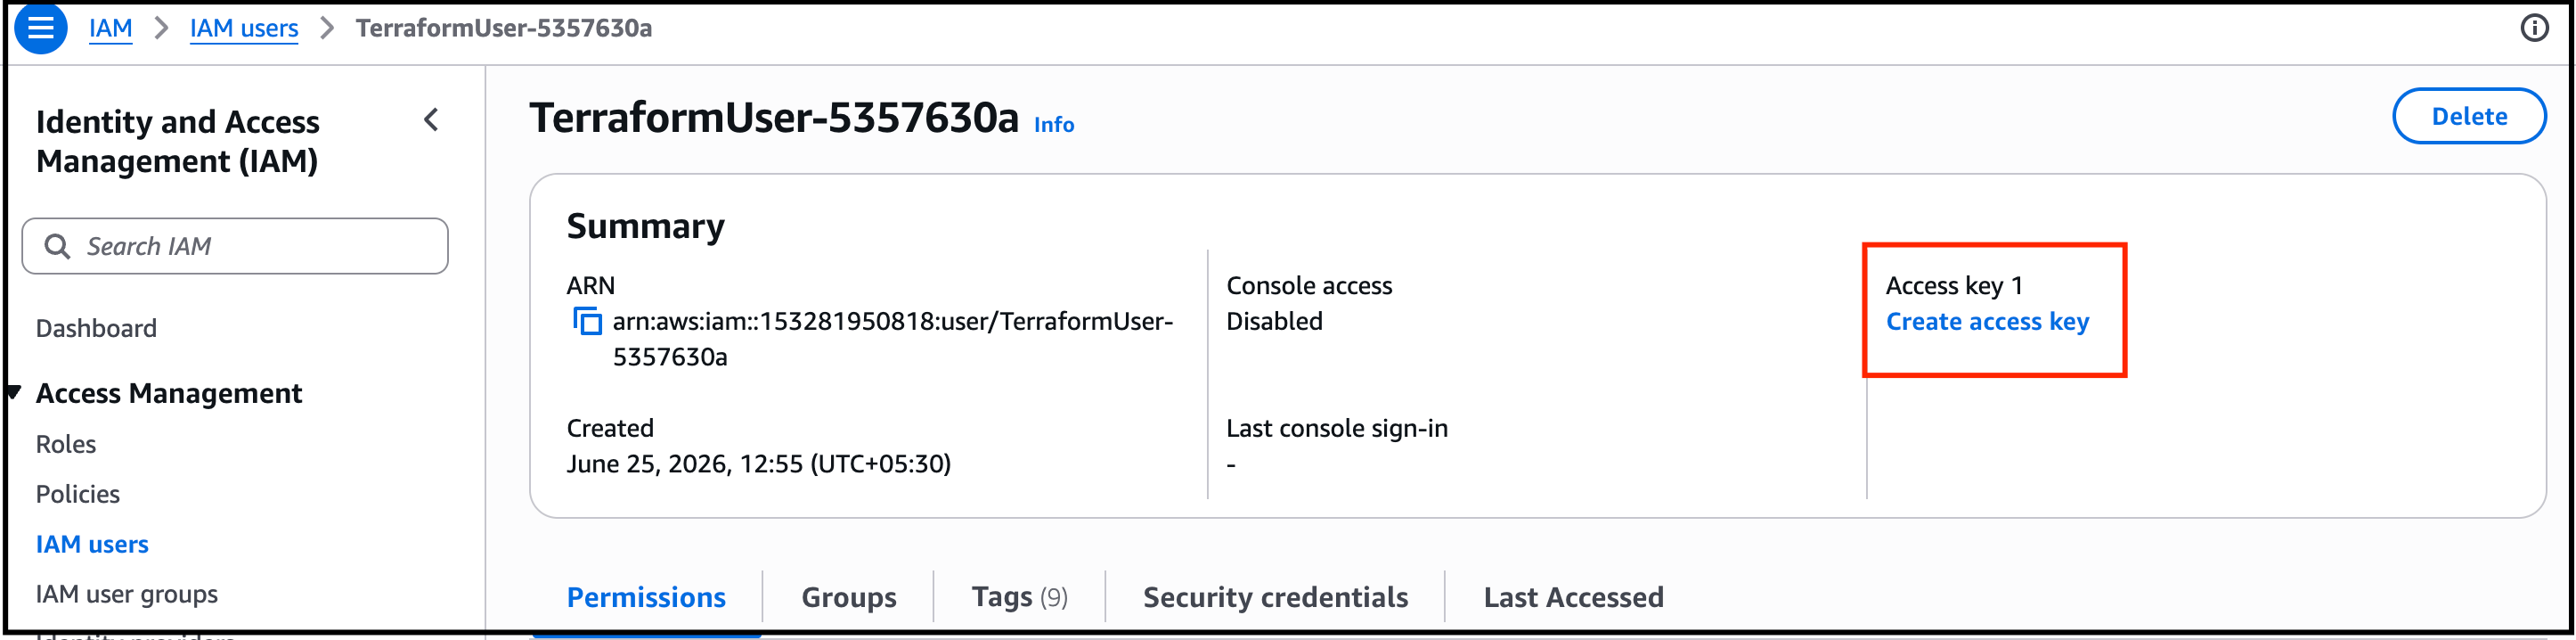
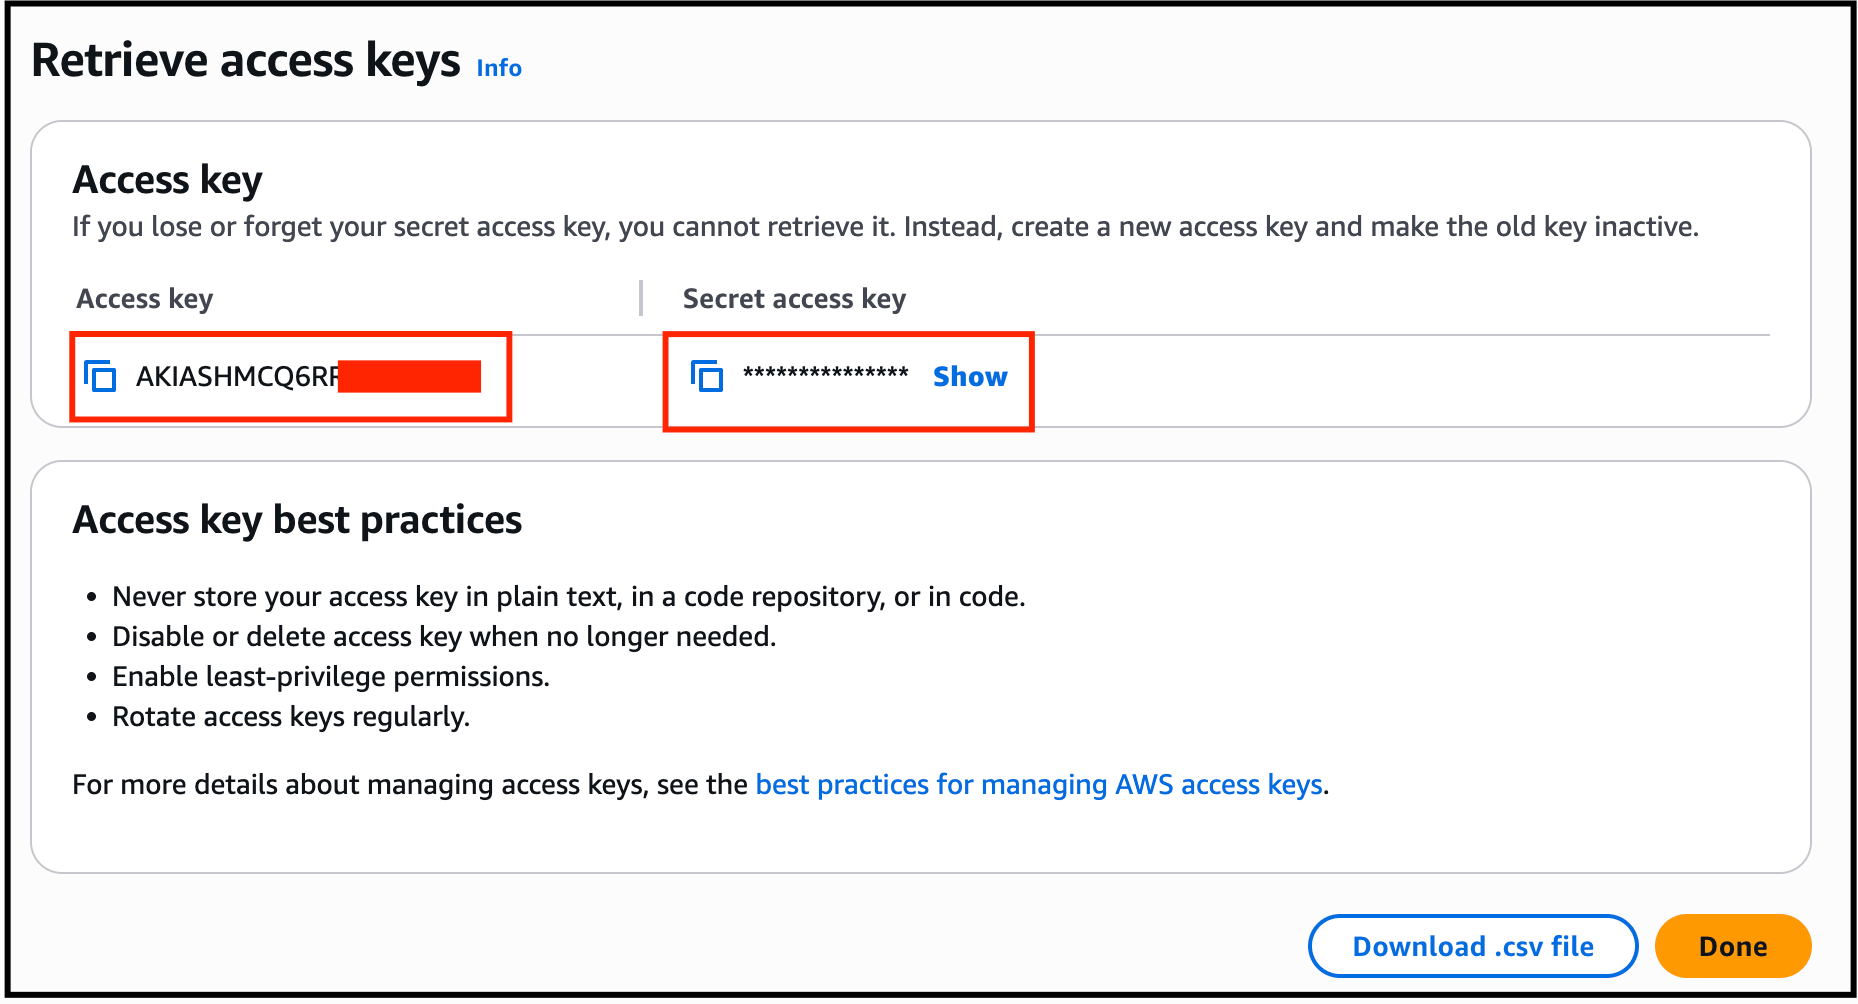
Click on Create Access Key.
-
Choose Other, Click on Next and click on Create Access Key.
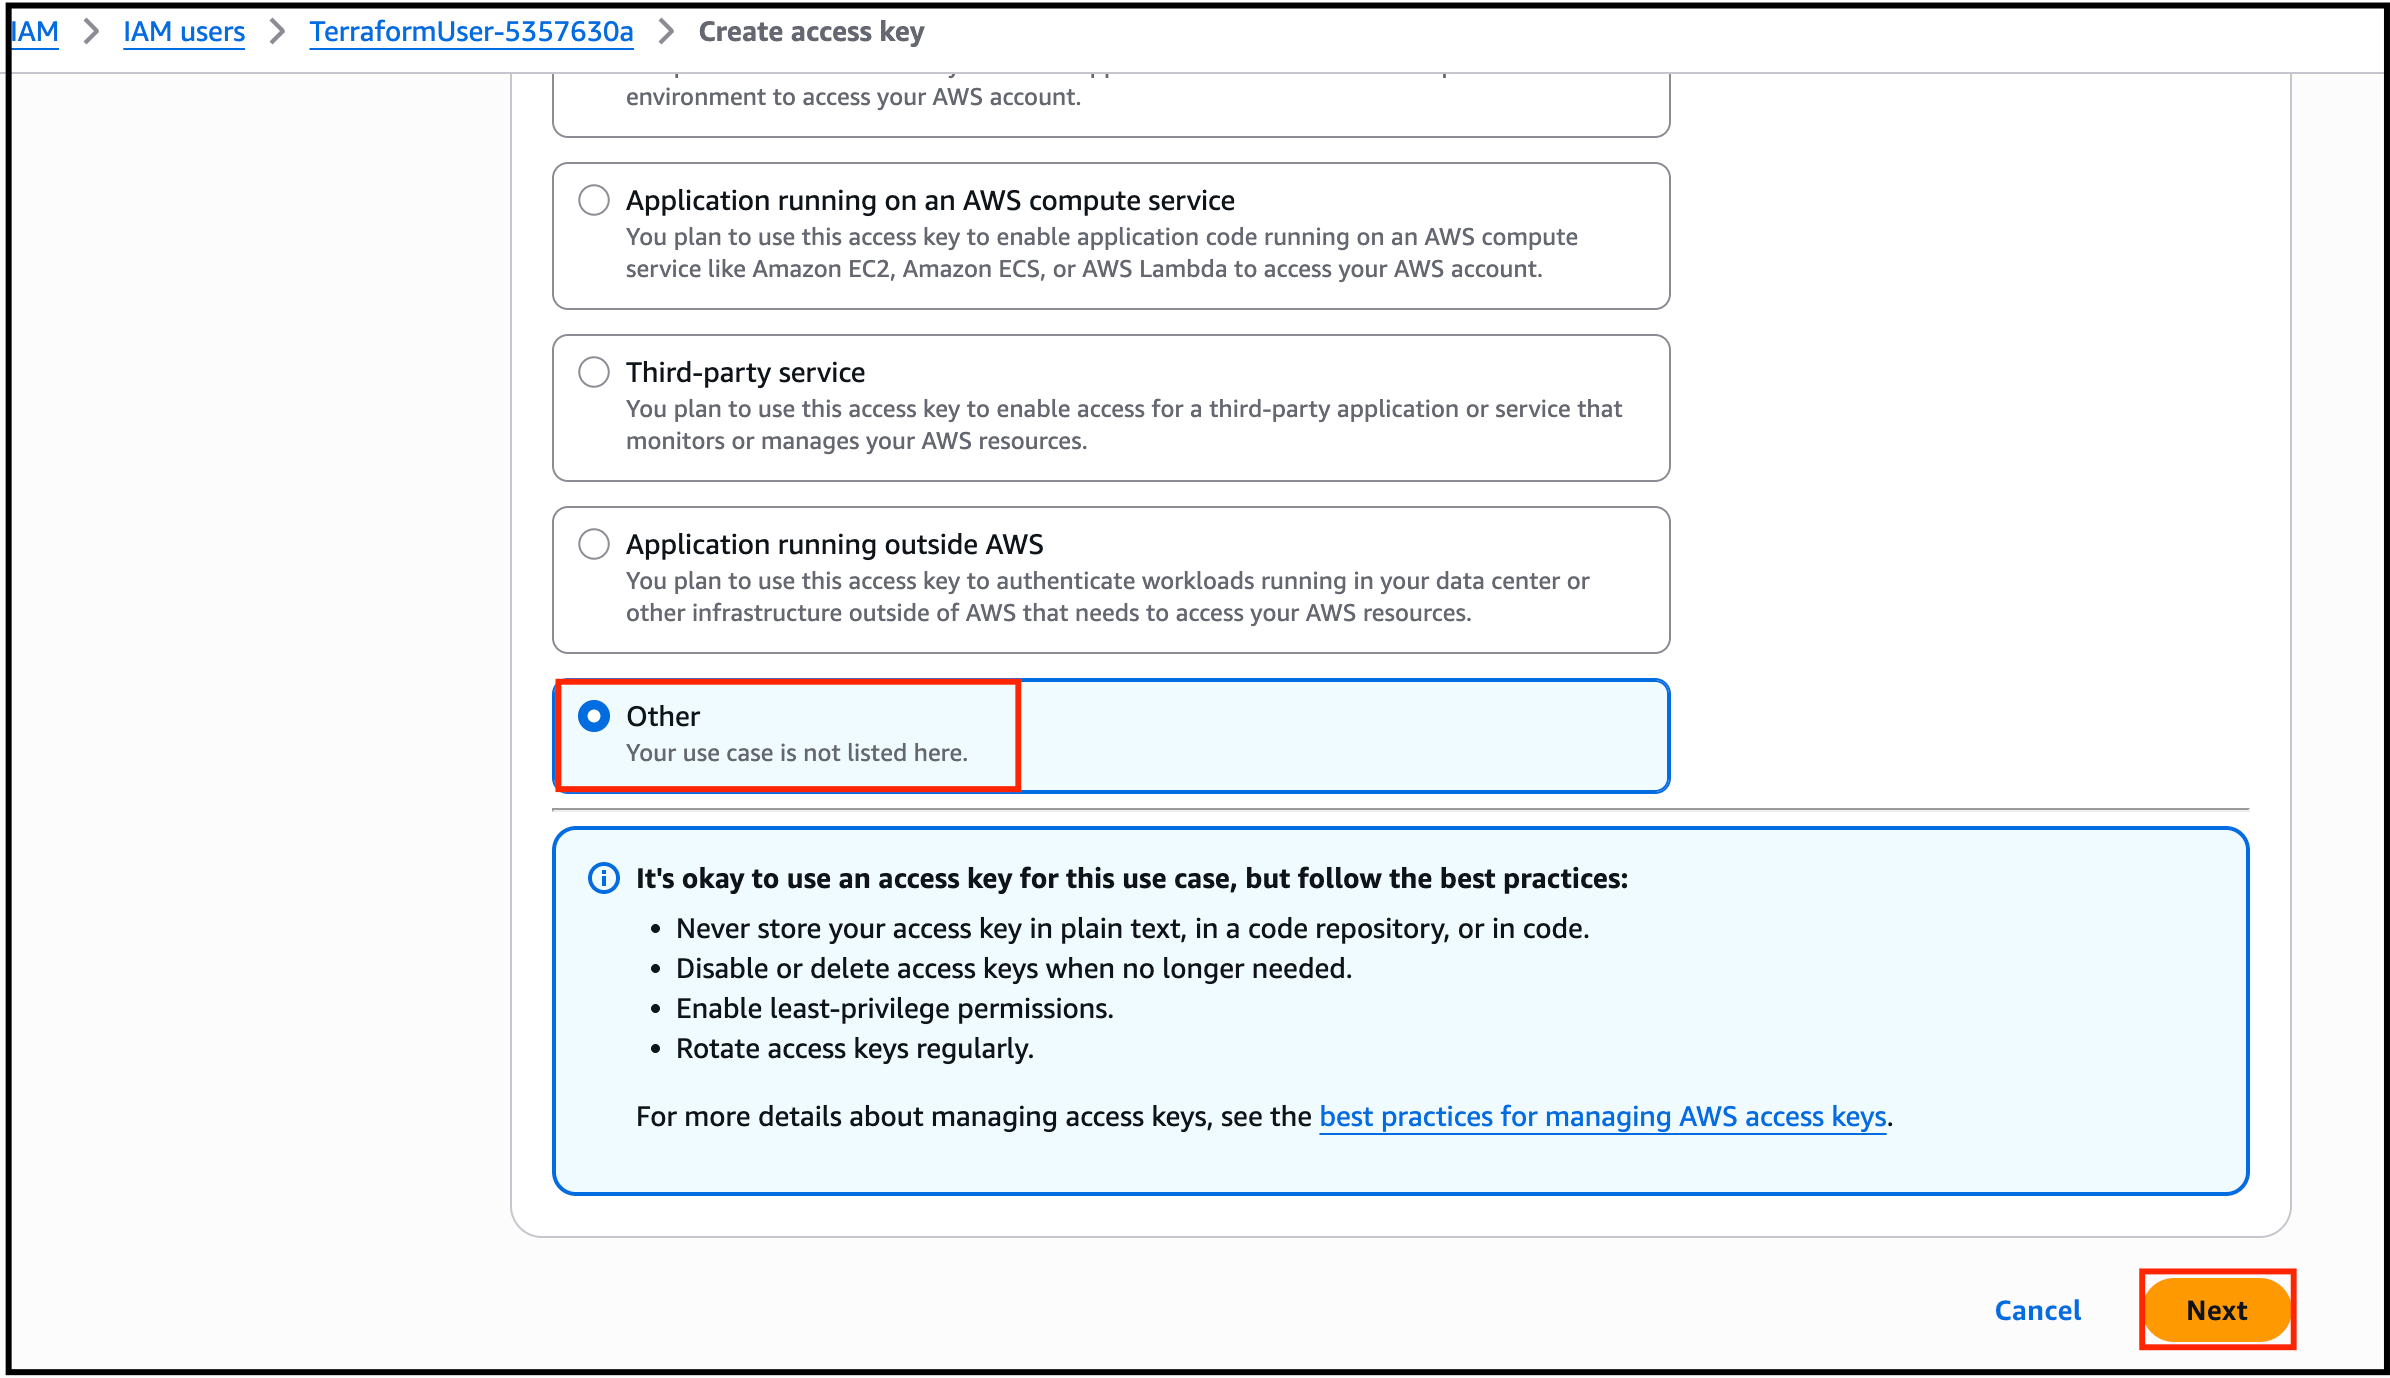
- Your Access and Secret key will get Created. Make a note of it for later use.
Task 2: Launching an EC2 Instance
- Make sure you are in US East (N. Virginia) us-east-1 Region.
- Navigate to EC2 by clicking on the Services menu at the top, then click on EC2 in the Compute section.
- Navigate to Instances on the left panel and click on Launch Instance button.
- Enter Name as Demo_Instance
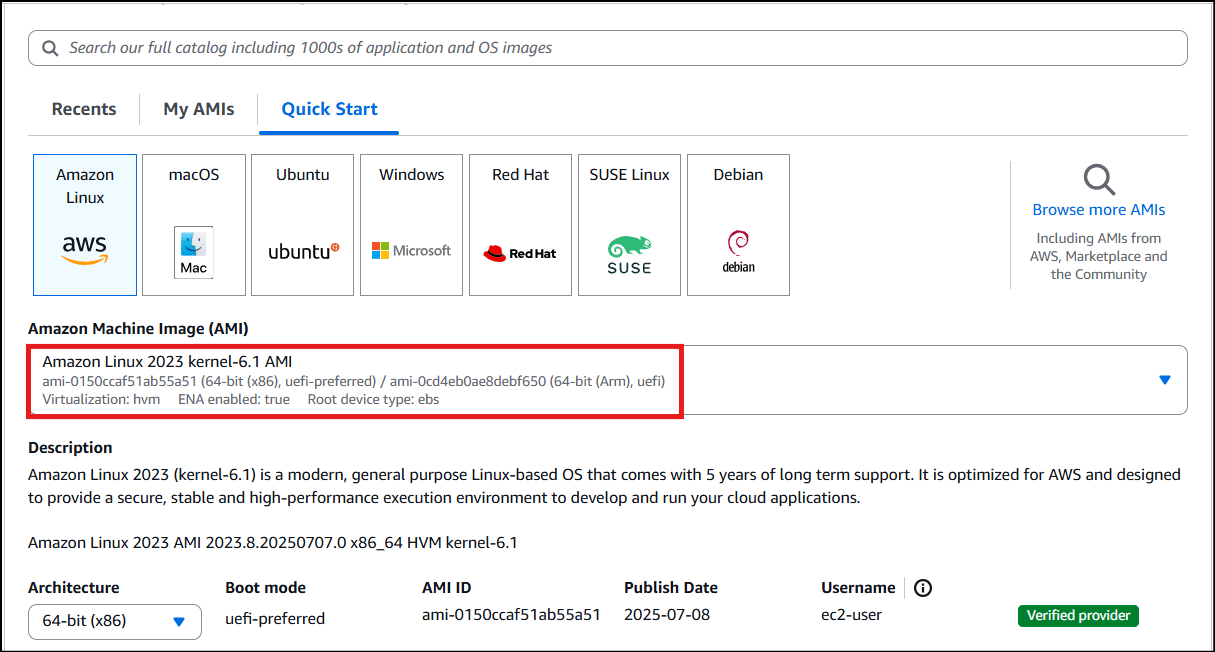
- Select Amazon Linux from the Quick Start.
-
Choose an Amazon Machine Image (AMI): Choose Amazon Linux 2023 AMI from the drop-down.
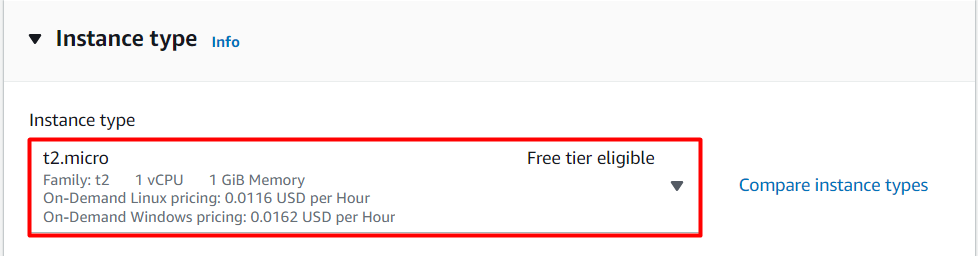
- Choose an Instance Type: Select t2.micro
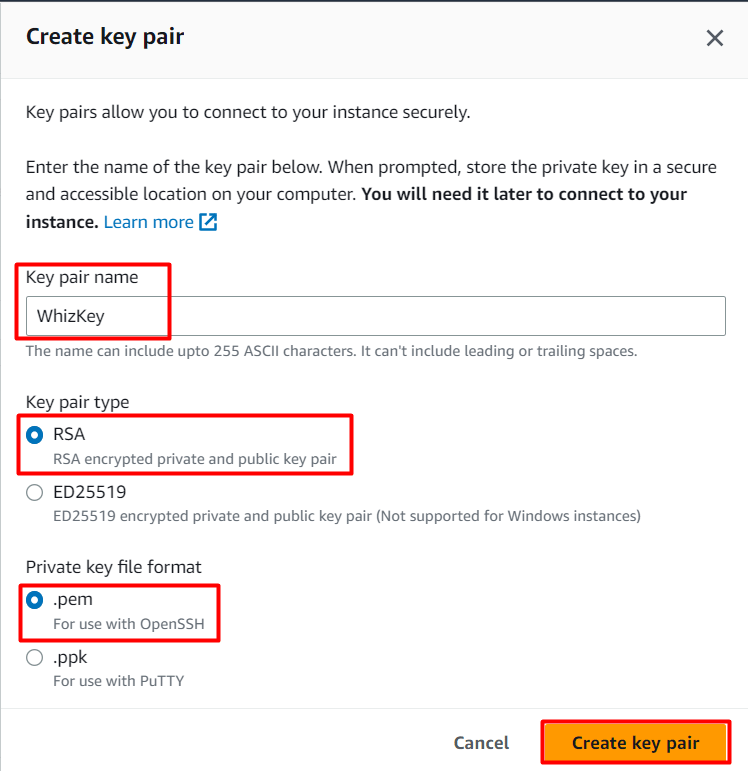
- For Key pair : Choose Create a new key pair
- Key Pair name : Enter WhizKey
- Key pair type : Choose RSA
- Private key file format: Choose .pem
- Click on Create key pair button.
-
In Network Settings Click on Edit Button:
- Auto-assign public IP: Select Enable
- Select Create new Security group
- Security group name : Enter kinesis_demo_SG
- Description : Enter Security Group to allow traffic to EC2
-
SSH rule will already be present for you. To add HTTP:
- Select Add Security rule Button
- Choose Type: HTTP
- Source: Select Anywhere
-
Under Advanced Details,
- IAM Instance profile : Select EC2_Role_<RANDOM_NUMBER>
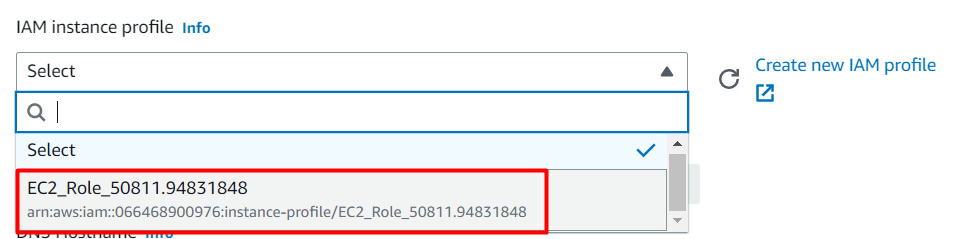
- Keep Rest thing Default and Click on Launch Instance Button.
- Select View all Instances to View Instance you Created
- Launch Status: Your instances are now launching, Navigate to Instances page from left menu and wait the status of the EC2 Instance changes to running and health check status changes to 2/2 checks passed
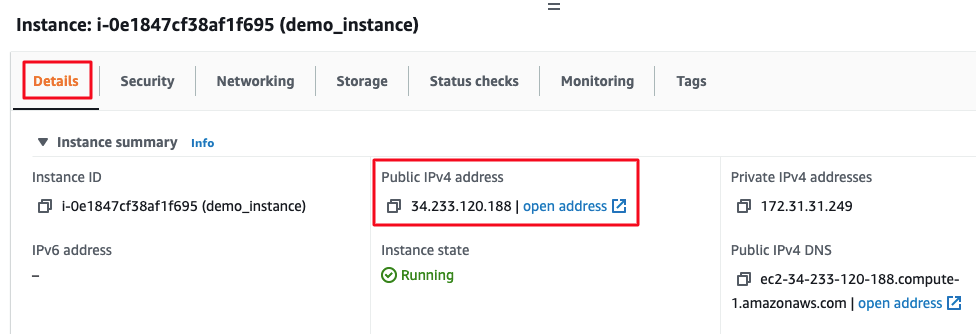
- Select the Instance and copy the Public IPv4 address from the Details section. Note down the Public IPv4 Address of your EC2 instance. A sample is shown in the screenshot below.
Task 3: SSH into EC2 Instance
- Please follow the steps in SSH into EC2 Instance.
Task 4: Host a sample website
In this task, we will host a sample website by navigating to the HTML folder present in the var directory and then we will fetch the sample site using the wget command.-
Switch to the root user :
-
Run all the updates using the yum command:
-
Install the LAMP and HTTPD server:
-
Start the HTTPD server:
-
Enable the HTTPD server:
-
Navigate to the HTML folder path.
- Download the zip file attached here and make sure it is located in your downloads. This is the working Marvel template source.
-
Open a new terminal. Then Run the following command to upload the zip file into the EC2.

-
Navigate back to your EC2 terminal. Run the following code. Then you should see the uploaded zip.

- Then run the following code.

- Unzip the downloaded html template. Use the zip file name to unzip.
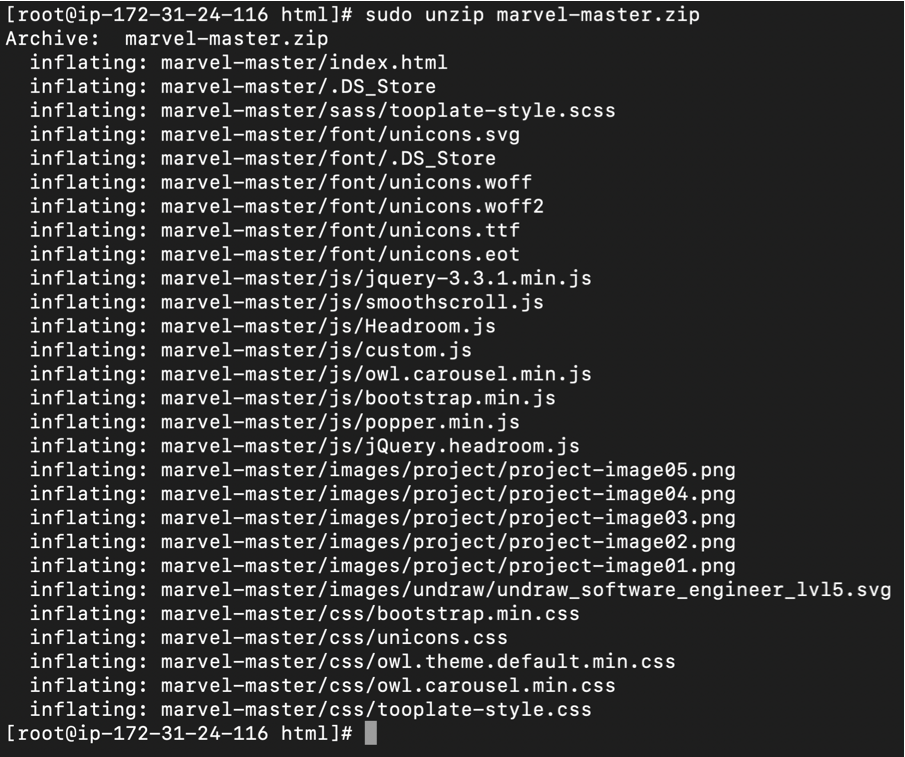
- Use the command ls to list all the files and folders present in the present working directory.

- You will be able to see a zip file and a folder. When we unzipped the marvel.zip, we got the folder, marvel-master.
- Copy the folder name to a text editor.
- To verify if the sample website is hosted, paste http://IP\_Address/folder\_name in the browser and press [Enter]
-
For example - http://34.233.120.188/marvel-master/
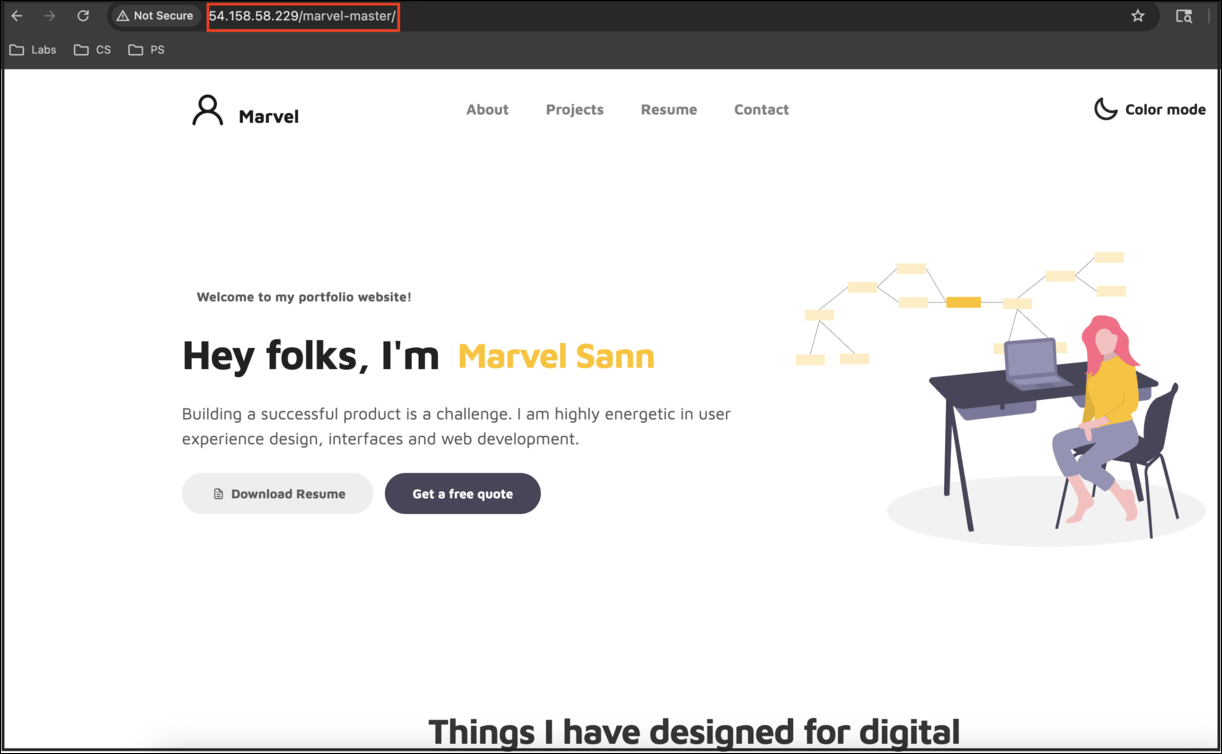
- You can see that the website is hosted successfully.
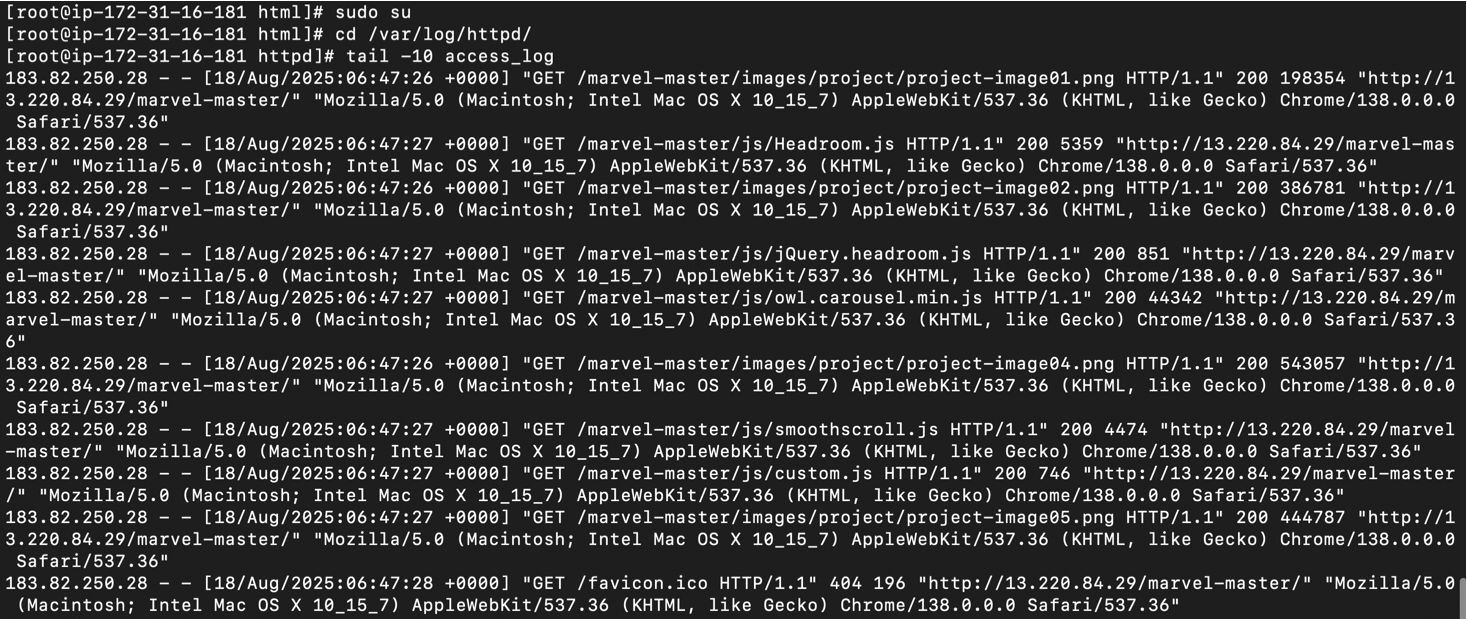
- The website logs will be in the path “/var/log/httpd/access_log”. For each click and use of the website, the related logs will be collected and stored here.
- You can check the logs using the following commands
Task 5: Set file permissions to httpd
Now let’s see how to store these continuous logs. Before proceeding, change the permission of the httpd folder, so that the file will be in readable, writable, and executable mode by ec2-user.-
Add the httpd group to your EC2 instance with the command
-
Add ec2-user user to the httpd group with the command
-
To refresh your permissions and include the new httpd group, log out completely with the command
- exit (if you are in the sudo, you have to exit twice)
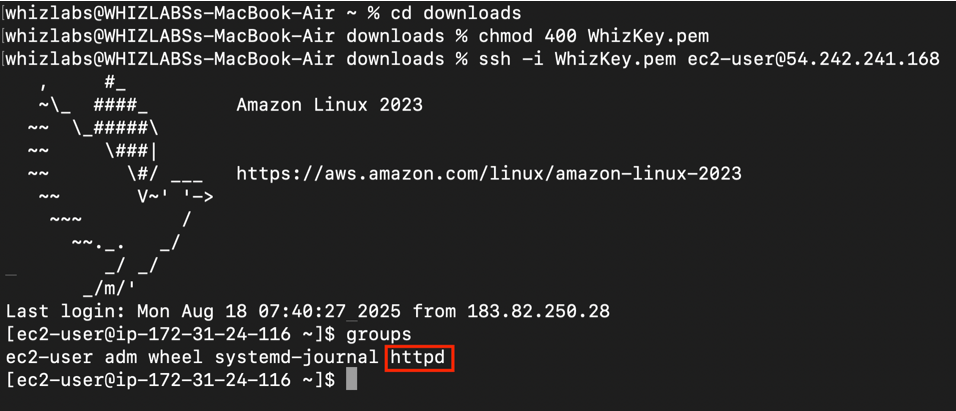
- Follow the steps to SSH into EC2 Instance. If possible do in the new terminal.
-
Verify that the httpd group exists with the groups with the command
-
Change the group ownership of the /var/log/httpd directory and its contents to the httpd group,
- Change the directory permissions of /var/log/httpd and its subdirectories to add group write permissions and set the group ID on subdirectories created in the future,
Task 6: Creating Kinesis Data Stream
Let us create a Kinesis data stream. The logs created in the EC2 sample website will be pushed to Kinesis data stream.- Make sure you are in the US East (N. Virginia) us-east-1 Region.
- Navigate to Kinesis by clicking on the Services menu, under the Analytics section.
-
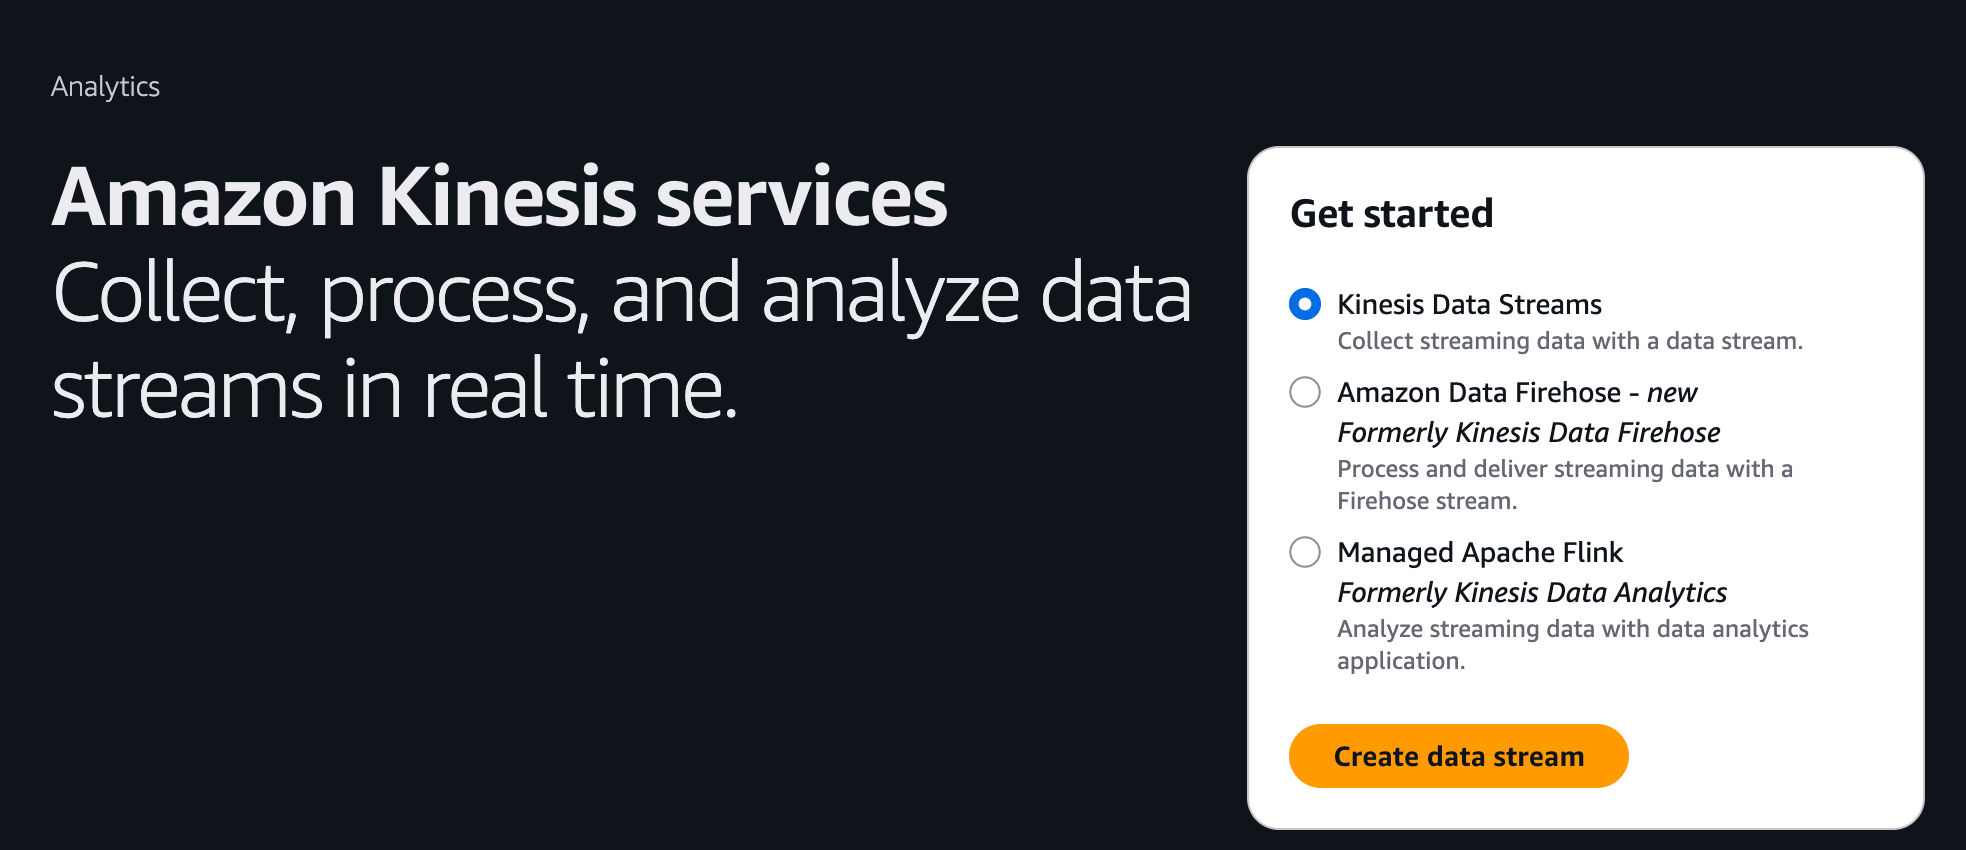
Under Get Started, select Kinesis Data Streams and click on Create data stream.
- Under Data stream name, enter the Data stream name as whiz-data-stream.
-
Leave everything as default. Click on Create data stream button.
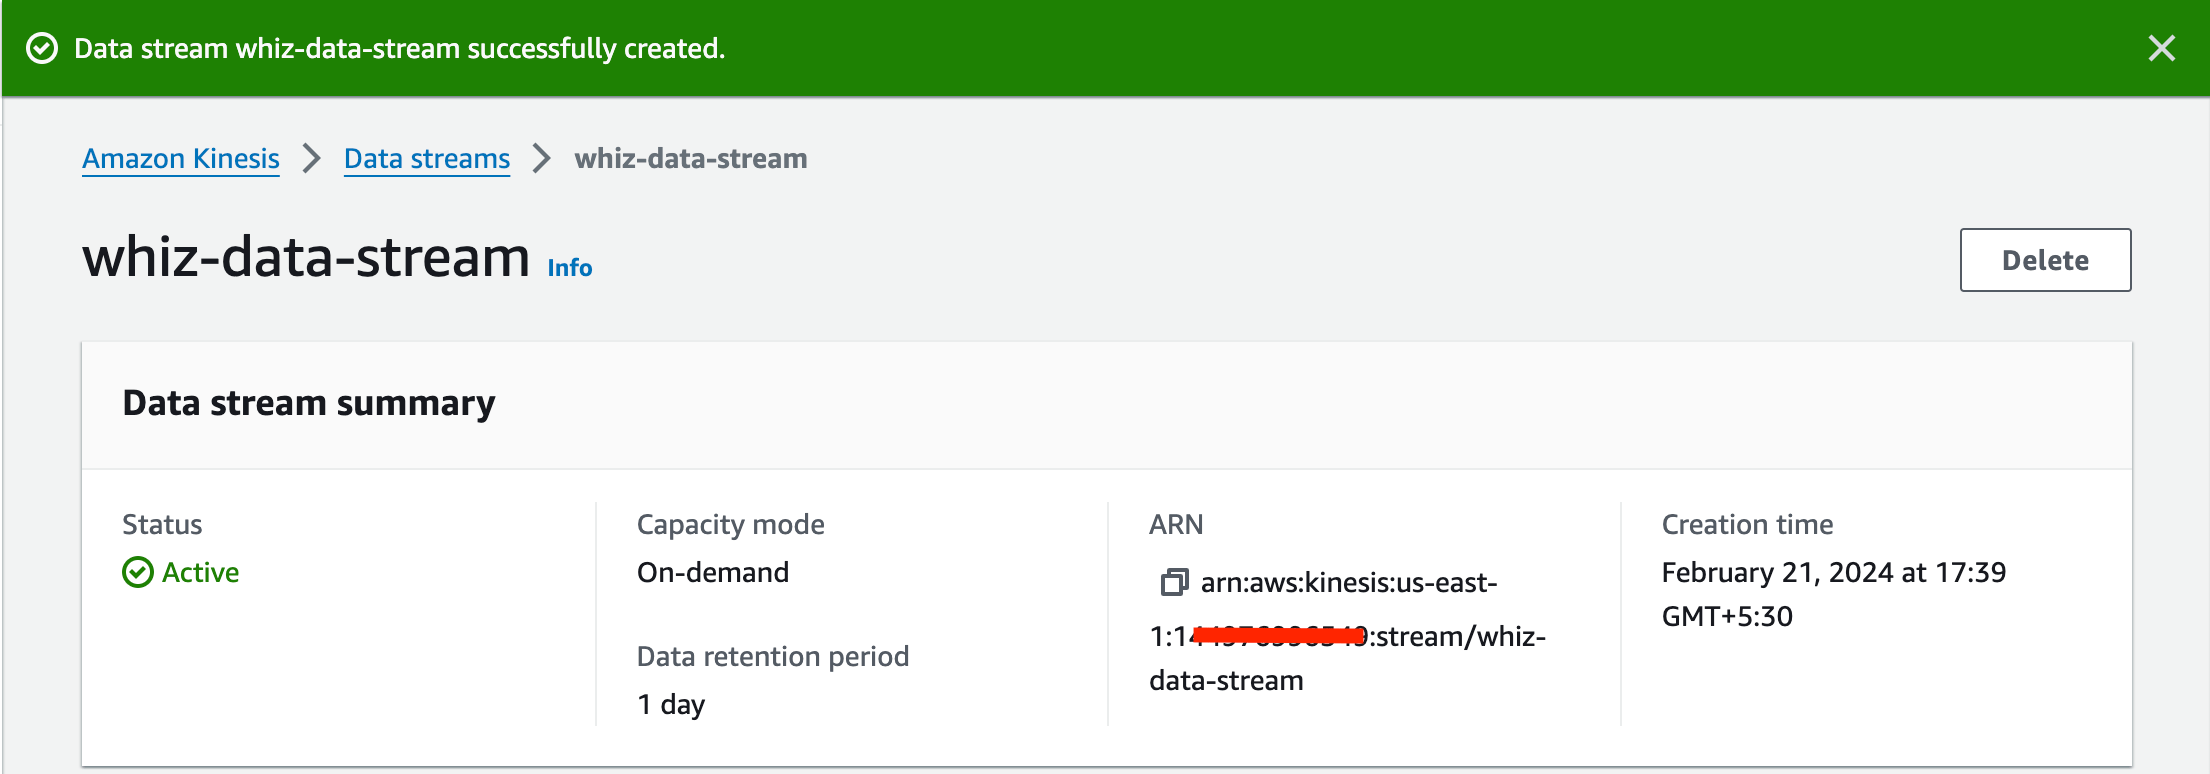
- Once the status is active, Click on the Configuration tab.
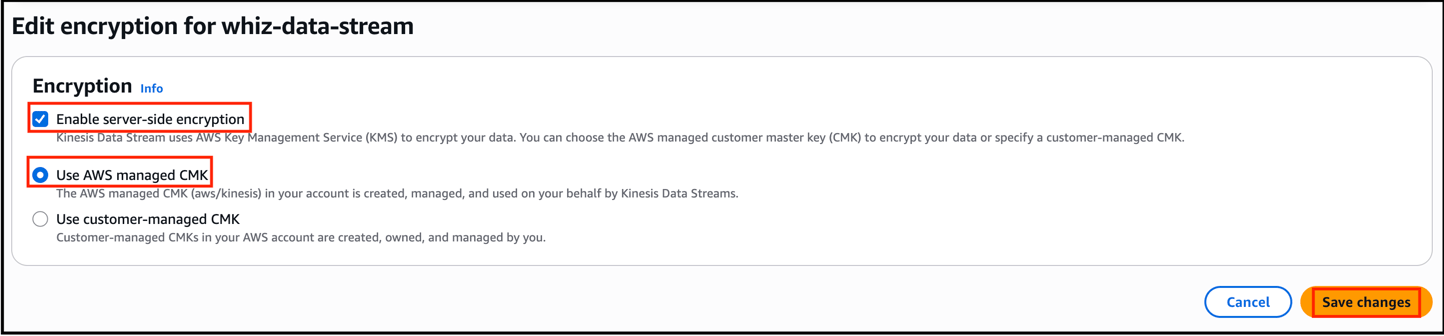
- Scroll down to Encryption and click on Edit button.
- Check Enable server-side encryption and use the default encryption key type, i.e Use AWS managed CMK.
- Click on Save changes button.
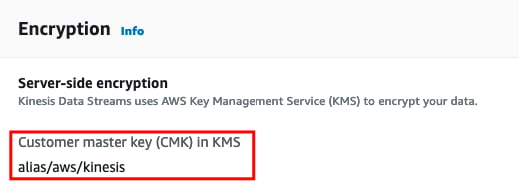
- You have used AWS KMS to encrypt your data.
Task 7: Creating a S3 Bucket
In this task, we will create an S3 bucket where we will store the data from the firehose.- Navigate to S3 by clicking on the Services menu, under the Storage section.
- Click on Create bucket button.
-
In the General Configuration,
-
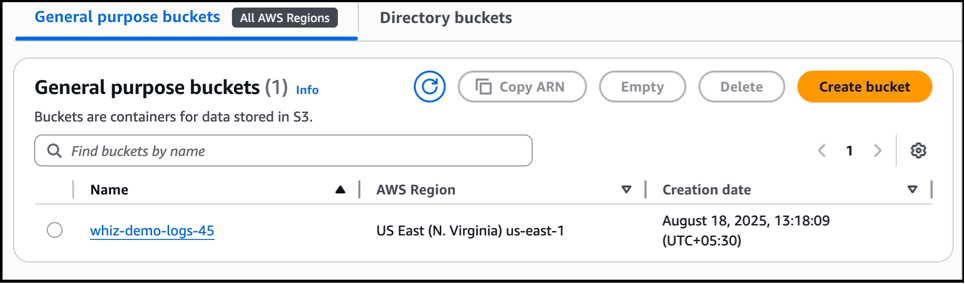
Bucket name: Enter whiz-demo-logs
Note: S3 Bucket names are globally unique, choose a name that is available.
-
Bucket name: Enter whiz-demo-logs
- Region: Select US East (N. Virginia) us-east-1 (i.e same region as the Kinesis data stream).
- In the Default encryption,
- Encryption key type: Leave the key type as Amazon S3 key (SSE-S3).
- Bucket key: Select Enable
- Click on Create bucket button.
Task 8: Creating Amazon Data Firehose - Kinesis Data Firehose
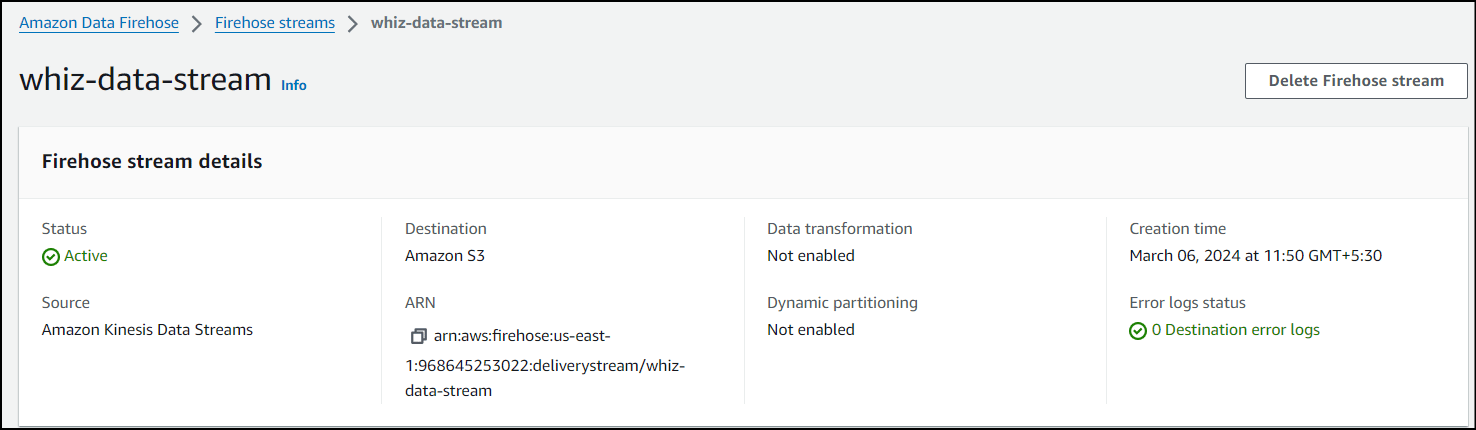
Once the streaming service gets the data from the logs, then we need to push the data somewhere. It is not possible to post the data from the Kinesis Data Streams. So we will use Kinesis Data Firehose.- Make sure you are in the US East (N. Virginia) us-east-1 Region.
- Navigate to Kinesis by clicking on the Services menu, under the Analytics section.
-
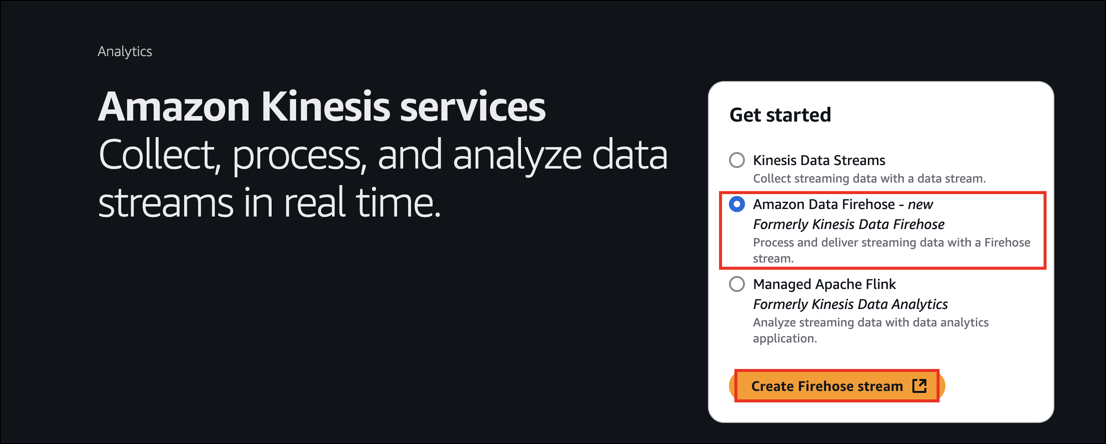
Under Get Started, select Amazon Data Firehose and click on Create Firehose stream.
-
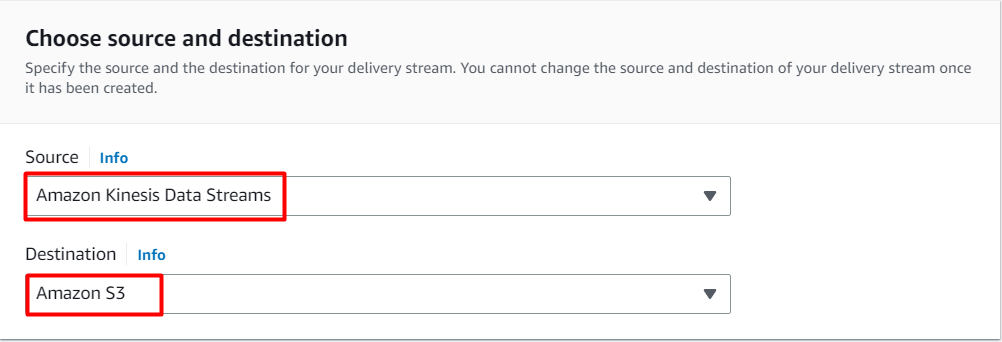
Under Choose Source and Destination,
- Source: Choose Amazon Kinesis Data Streams.
- Destination: Choose Amazon S3
- Under the Source settings,
- Click on Browse button.
-
From the pop-up, select the Data Stream we have created earlier.
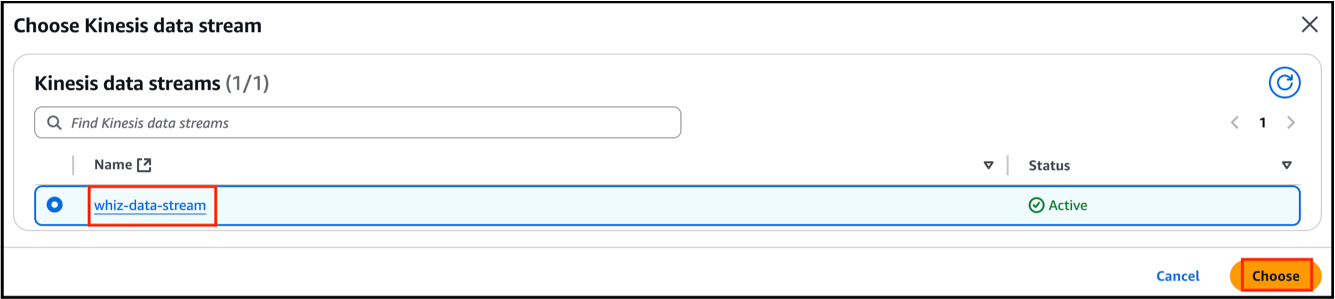
- Click on Choose button.
- Leave the Transform and convert records as default.
- Under the Destination settings,
- Click on Browse button.
-
From the pop-up, select the S3 Bucket we have created earlier, in my case, whiz-demo-logs
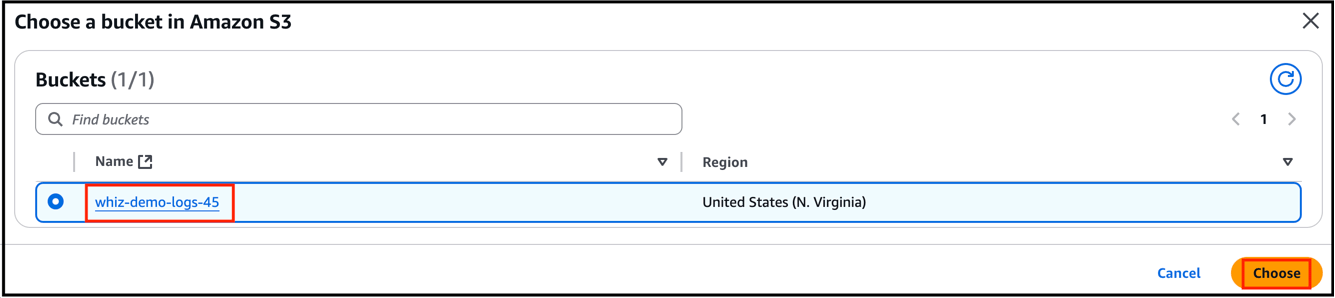
- Click on Choose button.
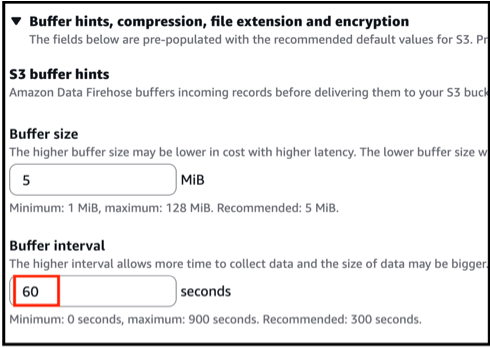
- Expand the Buffer hints, compression and encryption section. Under the Buffer interval, make it to 60 seconds.
- Expand the Advanced settings,
-
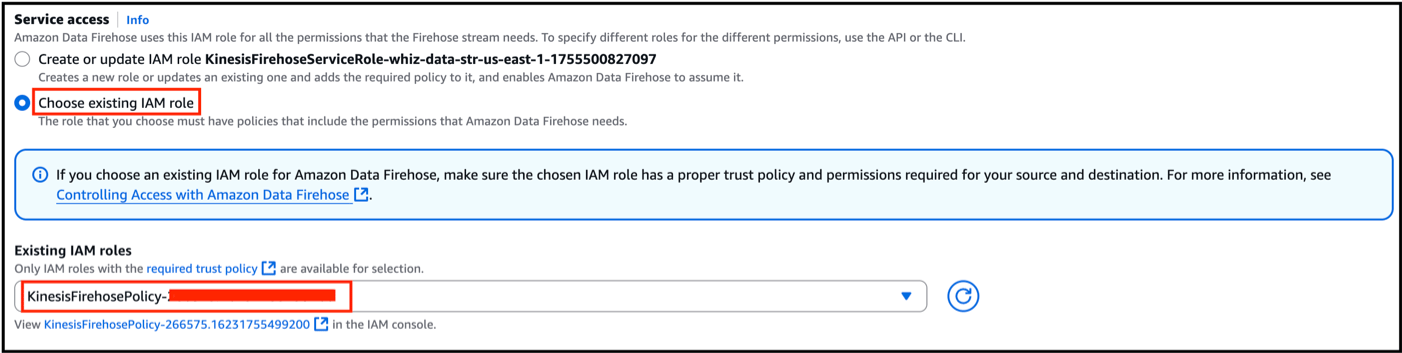
Under Service access, Choose existing IAM role and select it from the dropdown menu.
- Click on Create Firehose stream button.
Task 9: Creating and configuring Kinesis Agent
Let us configure a Kinesis agent which will collect data and send it to Kinesis Data Streams.- Follow the steps again to SSH into the EC2 instance.
-
Let us install the latest version of Kinesis agent on the instance.
- Type “y” if asked in the installation process.
- After installing the Kinesis agent, let us update the json file available in the path /etc/aws-kinesis/agent.json.
-
Edit the agent.json,
- Remove all the content and paste the below JSON content.
- Note 1: Make sure you copy the “awsAccessKeyId” , “awsSecretAccessKey” from the lab page and paste it the JSON code wherever required.
- Note 2: Make sure the “filePattern” consists of the log file path which is default in this case and “kinesisStream” consists of the created Kinesis Data Stream name.
- Press “ctrl + x” to save. Press “y” to save the modified changes and press Enter (Follow the commands to save the file carefully).
- Make sure you specify the “awsAccessKeyId” “awsSecretAccessKey” from the lab page.
- The name of the kinesis stream ( “kinesisStream” ) to which the agent sends data. Change the kinesisStream name according to the name you created.
-
Whenever you change the configuration file (agent.json), you must stop and start the agent, using the commands.


-
Once the agent is started for the first time, a log file will be created. Check the log file using the commands,
- You can check if the service is started properly by going through the log.

- We can see that the agent is successfully started.
Task 10: Testing the real-time streaming of data
Let us test by hosting the above sample website on multiple browsers or do some click activity on the website. The related logs will be collected on the listed S3 bucket.-
To test the data streaming, paste your IP_Address/folder_name in the multiple browsers and press enter.
-
For example - http://34.233.120.188/marvel-master/
Note: The folder_name is the unzipped folder of the sample website which we have noted earlier in the Task 5.
-
For example - http://34.233.120.188/marvel-master/
- Once you have followed the above step, click on the website links present to create more logs.
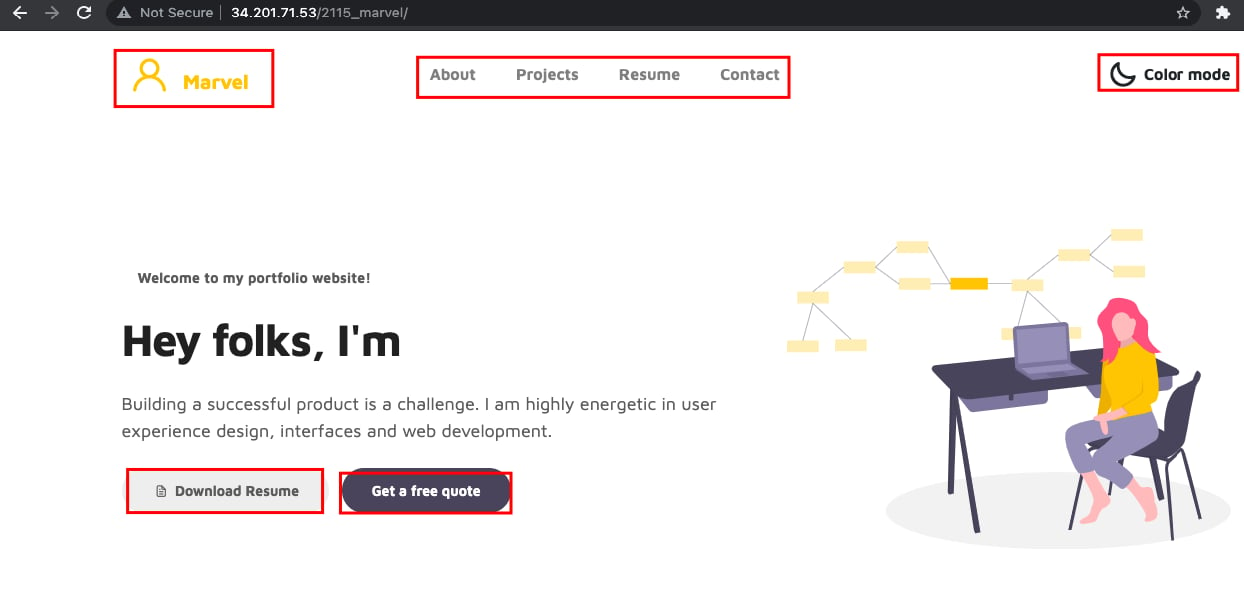
Note: We are clicking the links in the sample website website to generate logs which will be streamed to the created S3 Bucket.
-
Navigate to S3 by clicking on the Services menu, under the Storage section.
Note: Wait for 3-5 minutes, if you are not able to see the logs.
- You will see a hierarchy of folders with year > month > date > hour.
-
Click on the date or hour to see the logs created.
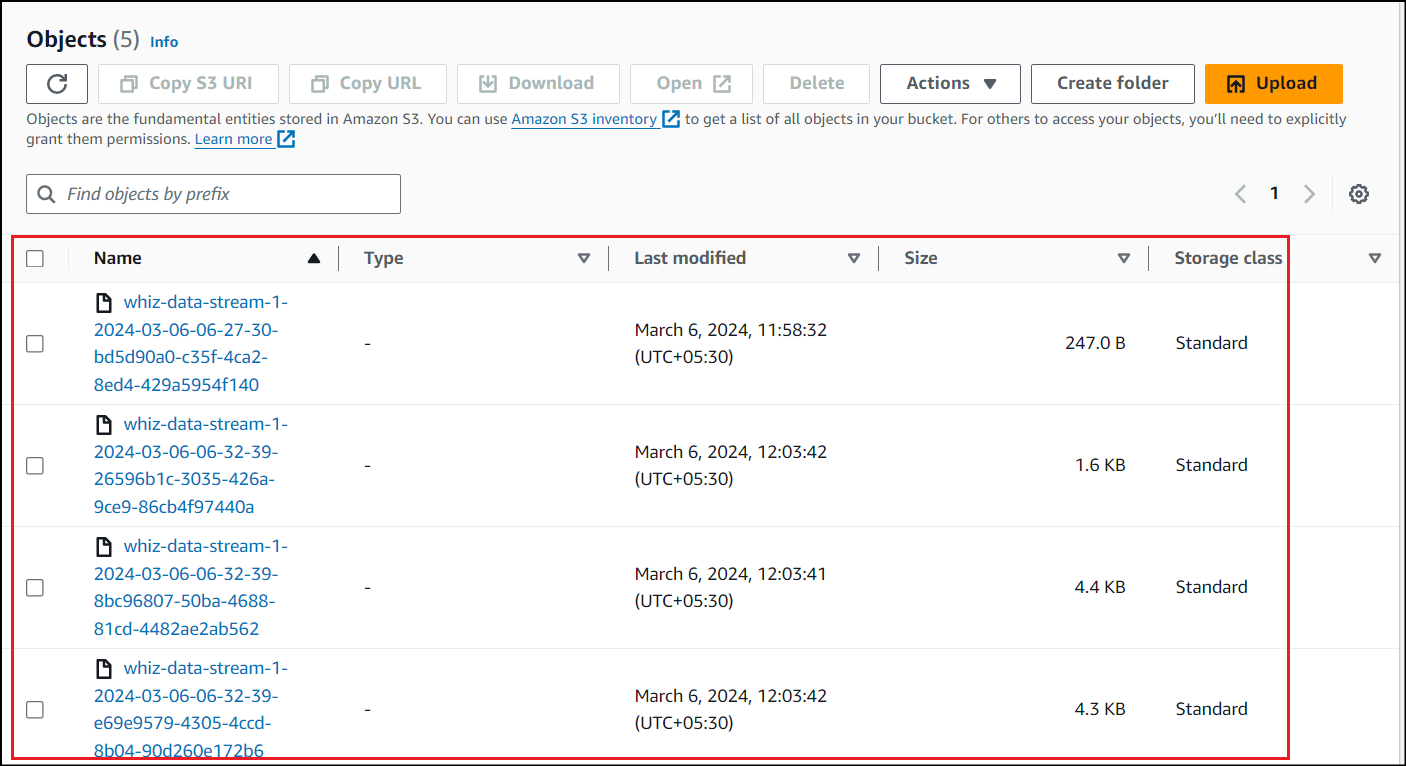
- Click on the log and select Open and save the file.
- Open the log file in any text editor in the local and check the logs.
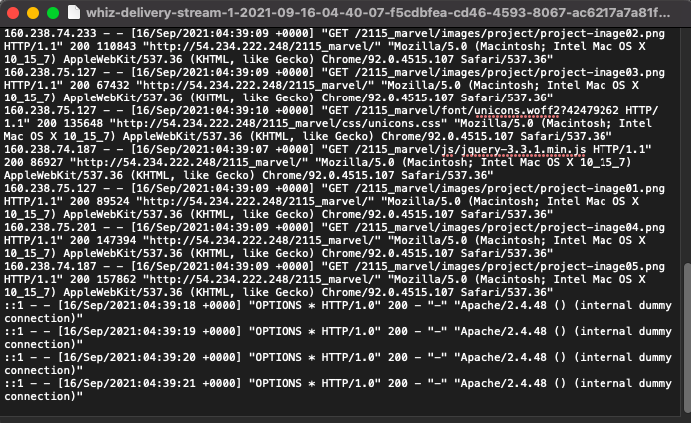
Note: The more the clicks in the page, the more the logs are generated. In this demo webpage, we have only 1 page. So try to open the webpage in many browsers and click on the links to generate the logs.
Task 11: Checking the CloudWatch metrics of Kinesis Data Stream and Firehose
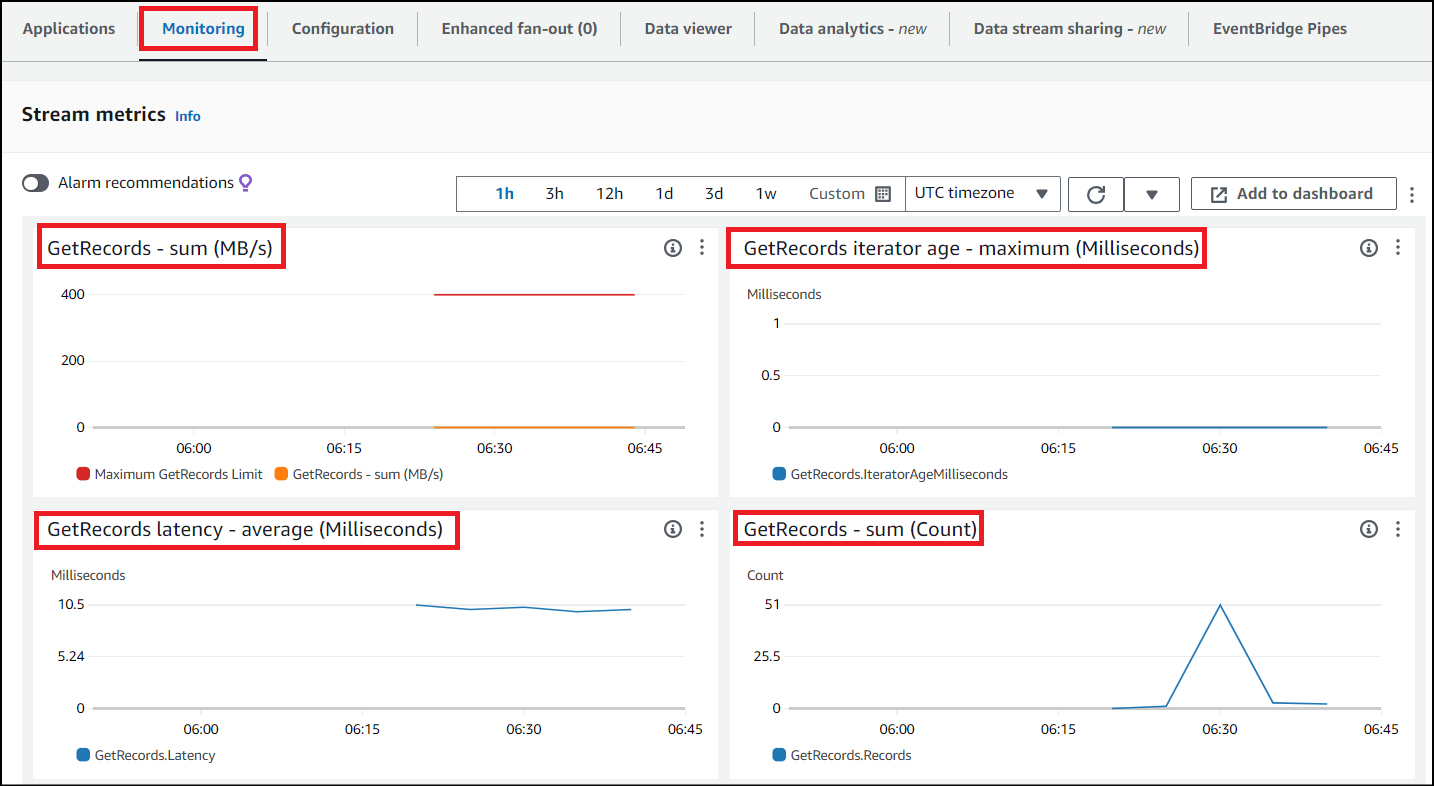
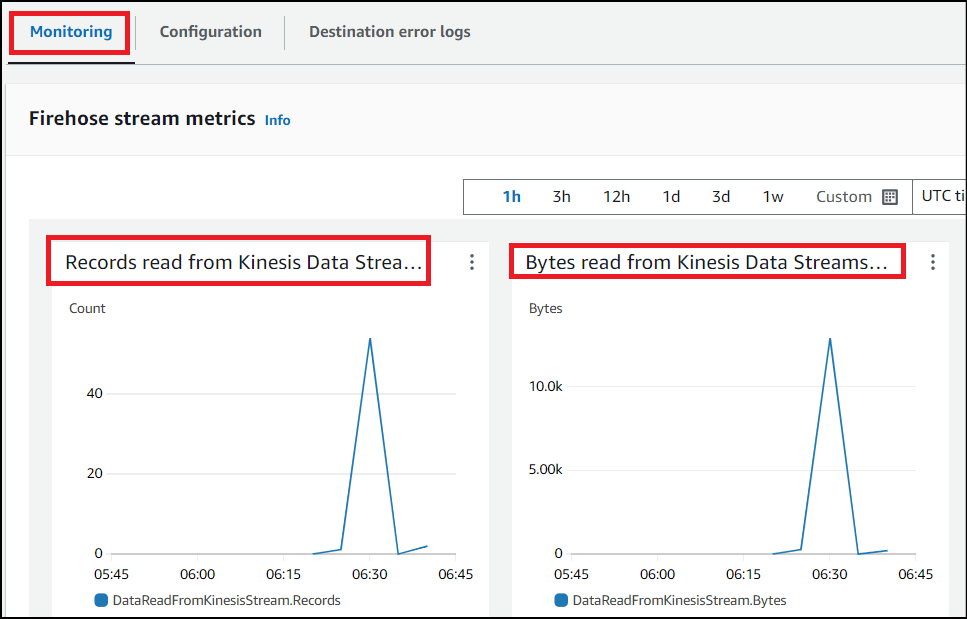
Let us the check the CloudWatch metrics of Kinesis Data Stream which records the data and Kinesis Delivery stream which reads the data from Data Stream.- Make sure you are in the US East (N. Virginia) us-east-1 Region.
- Navigate to Kinesis by clicking on the Services menu, under the Analytics section.
- Click on the created data stream in Data Streams section and navigate to the Monitoring tab. You will be able to see the graph according to the logs generated.
- On the left navigation panel, click on the Amazon Data Firehose.
- Click on the created delivery stream and navigate to the Monitoring tab. You will be able to see the graph.
Do you know ?
Amazon Kinesis Data Streams supports the concept of shards, which are the fundamental units of data capacity within a stream. Each shard in a Kinesis Data Stream can handle up to 1 MB/sec of data input and 2 MB/sec of data output. However, with the use of Kinesis Data Firehose, you can easily ingest data into Kinesis Data Streams at a much higher rate, exceeding the individual shard limits.
- Once the lab steps are completed, please click on the Validation button on the right side panel.
- In the second checkbox in the validation part, you should mention the folder name alone i.e., marvel-master.
Task 12: Delete AWS Resources
Terminating EC2 Instance :
- Make sure you are in the US East (N.Virginia) us-east-1 Region.
- Navigate to the Services menu at the top left corner and click on EC2 present under the Compute section.
- Click on Instances from the left navigation menu.
- Select the created instance and click on Instance state.
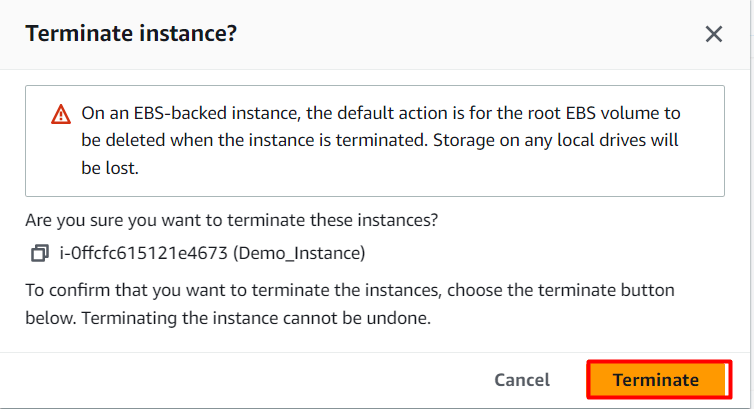
- From the drop-down menu select Terminate instance.
- Confirm the terminate by clicking on Terminate button.
Deleting Kinesis Data Streams :
- Make sure you are in the US East (N.Virginia) us-east-1 Region.
- Navigate to Kinesis by clicking on the Services menu, under the Analytics section.
- On the left panel, click on the Data streams.
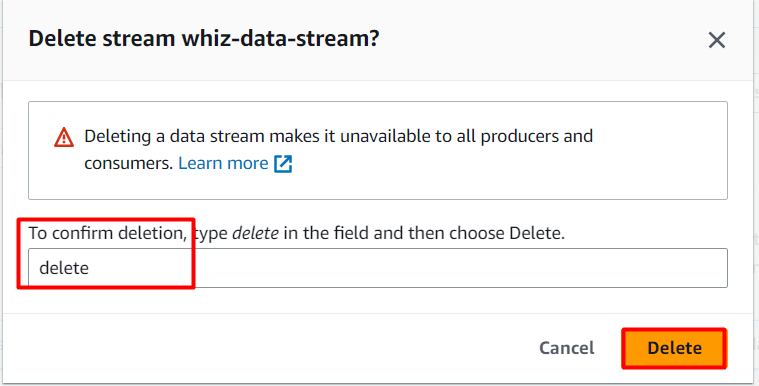
- Select the created data stream and click on the Actions button.
- Select Delete from the drop-down.
- Confirm by typing Delete and click on Delete button.
Deleting Kinesis Delivery Streams :
- Make sure you are in the US East (N.Virginia) us-east-1 Region.
- Navigate to Kinesis by clicking on the Services menu, under the Analytics section.
- On the left panel, click on the Data Firehose.
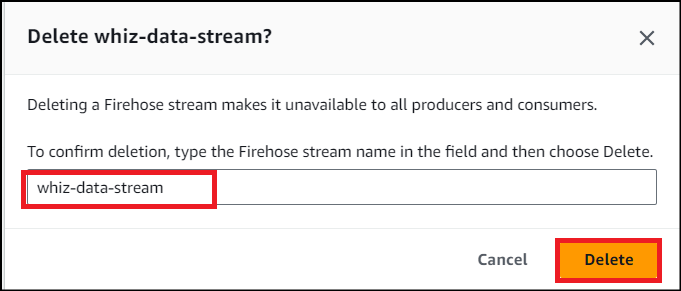
- Select the created delivery stream.
- Select Delete.
- Confirm by typing the delivery stream name in the field and click on Delete button.
Completion and Conclusion
- You have successfully launched an EC2 Instance.
- You have successfully hosted a sample website.
- You have successfully set file permissions to httpd.
- You have successfully created Kinesis data stream.
- You have successfully created a S3 Bucket.
- You have successfully created Kinesis Data Firehose.
- You have successfully created and configured Kinesis Agent.
- You have successfully tested the real-time streaming of data.
- You have successfully checked the CloudWatch metrics of Kinesis Data Streams and Data Firehose.
End Lab
- Sign out of the AWS Account.
- You have successfully completed the lab.
- Once you have completed the steps, click on End Lab from your IP Lab Portal and wait till the process gets completed.
What gets checked
When you press Check my work, the platform verifies each of these:- Launch an EC2 Instance — Check whether an EC2 Instance is launched or not.
- Check EC2 Instance Running State — Check whether the EC2 instance is in a running state.
- Launch EC2 AMI type Amazon Linux — Check whether the EC2 instance is launched using an Amazon AMI.
- Validate EC2 Instance Type t2.micro — Check whether the EC2 instance type is t2.micro.
- Create an Amazon Kinesis Data Firehouse Delivery stream — Check whether an Amazon Kinesis Firehouse Delivery Stream is created
- Create an Amazon Kinesis Data stream — Check whether an Amazon Kinesis Data Stream is created with encryption as enabled or not
- check s3 object — Check whether an object is uploaded to the S3 bucket.
- Create Private S3 bucket — Check whether a private S3 bucket is created or not