

Overview
Lab Details
- This lab walks you through the steps on how to enables versioning on an AWS S3 Bucket. Versioning allows you to keep multiple versions of an object in one bucket.
- Duration: 30 minutes
- AWS Region: US East (N. Virginia) us-east-1
Introduction
What is Versioning?
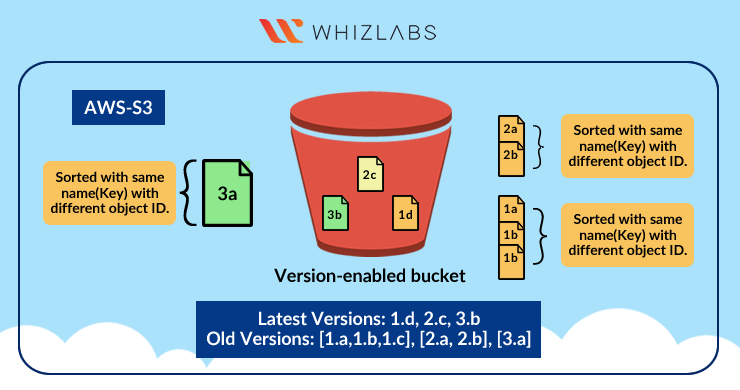
- Versioning is a means for keeping multiple variants of the same object in the bucket.
- Versioning is used to preserve, retrieve, and restore every version of every object stored in an S3 bucket.
- Versioning is done at the S3 Bucket level.
- Versioning can be enabled from the AWS Console / SDKs / API.
- Versioning, once enabled, cannot be completely disabled.
- The alternative to disabling versioning is placing the bucket in a “versioning-suspended” state.
- A drawback of having multiple versions of an object is you are billed multiple times (since the objects are getting stored in S3 each time).
- In order to avoid having multiple versions of the same object, S3 has a feature called Lifecycle Management. This allows us to decide on what to do when multiple versions of an object are piling up.
- One advantage of versioning is, we can provide permissions on versioned objects i.e., we can define which version of an object is public and which one is private.
Architecture Diagram
Task Details
- Sign in to AWS Management Console.
- Create an S3 bucket.
- Enable versioning on the S3 bucket.
- Upload an object and make the bucket public.
- Upload different versions of the file.
- Test the versioning of the object.
Launching Lab Environment
- To launch the lab environment, Click on the Start Lab button.
- Please wait until the cloud environment is provisioned. It will take less than a minute to provision.
- Once the Lab is started, you will be provided with IAM user name, Password, Access Key, and Secret Access Key.
Note : You can only start one lab at any given time
Files you need
Download these before you start — the lab cannot be completed without them.Lab guide
Lab Steps
Task 1: Sign in to AWS Management Console
- Click on the Open Console button, and you will get redirected to AWS Console in a new browser tab.
- On the AWS sign-in page,
- Leave the Account ID as default. Never edit/remove the 12 digit Account ID present in the AWS Console. otherwise, you cannot proceed with the lab.
- Now copy your User Name and Password in the Lab Console to the IAM Username and Password in AWS Console and click on the Sign in button.
- Once Signed In to the AWS Management Console, Make the default AWS Region as US East (N. Virginia) us-east-1.
Task 2: Create an S3 Bucket
In this task , we are going to create an S3 bucket with the required configurations like name, access and region.- Navigate to the Services menu at the top and click on S3 in the Storage section.
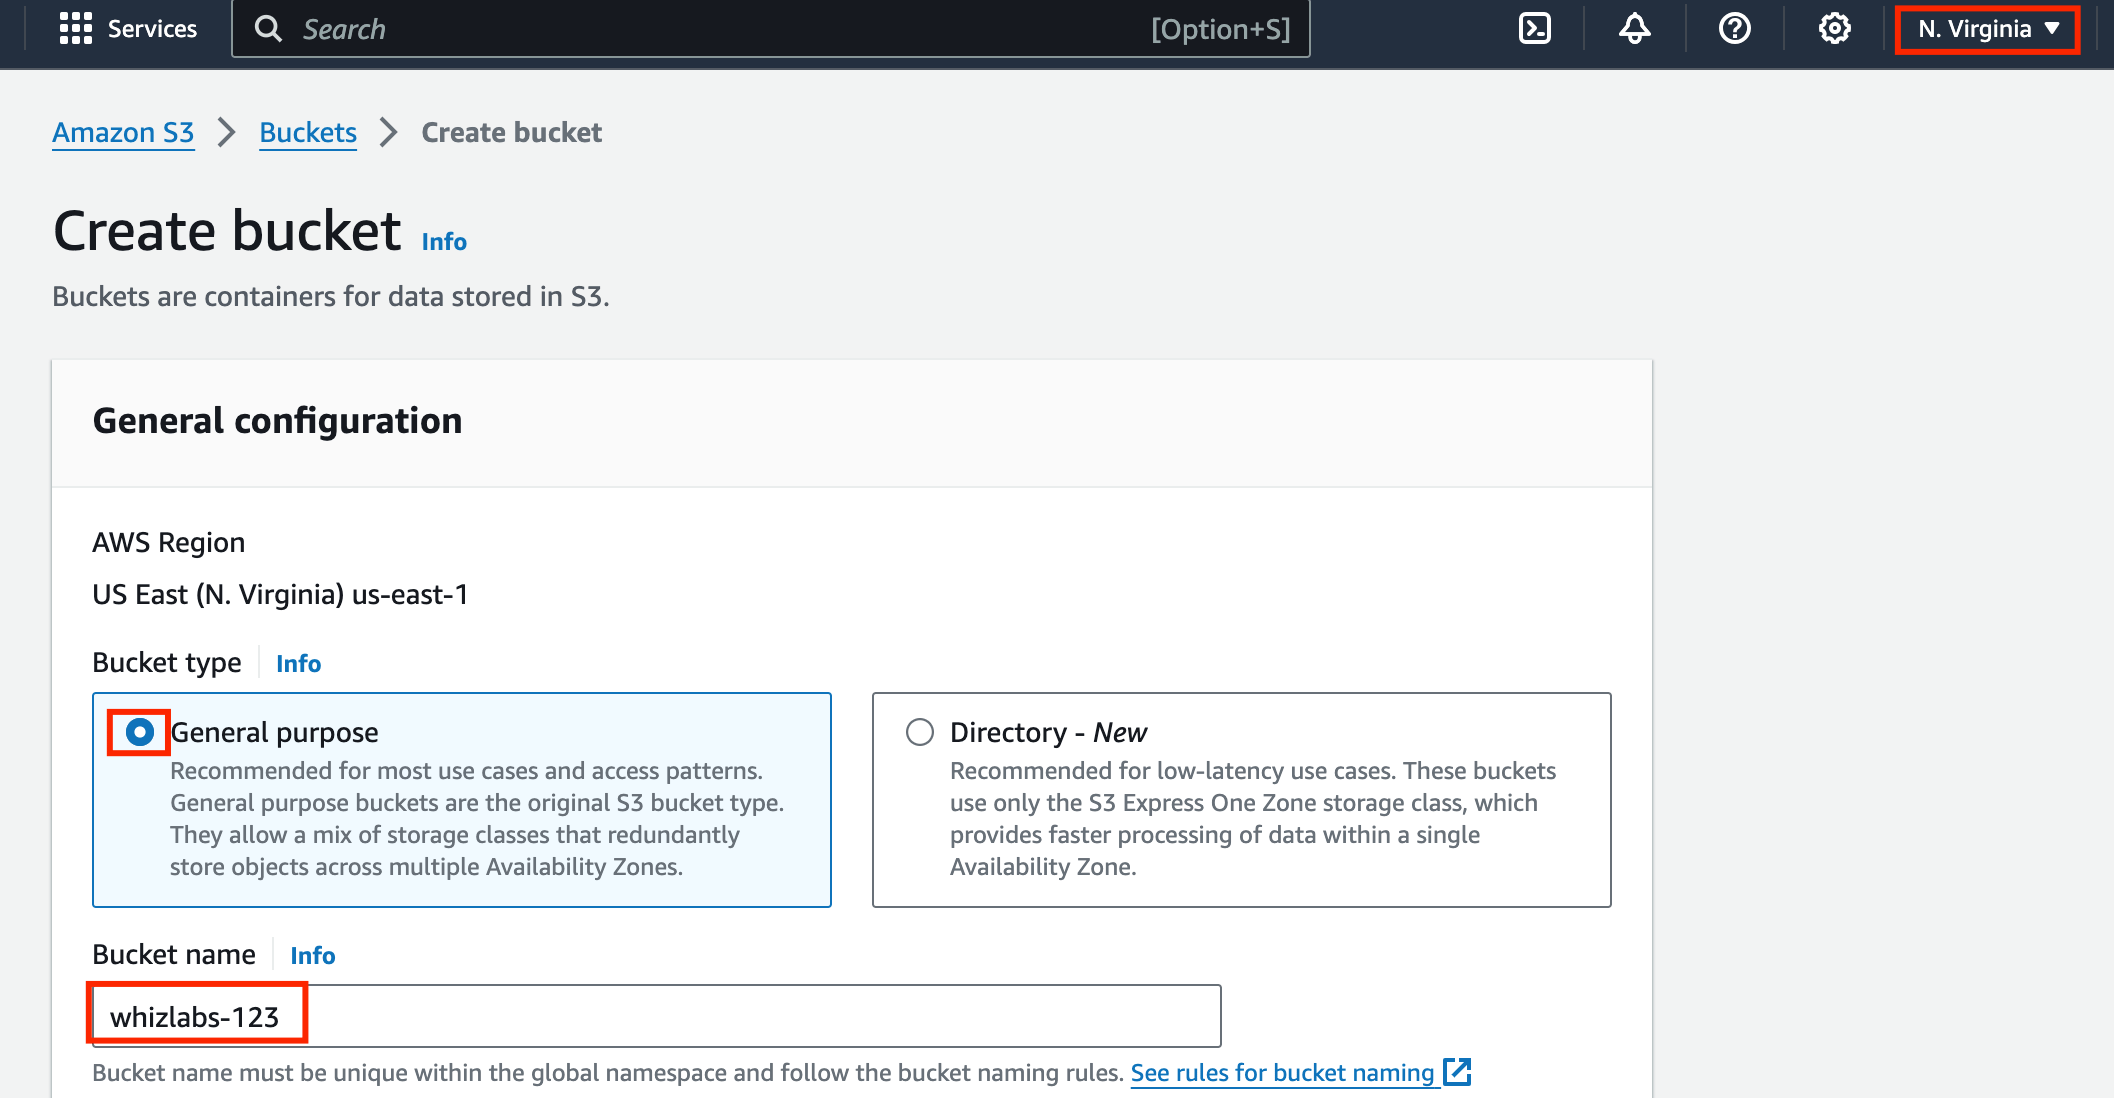
- On the S3 dashboard, click on Create bucket button and fill in the bucket details.
- Select Region as N.Verginia to create an S3 bucket.
- Bucket type Select : General purpose
- Bucket name**:** Enter whizlabs-<RANDOM_NUMBER>
- Note: S3 bucket names are globally unique, choose an available name.
- Object ownership: Select ACLs disabled (recommended) option
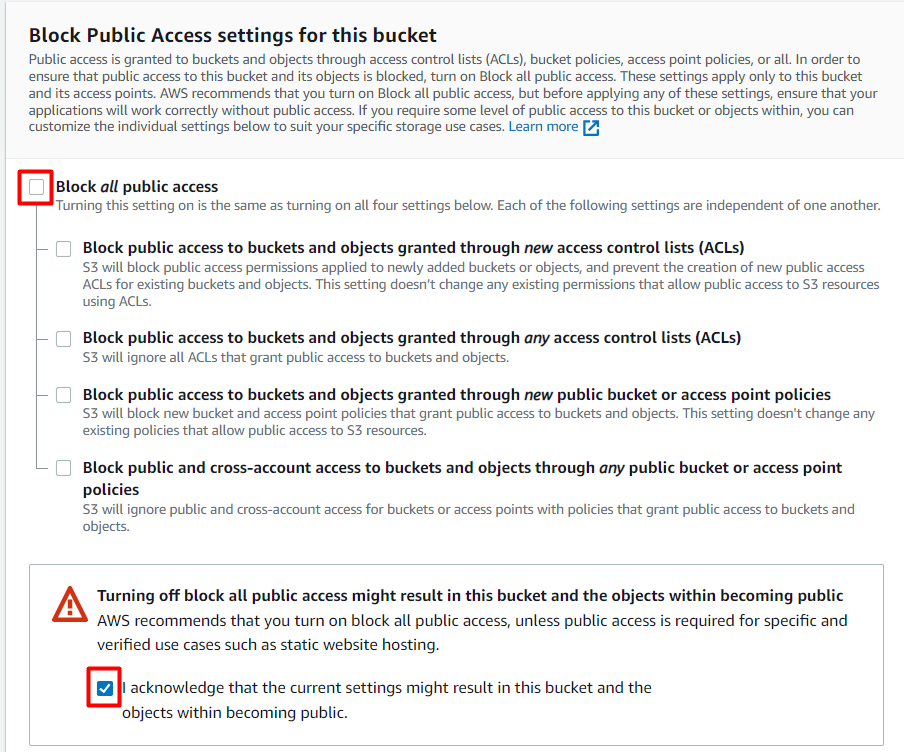
- Uncheck the option**, Block all public access,** and check the acknowledge option.
- Leave other settings as default.
- Click on Create bucket button.
- Your S3 Bucket is now created.

Task 3: Enable Versioning on the S3 bucket
- Click on your bucket name whizlabs2346.
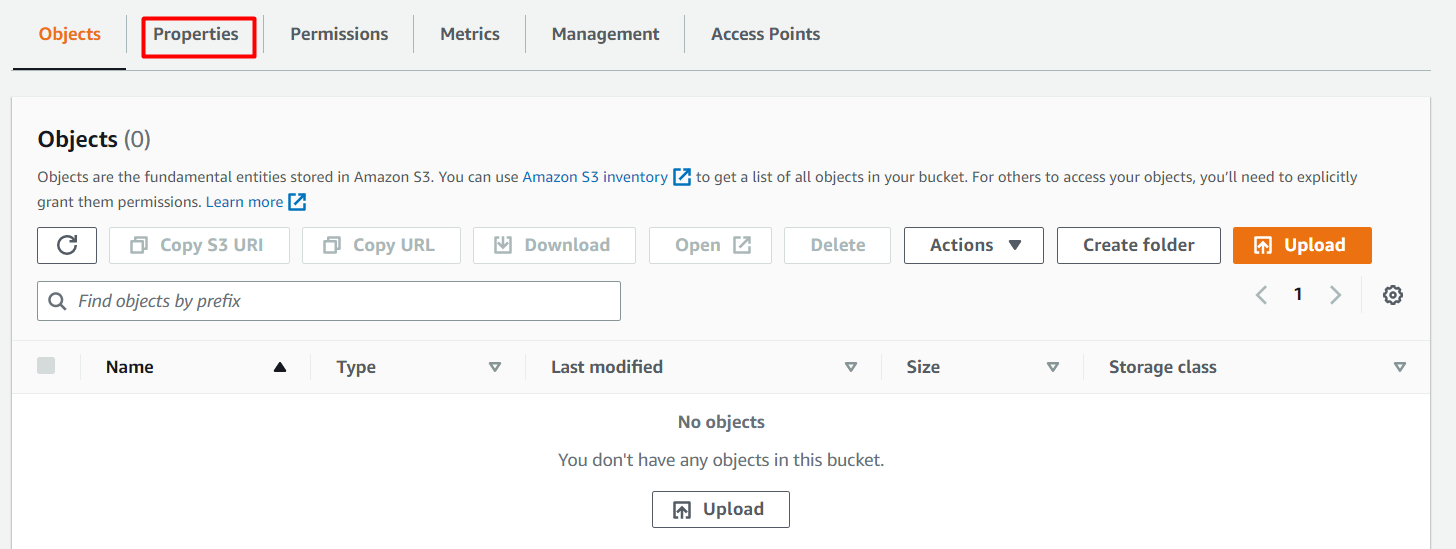
- Click on Properties tab.
- Under Bucket Versioning, click on Edit button.
- Bucket Versioning : Select Enable radio button.
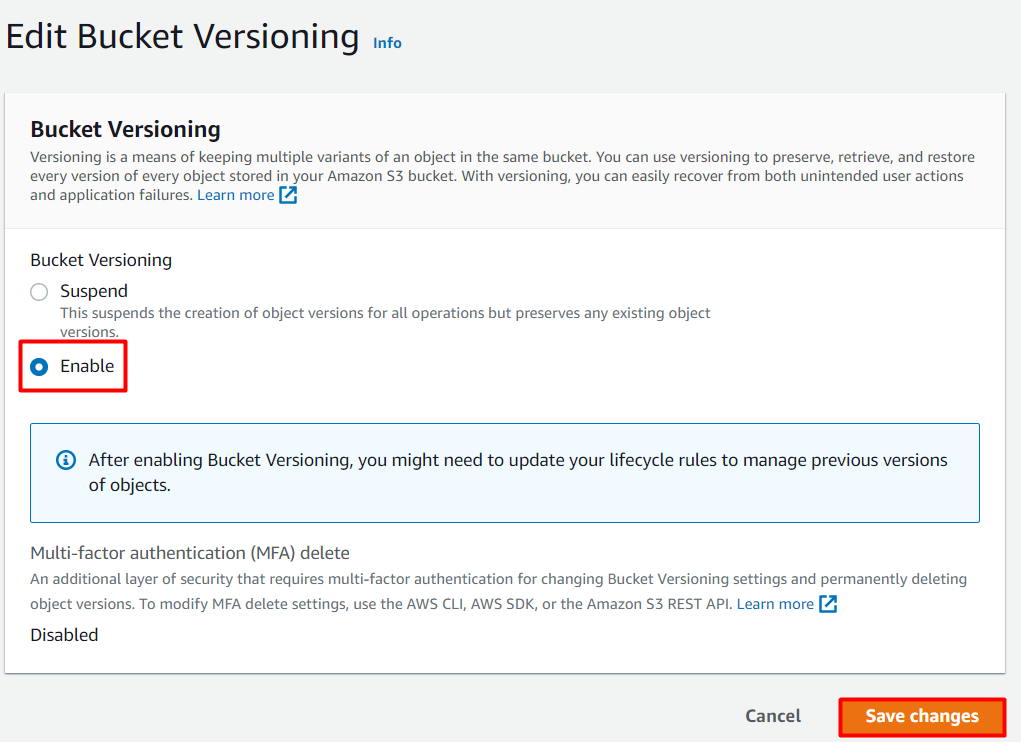
- Now Click on the Save changes button.
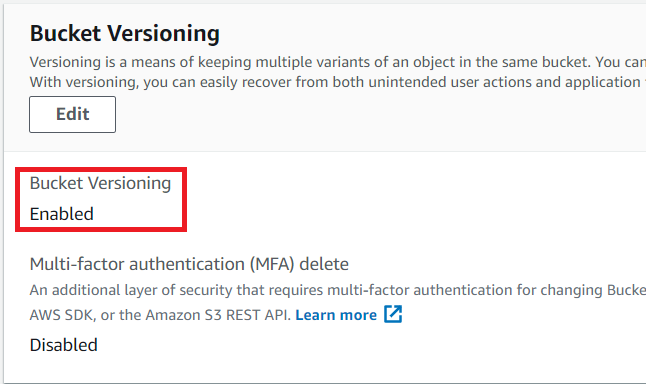
- Now Bucket versioning is enabled.
Task 4: Upload an object and make the bucket public
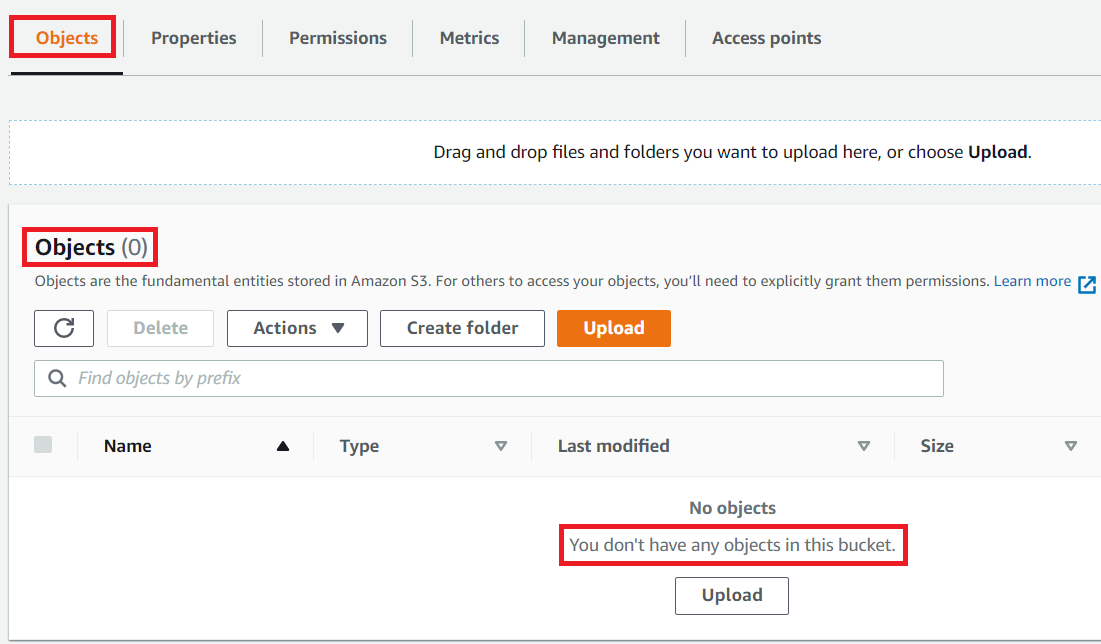
- Click on the Objects tab.
-
In the Overview, you can see the following message:
- This bucket is empty. Upload new objects to get started.
- Upload sample.txt file present in zip file download the zip file from our Download Me link.
-
To upload a file to our S3 bucket,
- Click on the Upload button.
- Click on the Add files button.
- Browse for the file you want to upload.
- Click on the Upload button.
- You can watch the progress of the upload from within the transfer panel at the bottom of the screen. If it’s a small file, you might not see the transfer. Once your file has been uploaded, it will be displayed in the bucket.

- Now click on the Close button on the top right corner of the screen.
- To copy the ARN of your S3 bucket, click on Properties tab and copy the ARN.
-
Make the bucket public with a Bucket Policy:
- Click the Permissions tab to configure your bucket:
- Scroll down to Bucket policy , click on Edit button on the Right side.
- The policy editor will open.
- In the policy below, update your bucket ARN in the Resource key-value and copy the policy code.
- Paste the bucket policy into the Bucket policy editor.
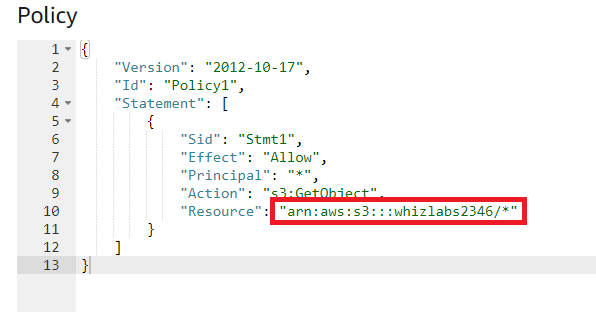
- Click on Save Changes button
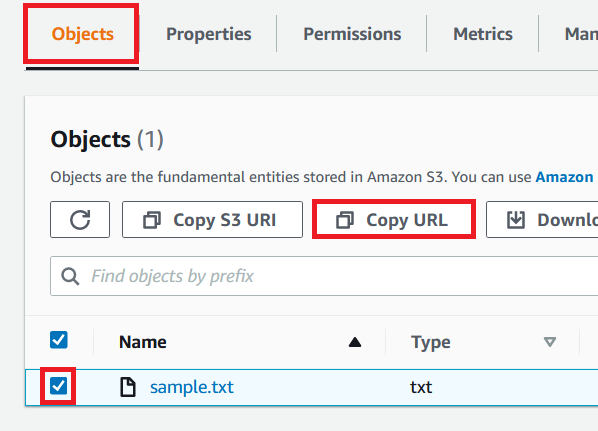
- Now again open the Objects tab, select the object name and click on Copy URL.
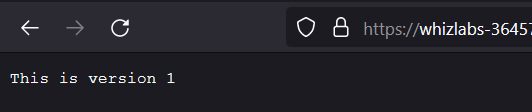
- Open a new tab, paste the URL and you will get the below output.
Task 5: Upload different versions of the file
- Now open the sample.txt file in your local text editor and update the file content as “This is version 2”.
- Click on the Upload button.
- Click on the Add files button.
- Browse for the file you want to upload.
- Click on the Upload button.
- Now click on the Close button on the top right corner of the screen.
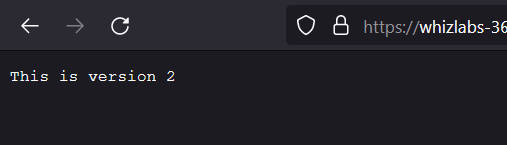
- Once the file has been uploaded successfully, copy the URL and paste it into your browser.
- You should see the latest version of the file you uploaded.
- Similarly, again edit the sample.txt and update the content as “This is version 3”.
- Then upload the file into the bucket and check the output in the browser.
Task 6: Test the Versioning of the object
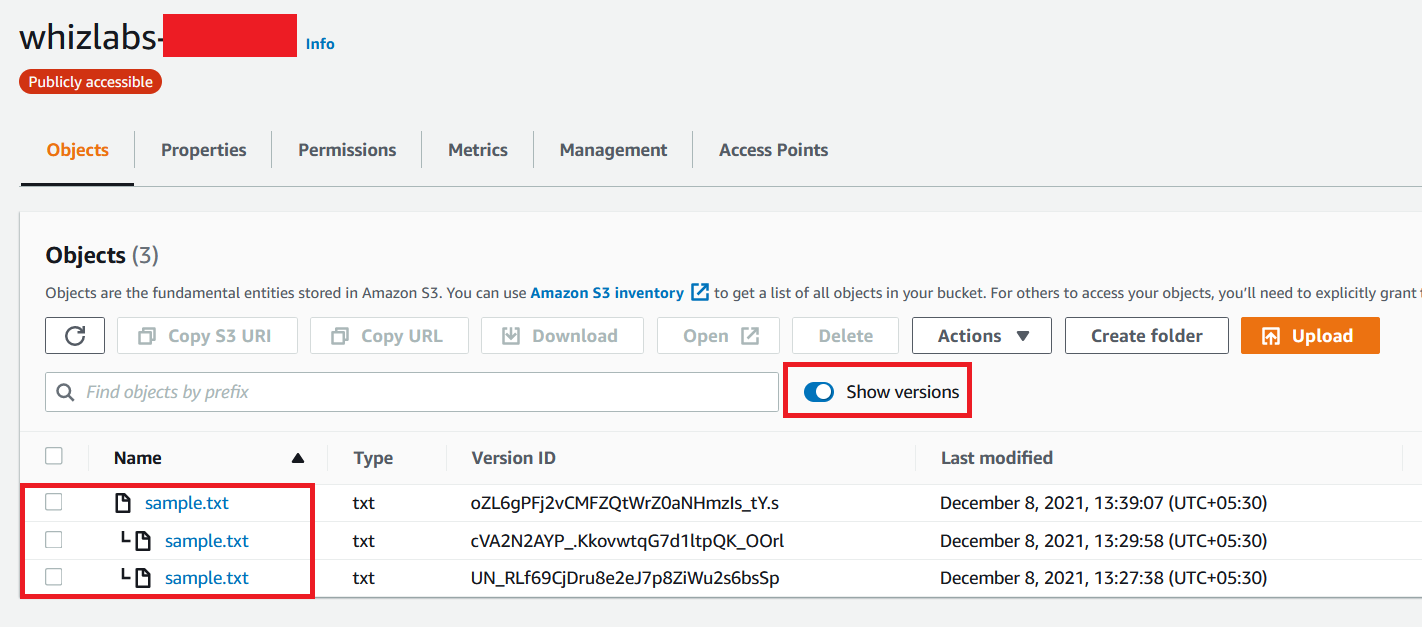
- Open your S3 bucket, click on Show versions. You will get the list of versions available for your sample.txt.
- Now delete the first object and try to see the output in the browser.
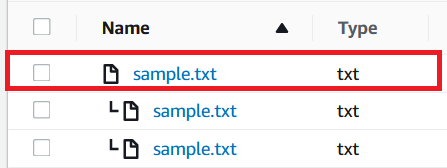
- You will get the output as “This is version 2”.
- Hence, when you delete the object from the bucket, the bucket pointer points to the previously available version.
Do you know?
Enabling versioning can impact storage costs since each version of an object consumes storage space. You are billed for the storage of all versions, including the current version and any previous versions. However, S3 provides options for lifecycle policies, which can automatically transition or expire older versions to help manage storage costs effectively.
- Once the lab steps are completed, please click on the Validation button on the left side panel.
- This will validate the resources in the AWS account and shows you whether you have completed this lab successfully or not.
Completion and Conclusion
- You have successfully created an S3 Bucket.
- You have successfully enabled Object Versioning on the Bucket.
- You have successfully uploaded a test file into the Bucket and tested its versioning.
- You have successfully validated the lab.
End Lab
- Sign out from the AWS Management Console.
- Click on End Lab button from IP Lab Portal Labs console and wait till the process gets completed
What gets checked
When you press Check my work, the platform verifies each of these:- Create an AWS S3 Bucket with Policy — Check whether S3 bucket is created and bucket policy added or not
- Enable S3 Bucket Versioning — Check whether S3 Bucket versioning in Enabled or not.
- Invoke S3 Object URL — Check whether an S3 Object URL is accessible from the internet or not.