

Overview
Lab Details
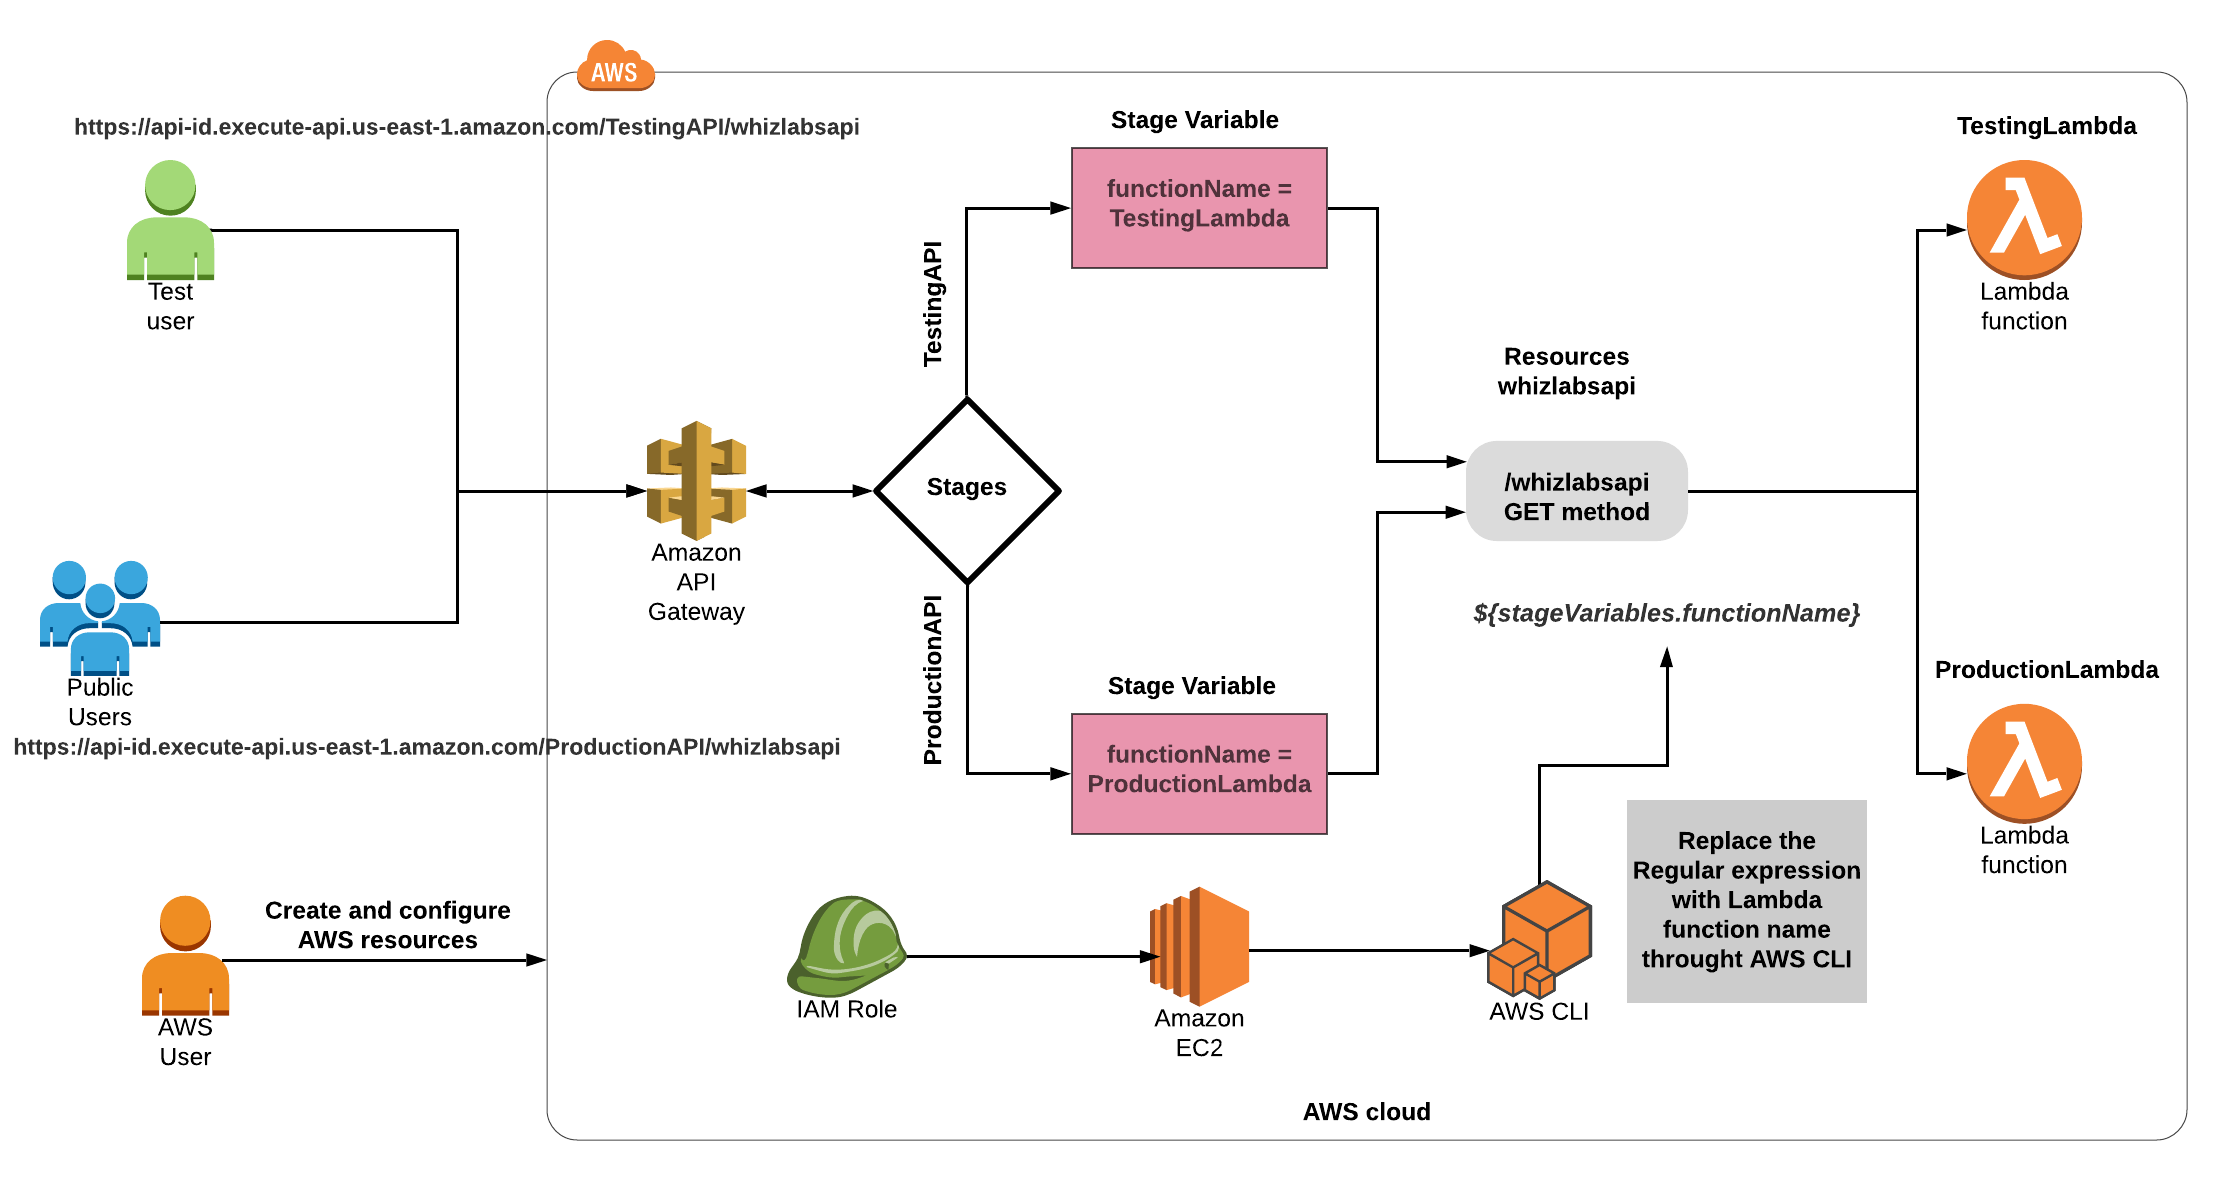
- This lab walks you through the steps to create an API Gateway with two different stages and integrate it to two different lambda functions.
- You will practice using Amazon API Gateway.
- Duration: 75 minutes.
- AWS Region: (N. Virginia) us-east-1.
Introduction
EC2
- AWS defines it as an Elastic Compute Cloud.
- It’s a virtual environment where “you rent” to have your environment created, without purchasing.
- Amazon refers to these virtual machines as instances.
- Preconfigured templates can be used to launch instances. These templates are referred to as images. Amazon provides these images in the form of AMIs (Amazon Machine Images).
- Allows you to install custom applications and services.
- Scaling of infrastructure, i.e., up or down, is easy based on the demand you face.
- AWS provides multiple configurations of CPU, memory, storage etc., through which you can pick the flavor that’s required for your environment.
- No limitation on storage. You can pick the storage based on the type of the instance that you are working on.
- Temporary storage volumes are provided, which are called Instance Store Volumes. Data stored in this gets deleted once the instance is terminated.
- Persistent storage volumes are available and are referred to as EBS (Elastic Block Store) volumes.
- These instances can be placed at multiple locations, which are referred to as Regions and Availability Zones (AZ).
- You can have your Instances distributed across multiple AZs i.e., within a single Region, so that if an instance fails, AWS automatically remaps the address to another AZ.
- Instances deployed in one AZ can be migrated to another AZ.
- To manage instances, images, and other EC2 resources, you can optionally assign your own metadata to each resource in the form of tags.
- A Tag is a label that you assign to an AWS resource. It contains a key and an optional value, both of which are defined by you.
- Each AWS account comes with a set of default limits on the resources on a per-Region basis.
- For any increase in the limit, you need to contact AWS.
- To work with the created instances, we use Key Pairs.
IAM
- Stands for Identity and Access Management.
- Web service that helps the user securely control access to AWS resources.
- Used to control who is authenticated and authorized to use AWS resources.
- The first “identity” is the creation of an account in the AWS portal. On providing the email and password, an Identity is created, and that’s the “root user” holding all the permissions to access all resources in AWS.
- The primary resources in IAM are users, groups, roles, policies, and identity providers.
- IAM Group is a collection of IAM Users. You use groups to specify permissions for a collection of users, which can make those permissions easier to manage for those users.
- IAM roles are like IAM Users in that they are both identities with permission policies that determine what the owner can access.
- IAM Roles do not have any credentials associated with them.
- IAM Roles are intended to be assumable by anyone who needs them.
- IAM can be used from the AWS CLI, AWS SDK and AWS Management Console.
Amazon API Gateway
- Amazon API Gateway is a fully managed service that makes it easy for developers to create, publish, maintain, monitor, and secure APIs at any scale.
- APIs act as the front door for applications to access data, business logic, or functionality from your backend services.
- API Gateway handles all the tasks involved in accepting and processing up to hundreds or thousands of concurrent API calls, including traffic management, CORS support, authorization and access control, throttling, monitoring, and API version management.
- Using API Gateway, you can create RESTful APIs and WebSocket APIs that enable real-time two-way communication applications. API Gateway supports containerized and serverless workloads, as well as web applications.
- AWS Lambda lets you run code without provisioning or managing servers. You pay only for the compute time you consume.
- With Lambda, you can run code for virtually any type of application or backend service – all with zero administration. Just upload your code and Lambda takes care of everything required to run and scale your code with high availability. You can set up your code to automatically trigger from other AWS services or call it directly from any web or mobile app.
Architecture Diagram
Task Details
- Sign into the AWS Management Console.
- Create an EC2 instance.
- Create two Lambda Function.
- Create a new API.
- Create a Resource.
- Create a Method.
- Run the CLI command to give lambda permissions to API using the EC2 instance.
- Deploy API Gateway with two different stages.
- Add stage variables to both stages.
- Test the API Gateway.
Launching Lab Environment
- To launch the lab environment, click on the Start Lab button.
- Please wait until the cloud environment is provisioned. It will take less than a minute to provision.
- Once the Lab is started, you will be provided with IAM username, Password, Access Key, and Secret Access Key.
Note : You can only start one lab at any given time
Lab guide
Lab Steps
Task 1: Sign in to AWS Management Console
- Click on the Open Console button, and you will get redirected to AWS Console in a new browser tab and it will be Logged in Successfully.
- On the AWS Console, in the search bar search for IAM and click on it.
-
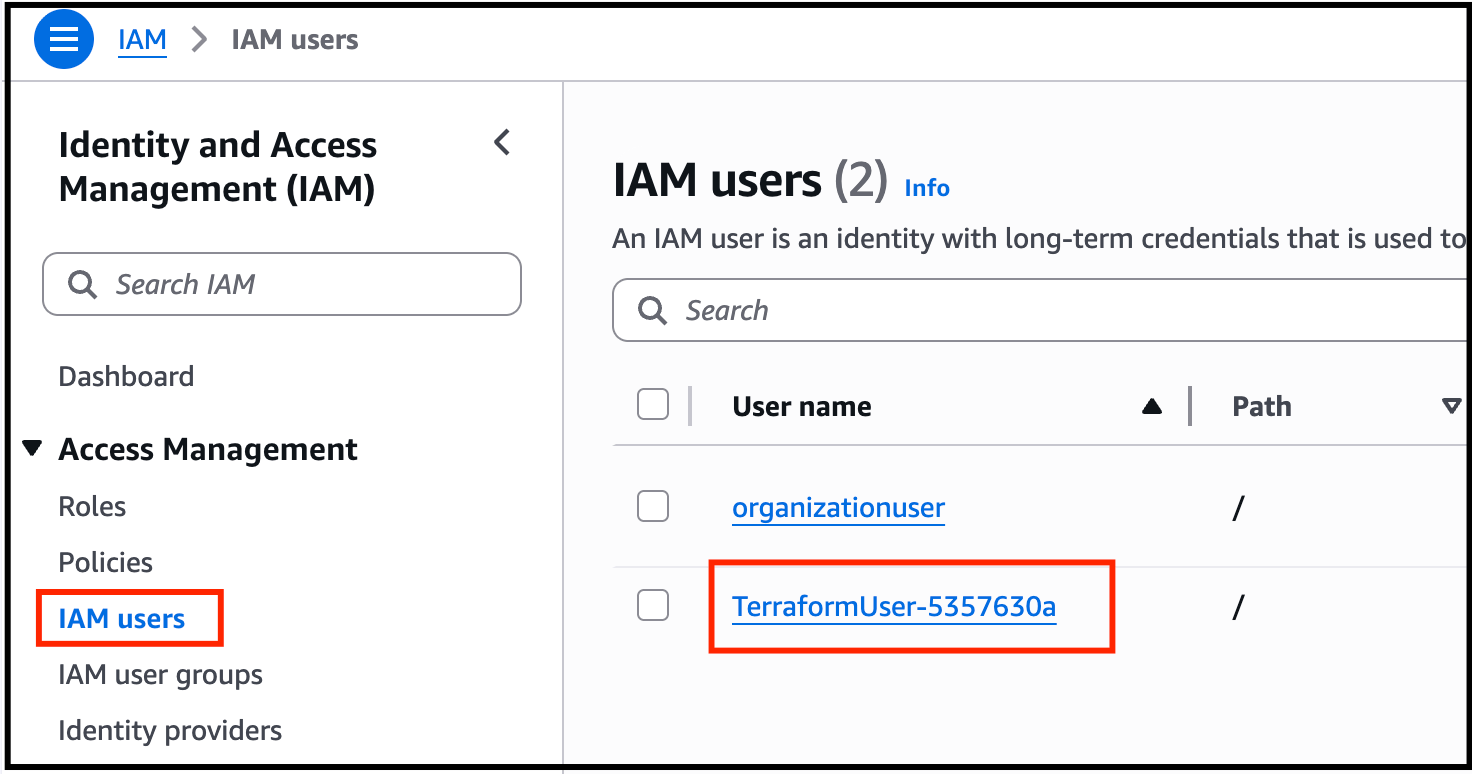
Then Click on IAM Users and select TerraformUser-XXXXX
-
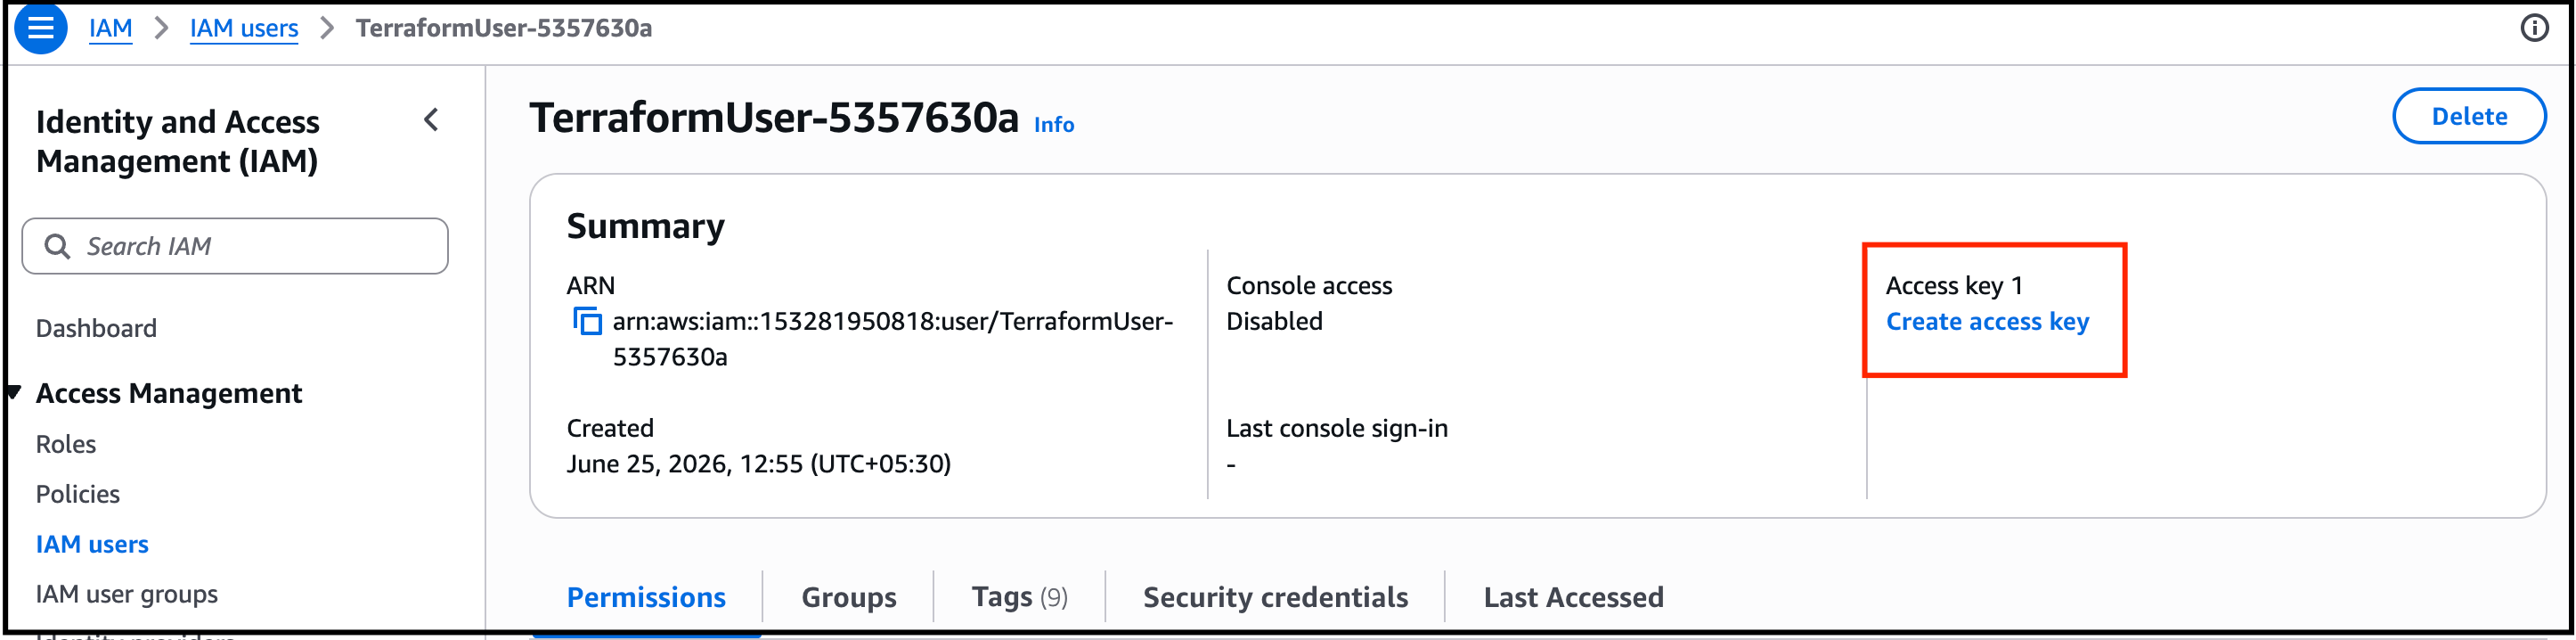
Click on Create Access Key.
-
Choose Other, Click on Next and click on Create Access Key.
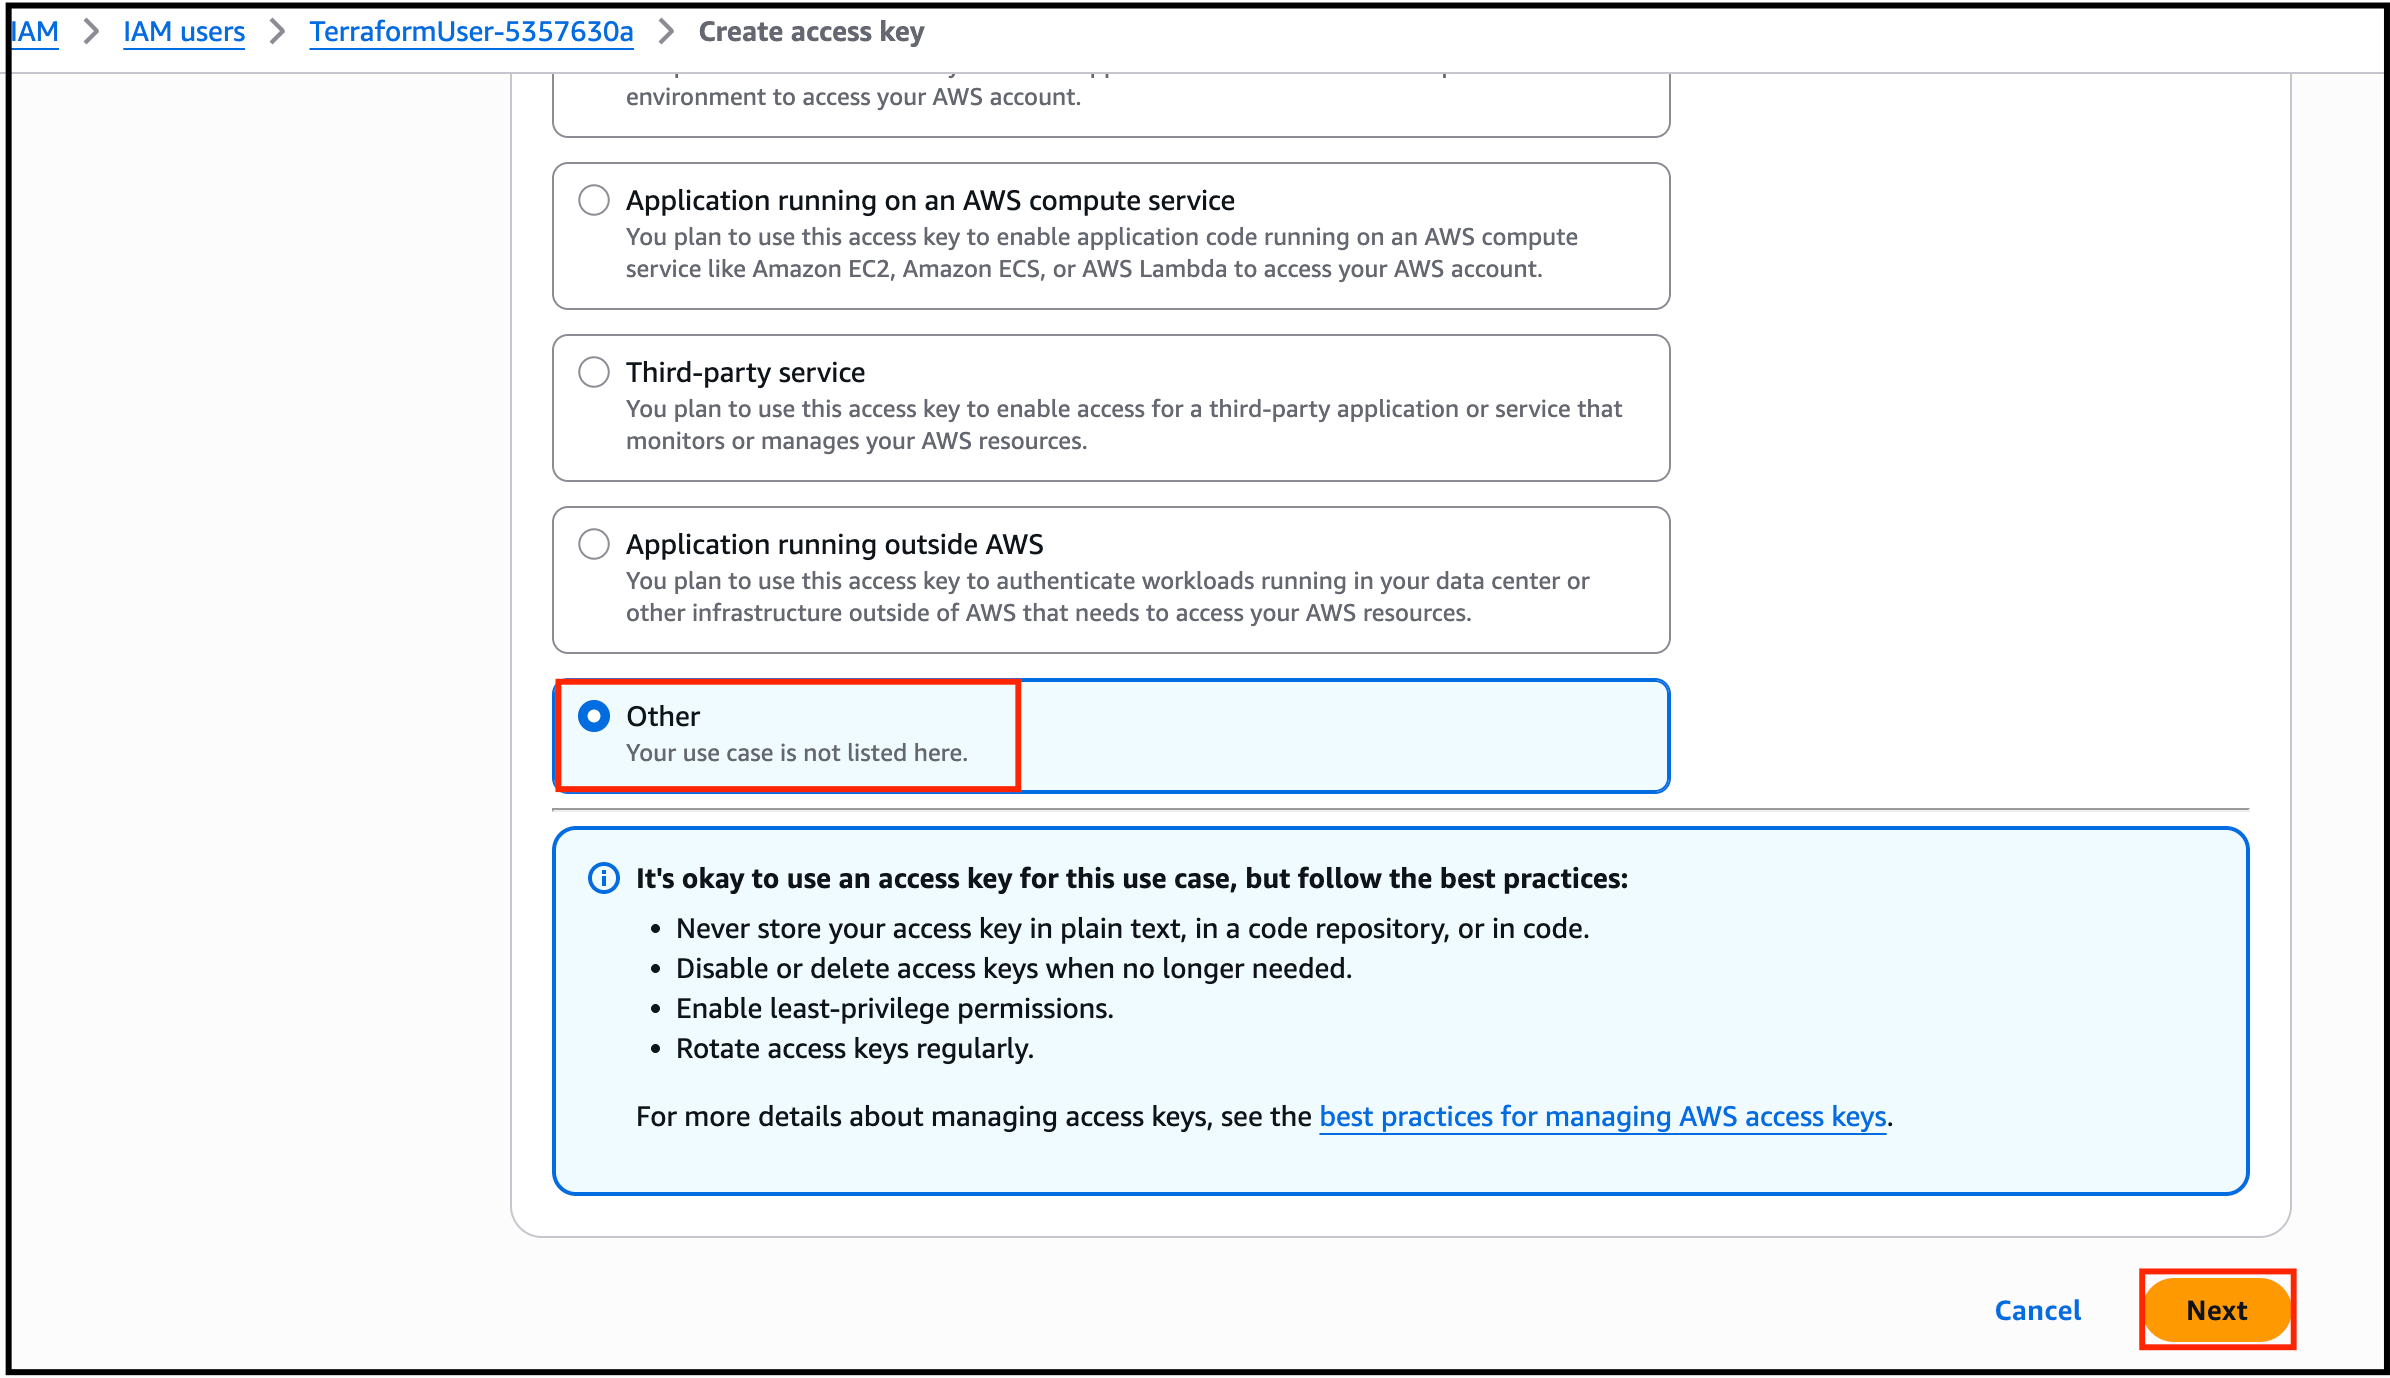
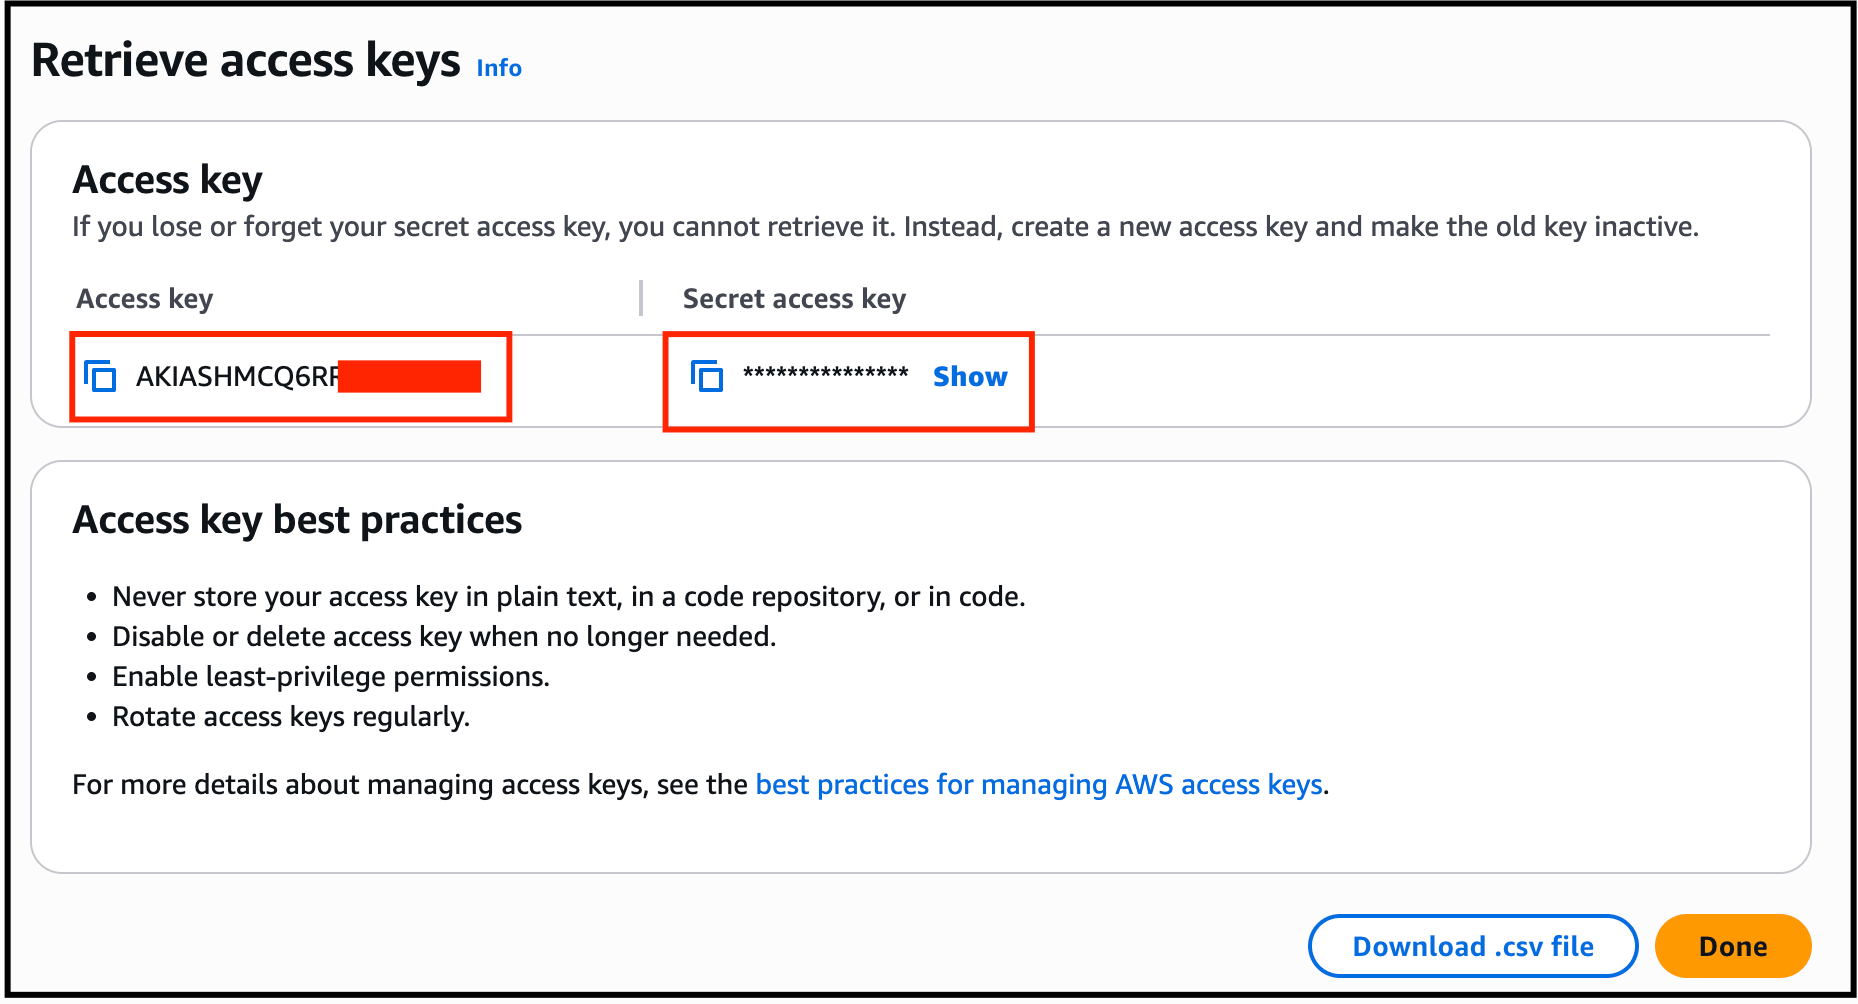
- Your Access and Secret key will get Created. Make a note of it for later use.
Task 2: Launching an EC2 Instance
In this task, we are going to allow the user to create an EC2 instance, which will be used later in the lab to run CLI commands and perform actions related to the API Gateway and Lambda functions.- Make sure you are in the US East (N. Virginia) us-east-1 Region.
- Navigate to EC2 by clicking on the Services menu in the top, then click on EC2 in the Compute section.
- Navigate to Instances on the left panel and click on Launch instances

- Name : Enter MyEC2CLIInstance
-
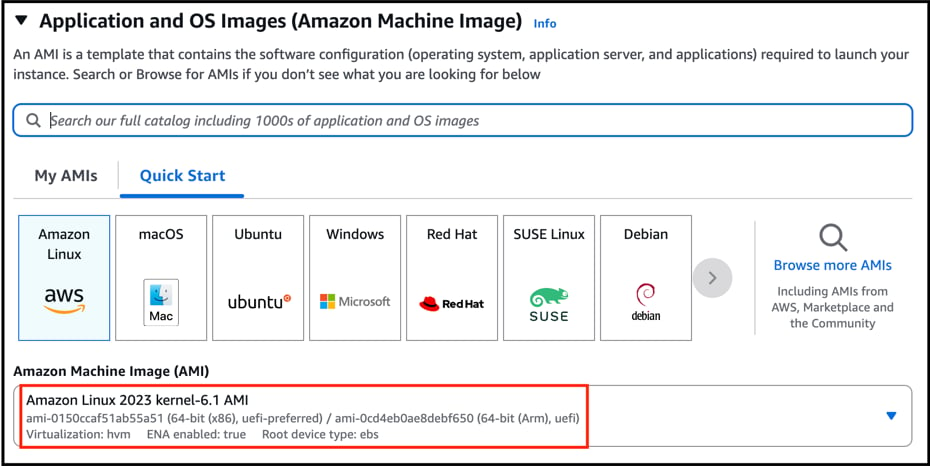
For Amazon Machine Image (AMI): Search for Amazon Linux 2023 AMI in the search box and click on the Select button.
- For Instance Type: select t2.micro
-
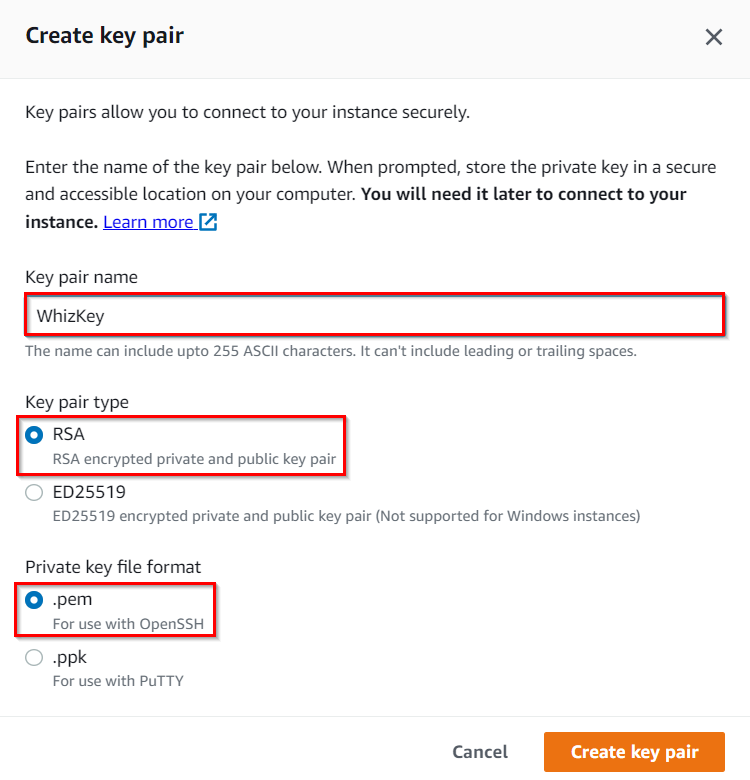
For Key pair: Select Create a new key pair Button
- Key pair name: WhizKey
- Key pair type: RSA
- Private key file format: .pem
- Select Create key pair Button.
- In Network Settings, Click on Edit Button:
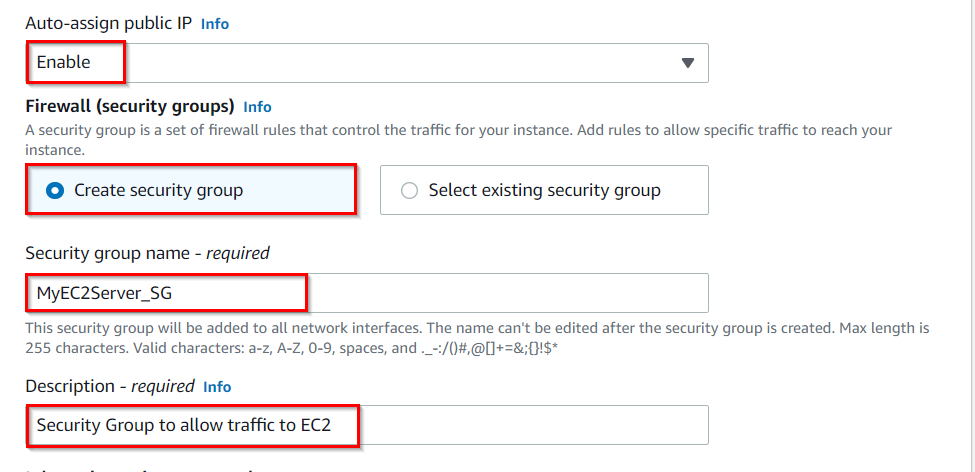
- Auto-assign public IP: Enable
- Select Create new Security group
- Security group name : Enter MyEC2Server_SG
- Description : Enter Security Group to allow traffic to EC2
- Check Allow SSH from and Select Anywhere from dropdown
-
To add SSH,
- Choose Type: SSH
- Source: Select Anywhere
- Under Advanced Settings, choose IAM Instance profile as EC2<RANDOM_NUMBER>.
- Keep rest thing Default and Click on Launch Instance Button.
- Select View all Instances to View the Instance you created.
- Launch Status: Your instances are now launching, Navigate to Instances page from left menu and wait the status of the EC2 Instance changes to running and health check status changes to 2/2 checks passed.

Task 3: Create two Lambda Functions
In this task, we are going to create two Lambda functions, namely ProductionLambda and TestingLambda. These functions will be integrated with the API Gateway in subsequent tasks.- Navigate to the Services menu at the top, then click on Lambda under the Compute section.
- Click on Create a function
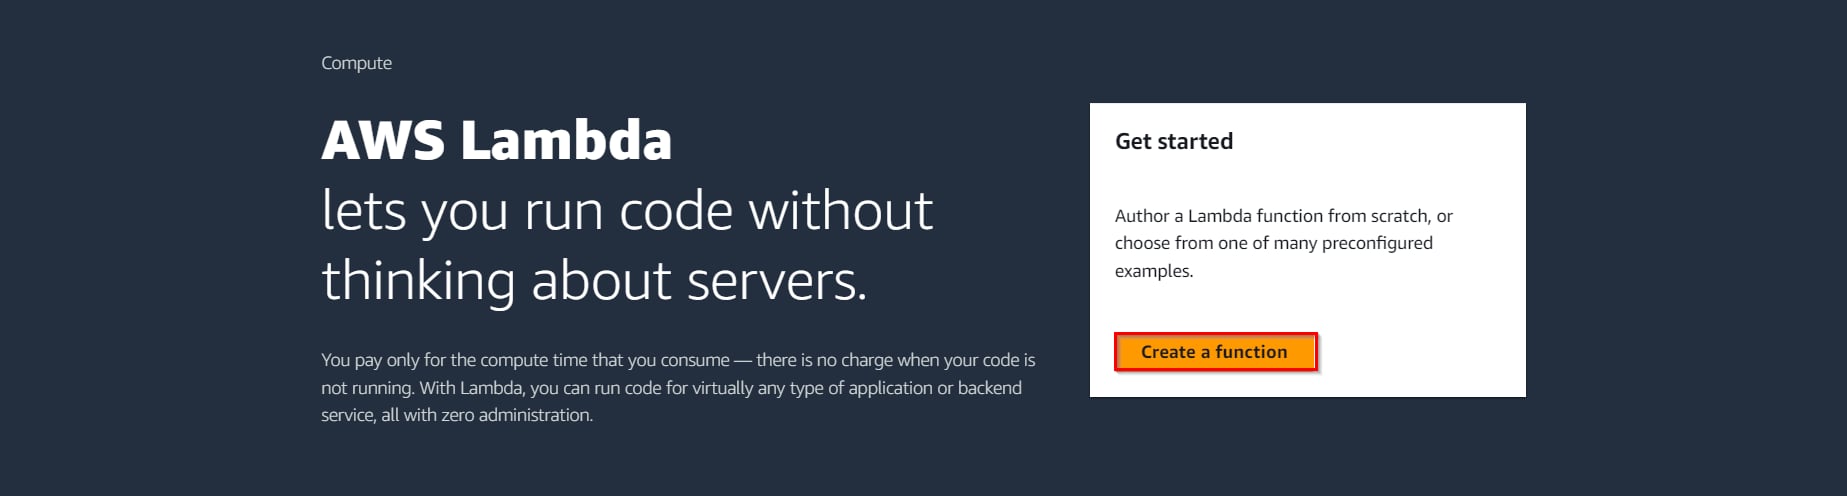
- Select Author from Scratch
- Function Name : Enter ProductionLambda
- Runtime : Select Python 3.12
- Expand Change default execution role
- Execution Role : Click on Use an existing role and choose whiz_lambda_role-<random_number>
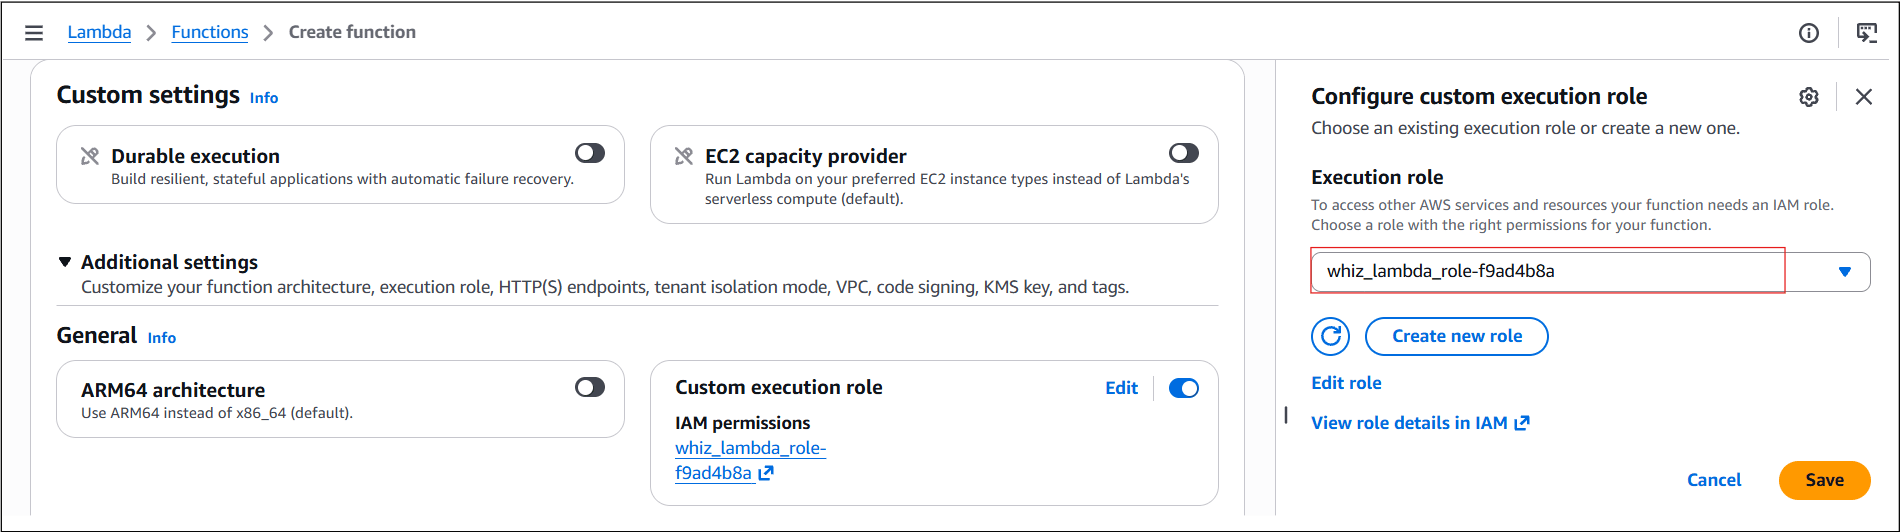
- Click on the Create function
- Once the Lambda Function is created successfully copy the Function ARN.
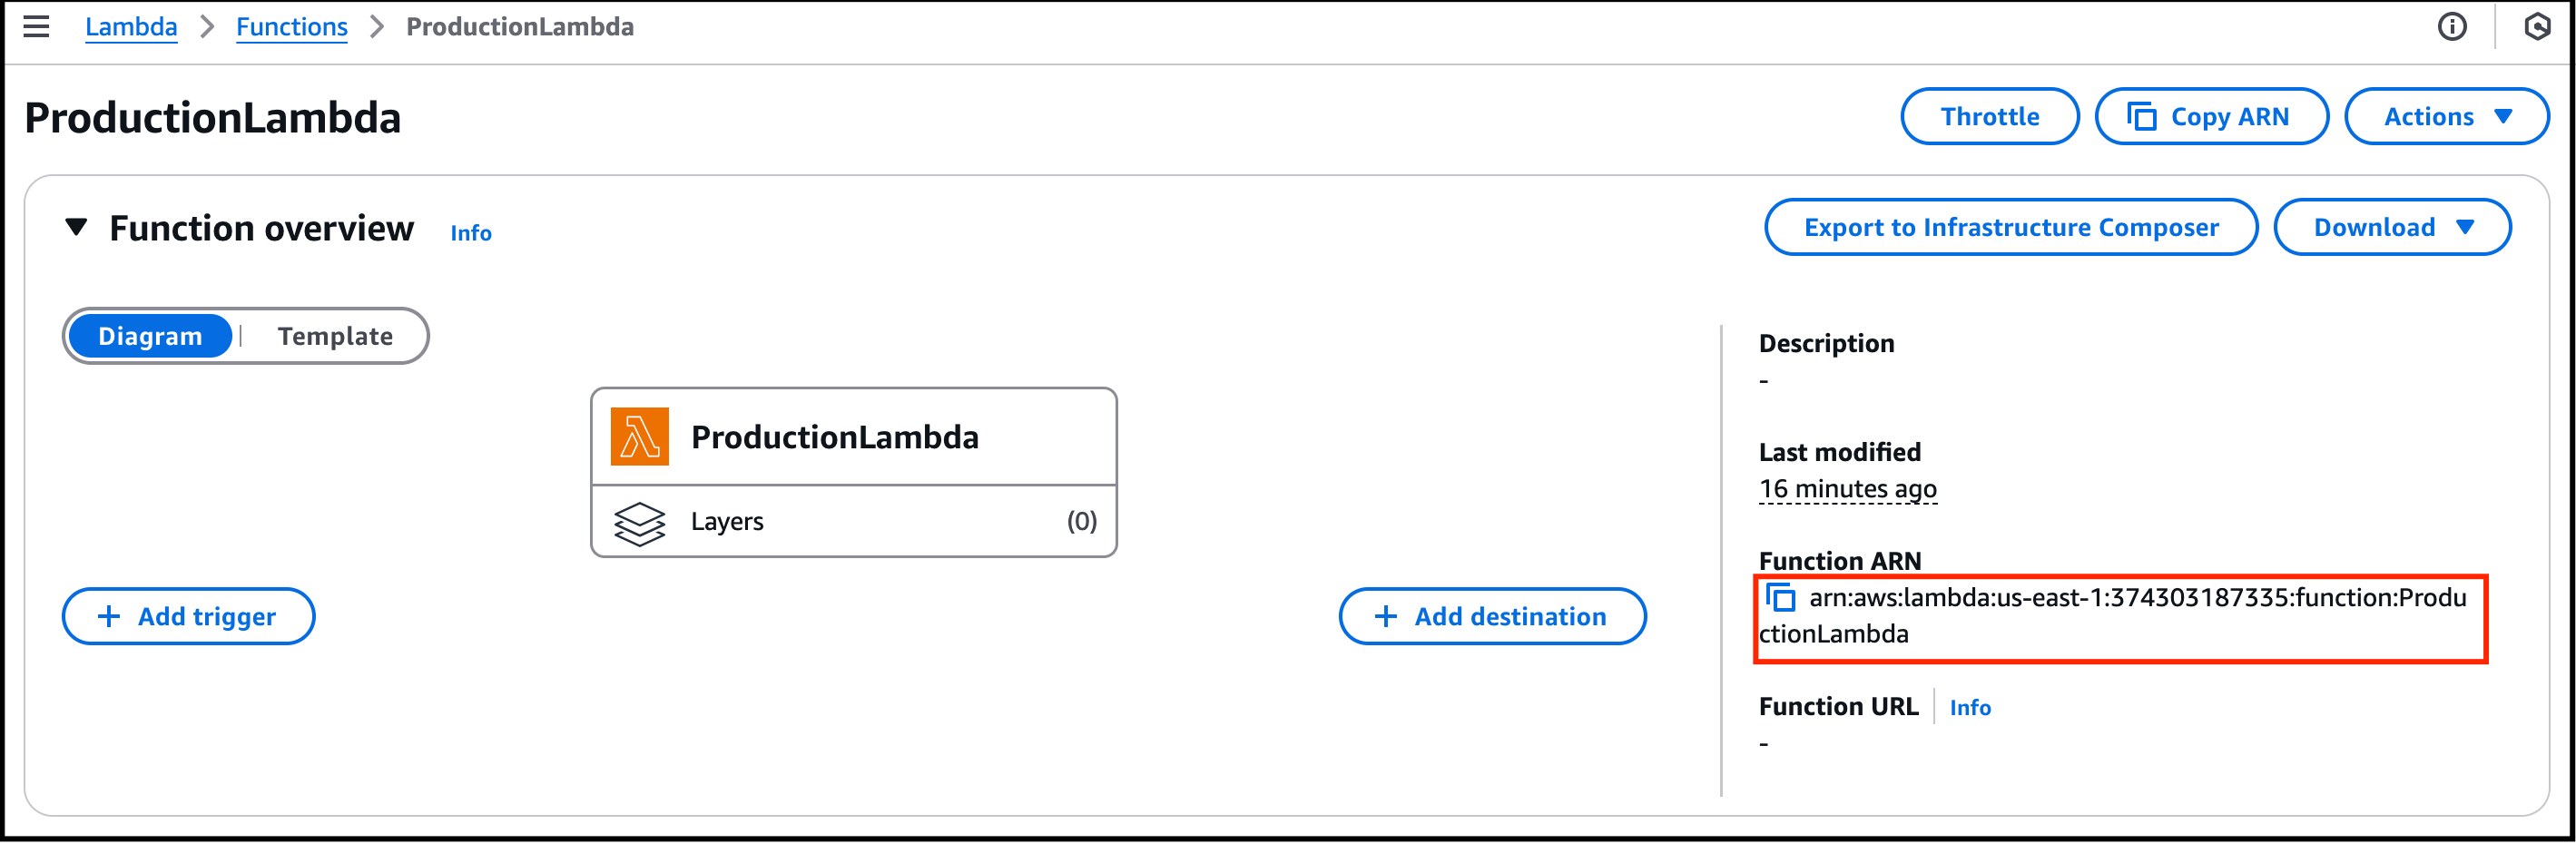
- Function code : Replace the existing code with the below and then click on Deploy.
-
Repeat the step 2 and 3 to create one more Lambda function with,
- Function Name : Enter TestingLambda
- Runtime : Select Python 3.12
- Execution Role : Click on Use an existing role
- Existing role : Select whiz_lambda_role-<random_number>
- Once the Lambda Function is created successfully copy the Function ARN.
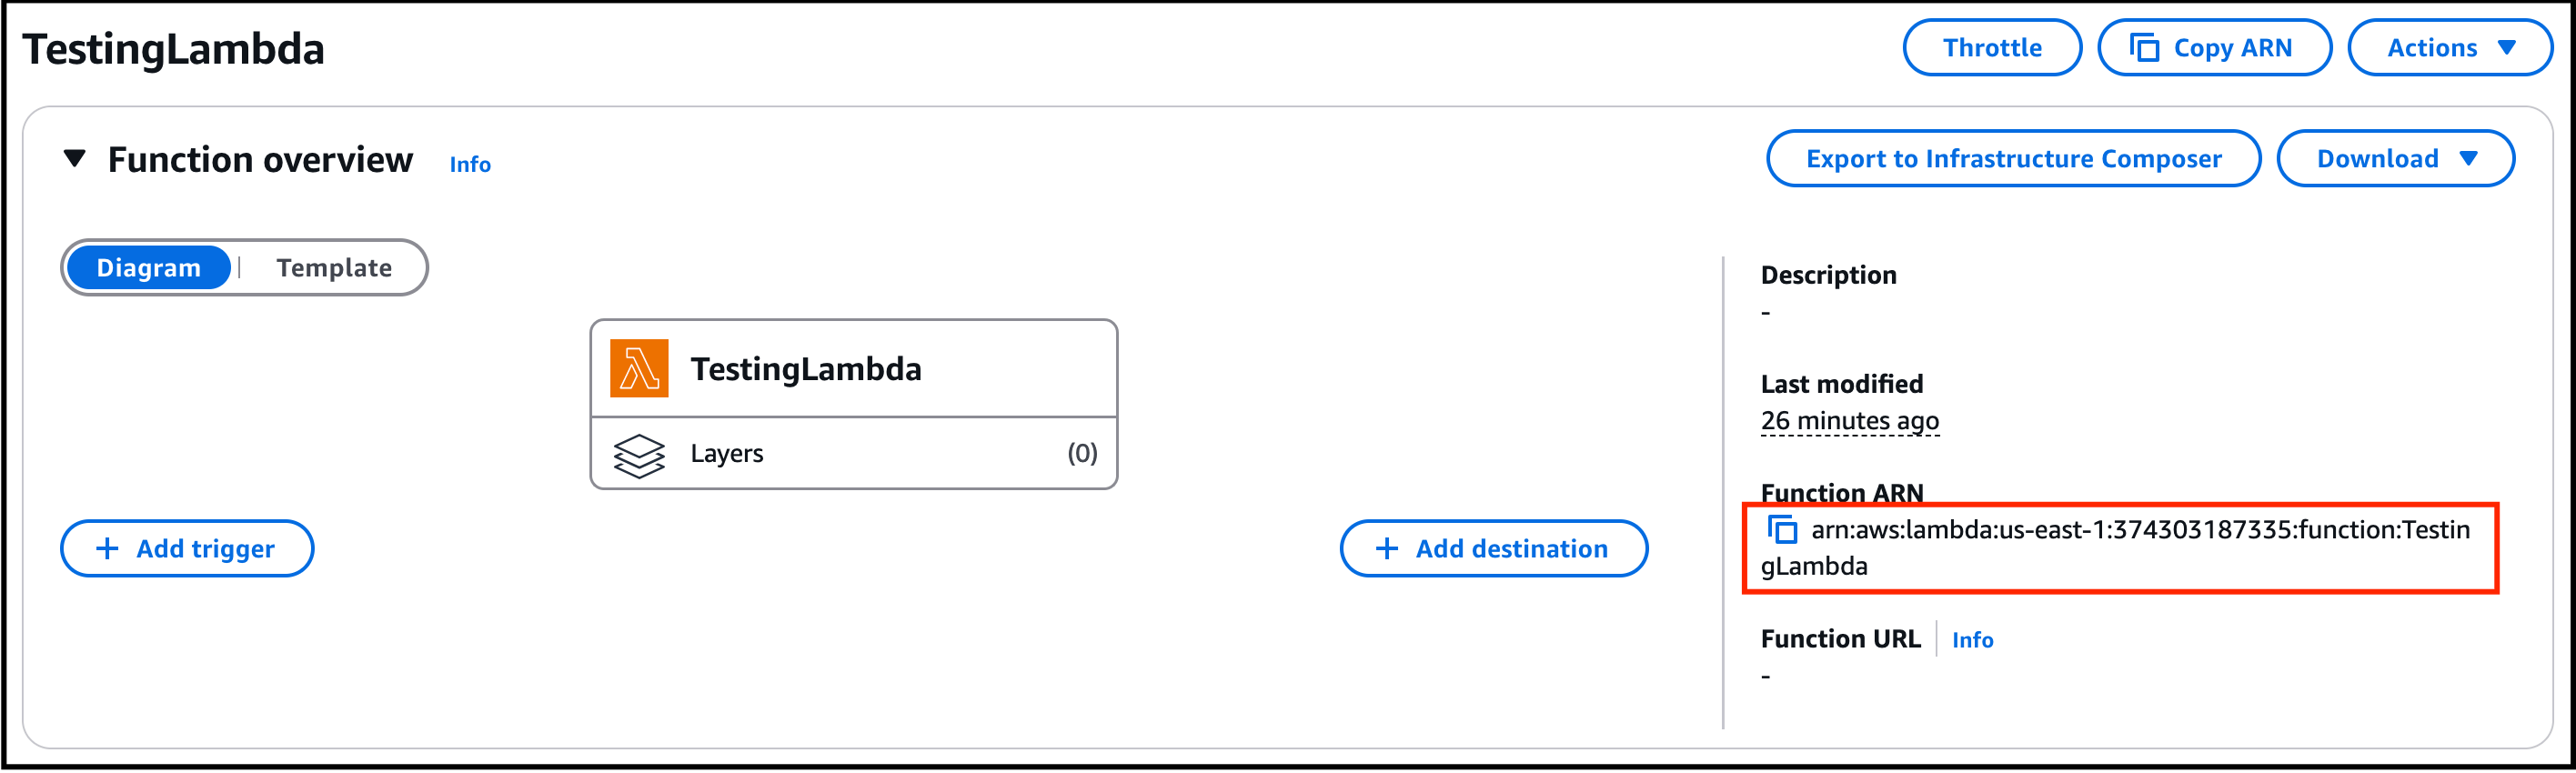
- Function code : Replace the existing code with the below and then click on Deploy button.
Task 4: Create an API
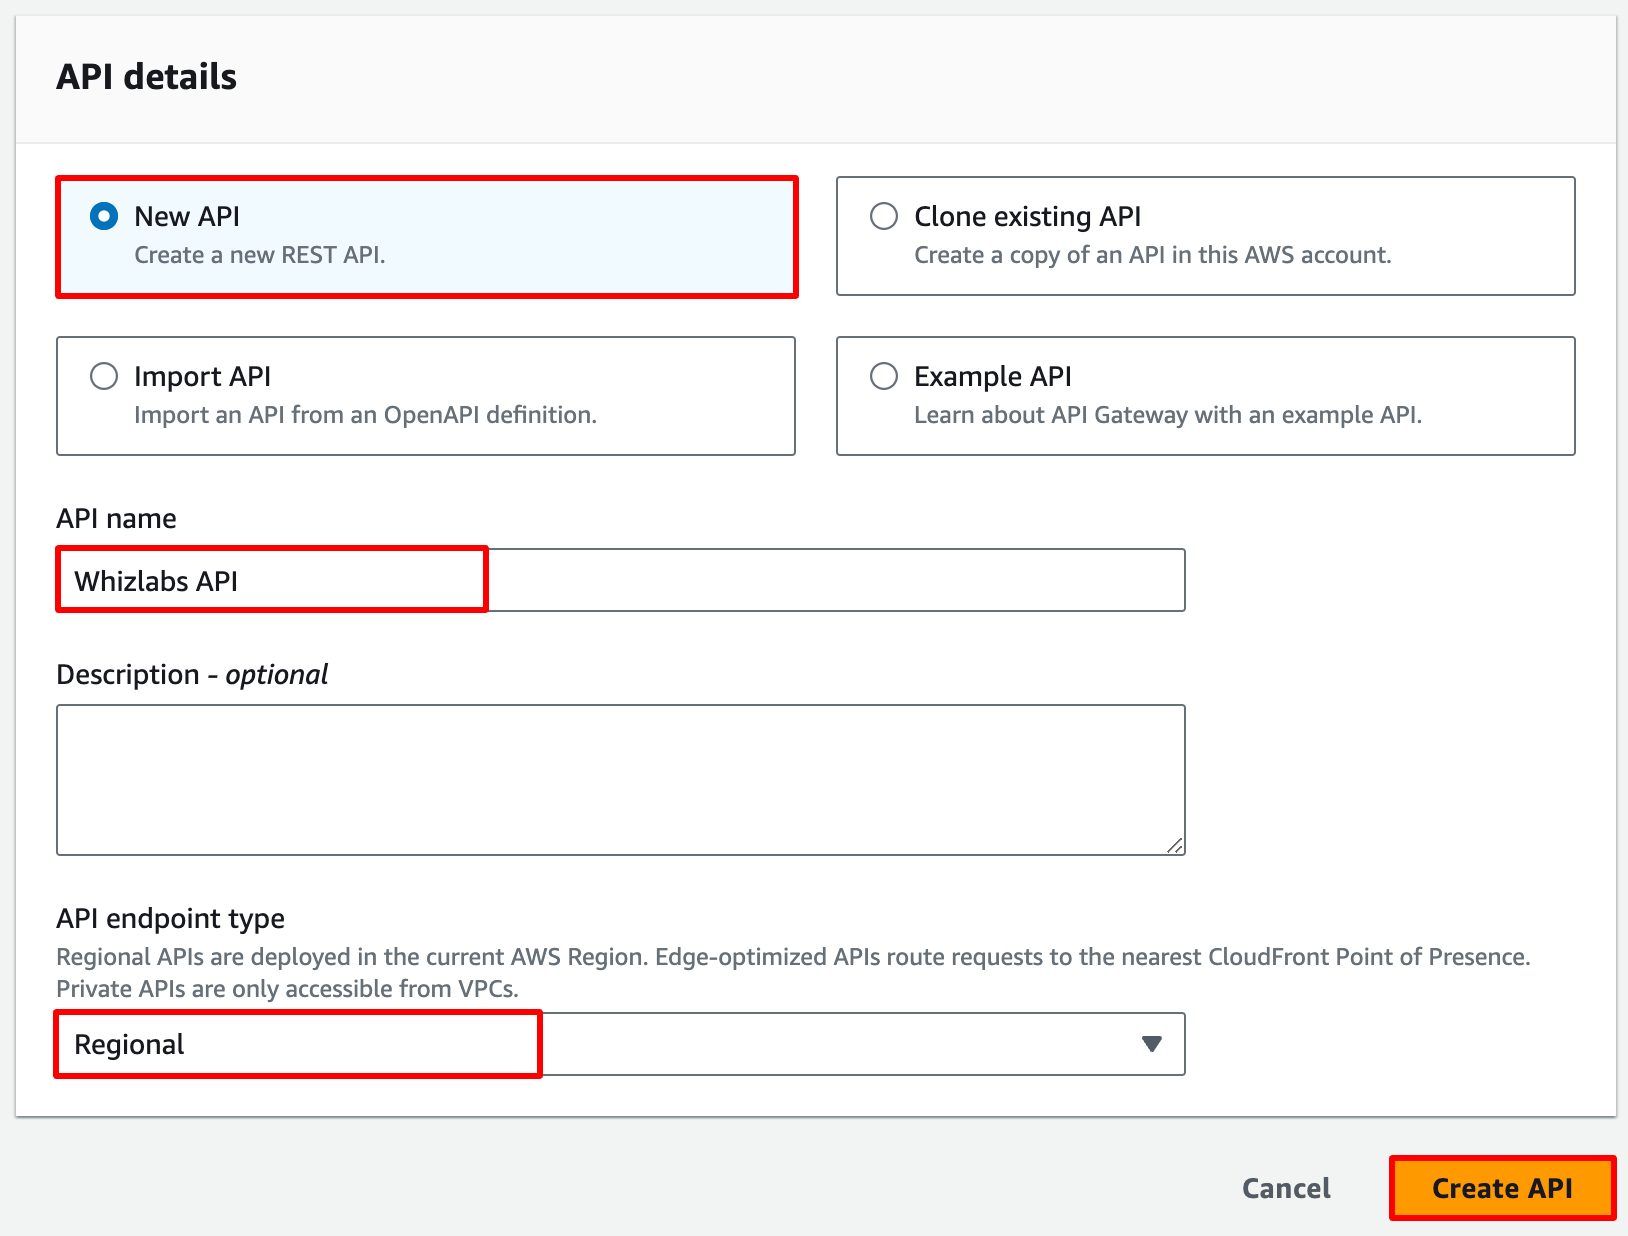
In this task, we are going to enable the user to create a new API in API Gateway called WhizlabAPI. The API will serve as the entry point for accessing the Lambda functions.- Navigate to the Services menu at the top, then click on API Gateway in the Networking and Content Delivery section.
- Click on Build under REST API
- Choose the protocol: Select REST
- Choose create new API as New API, Under settings, choose the API name IP Lab Portal API. Leave other options as default and click on Create API.
Task 5: Creating a Resource
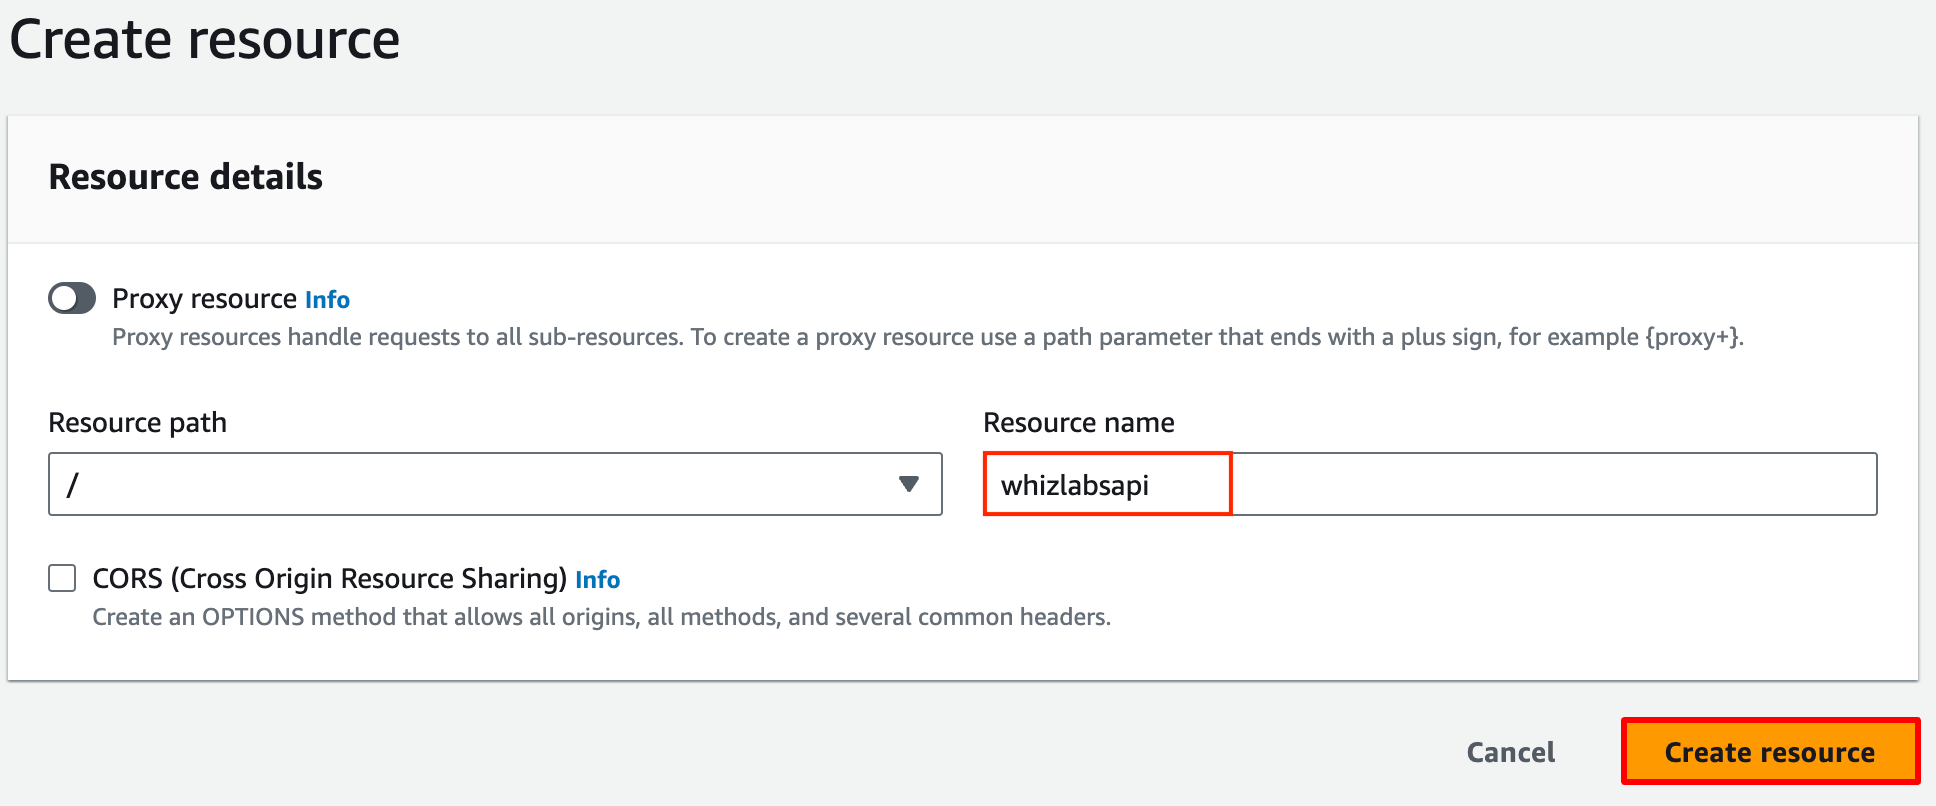
In this task, we are going to assist the user in creating a resource within the API. In this case, the resource will be used to define the endpoint for accessing the Lambda functions.- Once the API is created, select the API.
- Select Create Resource.
- Resource Name: Enter whizlabsapi
- Enter the resource name and click on Create Resource button
Task 6: Creating a Method
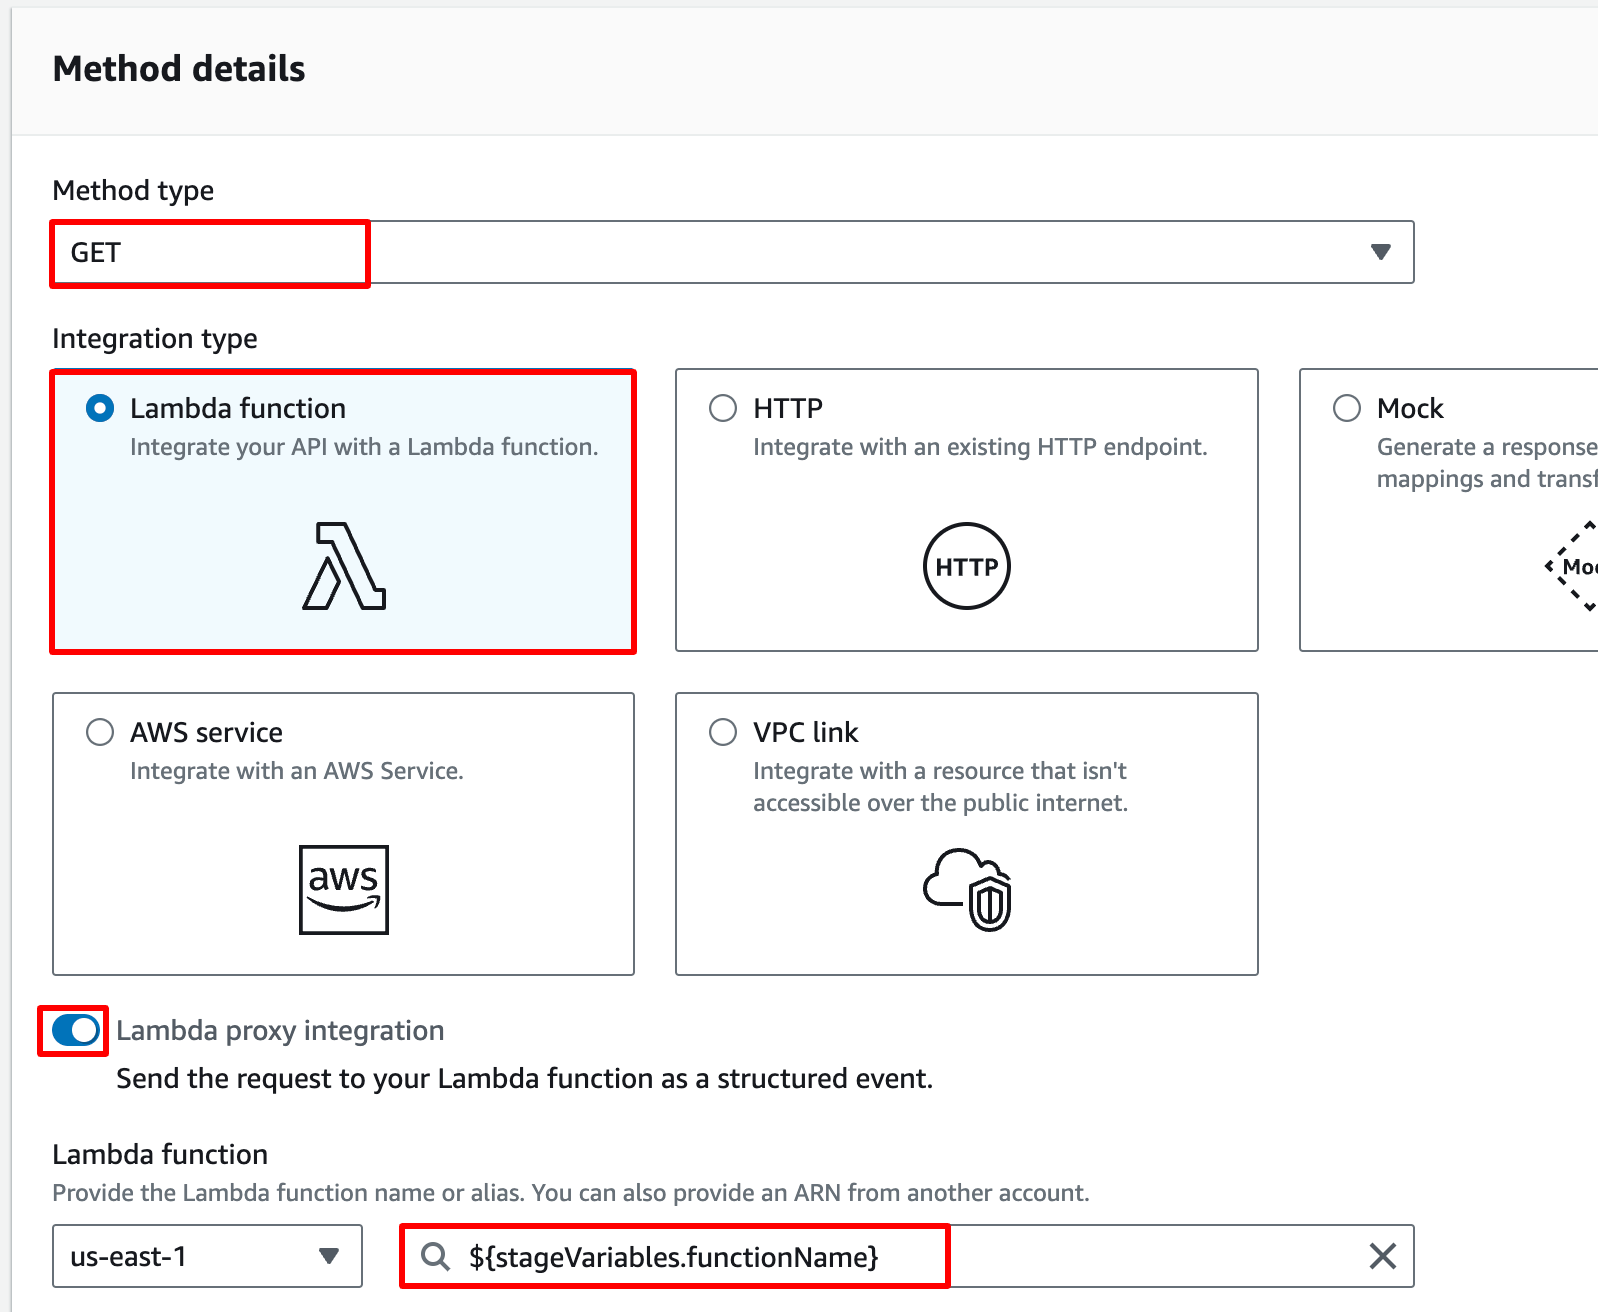
In this task, we are going to guide the user in creating a method for the resource. The method, specifically a GET method, will be integrated with the Lambda functions using the Lambda Proxy integration.- Once you create a resource whizlabsapi, click on Create method. Select Get in the drop-down list.
- Select the Integration Type as Lambda Function
- Use Lambda Proxy integration: Check the checkbox
- Lambda Region: Select us-east-1
- Lambda Function : Enter ${stageVariables.functionName}
Note: Don’t select the lambda function name, only enter ${stageVariables.functionName}
-
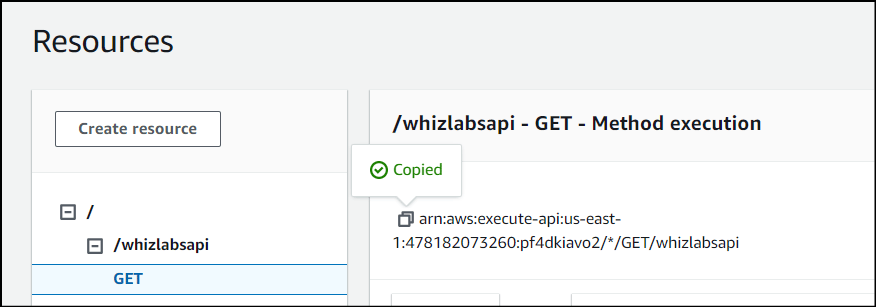
Click on the Save and Copy the Source-ARN
Task 7: Run the CLI command to give lambda permissions to the API using the EC2 instance
?In this task, we are going to run the CLI command to give lambda permissions to the API using the EC2 instance.- Navigate to the EC2 page and make sure you’re in the us-east-1 (N.Virginia) region.
Note: Don’t close the API Gateway page
- Click on Instances from the left side menu and select the EC2 instance which you created in the above step.
- Please follow the steps in SSH into EC2 Instance.
- Configure the AWS CLI on the EC2 instance by running the following command:

- Copy the CLI commands for API gateway. To generate a UUID in Bash follow below command:
- To combine certain information to ensure uniqueness follow below command:
- Now, run the below command. Ensure you replace the <productionlambda-function-arn> with the function arn of production lambda and <api-gateway-arn> with the arn of the api gateway you have copied earlier.

- Now, you will be able to see a JSON success output.

- Similarly, run the same command but change the function name to TestingLambda (Second lambda function you created). Ensure you replace the <testinglambda-function-arn> with the function arn of testing lambda and <api-gateway-arn> with the arn of the api gateway you have copied earlier.

- Now, you will be able to see a JSON success output.

Task 8: Deploy API Gateway with two different stages
In this task, we are going to assist the user in deploying the API Gateway with two different stages: TestingAPI and ProductionAPI. These stages provide separate environments for testing and production.Testing Lambda Stage
- Once the resource and the method have been created successfully, you can deploy the API.
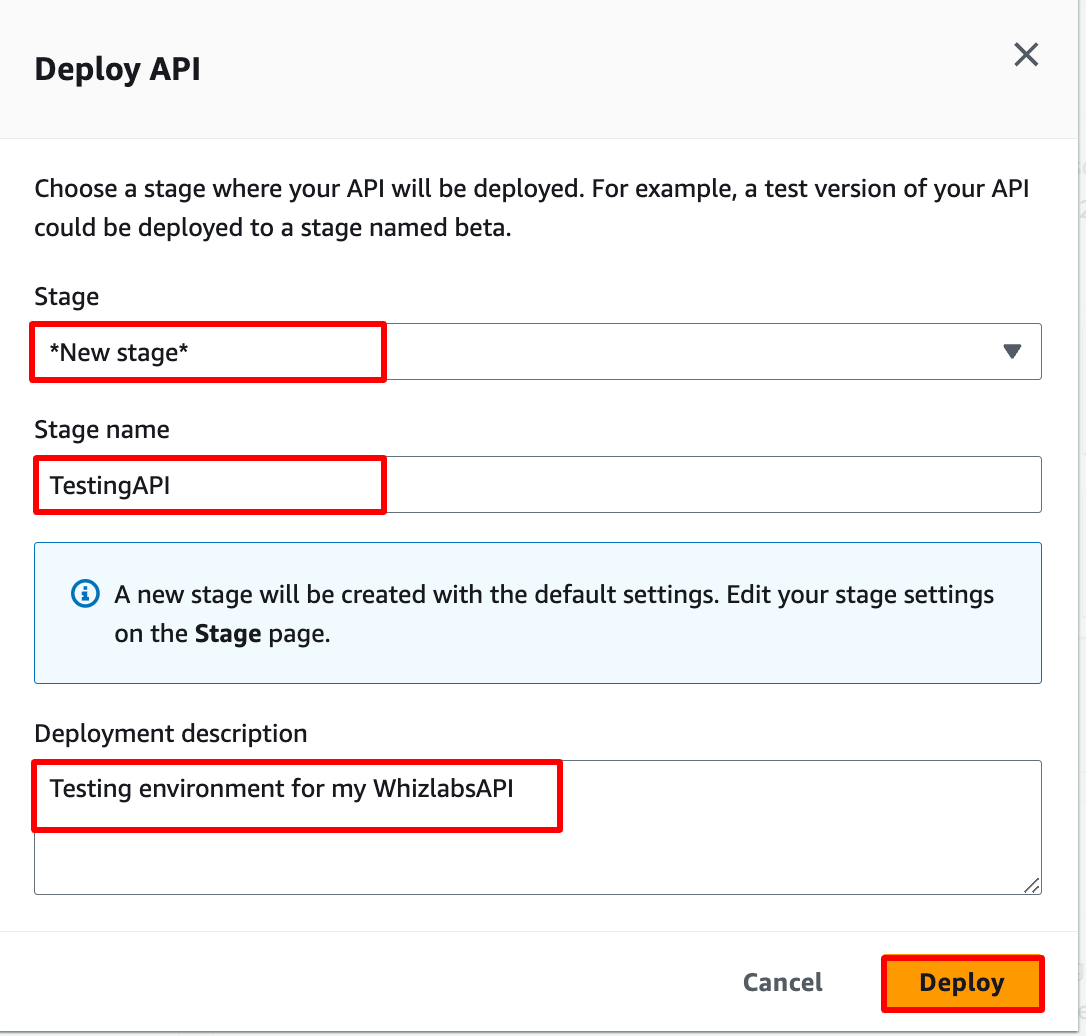
- Click on Deploy API.
- Select the Deployment Stage in the drop-down as New Stage.
- Stage Name: Enter TestingAPI and Stage description as Testing environment for my WhizlabsAPI.
- Click on Deploy
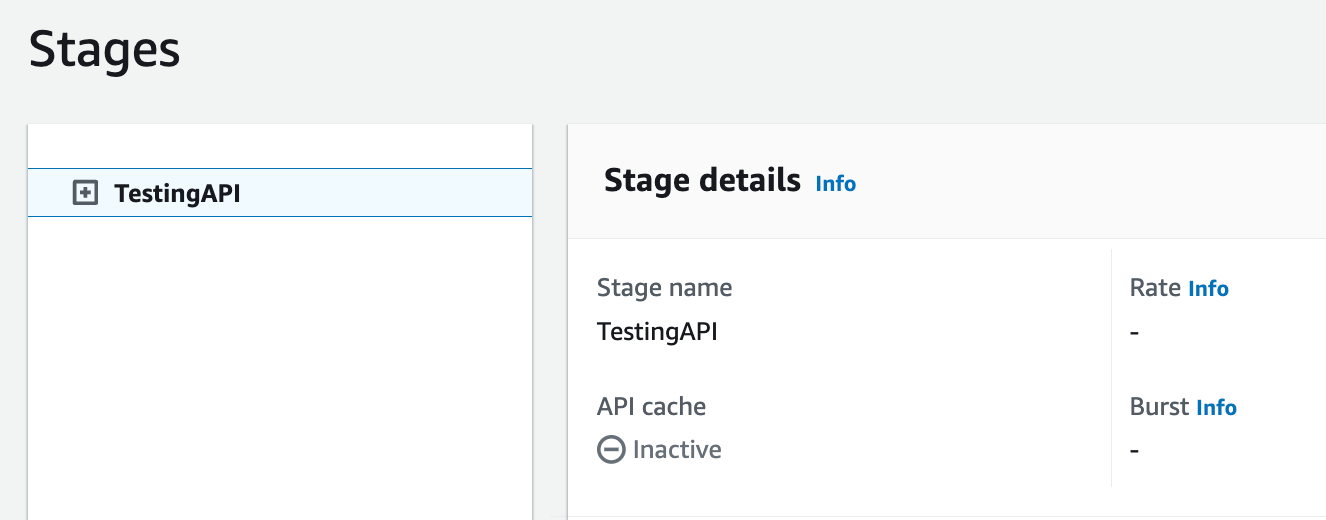
- Once the API has been deployed, navigate to Stages.
Production Lambda stage
- Click on the Resources from the left side menu.
-
Select the GET method which you have created.
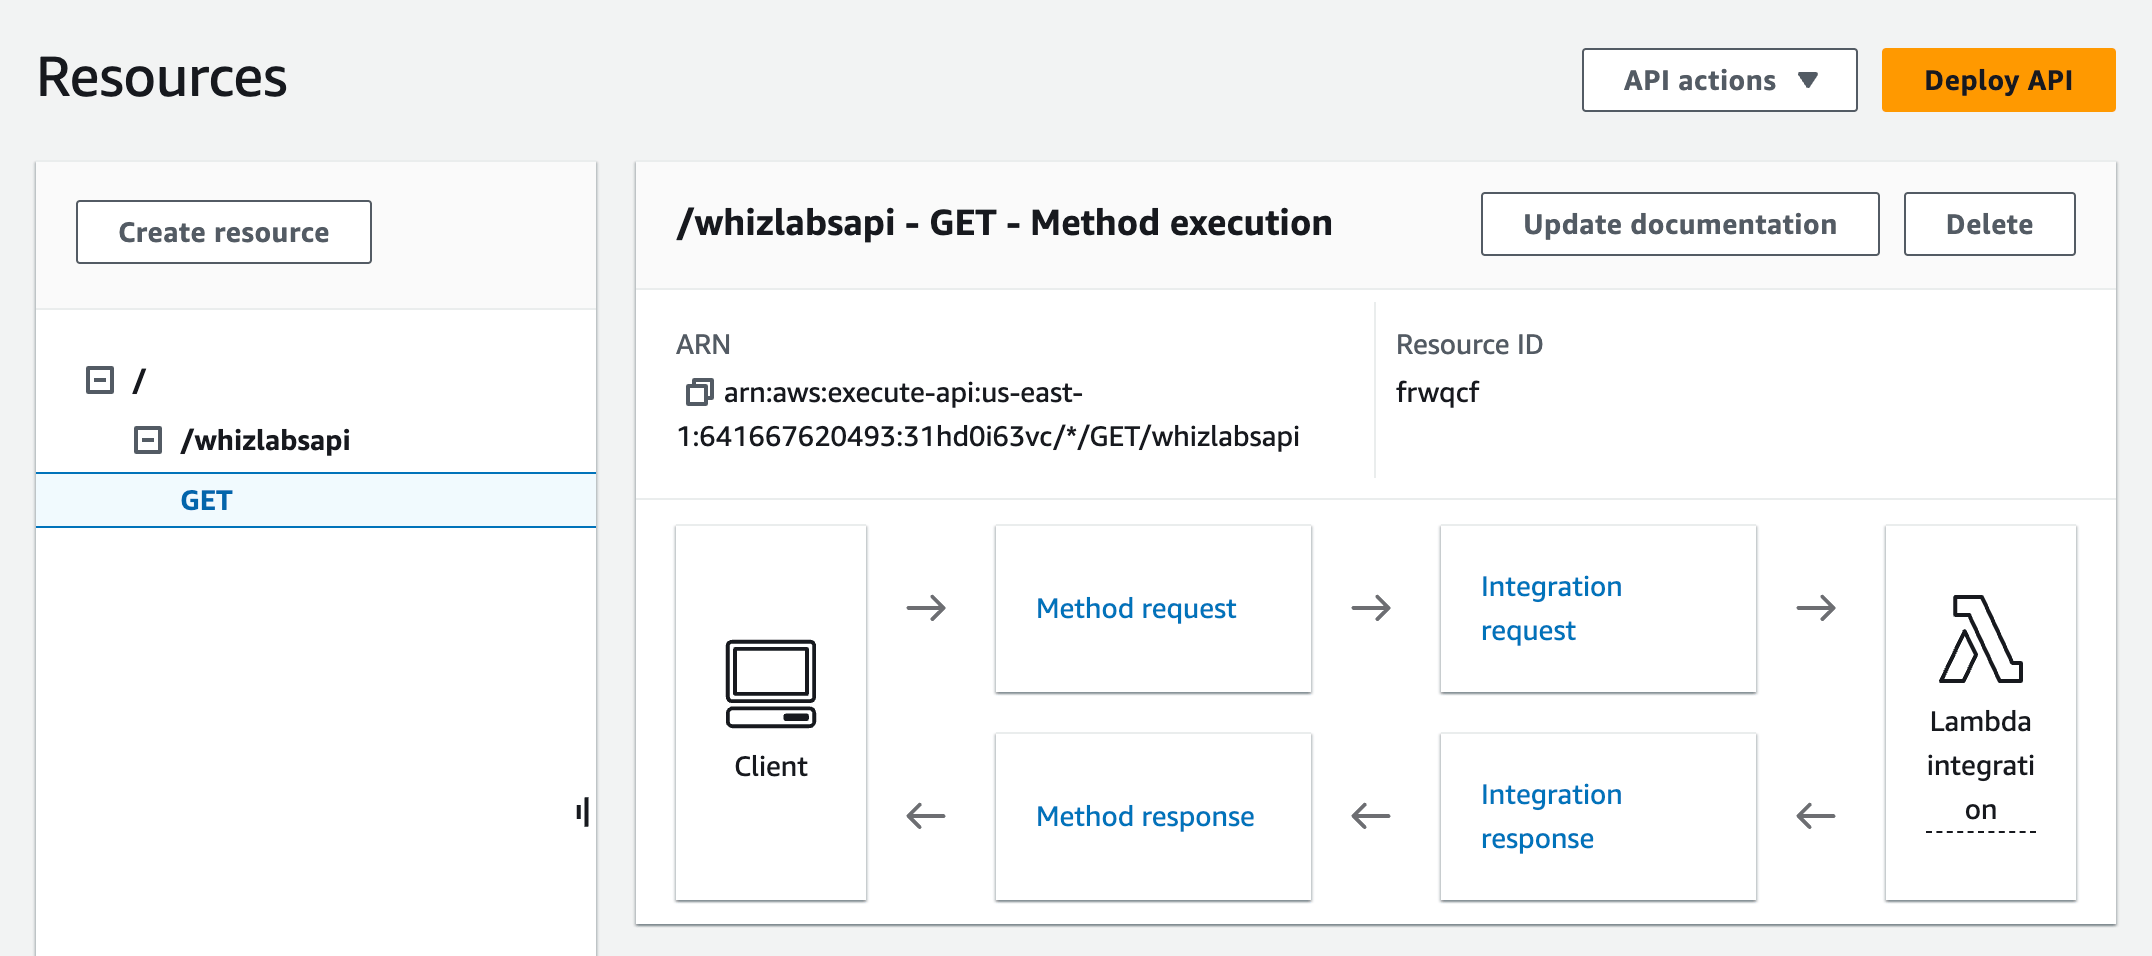
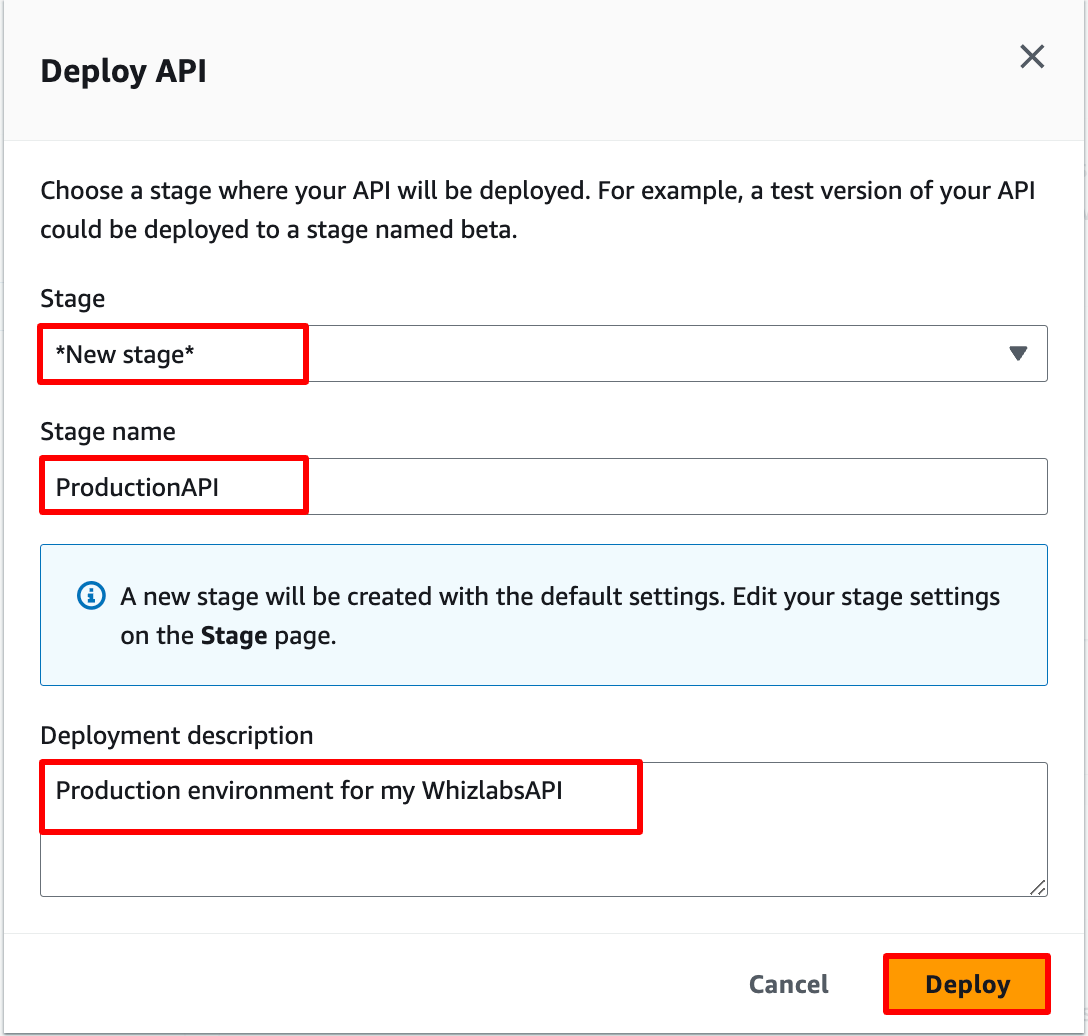
- Select Deploy API.
- Select the Deployment Stage in the drop-down as New Stage.
- Stage Name: Enter ProductionAPI and Stage description as Production environment for my WhizlabsAPI.
- Click on Deploy
- Once the API has been deployed, navigate to Stages.
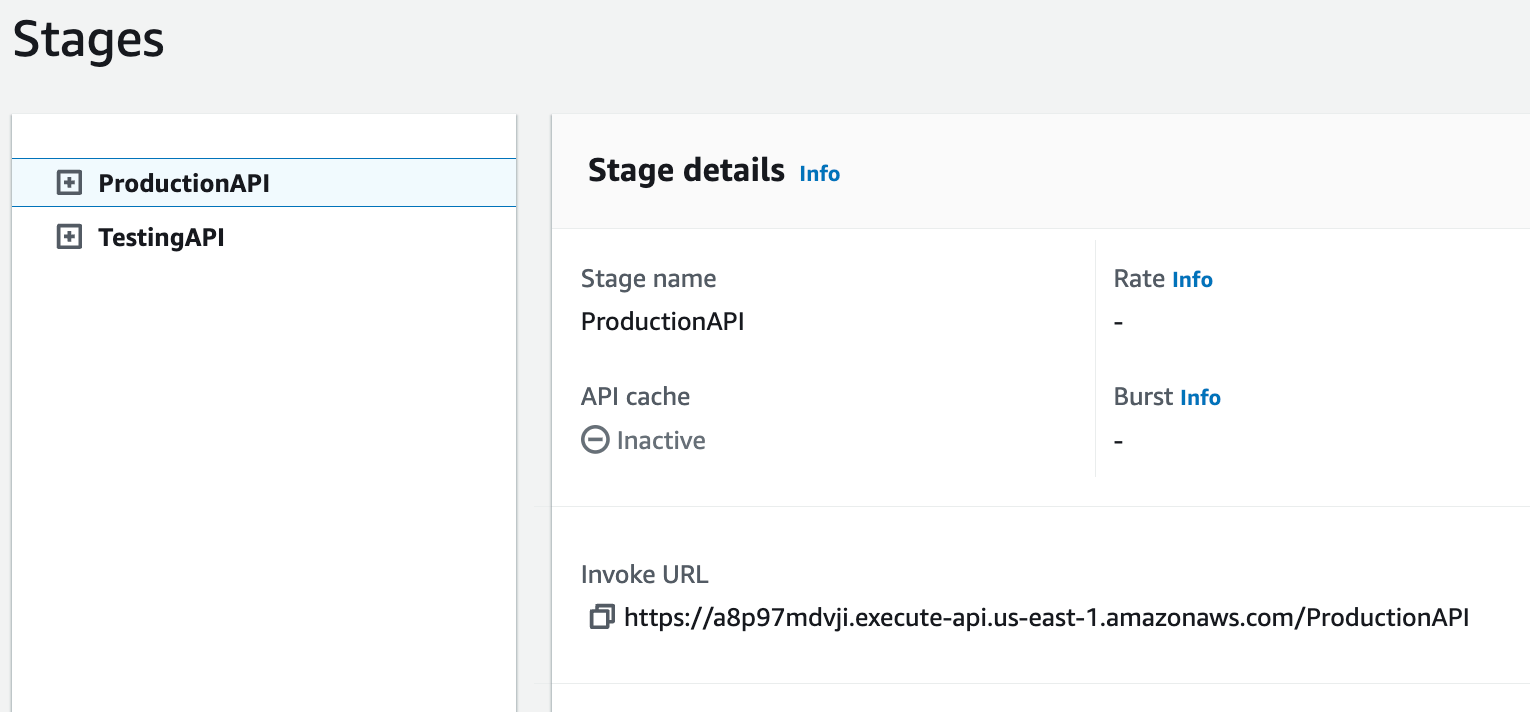
Task 9: Add stage variables to both stages
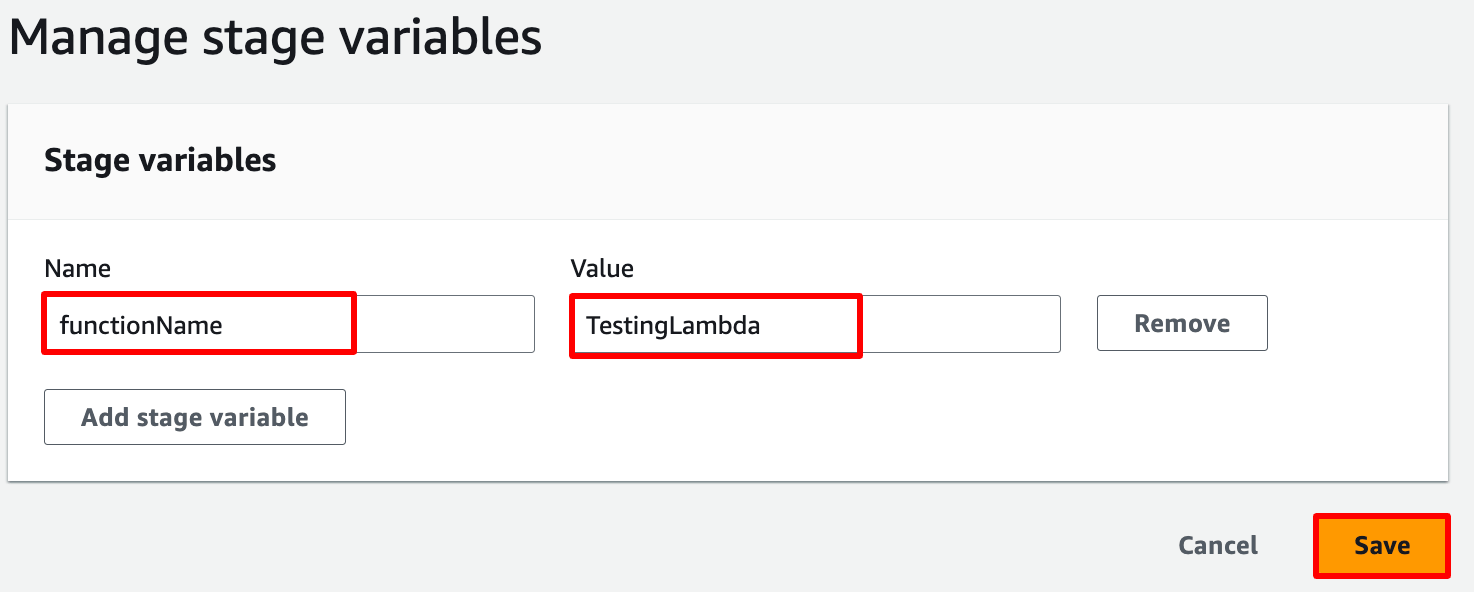
In this task, we are going to add stage variables to the deployed stages. The stage variables will be used to define the specific Lambda functions associated with each stage.- Now click on the TestingAPI stage in Stages.
-
Select the Stage Variables tab in the right side page and click on Edit and then Add Stage Variable
- Name: Enter functionName
- Value: Enter TestingLambda
- Note: In the value field, enter the Testing lambda function name.
- Now click on the Save button.
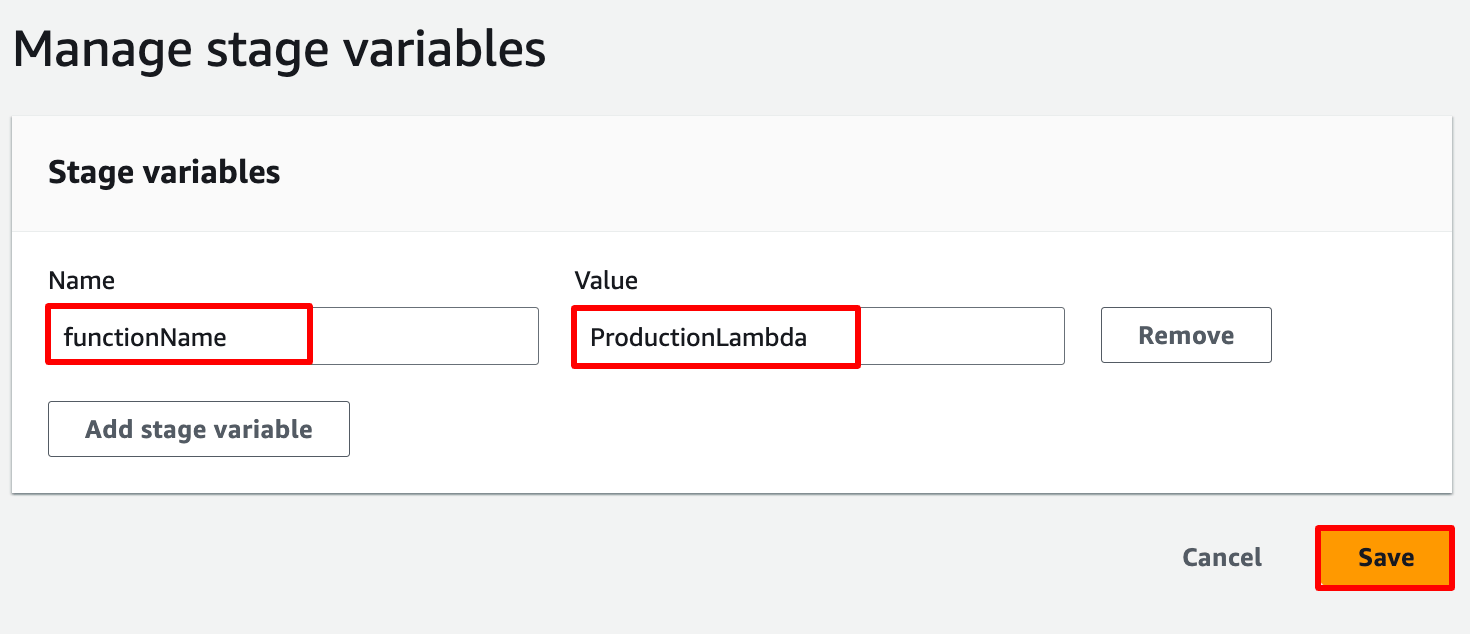
- Now click on the ProductionAPI stage in Stages.
-
Select the Stage Variables tab in right side page and click on Add Stage Variable
- Name: Enter functionName
- Value : Enter ProductionLambda
- Note: In the value field, enter the production lambda function name.
Task 10: Test the API Gateway
In this task, we are going to test the API Gateway by making GET requests to the endpoints associated with the deployed stages. This ensures that the API Gateway is properly integrated with the Lambda functions and functioning as expected.- Click on the ProductionLambda stage, open the stage
- Now click on the GET method.
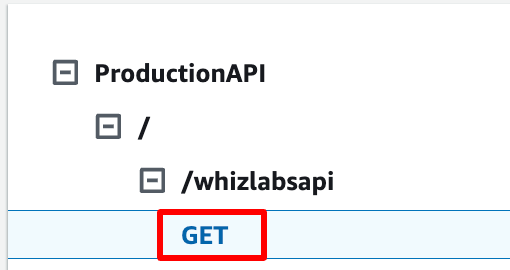
- Copy and Paste the Invoke URL (followed by the resource name) in the new tab to make a GET request.
- You will receive the GET request from the API. Here’s an example:

Note: If you make any mistake and after correcting it, still the API URL is showing the same error, please force refresh or clear cache.
- Similarly, click on the TestingLambda stage, open the stage
- Now click on the GET method.
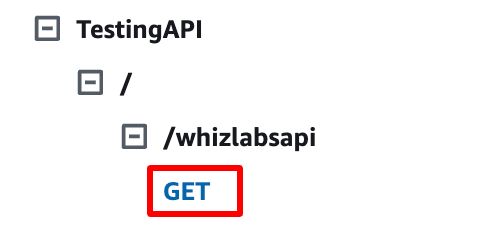
- Copy and Paste the Invoke URL (followed by the resource name) in the new tab to make a GET request.
- You will receive the GET request from the API. Here’s an example:

Do you Know?
API Gateway is designed to handle massive scale and can support up to hundreds of thousands of concurrent API requests. This means that even if your application experiences sudden spikes in traffic, API Gateway can handle the increased load seamlessly without any additional configuration or scaling effort on your part.
- Once the lab steps are completed, please click on the Validation button on the left side panel.
- This will validate the resources in the AWS account and shows you whether you have completed this lab successfully or not.
Completion and Conclusion
- You have successfully created an EC2 instance.
- You have successfully created two Lambda functions.
- You have successfully created the API.
- You have successfully created the API Resource and Method.
- You have successfully created two stages for API.
- You have successfully added stage variables for both stages.
- You have successfully tested the API
End Lab
- Sign out of AWS Account.
- You have successfully completed the lab.
- Once you have completed the steps, click on End Lab from your IP Lab Portal and wait till the process gets completed.
What gets checked
When you press Check my work, the platform verifies each of these:- Launch an EC2 Instance — Check whether an EC2 Instance is launched or not.
- Create a API Gateway — Check whether a REST/HTTP?WEBSOCKET API gateway is created or not
- Create an AWS Lambda Function — Check whether a Lambda Function is created or not