

Overview
Lab Details
- This lab walks you through creating an SES Email notification in the AWS management console.
- Duration: 15 minutes
- AWS Region: US East (N. Virginia) us-east-1
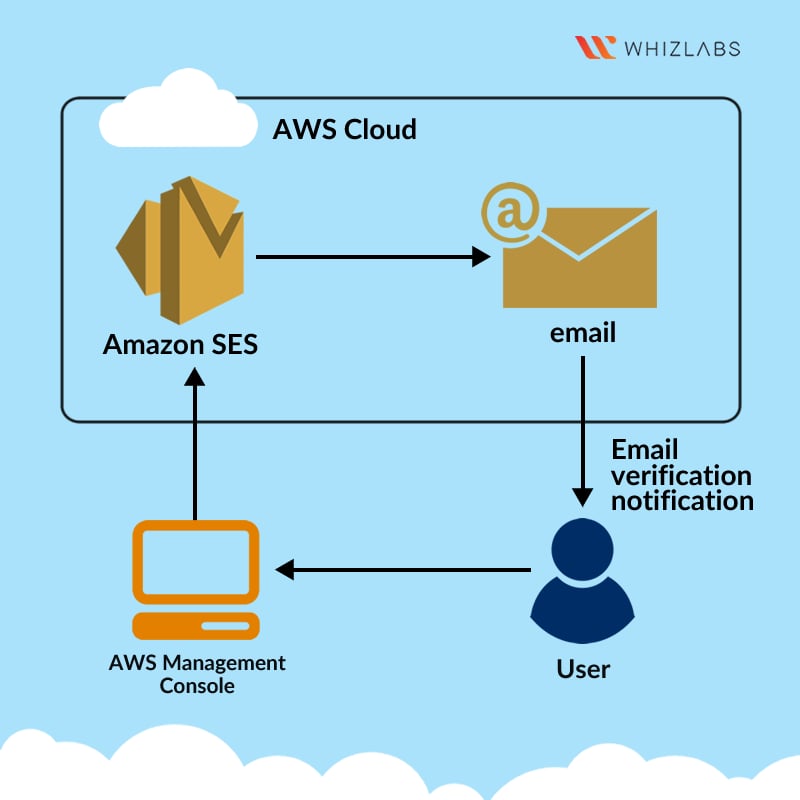
Architecture Diagram
Task Details
- Sign into AWS Management Console.
- Create an Email Identity using SES.
- Verify the Email address.
- Send a Test Email.
Launching Lab Environment
- To launch the lab environment, Click on the Start Lab button.
- Please wait until the cloud environment is provisioned. It will take less than a minute to provision.
- Once the Lab is started, you will be provided with IAM user name, Password, Access Key, and Secret Access Key.
Note : You can only start one lab at any given time
Lab guide
Lab Steps
Task 1: Sign in to AWS Management Console
- Click on the Open Console button, and you will get redirected to AWS Console in a new browser tab.
- On the AWS sign-in page,
- Leave the Account ID as default. Never edit/remove the 12 digit Account ID present in the AWS Console. otherwise, you cannot proceed with the lab.
- Now copy your User Name and Password in the Lab Console to the IAM Username and Password in AWS Console and click on the Sign in button
Task 2: Create an Email Identity using SES
- Make sure you are in the US East (N. Virginia) us-east-1 Region.
- Navigate to the Services menu at the top. Click on Amazon Simple Email Service in the Business Application section.
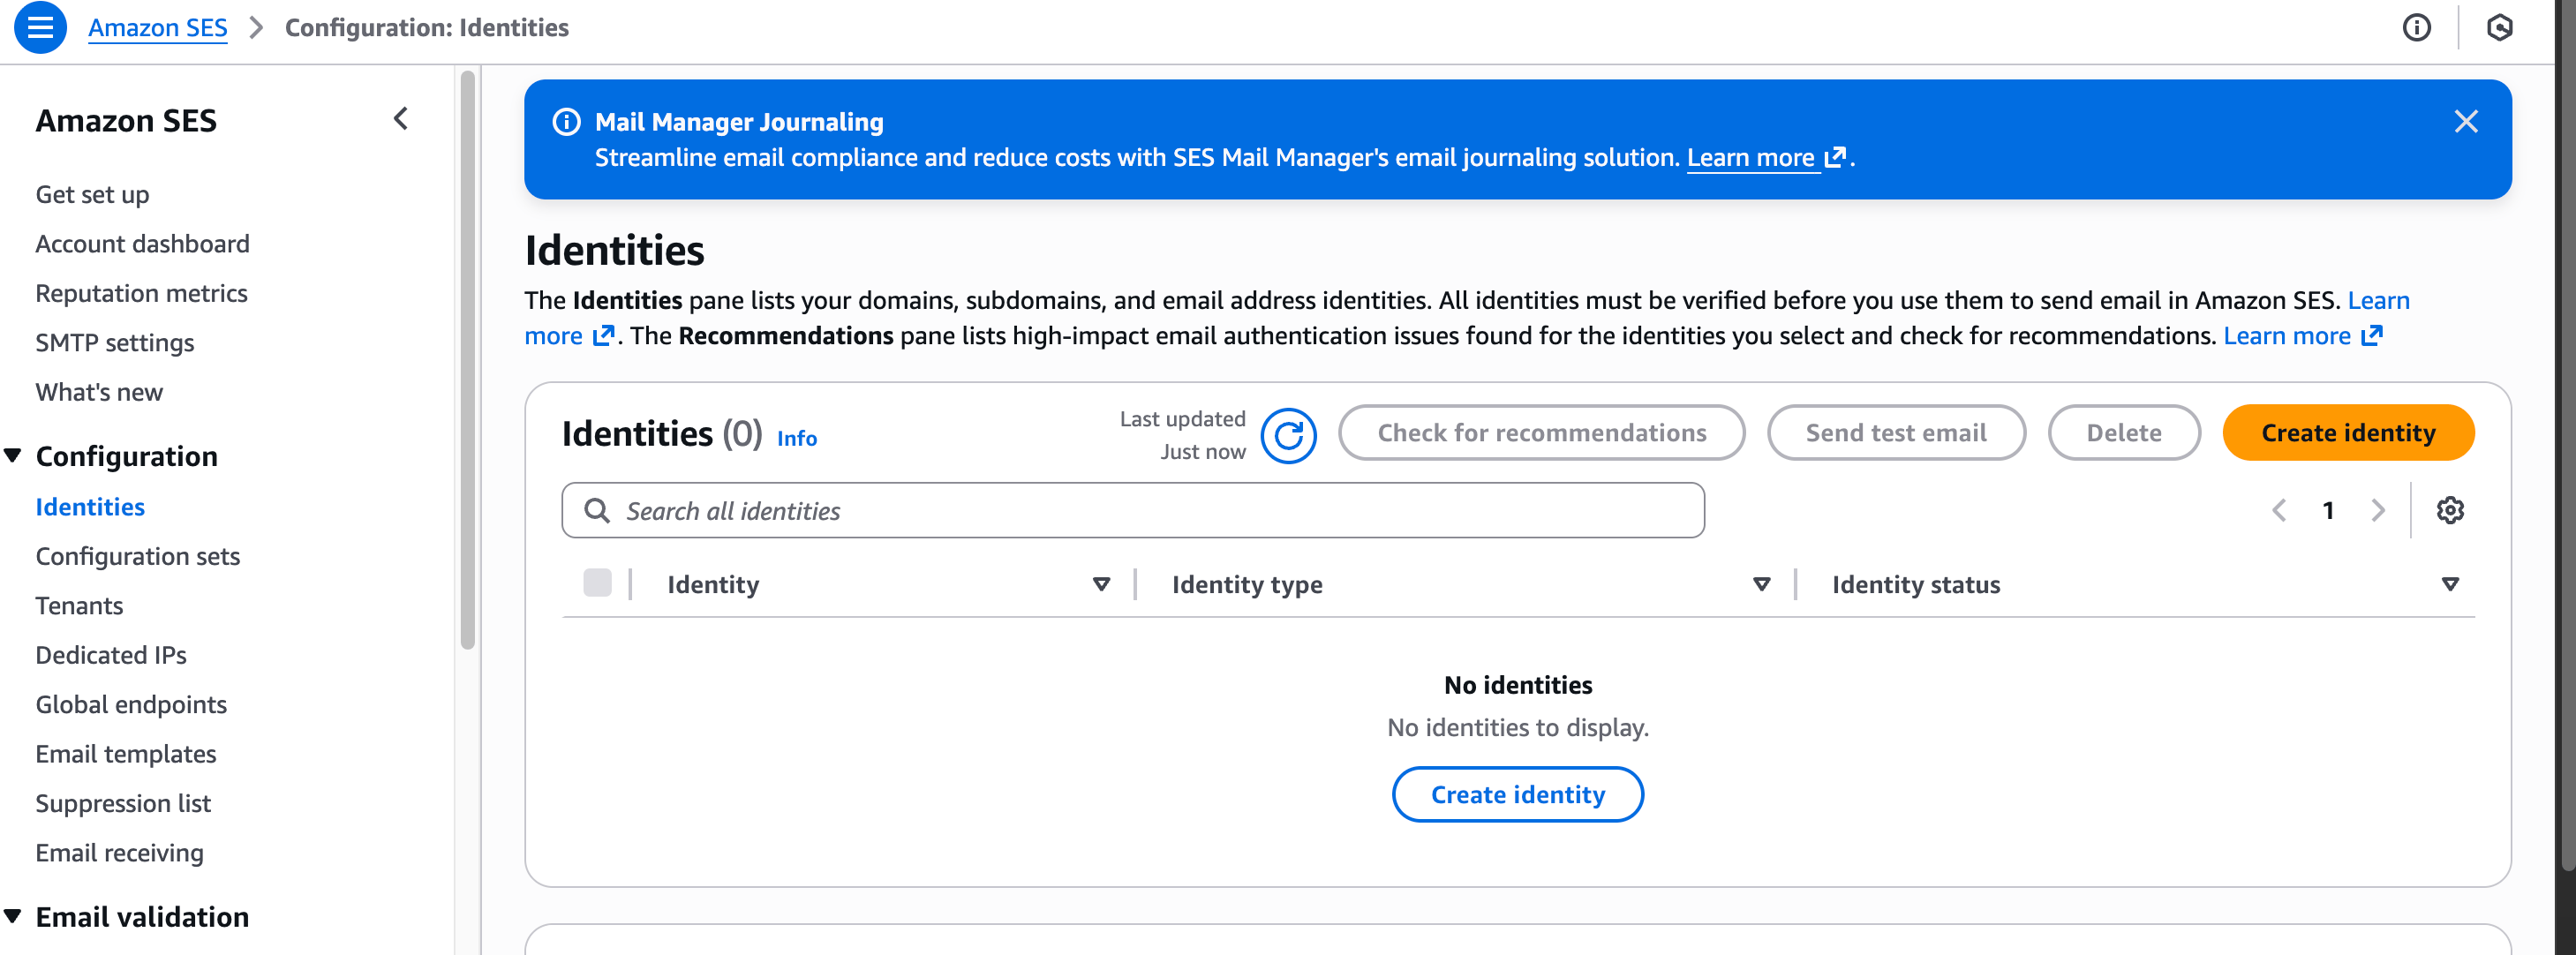
- On the left side menu, Select Identities
-
Click on Create Identity.
-
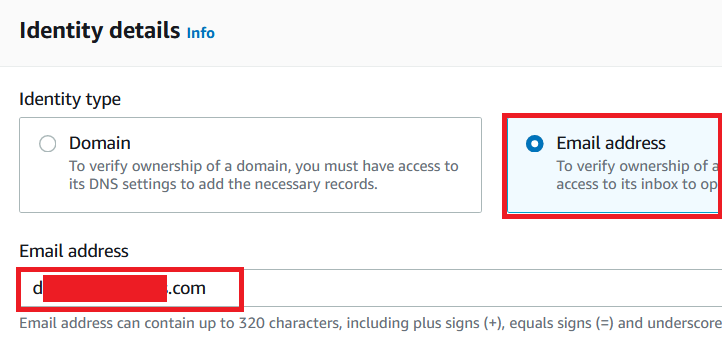
Enter the following details:
- Identity type: Select Email Address
- Email address: Enter your valid Email ID.
- Leave other options as default.
- Click on Create Identity.
- You will get the below IAM error, just ignore that. You will not need this permission to complete the lab.

-
Now you will be able to see that the Identity Status on the Email will be Verification Pending.

Task 3: Verify the Email address
- AWS will send a confirmation email to the email that you provided in the above step.
- Log in to your mailbox and you will be able to see a mail from Amazon Web Services.
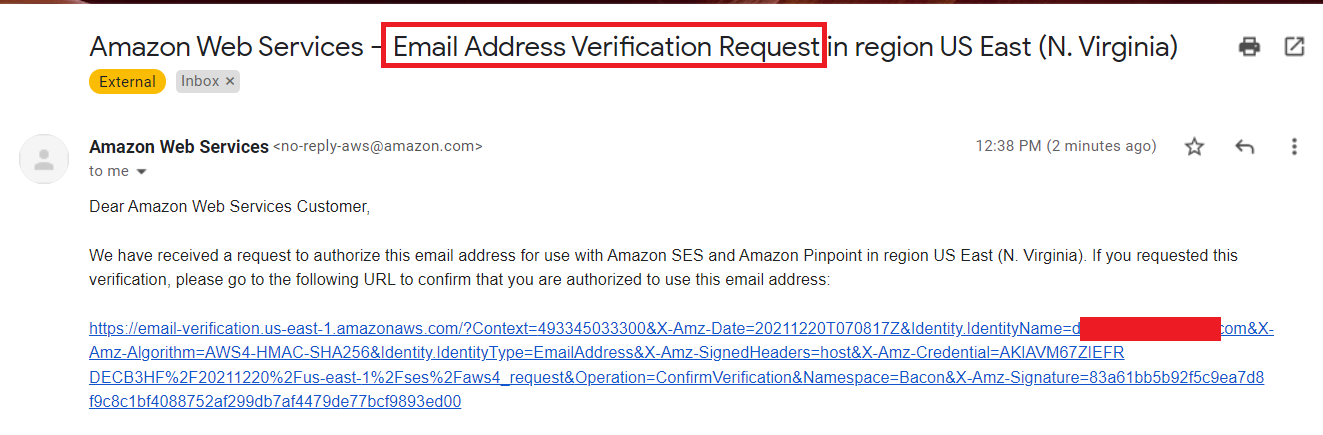
- Once you click on the link, you will be routed to the success page.

- Now go to the SES Email Address page and refresh the page. You will be able to see the Verification status as Active.

Task 4: Send a Test Email
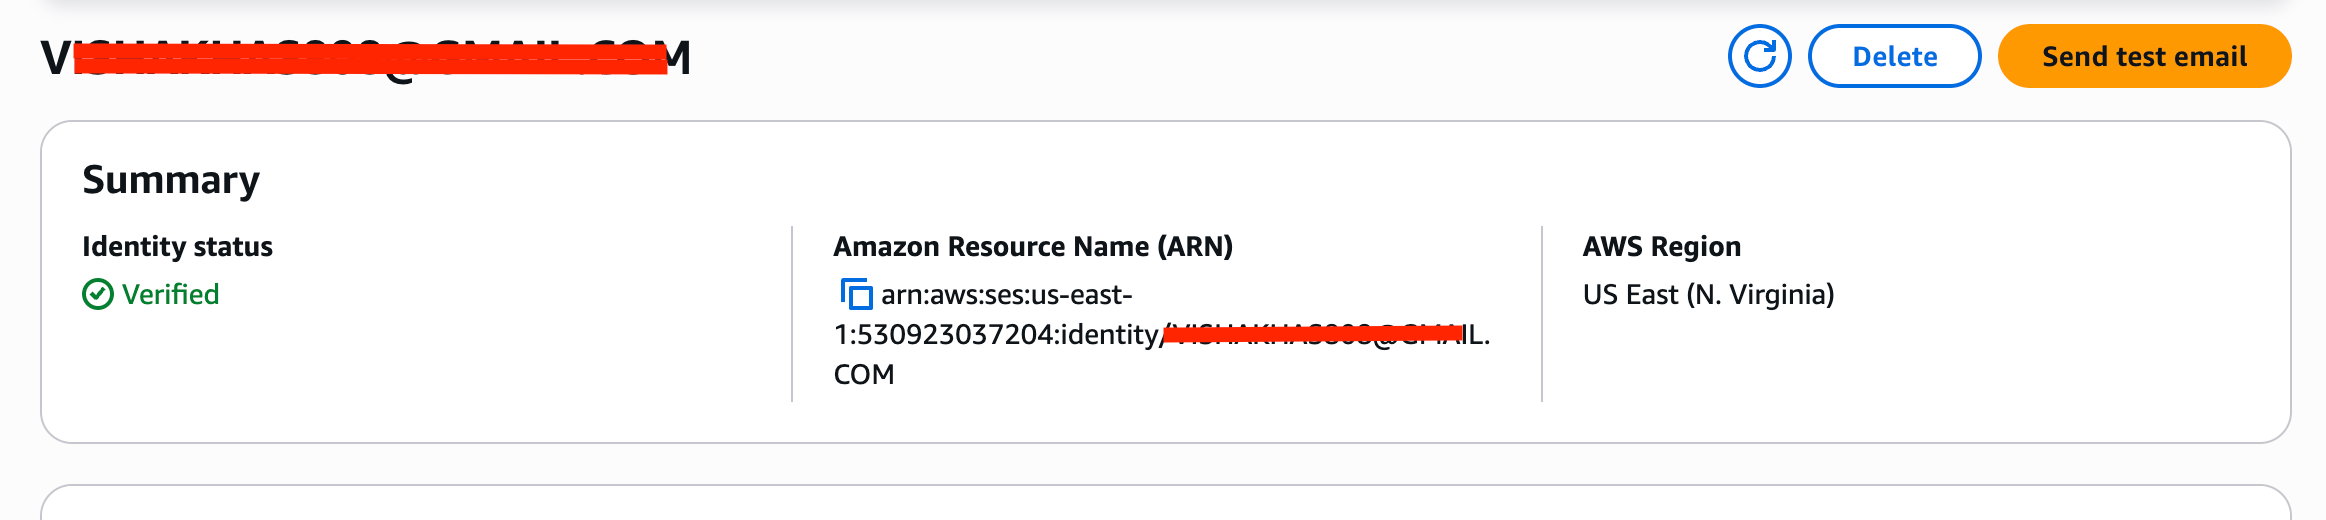
- Let us send a test email to the same email address.
-
Click on Send Test Email.
-
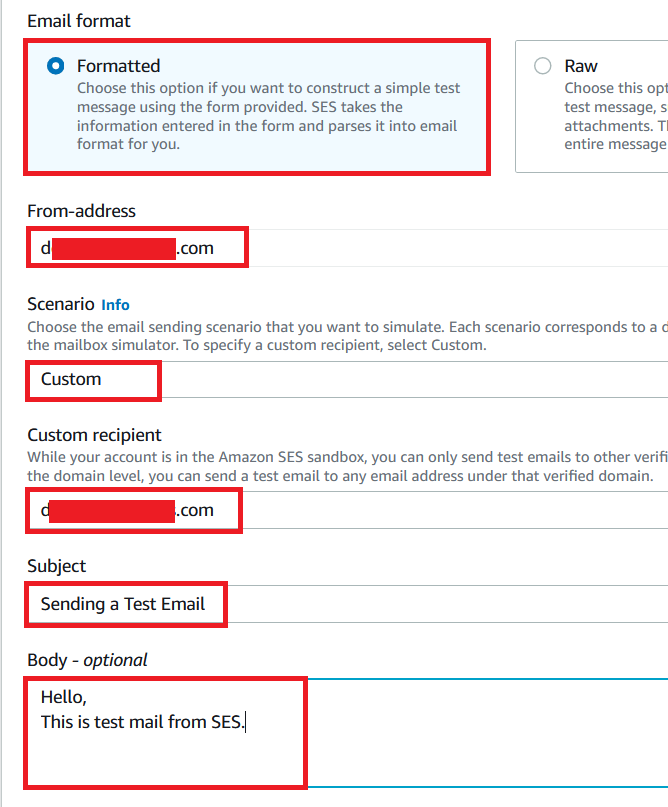
Make the following changes:
- Email Format: Select Formatted (keep it as default)
- From: Your email address will be present by default
- Scenario: Select Custom from the drop-down menu
- Custom recipient: Give the same email address (for testing purposes)
- Subject: Enter Sending a Test Email
- Body: Type any text as you wish
- Leave other options as default.
- Click on Send Test Email.
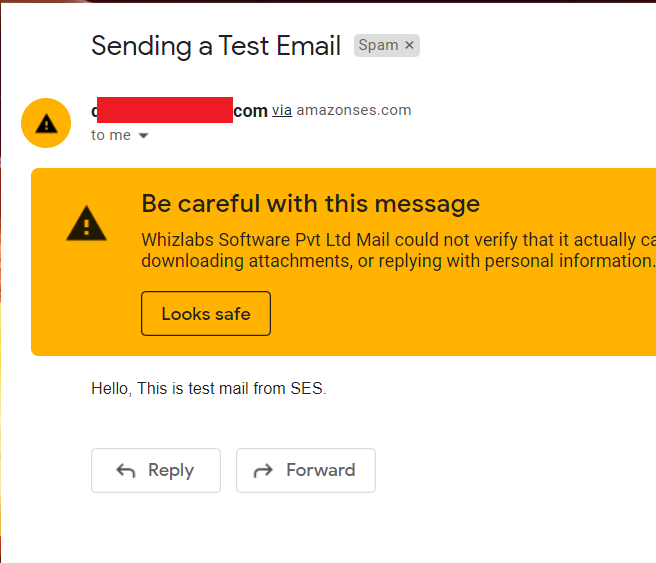
- Verify the mail received to your Inbox. If it is not present in your inbox, check in the spam.
Do you know?
Amazon Simple Email Service (SES) is a cloud-based email sending and receiving service provided by Amazon Web Services (AWS). It is designed to help businesses and developers manage their email communications at scale. SES simplifies the process of sending transactional and marketing emails, such as notifications, alerts, newsletters, and promotional messages, while ensuring high deliverability rates and compliance with email industry standards.
Completion and Conclusion
- You have successfully logged in to the AWS Management console.
- You have successfully created an SES Email address.
- You have successfully created verified the Email address.
End Lab
- Sign out of the AWS Account.
- You have successfully completed the lab.
- Once you have completed the steps click on End from the IP Lab Portal dashboard.
What gets checked
When you press Check my work, the platform verifies each of these:- Create a SES Email Identity — Check whether an SES Email Identity is created or not
- Check SES Email Identity Verification Status — Check whether an SES Email Identity is Email is verified or not