

Overview
Lab Details
- This lab walks you through Storing sensitive data in Secrets Manager and references the secret in the Amazon ECS task definition and then verifies worked by querying the environment variable inside a container showing the contents of the secret.
- Duration: 60 minutes
- AWS Region: US East (N. Virginia) us-east-1
Introduction
What is AWS Secrets Manager?
- AWS Secrets Manager is a secret management service that helps you protect access to your applications, services, and IT resources.
- It enables you to easily rotate, manage, and retrieve database credentials, API keys, and other secrets throughout their lifecycle.
- Using Secrets Manager, you can secure, audit, and manage secrets used to access resources in the AWS Cloud, on third-party services, and on-premises.
- You can securely store secrets, such as database credentials too, using built-in integration for Amazon RDS for MySQL, PostgreSQL, and Amazon Aurora.
- Hard coding secrets or sensitive information is a bad practice as it brings instability and there is a chance of people misusing them whoever gets their hands on them. And AWS Secrets Manager eliminates the need to hardcode sensitive information in plain text.
- It provides default encryption to your secrets stored in AWS Secrets Manager.
- Secrets Manager offers pay-as-you-go pricing.
Architecture Diagram
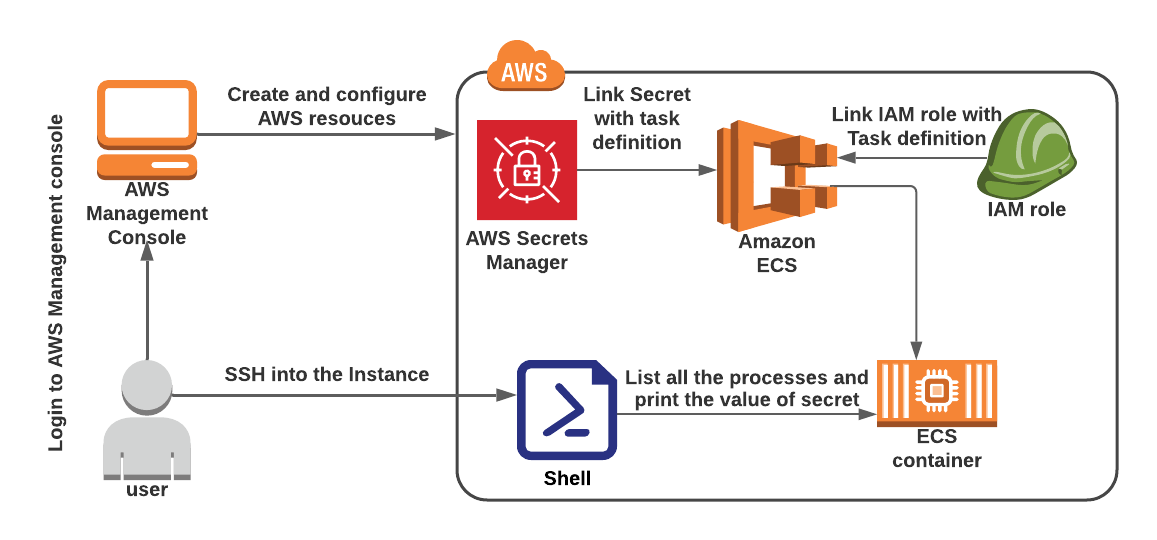
Task Details
- Sign in to AWS Management Console
- Create a Secrets Manager secret
- Copy the ARN of IAM role ecsTaskExecutionRole
- Create a Security Group for the ECS Cluster
- Create a Key Pair for the EC2 instance present inside ECS Cluster
- Create an ECS Cluster
- Create a task definition
- Start the task
- SSH into EC2 Instance
- List all the processes and print the value of Secret
- Deleting AWS Resources.
Launching Lab Environment
- To launch the lab environment, Click on the Start Lab button.
- Please wait until the cloud environment is provisioned. It will take less than a minute to provision.
- Once the Lab is started, you will be provided with IAM user name, Password, Access Key, and Secret Access Key.
Note : You can only start one lab at any given time
Lab guide
Lab Steps
Task 1: Sign in to AWS Management Console
- Click on the Open Console button, and you will get redirected to AWS Console in a new browser tab.
-
On the AWS sign-in page,
- Leave the Account ID as default. Never edit/remove the 12 digit Account ID present in the AWS Console. otherwise, you cannot proceed with the lab.
- Now copy your User Name and Password in the Lab Console to the IAM Username and Password in AWS Console and click on the Sign in button.
- Once Signed In to the AWS Management Console, Make the default AWS Region as US East (N. Virginia) us-east-1.
Task 2: Create a Secrets Manager secret
In this task, you will create a Secrets Manager secret and Store the sensitive data that will be accessed by SSHing into the running container.- Make sure you are in the US East N.Virginia (us-east-1) Region.
- Navigate to Secrets Manager by clicking on the Services menu at the top and selecting Secrets Manager under the Security, Identity & Compliance section.
-
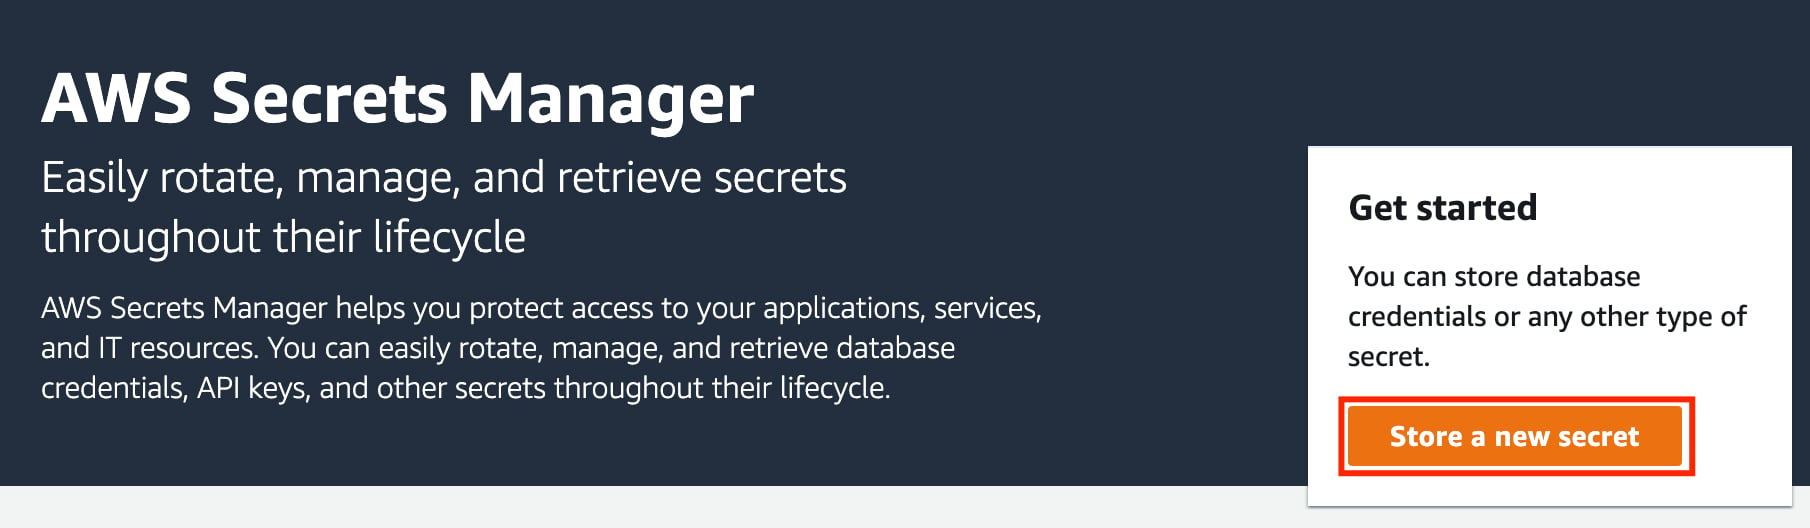
On the home page, click on Store a new secret button.
-
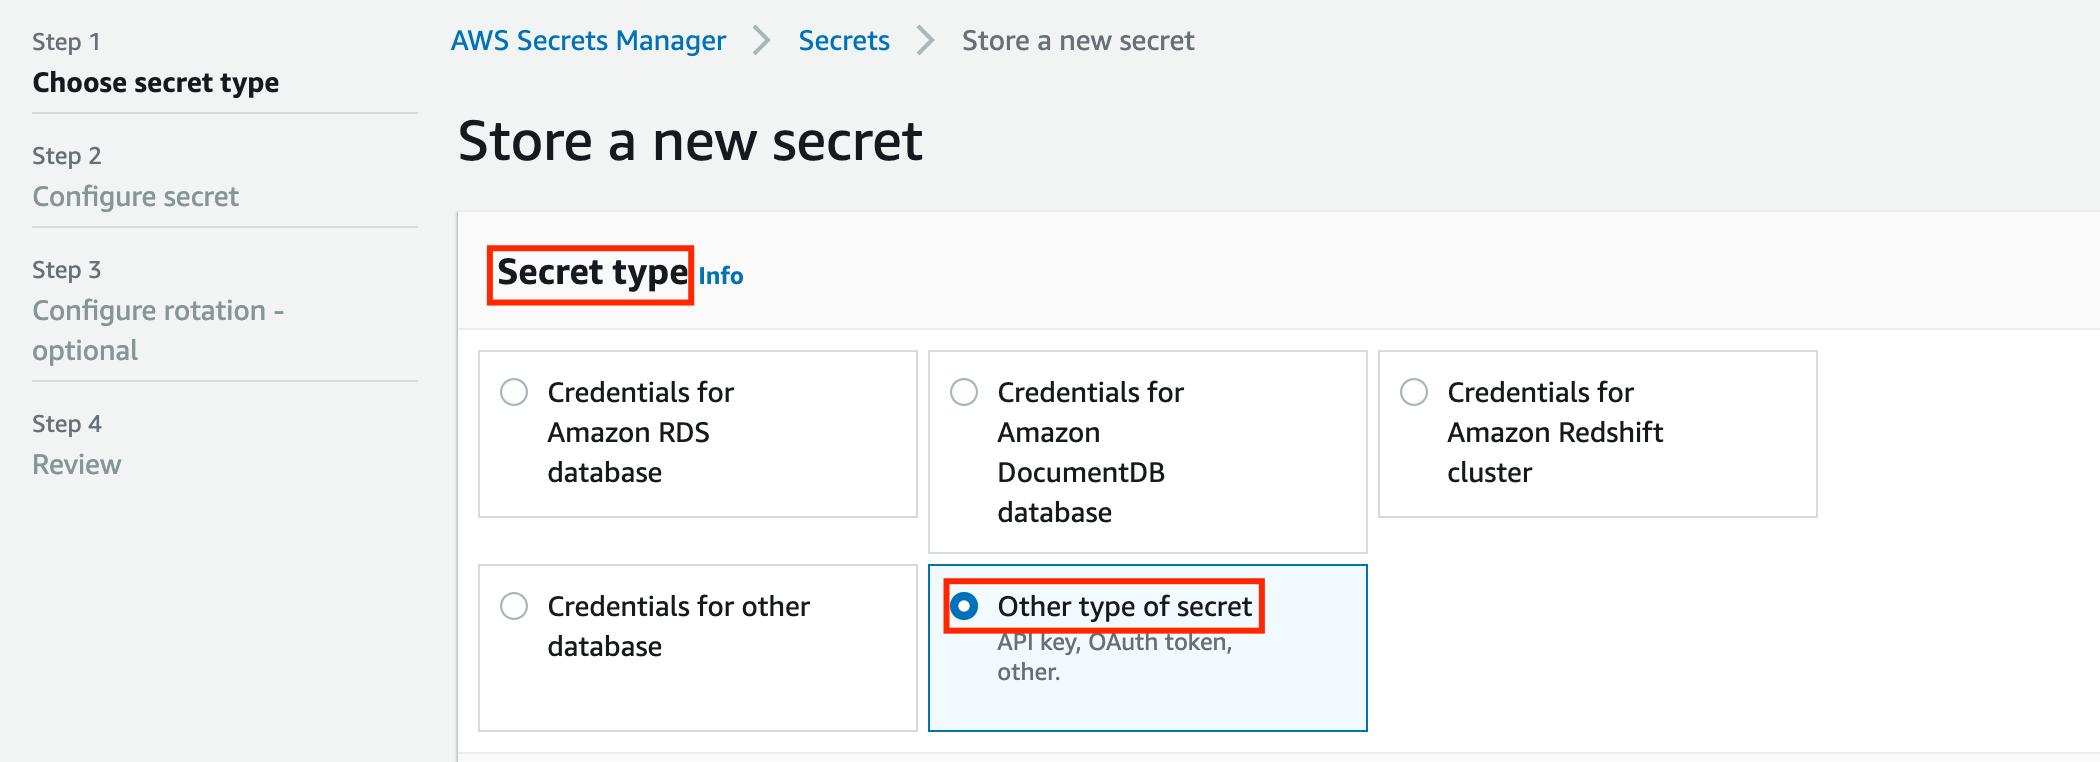
For Step 1, Choose secret type
-
Secret type: Choose Other type of secret
-
Choose PlainText
- Replace the existing text and enter password_value
- Encryption key: Leave it as default.
- Click on the Next button.
-
Secret type: Choose Other type of secret
-
For Step 2, Configure secret
- Secret name: Enter ProductionUserCredentials
- Description: Enter These credentials will be used in a production environment
- Keep all the options as default.
- Click on the Next button.
-
For Step 3, Configure rotation
- Keep all the options as default.
- Click on the Next button.
-
For Step 4, Review
- Review everything and click on the Store button.
-
The secret is now created.

-
Click on the Refresh button to see the Secret.
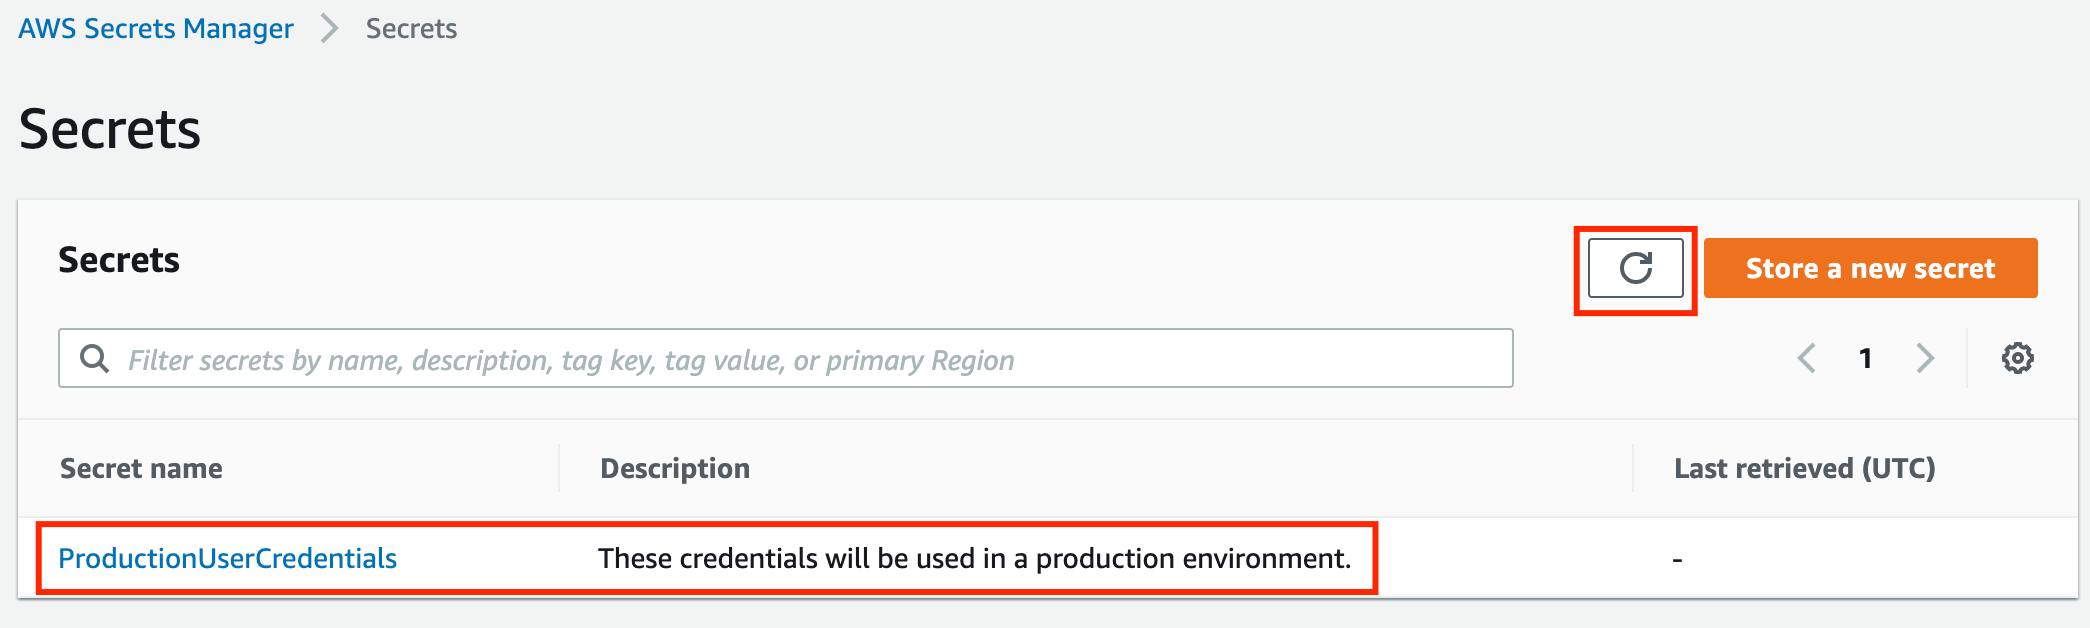
- Click on the Secret name to open the secret.
-
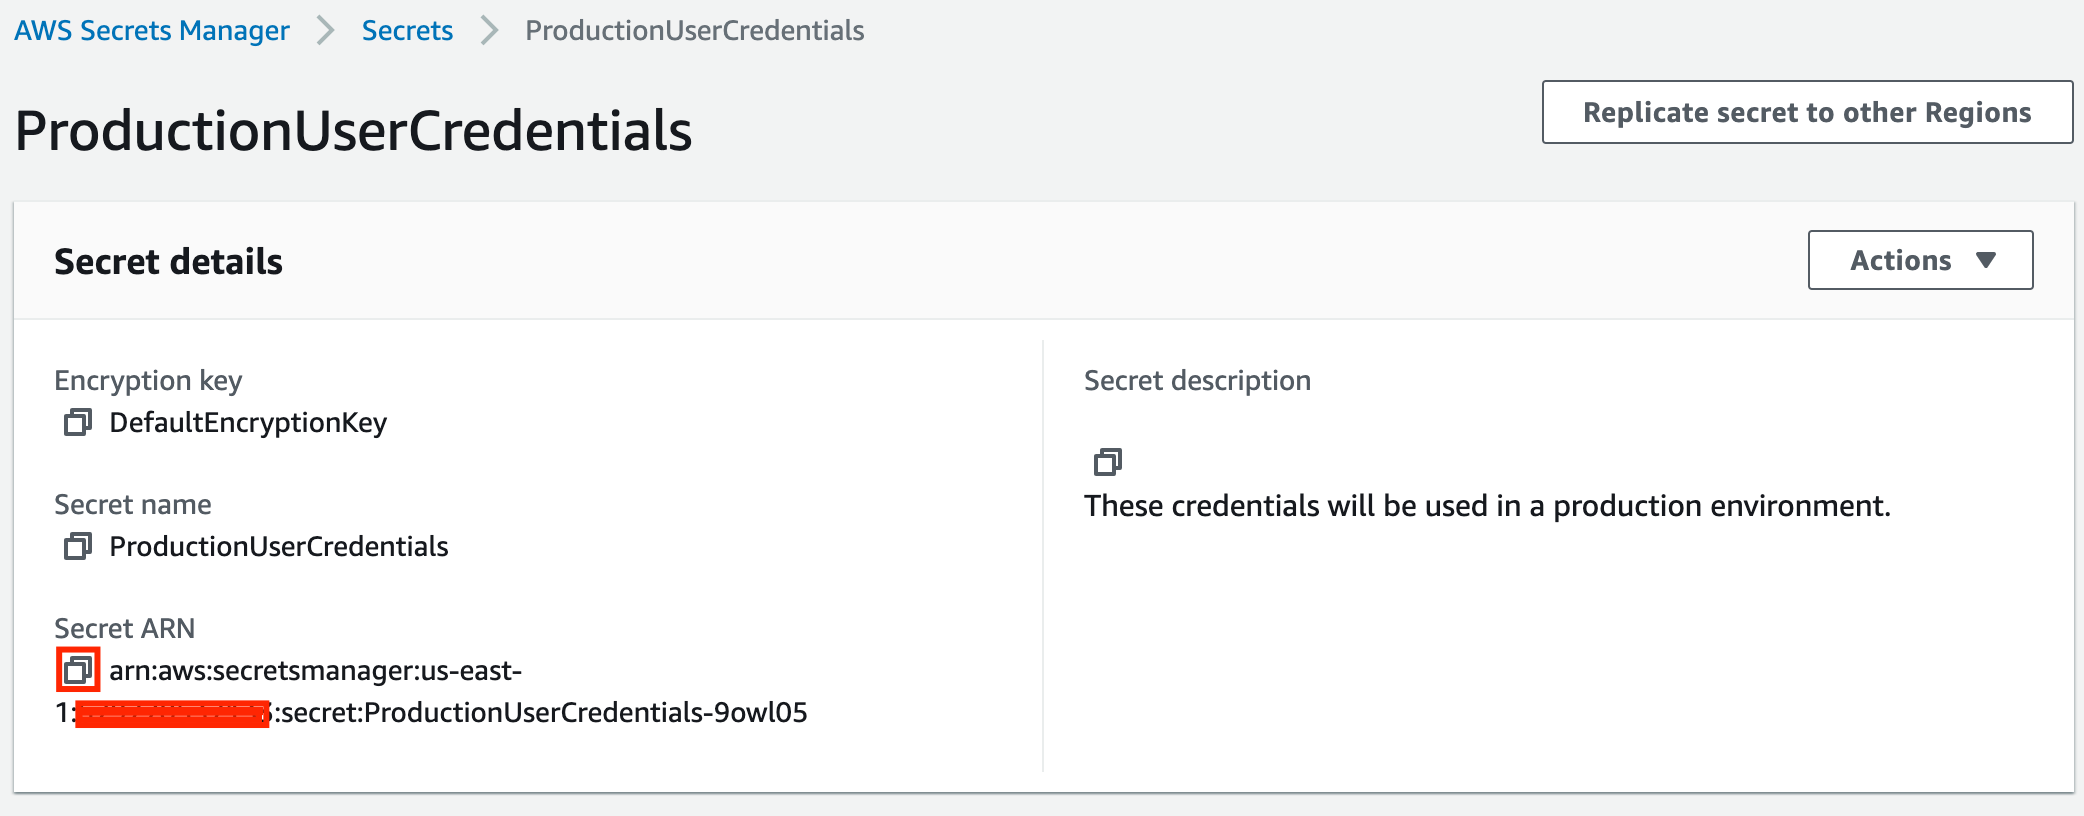
To copy, click the copy button for Secret ARN. Once copied, save it to your Notepad/Notes, it will be used in the next steps.
Task 3: Copy the ARN of IAM role ecsTaskExecutionRole
-
Navigate to IAM by clicking on the Services menu available under the Identity and Management section.
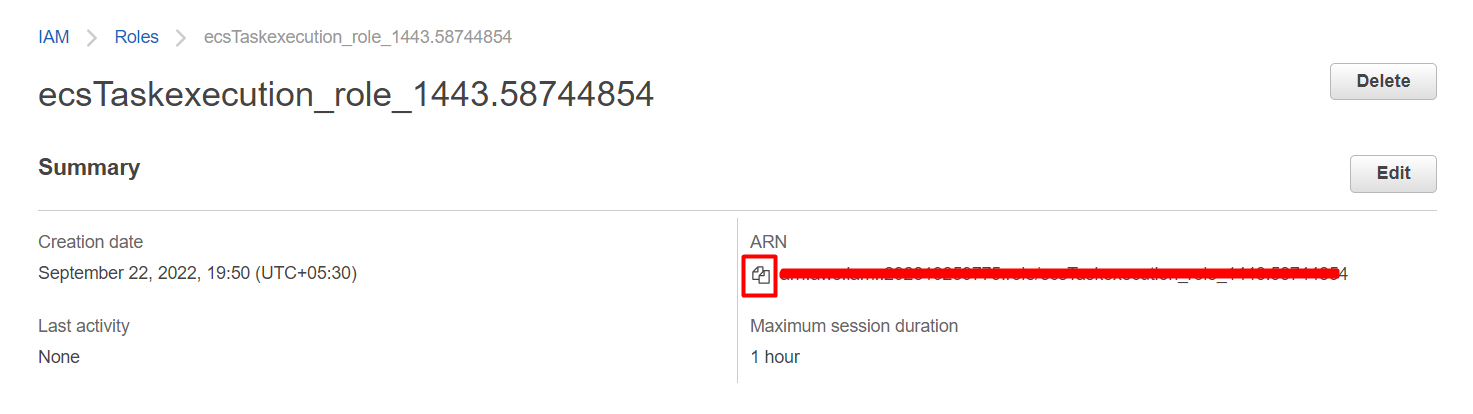
- IAM Link: https://us-east-1.console.aws.amazon.com/iamv2/home?region=us-east-1#/roles and search for ecsTaskexecution_role_<XXXXXXX>.
- Copy the ARN and save it to your notepad.
Task 4: Create a Security Group for the ECS Cluster
- Make sure you are in the N.Virginia Region.
- Navigate to EC2 by clicking on the Services menu available under the Compute section.
- On the left panel menu, select the Security group under the Network & Security section.
- Click on the Create Security Group
-
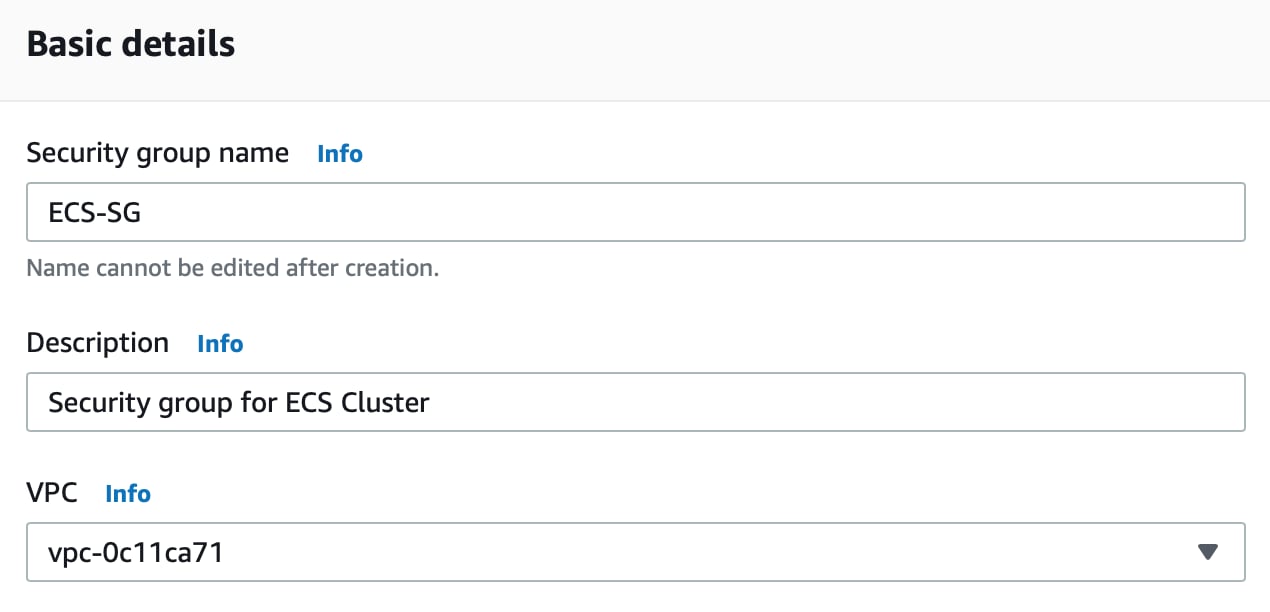
We are going to create a Security group for the ECS cluster.
- Security group name: Enter ECS-SG
- Description: Enter Security group for ECS Cluster
-
VPC: Select Default VPC
-
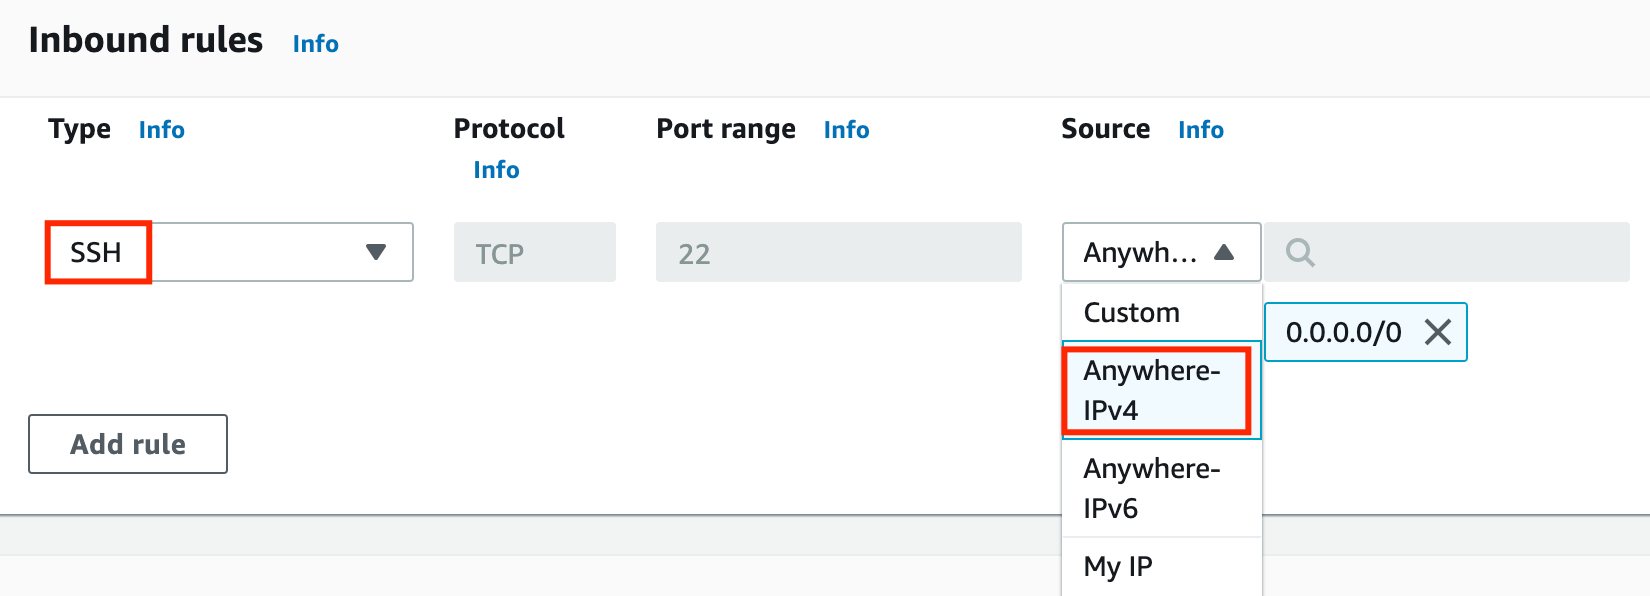
Click on the Add Rule under Inbound rules.
- Type : Select SSH
-
Source : Select Anywhere-IPv4
- Leave everything as default and click on the Create Security Group

Task 5: Create a Key Pair for the EC2 instance present inside ECS Cluster
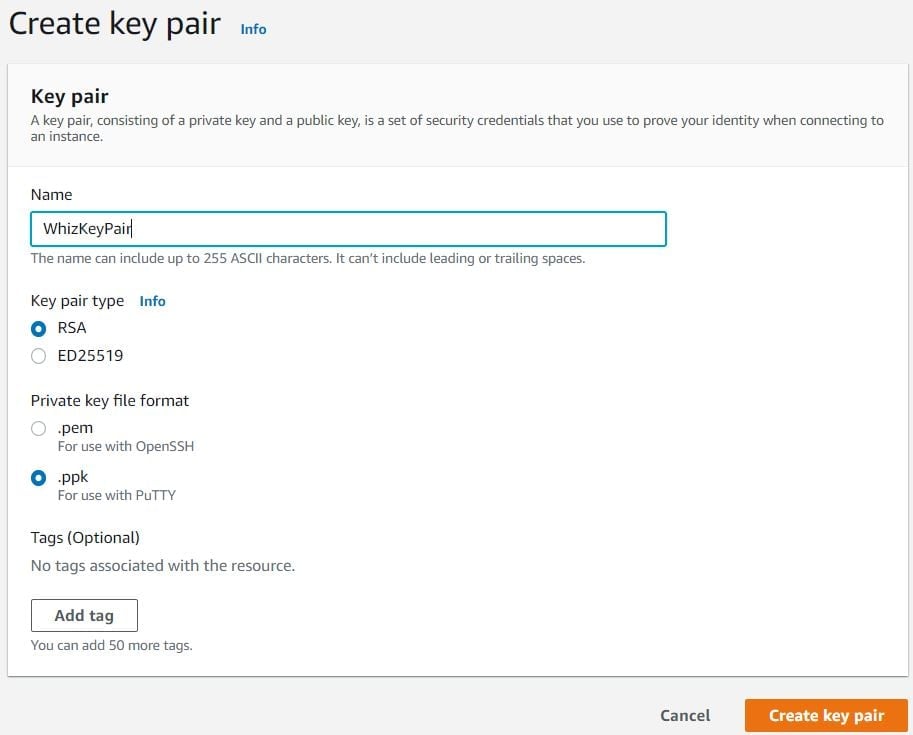
- In the left navigation pane (scroll down) within Network & Security, click on the KeyPairs.
- To create a new key pair, click on the Create Key Pair
-
Fill in the details below:
- Name: Enter WhizKeyPair
- Key pair type : RSA
- File format: pem (Linux & Mac Users) or ppk (Windows users)
- Leave other options as default.
-
Click on the Create Key pair
-
Key pair will be created.

- Save the keys on the Desktop/Downloads folder.
Task 6: Launching an ECS Cluster
- Make sure you are in the N.Virginia Region.
- Navigate to Elastic Container Service by clicking on the Services menu in the top, then click on Elastic Container Service in the Container section.
- On the left sidebar, click on the Clusters option present under the Amazon ECS section.
-
Click on the Create Cluster
- Cluster name: Enter whiz (or you can leave it as default)
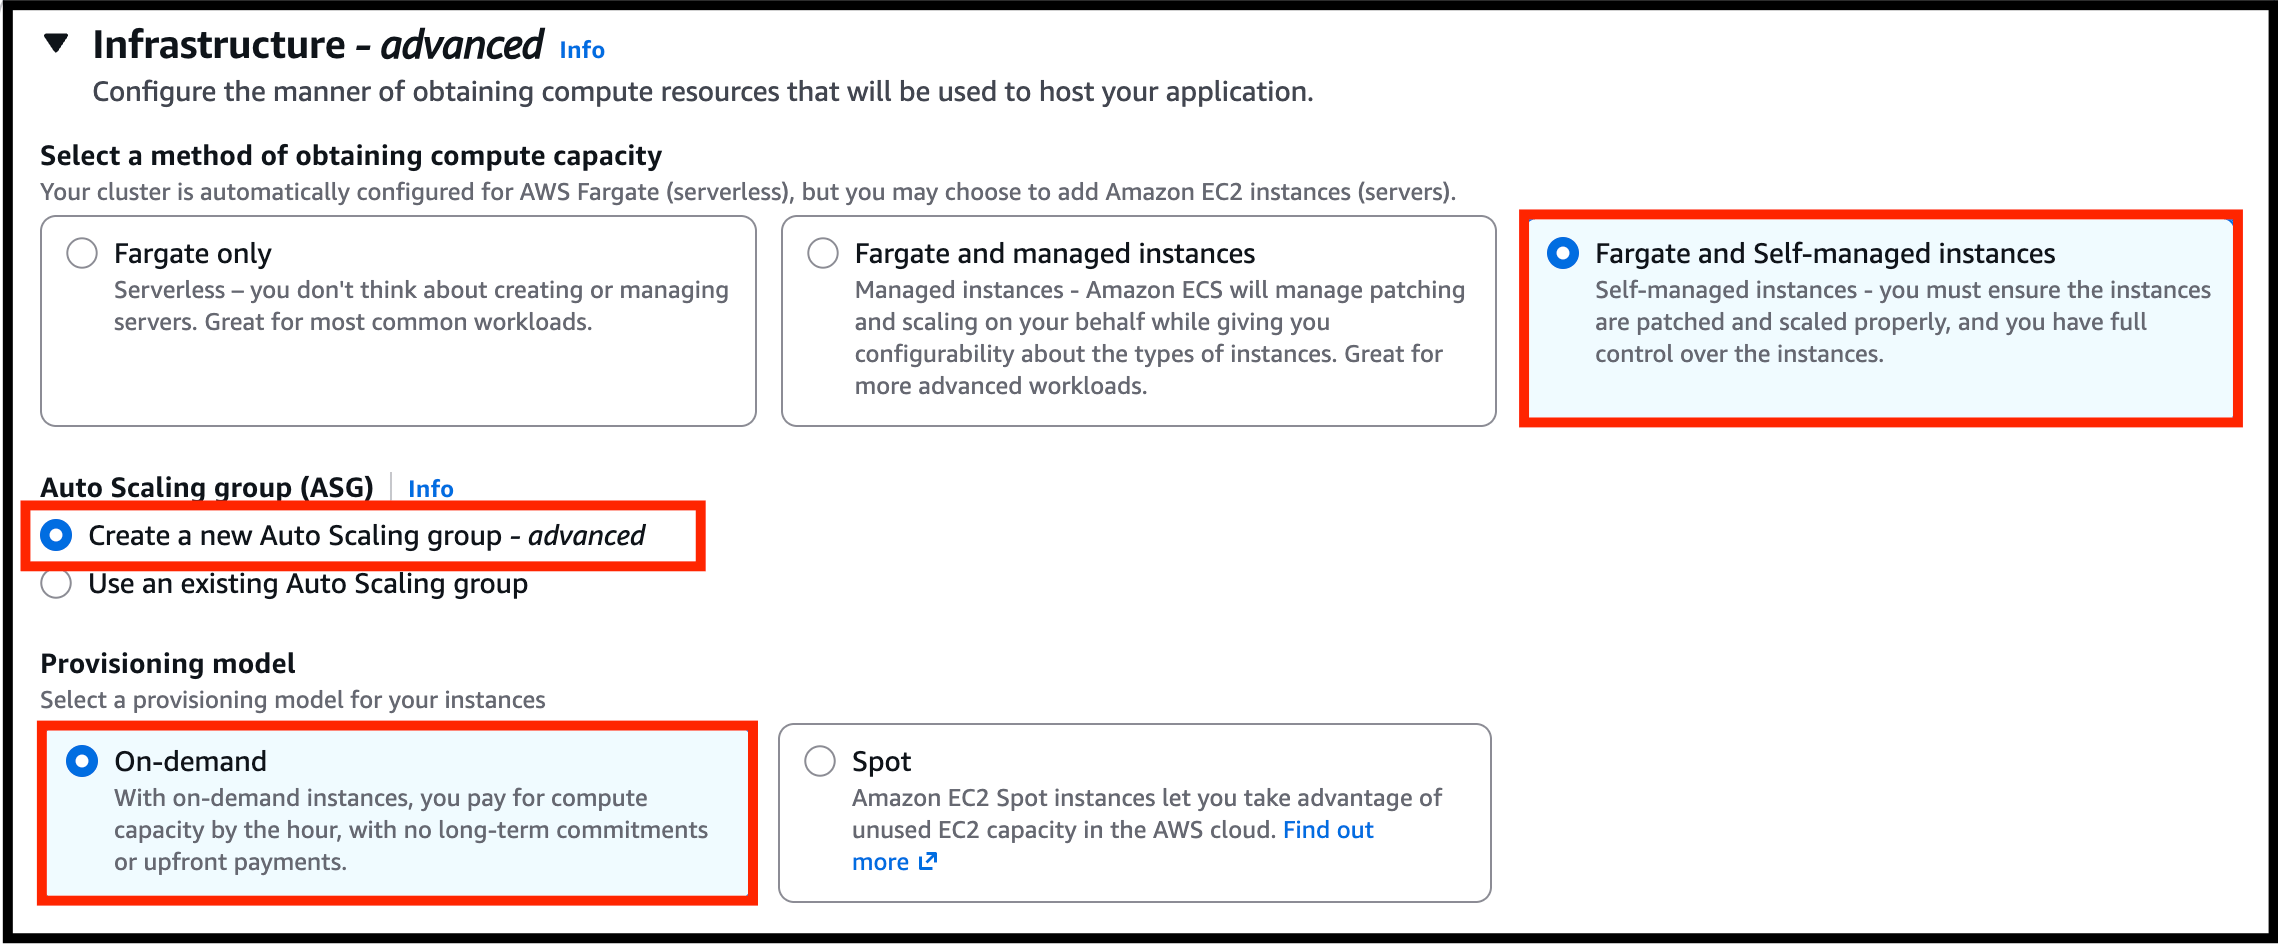
- For Infrastructure : Choose Fargate and Self-managed instances
- Auto Scaling group : Select Create a new Auto Scaling group - advanced
-
Provisioning Model: Select On-Demand
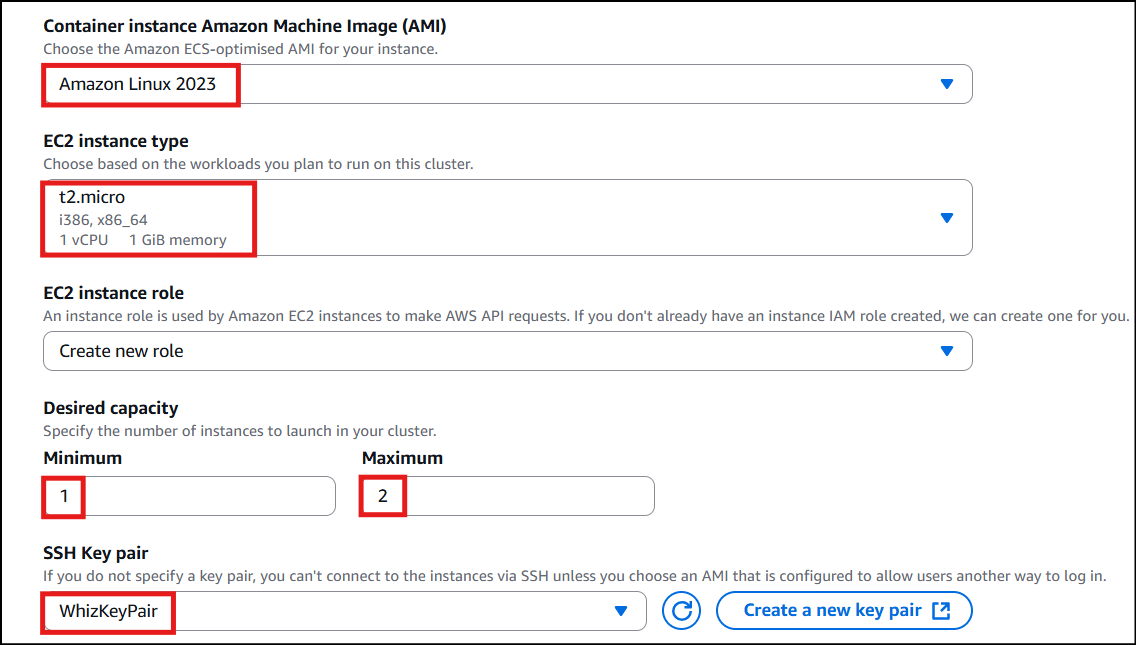
- Operating system/Architecture: Select Amazon Linux 2023
- EC2 instance type*: Select t2.micro
- Desired Capacity : For Minimum Enter 1 and for Maximum Enter 2
- SSH Key pair: Select WhizKeyPair
-
Root EBS Volume Size (GiB): Enter 30
-
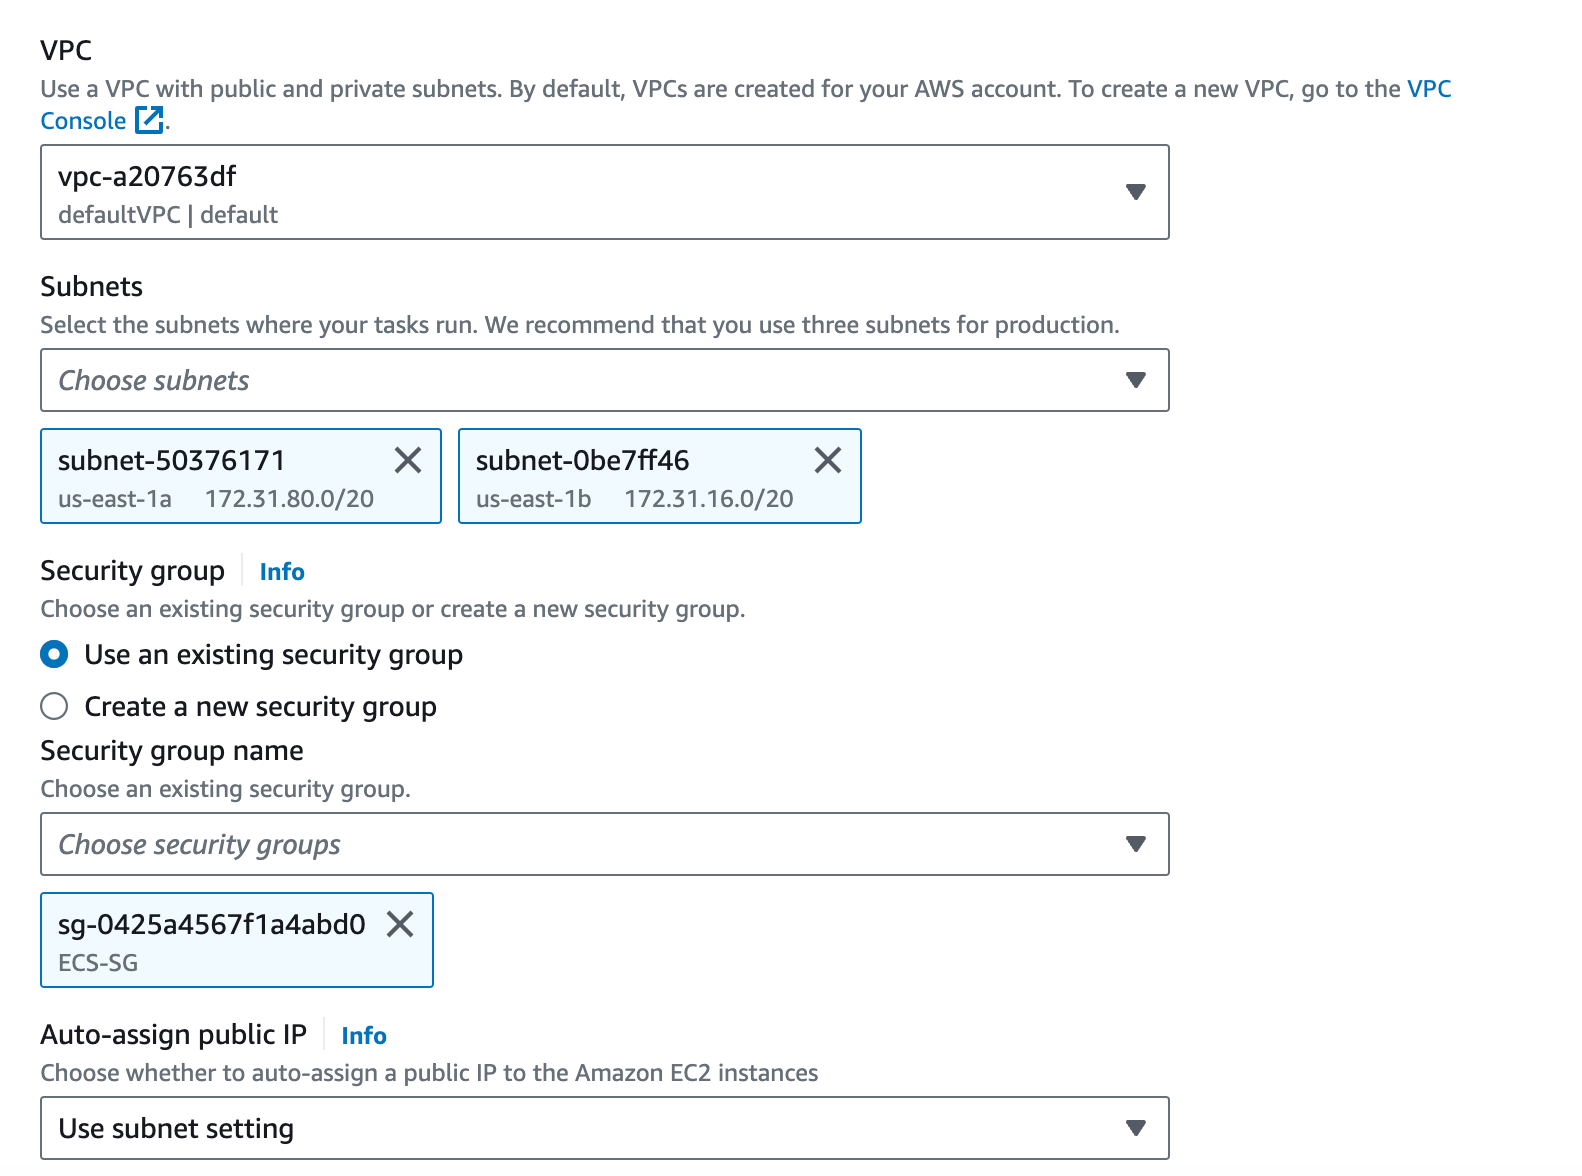
Expand Network settings for Amazon EC2 instances Section:
- VPC: Select Default VPC
- Subnets: Select us-east-1a and us-east-1b
- Auto assign public IP: Select Use subnet setting (default)
- Security group: Select ECS-SG security group
- Keep other options as default.
- Click on the Create button to create the whiz ECS cluster
- ECS cluster will be created in 2 minutes.
- It will take a few minutes to provision the ECS Instance.
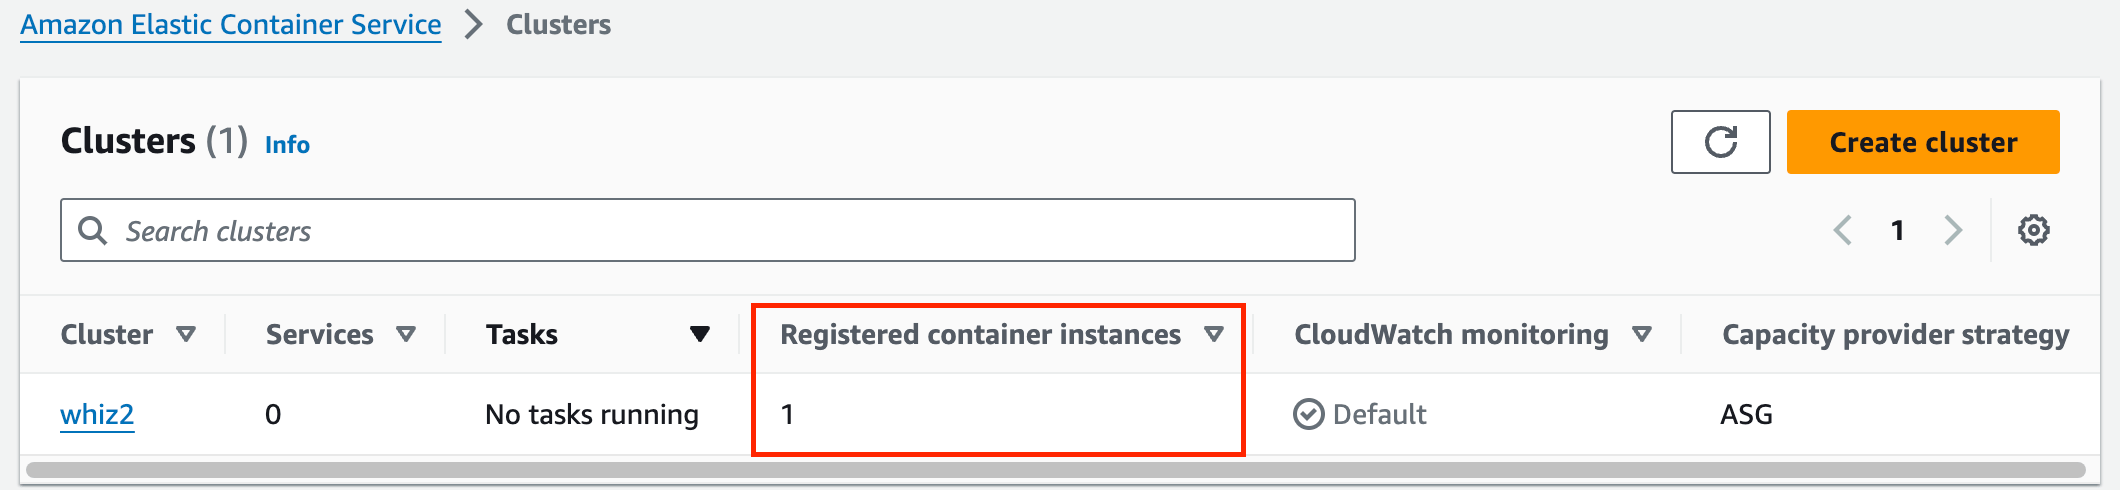
- whiz ECS Cluster will be created with 1 Container instances
Task 7: Create Task Definitions
- On the left sidebar, click on the Task Definitions option present under the Amazon ECS section.
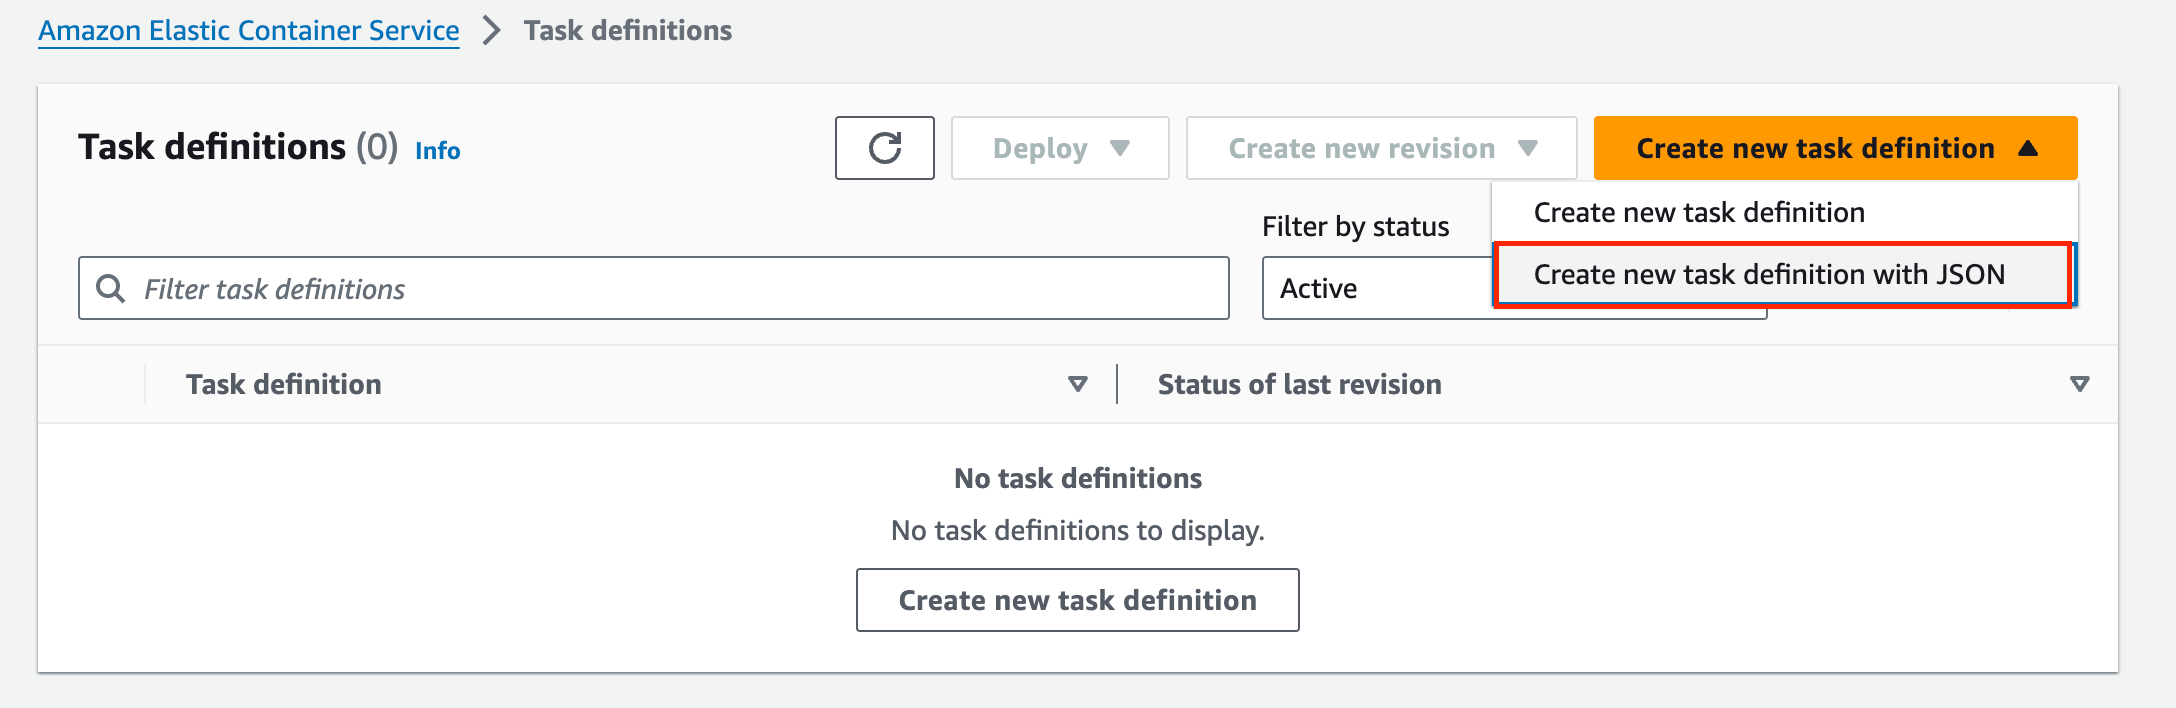
- Click on the Create New task defination with JSON
- Copy and paste the below code in the JSON editor.
- In line no 2 replace the IAM Role ARN with the value of the IAM role ARN copied earlier.
- In line no 22, replace the value with Secret ARN copied.
- Click on the Create button.
- Task Definition ecs-secrets-container is now created.
Task 8: Run the task
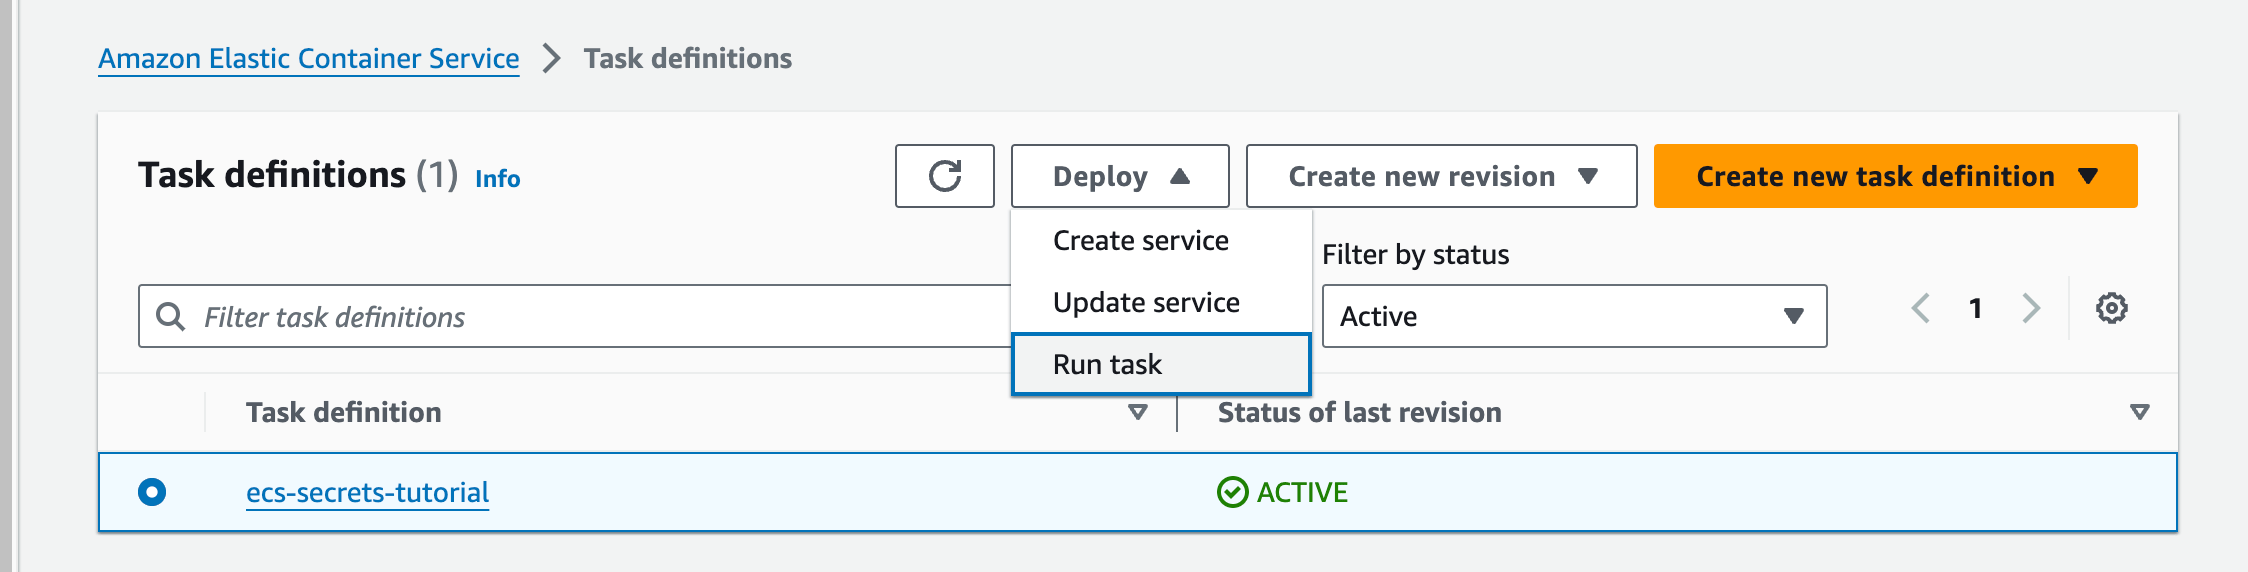
- To run the task present, Click on the Deploy button and choose Run Task.
- For Existing cluster : Choose the cluster created
- For Compute options : select Launch type and Select the Launch type as EC2.
- Keep all the options default until last.
- Expand the Tags section and Uncheck the option to Turn on Amazon ECS managed tags
- Finally, click on the Create to complete the process.
- The task is now created.
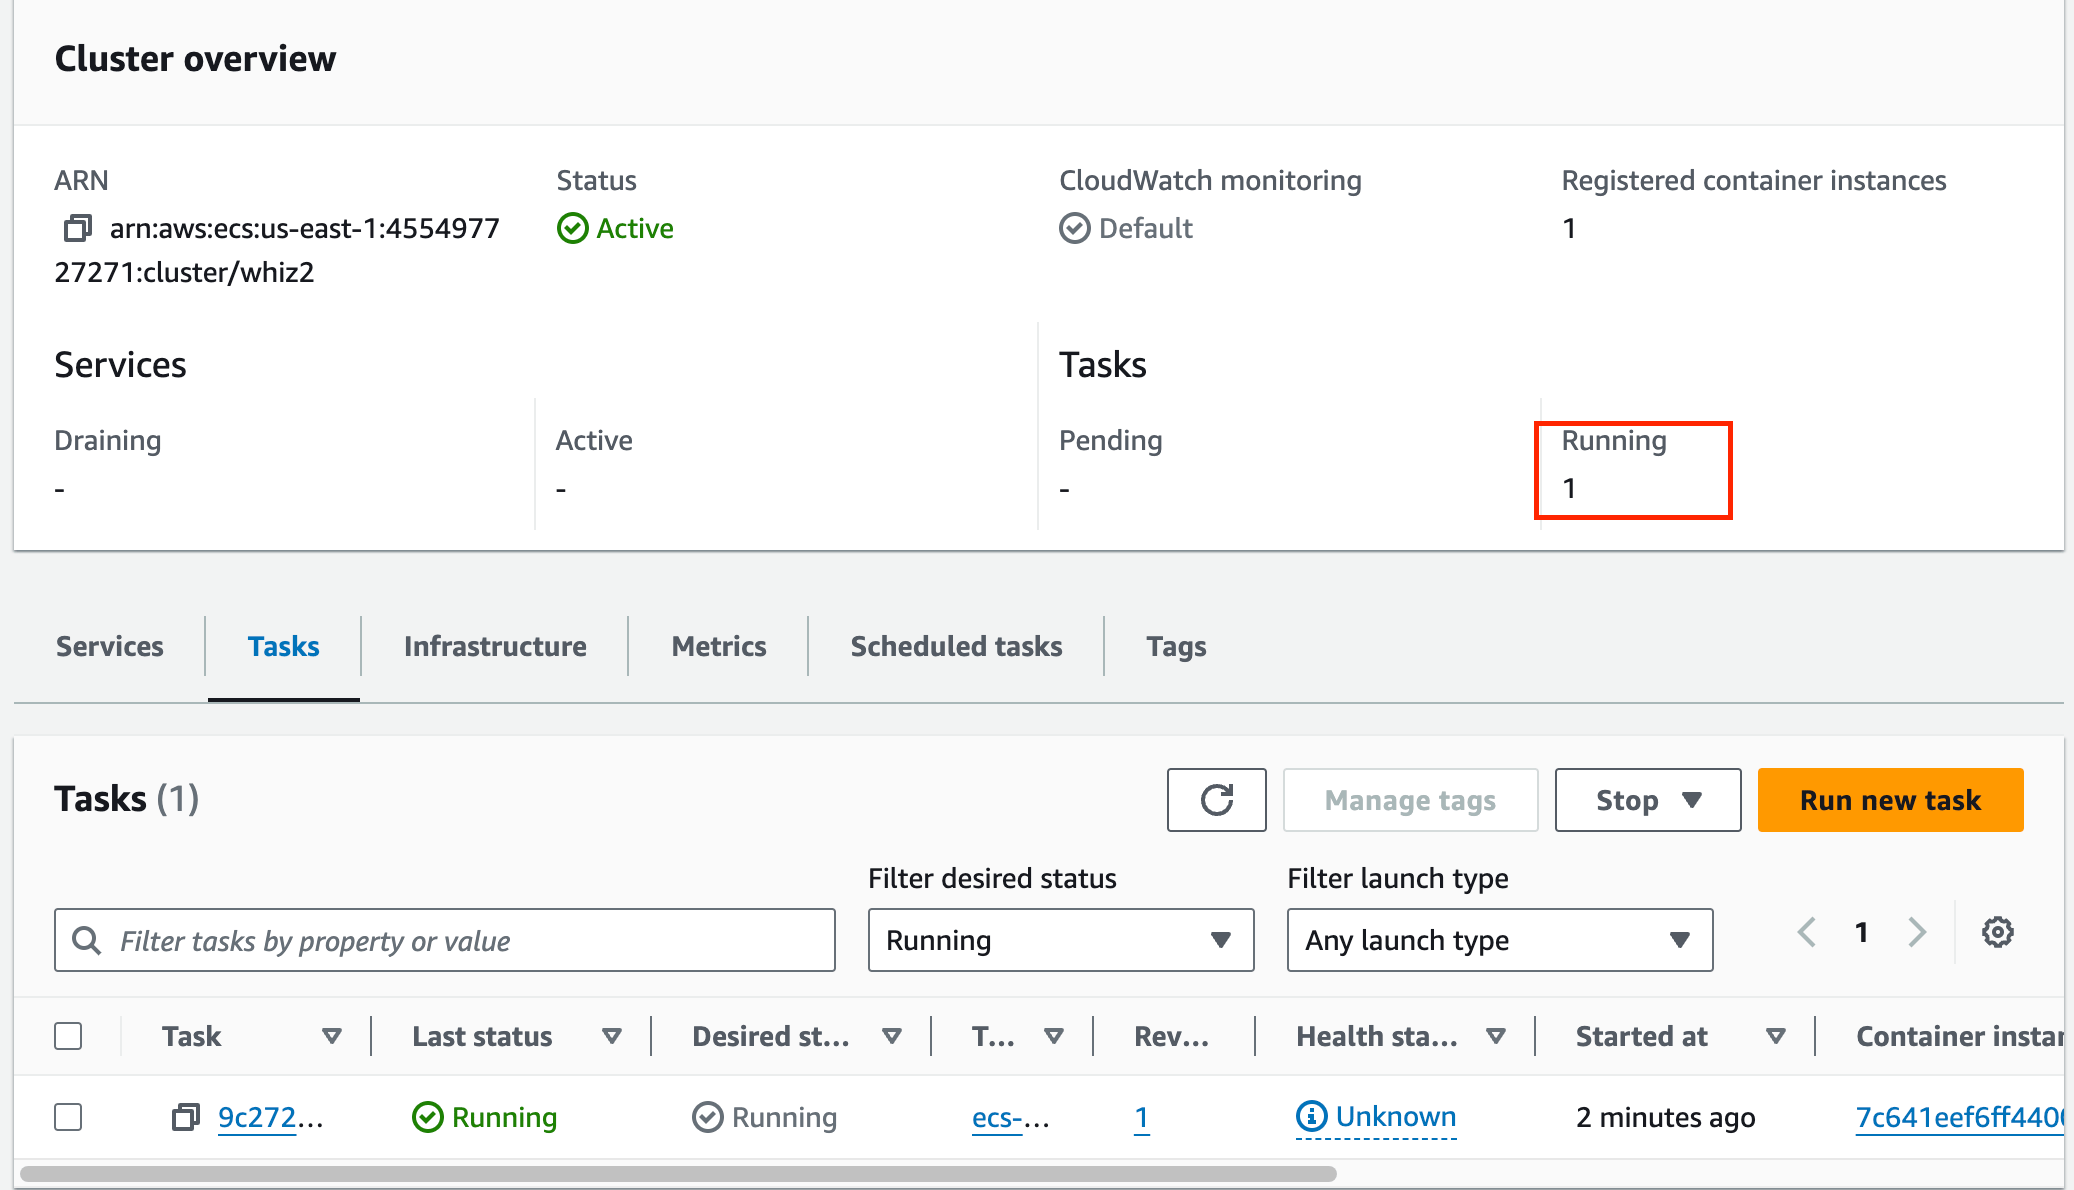
- Refresh the page after 2 minutes to see the running task.
- The task is running and you can see the Running tasks count has 1 in the EC2.
Task 9: SSH into EC2 Instance
- Switch to the EC2 Infrastructure tab and scroll down to container instances and click on the EC2 Instance ID.
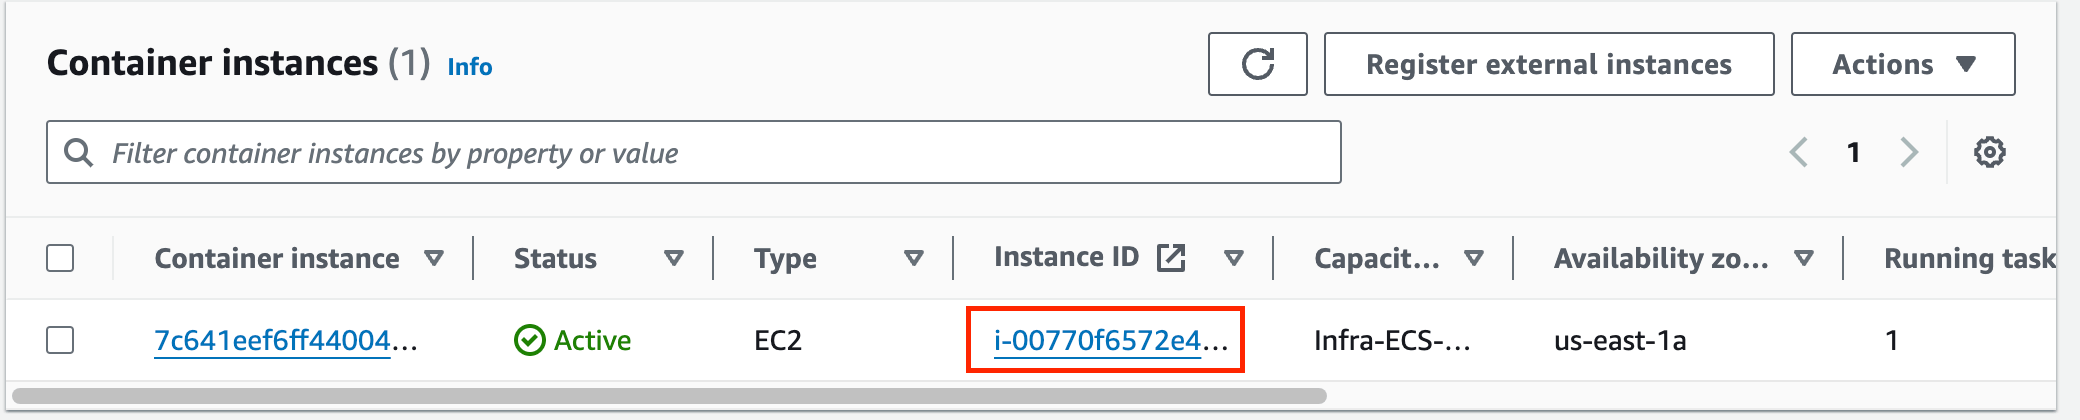
- SSH into this Instance using this guide.
Task 10: List all the processes and print the value of secret
-
Run the below command to list the docker processes.

- Copy the container ID of the present container ecs-secrets-container.
-
Connect to the ecs-secrets-tutorial container using the container ID copied
-
Syntax:
- Example: docker exec -it d5d61219371e /bin/bash
-
Syntax:
-
Use the echo command to print the value of the environment variable.

- If the output comes as password_value, then the lab is successful.
Do You Know ?
AWS Secrets Manager provides a built-in capability for automatic rotation of secrets. This means that you can configure AWS Secrets Manager to automatically change the values of your secrets on a predefined schedule or when certain events occur (e.g., based on time, on-demand, or when detected as compromised).
- Once the lab steps are completed, please click on the Validation button on the left side panel.
Task 11: Delete the resources created
Delete the Secret Manager Secret
- Make sure you are in the N.Virginia Region.
- Navigate to Systems Manager by clicking on the Service menu at the top and under the Management & Governance section.
- To open, click on the secret name.
-
To delete the secret, Select the Actions option and choose Delete secret.
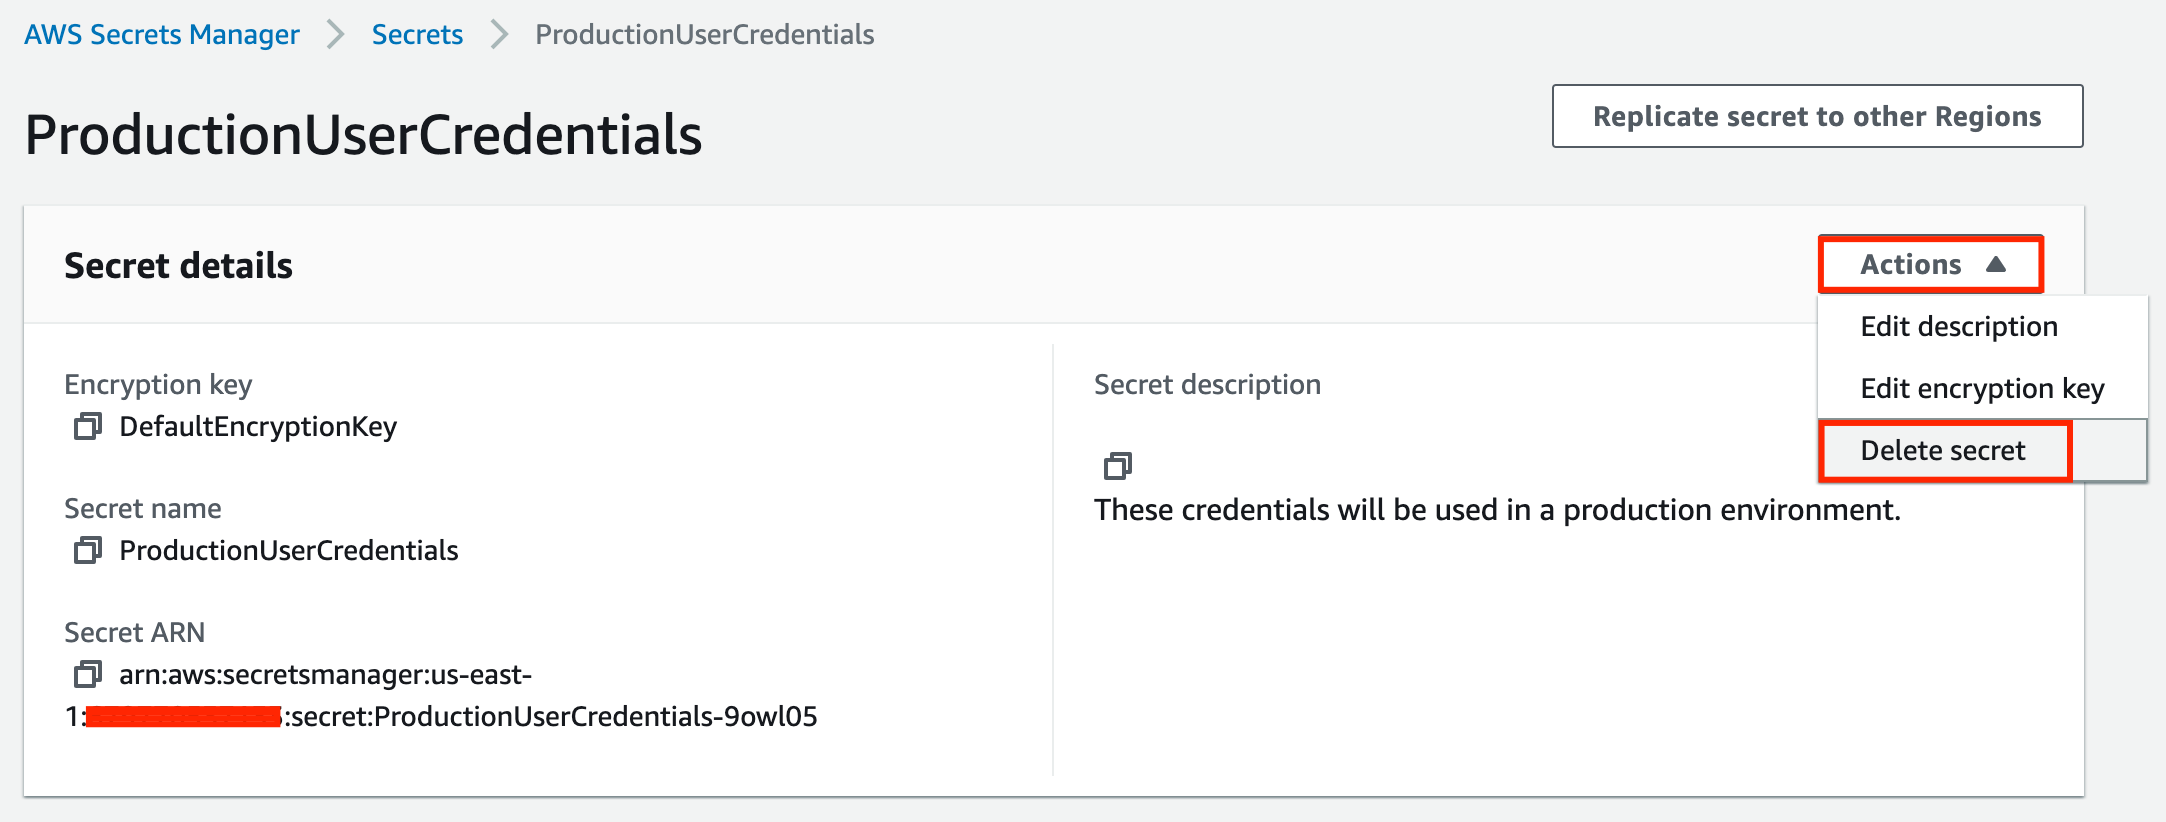
-
Enter the waiting period duration as 7 days and click on the Schedule deletion option.
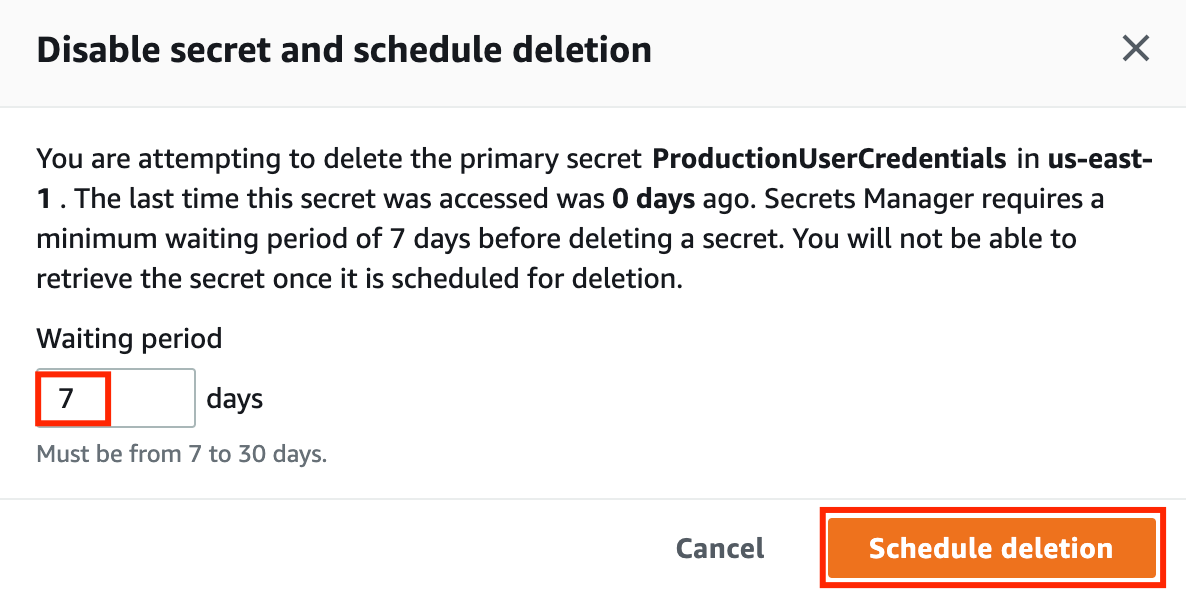
Deleting ECS Cluster
- Make sure you are in the N.Virginia Region.
- Navigate to Elastic Container Service by clicking on the Services menu in the top, then click on Elastic Container Service in the Container section.
- On the left sidebar, click on the Clusters option present under the Amazon ECS section.
- Click on the Cluster name whiz
- Click on the Delete Cluster option.
- Confirm the deletion by entering the phrase delete whiz in the pop-up window.
Completion and Conclusion
- You have created a Secrets Manager secret.
- You have copied the ARN of IAM role ecsTaskExecutionRole.
- You have created a Security group and key pair.
- You have created an ECS Cluster.
- You have created a task definition and started the task.
- You have listed all the processes and printed the value of secret.
- You have deleted all the resources.
End Lab
- Sign out of AWS Account.
- You have successfully completed the lab.
- Once you have completed the steps, click on End Lab from the IP Lab Portal dashboard.
What gets checked
When you press Check my work, the platform verifies each of these:- Create Secret in Secret Manager — Check if Secret created in Secret Manager
- Create ECS Service — Check whether ECS service created or not
- Create ECS Task Definition — Check whether ECS task definition created or not
- Launch an EC2 Instance — Check whether an EC2 Instance is launched or not.
- Validate EC2 Instance Type t2.micro — Check whether the EC2 instance type is t2.micro.
- Launch EC2 AMI type Amazon Linux — Check whether the EC2 instance is launched using an Amazon AMI.